

HQ
3UHIDFH
■ 7KDQNVIRU\RXUFKRRVLQJ%RVFKFRRNLQJDSSOLDQFHV
3OHDVHUHDGWKLVLQVWUXFWLRQFDUHIXOO\EHIRUH\RXXVH
WKHSURGXFWDQGNHHSLWSURSHUO\IRUIXWXUHUHIHUHQFH
,I\RXKDYHDQ\TXHVWLRQSOHDVHFRQWDFWORFDOVHUYLFH
FHQWUHRUGHDOHU
%6+ +RPH $SSOLDQFHV MLDQJVX&R/WG UHVHUYHV WKH ILQDO
LQWHUSUHWDWLRQ ULJKWV IRU WKH 2SHUDWLRQ DQG ,QVWDOODWLRQ
,QVWUXFWLRQ$Q\FKDQJHRILWZLOOQRWEHIXUWKHUQRWLILHG
7DEOHRIFRQWHQWV
HQ
2SHUDWLRQDQGLQVWDOODWLRQLQVWUXFWLRQ
( ,PSRUWDQW6DIHW\,QIRUPDWLRQ
6DIHW\LQVWUXFWLRQ
&DXVHVRIGDPDJH
$GYLFHRQVDYLQJHQHUJ\
f ,QGXFWLRQFRRNLQJ
$GYDQWDJHVRILQGXFWLRQFRRNLQJ
6XLWDEOHSDQV
* <RXUQHZDSSOLDQFH
7HFKQLFDOSDUDPHWHUV
9LHZRIQHZDSSOLDQFH
&RQWUROSDQHO
1 2SHUDWLRQ,QVWUXFWLRQ
5HVLGXDOKHDWLQGLFDWRU
6ZLWFKLQJWKHKRERQDQGRII
6HOHFWLQJDKRWSODWHDQGKHDWVHWWLQJ
&RRNLQJWDEOH
3RZHU%RRVWIXQFWLRQ
7LPHVHWWLQJRSWLRQV
3URJUDPPLQJWKHFRRNLQJWLPH
7KHNLWFKHQWLPHU
&OHDQLQJORFNIXQFWLRQ
&KLOGSURRIORFN
$XWRPDWLFVDIHW\FXWRXW
%DVLFVHWWLQJV
(QHUJ\FRQVXPSWLRQLQGLFDWRU
6XLWDELOLW\WHVWRIWDEOHZDUH
2 &DUHDQG&OHDQLQJ
&OHDQLQJVXUIDFHRIJODVVFHUDPLFV
&OHDQLQJGHFRUDWLYHVWULSVRILQGXFWLRQKRE
4 0DLQWHQDQFHDQG6HUYLFH
)DXOWV$QDO\VLVDQG7URXEOHVKRRWLQJ
1RUPDOQRLVHZKLOHWKHDSSOLDQFHLVZRUNLQJ
7LSVZLWK*RRG,QWHQWLRQ
5 ,QVWDOODWLRQ,QVWUXFWLRQ
6DIHW\3UHFDXWLRQV
3UHSDUHWKHNLWFKHQFDELQHW
,QVWDOOLQJDQGFRQQHFWLQJWKHKRE
C 3DFNDJH/LVW

,PSRUWDQWVDIHW\LQIRUPDWLRQ HQ
(,PSRUWDQW6DIHW\
,QIRUPDWLRQ
,PSRUWDQWVDIHW\LQIRUPDWLRQ
■ $IWHU\RXKDYHXQSDFNHGWKLVDSSOLDQFHSOHDVH
GLVSRVHRIWKHSDFNDJLQJPDWHULDOVYLD
HQYLURQPHQWDOO\IULHQGO\PHDQVWRFRQVHUYHDQLGHDO
HQYLURQPHQW
6DIHW\LQVWUXFWLRQ
■ ,I \RX ILQG WKH EXLOWLQ LQGXFWLRQ KRE LV YLVLEO\ GDPDJHG
GRQRWXVHLWSOHDVHFRQWDFWORFDOVHUYLFHFHQWUH
LPPHGLDWHO\
■ 7KHLQGXFWLRQKRELVVSHFLDOO\GHVLJQHGIRUWKH
SXUSRVH RI KRPH FRRNLQJ VR WKDW LW VKRXOG EH LQVWDOOHG
LQWKHNLWFKHQIRUSHUVRQDOXVH
■ 7RXVHWKLVDSSOLDQFHVDIHO\DGXOWVDQGFKLOGUHQZKR
DVDUHVXOWRIWKHIROORZLQJFRQGLWLRQVDUHQRWFDSDEOH
RIXVLQJWKLVDSSOLDQFHVKRXOGQRWGRVRZLWKRXWWKH
JXLGDQFHRUVXSHUYLVLRQRIDUHVSRQVLEOHSHUVRQ
3DWLHQWZLWKSK\VLFDOVHQVRU\RUPHQWDOGLVDELOLW\
/DFNRIH[SHULHQFHRUNQRZOHGJH
■ 3OHDVHVXSHUYLVHWKHFKLOGUHQWRHQVXUHWKH\GRQRW
SOD\ZLWKWKHDSSOLDQFH
■ $OWKRXJKWKLVLQGXFWLRQKREFRPSOLHVZLWKFXUUHQW
VDIHW\UHJXODWLRQVDQGHOHFWURPDJQHWLFFRPSDWLELOLW\
UHJXODWLRQV,WLVDOVRSRVVLEOHWKDWSHRSOHZLWKRWKHU
W\SHVRIGHYLFHVXFKDVSDFHPDNHUKHDULQJDLG
FRXOGH[SHULHQFHVRPHGLVFRPIRUW
■ 'RQRWFRQWUROWKHLQGXFWLRQKREZLWKDQDGGLWLRQDO
WLPHURUDQLQGHSHQGHQWUHPRWHFRQWUROV\VWHP
■ ,I\RXIRXQGWKHSRZHUFDEOHRILQGXFWLRQKRELV
GDPDJHGLWPXVWEHUHSODFHGZLWKVSHFLILHGSRZHU
FDEOHRUWKDWERXJKWIURPWKHFXVWRPHUVHUYLFHFHQWUH
RIWKHPDQXIDFWXUHUWKHUHSODFHPHQWRISRZHUFDEOH
PXVWEHFDUULHGRXWE\TXDOLILHGSHUVRQQHOIURPWKH
PDQXIDFWXUHURULWVPDLQWHQDQFHGHSDUWPHQWRU
HTXLYDOHQW
■ 7KLVDSSOLDQFHLQFRUSRUDWHVDQHDUWKFRQQHFWLRQIRU
IXQFWLRQDOSXUSRVHVRQO\
■ 7KHPD[LPXPDOWLWXGHRIXVHWKLVDSSOLDQFHLVP
&DXWLRQ
7KHFRRNLQJSURFHVVKDVWREHVXSHUYLVHG$VKRUWWHUP
FRRNLQJSURFHVVKDVWREHVXSHUYLVHGFRQWLQXRXVO\
::DUQLQJ² 'DQJHURIILUH
'RQRWVWRUHLWHPVRQWKHFRRNLQJVXUIDFHV
,IWKHUHLVDGUDZHUEHORZWKHLQGXFWLRQKREWKLVVKRXOG
QRWEHXVHGWRVWRUHDQ\IODPPDEOHREMHFWV
8QDWWHQGHGFRRNLQJRQDKREZLWKIDWRURLOFDQEH
GDQJHURXVDQGPD\UHVXOWLQDILUH
$YRLGRYHUKHDWLQJWKHRLORYHUKHDWHGRLOFDQLJQLWHDQG
FDXVHDILUH
,QWKHHYHQWWKDWWKHRLOFDWFKHVILUHQHYHUXVHZDWHUWR
SXWLWRXWVZLWFKRIIWKHLQGXFWLRQKRELPPHGLDWHO\<RX
PD\ SXW RII WKH ILUH TXLFNO\ E\ FRYHULQJ WKH FRRNZDUH ZLWK
DFRYHURUGLVK
::DUQLQJ² 5LVNRIHOHFWULFVKRFN
GLVFRQQHFWWKHDSSOLDQFHIURPWKHPDLQVLIWKHLQGXFWLRQ
KRELVEURNHQRUFUDFNHG
;$WWHQWLRQWKHKLJKWHPSHUDWXUHVXUIDFH
'RQRWWRXFKWKHKRWDUHDVRIWKHLQGXFWLRQKRE'RQRW
SODFH FXWOHU\ OLGV RU RWKHU PHWDO REMHFWV RQ WKH VXUIDFH RI
LQGXFWLRQKREDVWKH\FDQKHDWXS
■ .HHSWKHKRWSODWHVDQGSDQEDVHVGU\
,IWKHUHLVDQ\OLTXLGEHWZHHQWKHSDQEDVHVDQG
KRWSODWHVWKLVFRXOGJHQHUDWHVWHDPSUHVVXUHZKLOH
WKH LQGXFWLRQ KRE LV LQ XVH WKLV FRXOG FDXVH WKH SDQ WR
VKDNHDEQRUPDOO\
■ 7KLVLQGXFWLRQKRELVILWWHGZLWKDIDQDWWKHORZHU
VHFWLRQ ,I D GUDZHU LV ILWWHG XQGHU WKH LQGXFWLRQ KRE GR
QRWNHHSVPDOOREMHFWVRUSDSHULQLWDVLIWKHVHVPDOO
REMHFWV RU SDSHU DUH SLFNHG XS WKH\ FRXOG GDPDJH WKH
FRROLQJIDQRUDIIHFWWKHFRROLQJV\VWHP
■ 1HYHUUHVWKRWSDQVRQWKHFRQWUROSDQHOWKHLQGLFDWRU
DUHDRUWKHKREVXUURXQG
■ $OZD\VVZLWFKRIIWKHLQGXFWLRQKREXVLQJWKHSRZHU
VZLWFKRIWKHFRQWUROSDQHODIWHUHDFKXVH
'RQRWZDLWXQWLOWKHKREVZLWFKHVRIIDXWRPDWLFDOO\
ZKHQWKHSDQLVUHPRYHG
&DXVHVRIGDPDJH
■ 7KHURXJKEDVHVRISDQVPD\VFUDWFKWKHKRE
■ 6DOWVXJDUDQGVDQGPD\VFUDWFKWKHFHUDPLFJODVV
'RQRWSODFHWKHVHREMHFWVRQWKHKRERUXVHFHUDPLF
JODVVRIWKHLQGXFWLRQKREDVZRUNVXUIDFH
■ +DUGRUVKDUSREMHFWVPD\FDXVHGDPDJHLIWKH\IDOO
RQWRWKHKRE
■ 6SLOW IRRG PD\ GDPDJH WKH LQGXFWLRQ KRE ,W VKRXOG EH
UHPRYHGLPPHGLDWHO\XVLQJDJODVVVFUDSHU
■ 8QVXLWDEOHFOHDQLQJSURGXFWVPD\FDXVHPHWDO
GLVFRORUDWLRQDQGGDPDJHRQFRRNZDUH
$GYLFHRQVDYLQJHQHUJ\
■ &KRRVH SDQV ZKLFK DUH WKH ULJKW VL]H RI WKH DPRXQW RI
IRRGWREHSUHSDUHG$ODUJHSDQZKLFKLVKDOIIXOOZLOO
FRQVXPHDORWRIHQHUJ\
■ $OZD\VFHQWUHWKHSDQRQWKHKRWSODWHDQGDOZD\V
FRYHUWKHSDQZLWKWKHPDWFKLQJOLG&RRNLQJZLWKRXW
XVLQJWKHOLGZLOOFRQVXPHPRUHHQHUJ\
■ :H UHFRPPHQG QRW WR SODFH SDQV WKDW KDYH EHHQ XVHG
RQDJDVKRERQWKHLQGXFWLRQKRE7KHIODPHFDQ
GHIRUPWKHIODWQHVVRIERWWRP,QFDVH\RXKDYHWR
XVHWKHPSOHDVHFKHFNWKDWERWWRPLVIODW
en ,QGXFWLRQFRRNLQJ
f,QGXFWLRQFRRNLQJ
,QGXFWLRQFRRNLQJ
$GYDQWDJHVRILQGXFWLRQFRRNLQJ
,QGXFWLRQFRRNLQJLQYROYHVDUDGLFDOFKDQJHWRWKH
WUDGLWLRQDOPHWKRGRIKHDWLQJDVWKHKHDWLVJHQHUDWHG
GLUHFWO\LQWKHSDQ,WRIIHUVDQXPEHURIDGYDQWDJHV
■ *UHDWHUVSHHGLQFRRNLQJDQGIU\LQJ
■ 5HGXFHGHQHUJ\FRQVXPSWLRQ
■ &OHDQHU DQG HDVLHU WR XVH 6SLOW IRRG GRHV QRW EXUQ DV
PXFKRQWKHLQGXFWLRQKRE
■ &RRNLQJFRQWURODQGVDIHW\7KHLQGXFWLRQKRE
VXSSOLHUVRUFXWVRIIWKHKHDWDVVRRQDVWKHFRQWUROV
DUHRSHUDWHG7KHLQGXFWLRQKRWSODWHVWRSVVXSSO\LQJ
KHDWLIWKHSDQLVPRYHGEHIRUHWKHSRZHUKDVEHHQ
VZLWFKHGRII
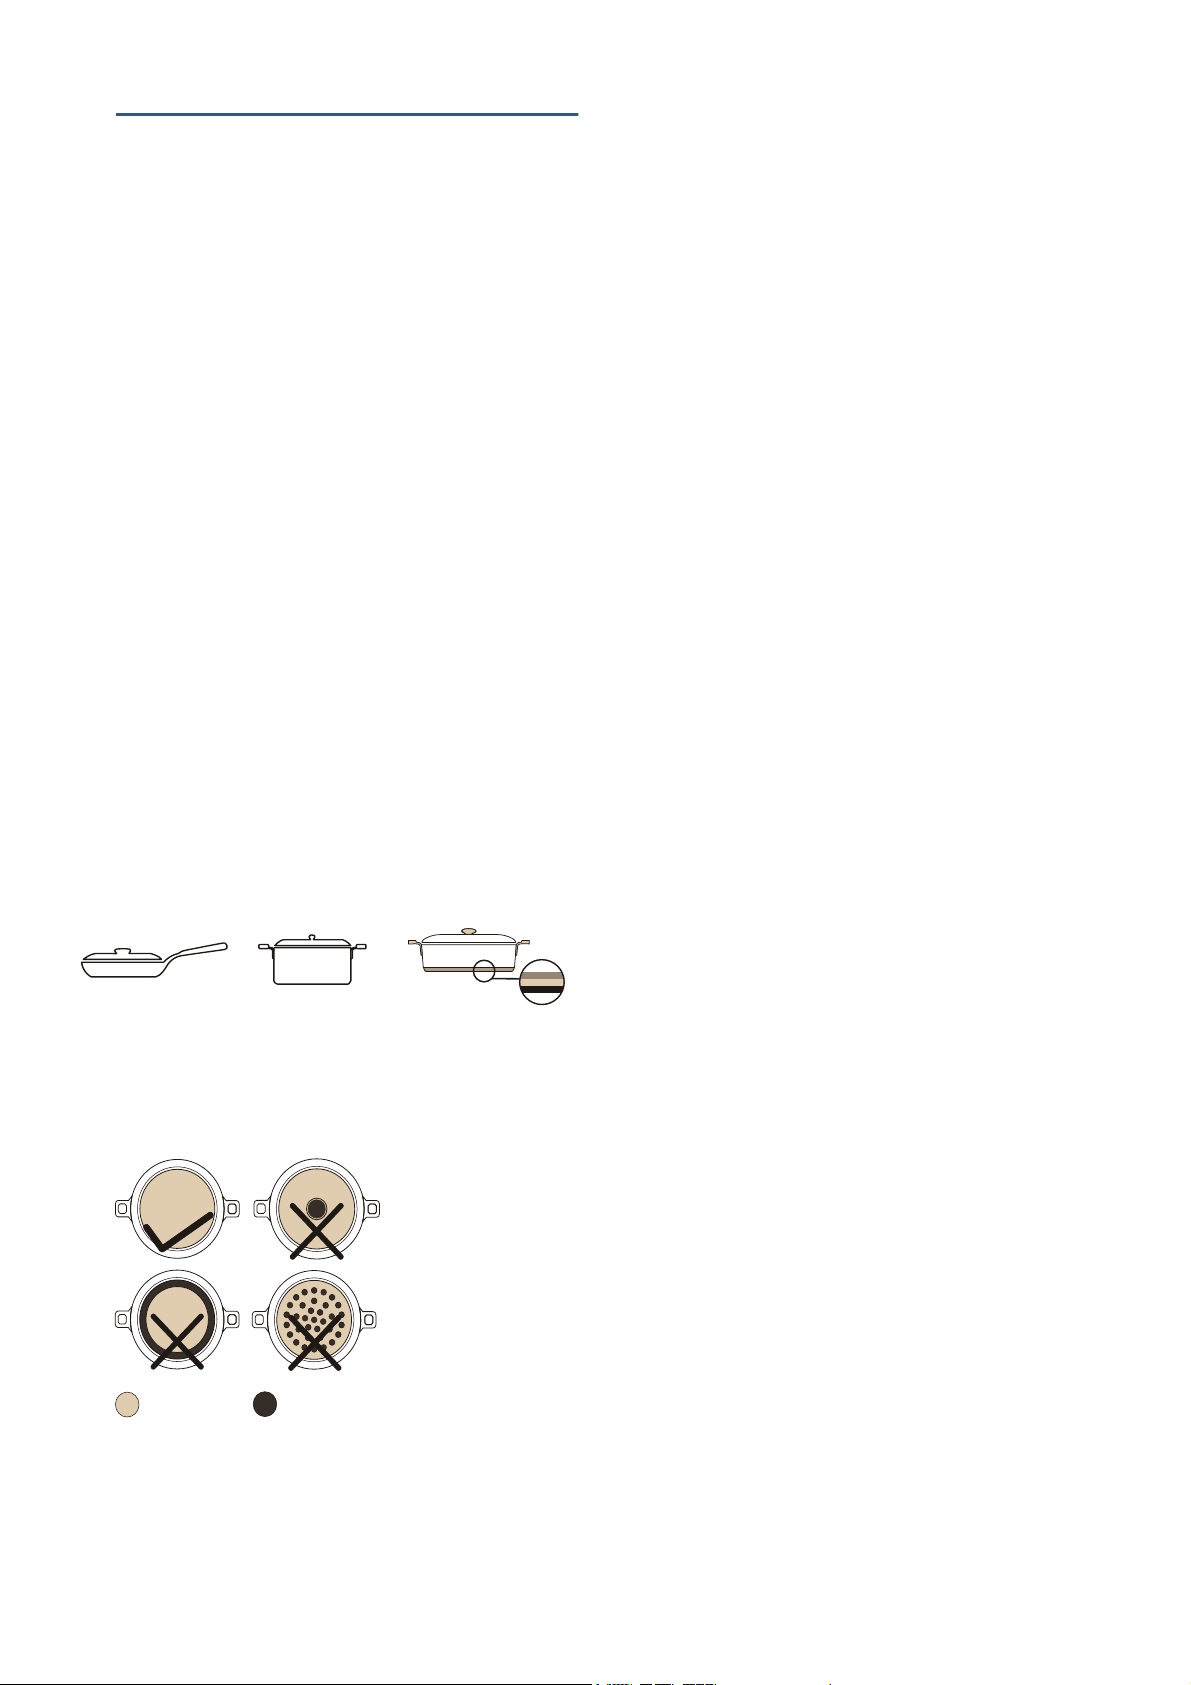
6XLWDEOHSDQV
■ 3OHDVHXVHWKHVSHFLDOLQGXFWLRQKREFRRNZDUHZLWK
WKHPDWHULDODQGVL]HWKDWPHHWWKHUHTXLUHPHQWV
■ &KHFNLQJIODWQHVVRISDQEDVH3XWDUXOHURQWKHSDQ
EDVHLIQRJDSEHWZHHQWKHUXOHUDQGSDQLWPHDQV
WKHSDQEDVHLVIODW
■ )HUURPDJQHWLFSDQVDUHRQO\SDQVZKLFKDUHVXLWDEOH
IRULQGXFWLRQFRRNLQJ,QRUGHUWRJHWJRRGFRRNLQJ
UHVXOWVWKHGLPHQVLRQRIIHUURPDJQHWLFSDQVVKRXOG
PDWFKHVWKHKRWSODWH7KHSDQVPDGHRIWKHIROORZLQJ
PDWHULDOV3DQVDVVKRZQDUHUHFRPPHQGHG
&DVWLURQ
6SHFLDOO\VWDLQOHVVVWHHO
2WKHUVVSHFLDOO\GHVLJQHGFRRNZDUHRILQGXFWLRQ
FRRNLQJPDGHIURPKHDWGLIIXVLQJPDWHULDOV
■ 3OHDVHXVHWKHPDJQHWLQWKHSDFNDJHWRGHWHUPLQHLI
WKHVL]HRIWKHIHUURPDJQHWLFSDUWKDVPHWWKH
UHTXLUHPHQWVVSHFLILHGLQWKLVXVHUPDQXDO
3DQPDQXIDFWXUHUVZLOOXVXDOO\LQGLFDWHLIWKHLUSDQV
DUHVXLWDEOHIRULQGXFWLRQFRRNLQJ
■ 1HYHUXVHSDQVPDGHRIWKHIROORZLQJPDWHULDO
*ODVV
(DUWKHQZDUH
&RSSHU
$OXPLQLXP
■ ,IQRSDQLVSODFHGRQWKHKRWSODWHRUWKHSDQLVQRW
PDGHRIDVXLWDEOHPDWHULDORULWLVQRWDVXLWDEOHVL]H
WKH KHDW VHWWLQJ LQGLFDWRU RI WKH LQGXFWLRQ KRE ZLOO IODVK
3ODFHDVXLWDEOHSDQRQWKHKRWSODWHWRVWRSWKH
LQGLFDWRUIURPIODVKLQJ
,IWKHUHLVDGHOD\RIPRUHWKDQVHFRQGVWKH
KRWSODWHZLOOVZLWFKRIIDXWRPDWLFDOO\
■ 'R QRW KHDW HPSW\ SDQV DQG GR QRW XVH SDQV ZLWK WKLQ
EDVHV
(PSW\FRRNZDUHFDQKHDWXSVRTXLFNO\WKDWWKHEDVH
RIWKHSDQFRXOGPHOWDQGGDPDJHWKHLQGXFWLRQKRE·V
VXUIDFH,QWKLVFDVHSOHDVHGRQRWWRXFKSDQDQG
VZLWFKRIIWKHLQGXFWLRQKREGLUHFWO\
,ILWGRHVQRWZRUNDIWHUFRROLQJFRQWDFWORFDOVHUYLFH
FHQWUHRUGLVWULEXWRU
$UHDFDQ
DWWUDFWPDJQHW
$UHDFDQW
DWWUDFWPDJQHW
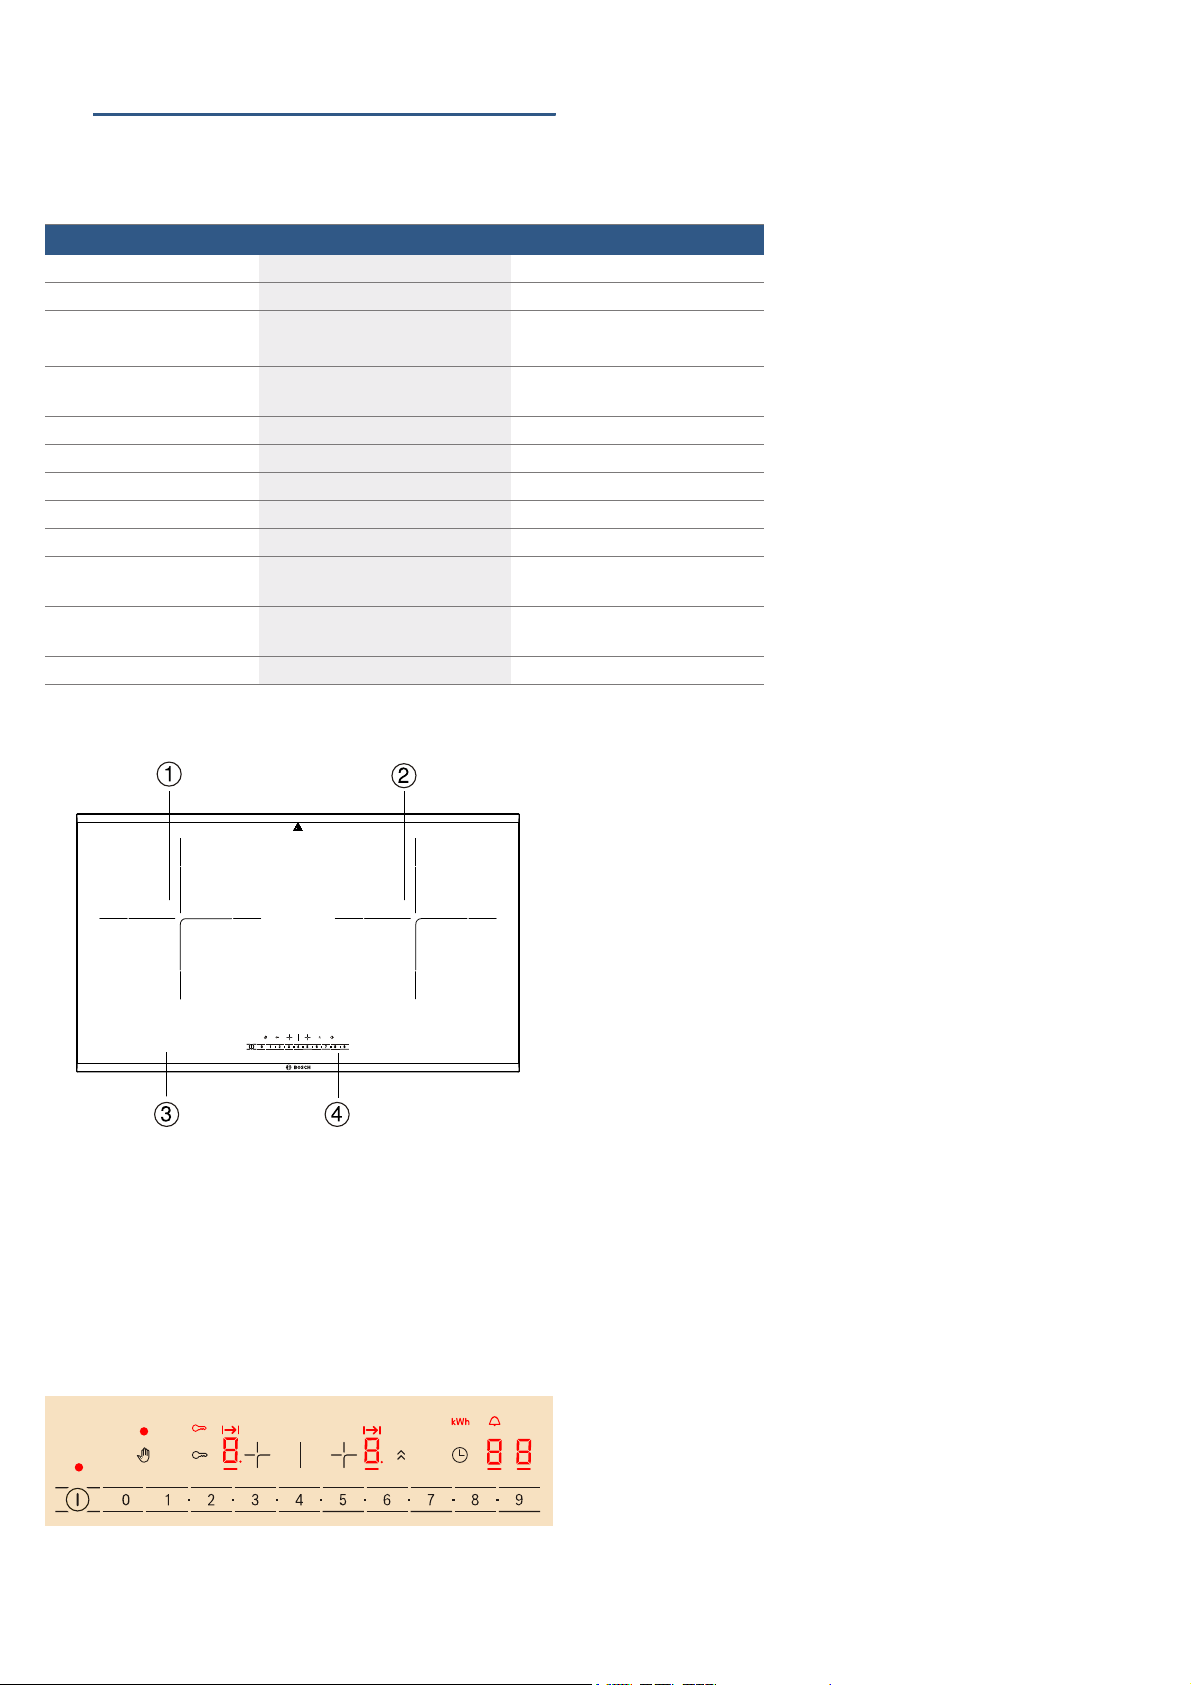
<RXUQHZDSSOLDQFH HQ
*<RXUQHZDSSOLDQFH
<RXUQHZDSSOLDQFH
7HFKQLFDOSDUDPHWHUV
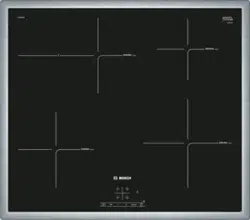
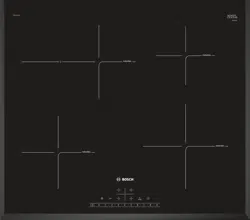
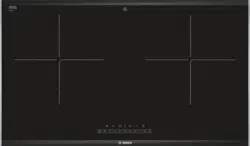
9LHZRIQHZDSSOLDQFH
/HIWKRWSODWH
5LJKWKRWSODWH
&HUDPLFJODVV
&RQWUROSDQHO
1RWH <RXFDQDVFHUWDLQZKHWKHUWKHSDQKDVEHHQ
SODFHGDWWKHFHQWUHRIWKHKRWSODWHDFFRUGLQJWRWKH
H[WHQGHGOLQHRIWKHFURVVHV
&RQWUROSDQHO
0DLQSRZHUVZLWFK #넺
7RVZLWFKWKHKRERQDQGRII
&OHDQLQJORFN >넺
7RDFWLYDWHFOHDQLQJORFNIXQFWLRQ
&KLOGSURRIORFN D넺
7RDFWLYDWHFKLOGSURRIORFN
+RWSODWHVHOHFWLRQ N넺
7RVHOHFWOHIWKRWSODWHRUULJKWKRWSODWH
3RZHU%RRVW G넺
7RDFWLYDWH3RZHU%RRVWIXQFWLRQ
7LPHVHWWLQJ 0
7RSURJUDPWKHFRRNLQJWLPHDQGNLWFKHQWLPHU
1XPEHU
8VHIRUKHDWVHWWLQJDQGWLPHSURJUDP
3URGXFWFRGH 33,06 33,7:
3URGXFWPRGHO &633,06 &633,7:
'LPHQVLRQ:['[+PP [[ [[
6L]HRIWDSSLQJ:['
PP
[
)LOOHW[5
[
)LOOHW[5
+HLJKWDERYHLQVWDOODWLRQ
WDEOHPP
3DQHO %ODFNFHUDPLFJODVV %ODFNFHUDPLFJODVV
1HWZHLJKWNJ
*URVVZHLJKWNJ
5DWHGYROWDJH 99a 9a
5DWHGIUHTXHQF\ +] +]
/HIWKRWSODWHUDWHGSRZHU
:
+HDWVHWWLQJ
5LJKWKRWSODWHUDWHG
SRZHU:
+HDWVHWWLQJ
7RWDOUDWHGSRZHU:

en 2SHUDWLRQ,QVWUXFWLRQ
12SHUDWLRQ,QVWUXFWLRQ
2SHUDWLRQ,QVWUXFWLRQ
5HVLGXDOKHDWLQGLFDWRU
■ 7KH KRE KDV D UHVLGXDO KHDW LQGLFDWRU IRU HDFK KRWSODWH
WR VKRZ WKH KRWSODWH ZKLFK DUH VWLOO KRW $YRLG WRXFKLQJ
WKHKRWSODWHZKHQWKH
•œLQGLFDWRULVRQ
■ $OWKRXJK WKH KRE LV VZLWFKHG RII WKH LQGLFDWRU ZLOO VWD\
OLWZKLOHWKHKRWSODWHLVKRW
■ :KHQWKHSDQLVUHPRYHGEHIRUHWKHKRWSODWHLV
WXUQHGRIIWKH •œLQGLFDWRUDQGVHOHFWHGKHDWVHWWLQJ
ZLOOEHGLVSOD\HGDOWHUQDWHO\ •ZLOOEHRQZKHQWKH
WHPSHUDWXUH LV YHU\ KLJK D ZKLOH ODWHU œ ZLOO EH RQ WKLV
LQGLFDWHVWKDWWKHWHPSHUDWXUHKDVJRQHGRZQWKH
UHVLGXDOKHDWLQGLFDWRUZLOOJRRIIDIWHUWKHLQGXFWLRQ
KREKDVFRROHGGRZQFRPSOHWHO\
6ZLWFKLQJWKHKRERQDQGRII
■ 7RVZLWFKRQ
7RXFKWKH #V\PERO$EHHSVRXQGV7KHLQGLFDWRU
QH[WWRWKHPDLQSRZHUVZLWFKDQGWKHKRWSODWH
LQGLFDWRUV ‹OLJKWXS7KHKRELVUHDG\WRXVH
■ 7RVZLWFKRII
7RXFKWKH #V\PEROXQWLOWKHLQGLFDWRUJRHVRXW$OO
KRWSODWHVDUHVZLWFKHGRII$EHHSVRXQGV
7KHUHVLGXDOKHDWLQGLFDWRUUHPDLQVOLWXQWLOWKH
KRWSODWHVKDYHFRROHGGRZQVXIILFLHQWO\
&DXWLRQ
7KHKREVZLWFKHVRIIDXWRPDWLFDOO\LIDOOKRWSODWHVKDYH
EHHQVZLWFKHGRIIIRUVRPHWLPH
7KHKRWSODWHVHWWLQJVEHVDYHGDIWHUWKHKREKDYHEHHQ
VZLWFKHGRIIOHVVWKHQVHFRQGV
,I \RX UHVWDUW WKH KRE LQ VHFRQGV WKH KRWSODWH ZLOO IROORZ
XSWKHSUHYLRXVVHWWLQJVXFKDVKHDWLQJVHWWLQJDQGWLPH
SURJUDPPLQJ
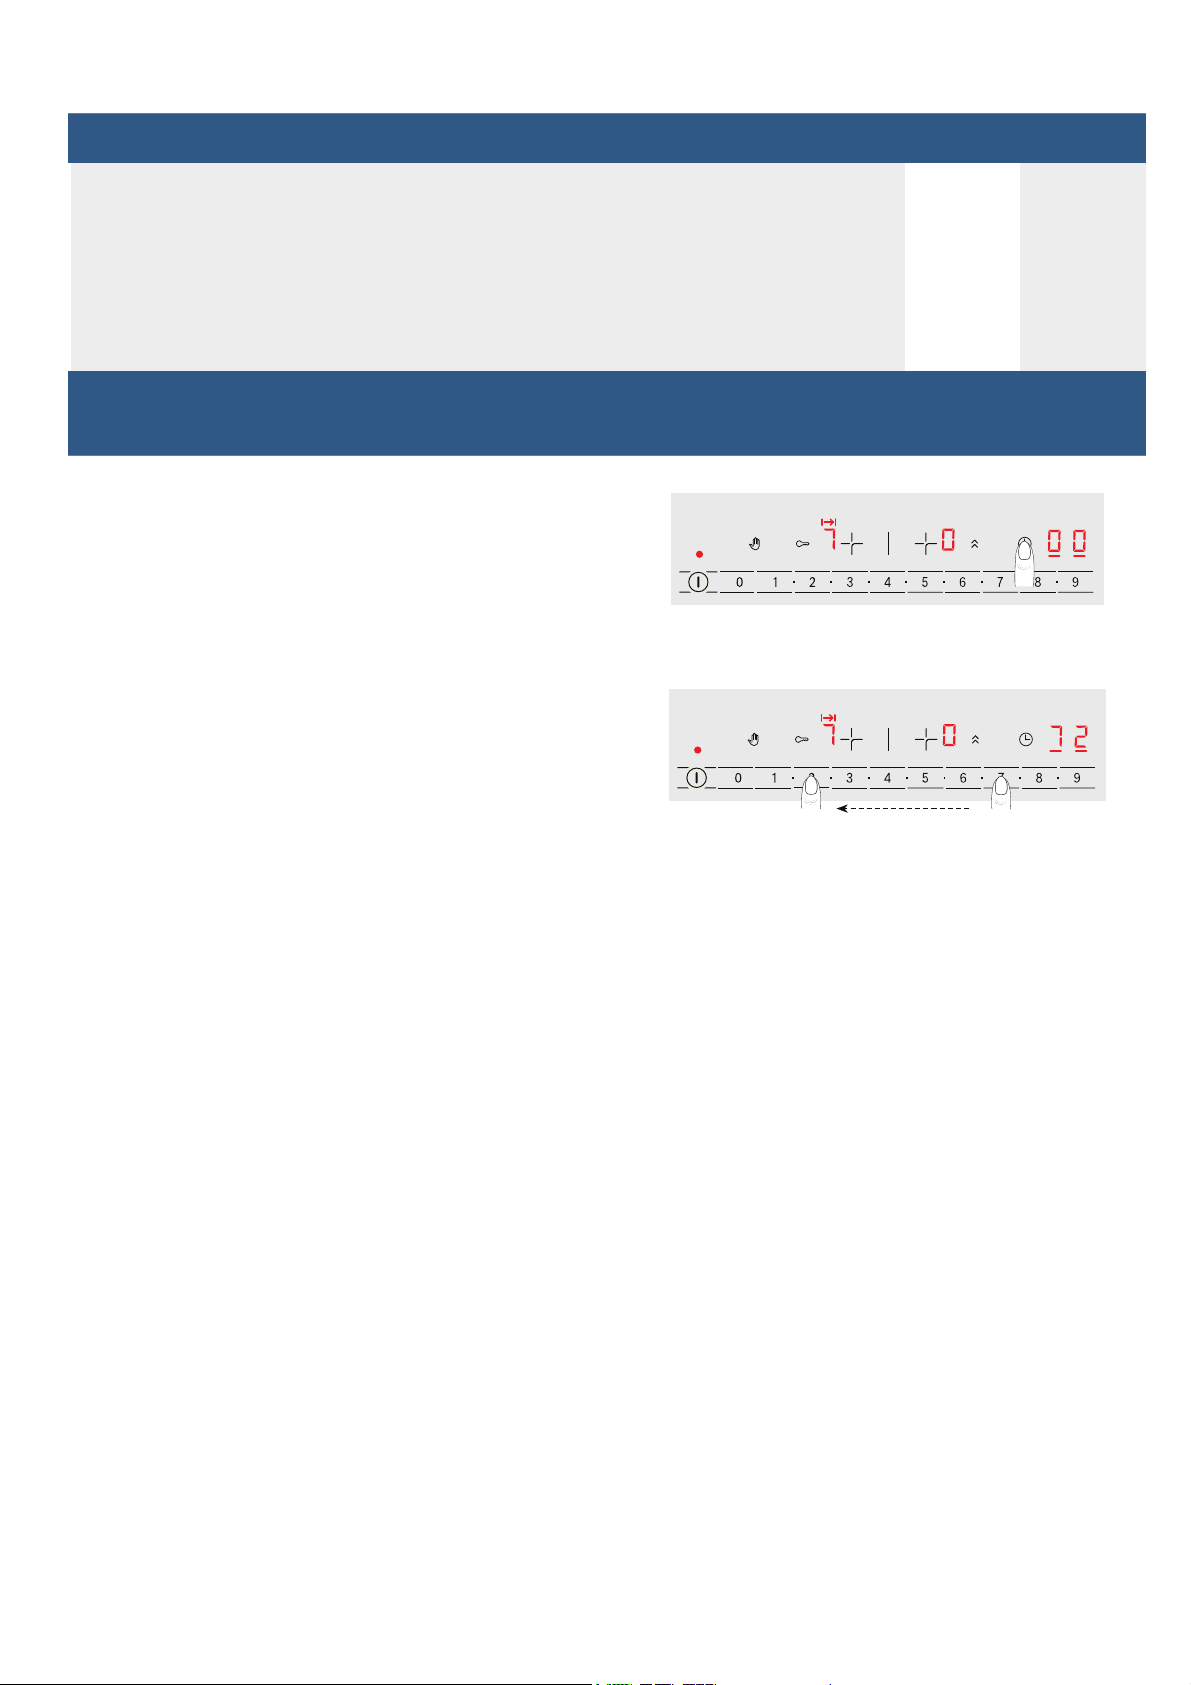
6HOHFWLQJDKRWSODWHDQGKHDWVHWWLQJ
■ 7RXFKWKH #V\PEROWRVZLWFKRQWKHKRE
7RXFKWKH äV\PEROIRUUHTXLUHGKRWSODWH7KH ‹
LQGLFDWRUOLJKWVXS
7KHQ VHOHFW WKH UHTXLUHG KHDW VHWWLQJ IURP WKH VHWWLQJV
UDQJH
+HDWVHWWLQJ ‚ ORZHVWVHWWLQJ
+HDWVHWWLQJ Š KLJKHVWVHWWLQJ
<RX FDQ VHW WKH UHTXLUHG KHDW VHWWLQJ E\ SUHVV QXPEHU
WKHQWKHKHDWVHWWLQJDSSHDUVLQWKHKRWSODWH
GLVSOD\
(YHU\KHDWVHWWLQJKDVDQLQWHUPHGLDWHVHWWLQJ7KLV
LQWHUPHGLDWHVHWWLQJLVPDUNHGZLWKWKHV\PERO
HJ7KHKHDWLQJVHWWLQJ …LQGLFDWHWKHKHDWVHWWLQJ
KLJKHUWKDQKHDWLQJVHWWLQJ …DQGORZHUWKDQKHDWLQJ
VHWWLQJ †
■ &KDQJLQJWKHKHDWVHWWLQJ
6HOHFWWKHKRWSODWHDQGWKHQVHWWKHUHTXLUHGKHDW
VHWWLQJLQWKHGLJLWDO]RQH
■ 6ZLWFKRIIWKHKRWSODWH
6HOHFWWKHKRWSODWHDQGWKHQVHOHFWKHDWVHWWLQJ ‹LQ
WKHGLJLWDO]RQH7KHKRWSODWHZLOOEHVZLWFKHGRIIDQG
WKHUHVLGXDOKHDWLQGLFDWRUOLJKWVXS
&DXWLRQ
,IQRSDQKDVEHHQSODFHGRQWKHKRWSODWHWKHVHOHFWHG
SRZHUOHYHOIODVKHV$IWHUDFHUWDLQWLPHKDVHODSVHGWKH
KRWSODWHVZLWFKHVRII
,I D SDQ KDV EHHQ SODFHG RQ WKH KRWSODWH EHIRUH VZLWFKLQJ
RQWKHKRELWZLOOEHGHWHFWHGZLWKLQDIHZVHFRQGVRI
SUHVVLQJ WKH PDLQ VZLWFK DQG WKH KRWSODWH ZLOO EH VHOHFWHG
DXWRPDWLFDOO\2QFHGHWHFWHGVHOHFWWKHSRZHUOHYHO
ZLWKLQWKHQH[WDIHZVHFRQGVRUWKHKRWSODWHZLOOVZLWFK
RII
,I PRUH WKDQ RQH SDQ LV SODFHG RQ WKH KRE RQO\ RQH ZLOO EH
GHWHFWHGZKHQVZLWFKLQJLWRQ
&RRNLQJWDEOH
7KHWDEOHVKRZVZKLFKKHDWVHWWLQJLVVXLWDEOHIRUHDFK
W\SH RI IRRG 7KH FRRNLQJ WLPH PD\ YDU\ GHSHQGLQJ RQ WKH
W\SHZHLJKWWKLFNQHVVDQGTXDOLW\RIWKHIRRG
+HDWVHWWLQJ &RRNLQJWLPH
PLQV
0HOWLQJ
&KRFRODWHFRDWLQJ
%XWWHUKRQH\JHODWLQH
+HDWLQJDQGNHHSLQJZDUP
6WHZHJOHQWLOVWHZ
0LON
+HDWLQJVDXVDJHVLQZDWHU
:LWKRXWOLG
7XUQVHYHUDOWLPHV
3UHKHDWWRKHDWVHWWLQJ

2SHUDWLRQ,QVWUXFWLRQ HQ
'HIURVWLQJDQGKHDWLQJ
6SLQDFKIUR]HQ
*RXODVKIUR]HQ
3RDFKLQJVLPPHULQJ
3RWDWRGXPSOLQJV
)LVK
:KLWHVDXFHVHJ%pFKDPHOVDXFH
:KLVNHGVDXFHVHJVDXFHEpDUQDLVHKROODQGDLVH
%RLOLQJVWHDPLQJEUDLVLQJ
5LFHZLWKGRXEOHWKHYROXPHRIZDWHU
5LFHSXGGLQJ
8QSHHOHGERLOHGSRWDWRHV
%RLOHGSRWDWRHV
3DVWDQRRGOHV
6WHZ
6RXSV
9HJHWDEOHV
9HJHWDEOHVIUR]HQ
&RRNLQJLQDSUHVVXUHFRRNHU
%UDLVLQJ
5RXODGHV
3RWURDVW
*RXODVK
5RDVWLQJIU\LQJZLWKOLWWOHRLO
(VFDORSHSODLQRUEUHDGHG
(VFDORSHIUR]HQ
&KRSSODLQRUEUHDGHG
6WHDNFPWKLFN
3RXOWU\EUHDVWFPWKLFN
3RXOWU\EUHDVWIUR]HQ
5LVVROHVFPWKLFN
+DPEXUJHUVFPWKLFN
)LVKDQGILVKILOOHWSODLQ
)LVKDQGILVKILOOHWEUHDGHG
)LVKEUHDGHGDQGIUR]HQHJILVKILQJHUV
6FDPSLSUDZQV
6DXWpHLQJIUHVKYHJHWDEOHVDQGPXVKURRPV
6WLUIU\YHJHWDEOHVPHDWFXWLQ$VLDQVW\OHVWULSV
)UR]HQGLVKHVHJURDVWHGGLVKHV
3DQFDNHVEDNHGLQVXFFHVVLRQ
2PHOHWWHFRRNHGLQVXFFHVVLRQ
)ULHGHJJV
+HDWVHWWLQJ &RRNLQJWLPH
PLQV
:LWKRXWOLG
7XUQVHYHUDOWLPHV
3UHKHDWWRKHDWVHWWLQJ
en 2SHUDWLRQ,QVWUXFWLRQ
3RZHU%RRVWIXQFWLRQ
■ 7KH 3RZHU%RRVW IXQFWLRQ HQDEOHV \RX WR KHDW XS ODUJH
TXDQWLWLHV RI ZDWHU IDVWHU WKDQ ZKHQ XVLQJ KHDW VHWWLQJ
Š
■ 7KLV IXQFWLRQ FDQ EH DFWLYDWHG IRU D KRWSODWH EXW XQGHU
FRQGLWLRQRI RQO\ RQHKRWSODWHZDVLQXVH 2WKHUZLVH
›DQG ŠIODVKLQWKHGLVSOD\IRUWKHVHOHFWHGKRWSODWH
7KHKHDWVHWWLQJ ŠLVWKHQVHWDXWRPDWLFDOO\ZLWKRXW
DFWLYDWLQJWKHIXQFWLRQ
■ $FWLYDWLQJ
6HOHFWDKRWSODWH
7RXFKWKH GV\PERO
7KH ›LQGLFDWRUOLJKWVXS7KHIXQFWLRQKDVQRZEHHQ
DFWLYDWHG
■ 'HDFWLYDWLQJ
6HOHFWWKHKRWSODWH
7RXFKWKH GV\PERO
7KH ›LQGLFDWRUJRHVRXWDQGWKHKRWSODWHVZLWFKHV
EDFNWRWKH ŠKHDWVHWWLQJ
7KHIXQFWLRQLVGHDFWLYDWHG
1RWH ,QFHUWDLQFLUFXPVWDQFHVWKH3RZHU%RRVWIXQFWLRQ
FDQVZLWFKLWVHOIRIIDXWRPDWLFDOO\LQRUGHUWRSURWHFWWKH
HOHFWURQLFHOHPHQWVLQVLGHWKHKRE
7LPHVHWWLQJRSWLRQV
<RXUKREKDVWZRWLPHUIXQFWLRQV
■ 3URJUDPPLQJWKHFRRNLQJWLPH
■ .LWFKHQWLPHU
3URJUDPPLQJWKHFRRNLQJWLPH
■ <RXFDQVHWDFRRNLQJWLPHRIXSWR ŠŠPLQXWHV
7KHKRWSODWHDXWRPDWLFDOO\VZLWFKHVRIIDIWHUWKHWLPH
WKDWLVVHWKDVHODSVHG
■ 6HWWLQJSURFHGXUH
6HOHFWWKHKRWSODWHDQGWKHUHTXLUHGKHDWVHWWLQJ
7RXFKWKH 0V\PERO7KH xGLVSOD\IRUWKHKRWSODWH
OLJKWVXS ‹‹OLJKWVXSRQWKHWLPHUGLVSOD\
6HWWKHUHTXLUHGWLPHLQWKHGLJLWDO]RQH7KHVHWWLQJ
GLVSOD\LQWKHWLPHGLVSOD\WLPHXQLWPLQXWHV
HJ6HWWLQJFRRNLQJWLPHPLQXWHV
N 3UHVVQXPEHULWZLOOEHGLVSOD\HGLQWKHVLQJOH
GLJLWV
N :LWKLQWKHQH[WVHFRQGVVHWWKHVHFRQGQXPEHU
,W ZLOO EH GLVSOD\HG LQ WKH VLQJOH GLJLWV 7KH QXPEHU
ZLOOEHPRYHGWRWKHOHIW
7KHQWKHFRRNLQJWLPHZLOOEHGLVSOD\HGLQWKHWLPH
GLVSOD\
,I\RXQRWFRQWLQXHVWRSURJUDPWLPHZLWKLQ
VHFRQGVWKHFXUUHQWWLPHGLVSOD\DVWKHSURJUDPPHG
WLPHZLOOVWDUWWRFRXQWGRZQ
■ &KDQJLQJRUFDQFHOOLQJWKHWLPH
6HOHFWWKHKRWSODWHDQGWKHQWRXFKWKH 0 V\PERO
&KDQJHWKHFRRNLQJWLPHLQGLJLWDO]RQHRUVHW ‹‹LQ
RUGHUWRFDQFHOWKHWLPH
■ 2QFHWKHWLPHKDVHODSVHG
7KHKRWSODWHVZLWFKHVRII$EHHSVRXQGV7KHWLPH
SURJUDPIXQFWLRQOLJKWVXS ‹‹IRUVHFRQGVLQWKH
GLVSOD\
:KHQDQ\V\PEROLVWRXFKHGWKHLQGLFDWRUJRRXWDQG
WKHEHHSLQJVWRSV
&DXWLRQ
7R VHW D FRRNLQJ WLPH RI XQGHU PLQXWHV DOZD\V WRXFK
EHIRUH\RXVHOHFWWKHUHTXLUHGYDOXH
■ 6HOHFWWKHKRWSODWHDQGWKHQWRXFKWKH 0 V\PEROWR
VKRZWKHUHPDLQLQJFRRNLQJWLPH
,IWKHKRELVVZLWFKHGRIIEHIRUHWKHWLPHKDVHODSVHG
WKHWLPHSURJUDPIXQFWLRQZLOOQRORQJHUEHDFWLYDWHG
'HHSIDWIU\LQJ JSHUSRUWLRQLQ ORLOGHHSIDWIULHGLQSRUWLRQV
)UR]HQSURGXFWVHJFKLSVFKLFNHQQXJJHWV
&URTXHWWHVIUR]HQ
0HDWHJFKLFNHQSRUWLRQV
)LVKEUHDGHGRULQEHHUEDWWHU
9HJHWDEOHVPXVKURRPVEUHDGHGRUEDWWHUHGWHPSXUD
6PDOOEDNHGLWHPVHJGRXJKQXWVIUXLWLQEDWWHU
+HDWVHWWLQJ &RRNLQJWLPH
PLQV
:LWKRXWOLG
7XUQVHYHUDOWLPHV
3UHKHDWWRKHDWVHWWLQJ

2SHUDWLRQ,QVWUXFWLRQ HQ
&DXWLRQ
(DFKKRWSODWHFDQEHSURJUDPPHGWKHGLIIHUHQWFRRNLQJ
WLPH WRXFK WKH
0 V\PERO UHSHDWHGO\ WR VKRZ WKH UHOHYDQW
KRWSODWH DQG LWV UHPDLQLQJ FRRNLQJ WLPH RU UHPDLQLQJ WLPH
RINLWFKHQWLPHULQWKHWLPHUGLVSOD\
7KHNLWFKHQWLPHU
■ <RX FDQ XVH WKH NLWFKHQ WLPHU WR VHW D WLPH RI XS WR
PLQXWHV 7KH NLWFKHQ WLPHU FDQ UXQ QR PDWHU WKH KRE LV
ORFNHGRUVZLWFKHGRII7KLVIXQFWLRQGRHVQRW
DXWRPDWLFDOO\VZLWFKRIIDKRWSODWH
■ 6HWWLQJSURFHGXUH
7RXFKWKH 0V\PEROUHSHDWHGO\XQWLOWKH SLQGLFDWRU
OLJKWVXS ‹‹OLJKWVXSLQWKHWLPHUGLVSOD\
6HWWKHUHTXLUHGWLPHLQWKHGLJLWDO]RQH$IWHUDIHZ
VHFRQGVWKHWLPHEHJLQVWRHODSVH
■ &KDQJLQJRUGHOHWLQJWKHWLPH
7RXFKWKH 0V\PEROUHSHDWHGO\XQWLOWKH SLQGLFDWRU
OLJKWVXS&KDQJHWKHFRRNLQJWLPHLQWKHGLJLWDO]RQH
RUVHW ‹‹LQRUGHUWRGHOHWHWKHSURJUDPPHGFRRNLQJ
WLPH
■ :KHQWKHWLPHKDVHODSVHG
$QZDUQLQJVLJQDOVRXQGV ‹‹DSSHDUVLQWKHWLPHU
GLVSOD\DQGWKH SLQGLFDWRUOLJKWVXS7KHGLVSOD\VJR
RXWDIWHUVHFRQGV
:KHQDQ\V\PEROLVWRXFKHGWKHLQGLFDWRUJRRXWDQG
WKHEHHSLQJVWRSV
&OHDQLQJORFNIXQFWLRQ
■ &OHDQLQJWKHKRESDQHOZKHQWKHKRELV21PD\
FKDQJHWKHVHWWLQJV
7RDYRLGWKLV\RXFDQXVHWKHFOHDQLQJORFNIXQFWLRQ
■ 3UHVVWKH >V\PERO7KHFRQWUROSDQHOZLOOUHPDLQ
ORFNHGIRUDSSUR[LPDWHO\VHFRQGV
7KHVXUIDFHRIWKHFRQWUROSDQHOFDQQRZEHFOHDQHG
ZLWKRXWULVNRIFKDQJLQJWKHVHWWLQJV
■ $IWHUWKHWLPHKDVHODSVHGDZDUQLQJEHHSZLOOVRXQG
DQGWKHIXQFWLRQLVGHDFWLYDWHG
&DXWLRQ
7KHORFNGRHVQRWDSSO\WRWKH >V\PERORUWRWKHPDLQ
VZLWFK
#7KHFOHDQLQJORFNIXQFWLRQFDQEHGHDFWLYDWHG
DQGWKHKREFDQEHVZLWFKHGRIIDWDQ\WLPH
&KLOGSURRIORFN
■ <RXFDQXVHWKHFKLOGSURRIORFNWRSUHYHQWFKLOGUHQ
IURPVZLWFKLQJRQWKHKRE
■ 7KHKREPXVWEHVZLWFKHGRIIWKHQDFWLYDWLQJDQG
GHDFWLYDWLQJWKHFKLOGSURRIORFN
■ 7RDFWLYDWH
7RXFK WKH
' V\PERO IRU DSSUR[ ILYH VHFRQGV XQWLO WKH
LQGLFDWRUOLJKWVXS
7KHKRELVORFNHG2QO\NLWFKHQWLPHUHIIHFWLYHRWKHU
IXQFWLRQLQYDOLG
■ 7RGHDFWLYDWH
7RXFK WKH ' V\PERO IRU DSSUR[ ILYH VHFRQGV XQWLO WKH
LQGLFDWRU JRHV RXW 7KH ORFN LV UHOHDVHG 7KH LQGXFWLRQ
KREFDQEHXVHG
■ $XWRPDWLFDOO\FKLOGSURRIORFN
:LWKWKLVIXQFWLRQWKHFKLOGSURRIORFNDXWRPDWLFDOO\
DFWLYDWHVZKHQDKRELVVZLWFKHGRII
<RXFDQILQGRXWKRZWRVZLWFKWKHDXWRPDWLF
FKLOGSURRIORFNRQLQWKH´8VHUVHWWLQJVµVHFWLRQ
$XWRPDWLFVDIHW\FXWRXW
■ ,IDKRWSODWHRSHUDWHVIRUDQH[WHQGHGSHULRGDQGQR
VHWWLQJVDUHFKDQJHGWKHDXWRPDWLFVDIHW\VKXWRIILV
DFWLYDWHG
7KH KRWSODWH VWRSV KHDWLQJ ” ‰ DQG WKH UHVLGXDO KHDW
LQGLFDWRU •RU œIODVKDOWHUQDWHO\LQWKHKRWSODWH
GLVSOD\
:KHQ\RXWRXFKDQ\V\PEROWKHGLVSOD\VZLWFKHVRII
7KHKRWSODWHFDQQRZEHVHWDJDLQ
■ 7KHSRLQWDWZKLFKWKHVDIHW\VKXWRIIEHFRPHVDFWLYH
GHSHQGVRQZKLFKKHDWVHWWLQJKDVEHHQVHW
%DVLFVHWWLQJV
7KHDSSOLDQFHKDVYDULRXVEDVLFVHWWLQJV<RXFDQDGDSW
WKHVHWRVXLW\RXUFRRNLQJKDELWV
'LVSOD\ )XQFWLRQ
™‚ $XWRPDWLFFKLOGSURRIORFN
‹ 0DQXDO
‚ $XWRPDWLF
ƒ )XQFWLRQGHDFWLYDWHG
™ƒ $XGLEOHVLJQDOV
‹ &RQILUPDWLRQDQGIDXOWVLJQDOVDUHVZLWFKHGRII
‚ 2QO\WKHIDXOWVLJQDOLVVZLWFKHGRQ
ƒ 2QO\WKHFRQILUPDWLRQVLJQDOLVVZLWFKHGRQ
„ $OOVLJQDOWRQHVDUHVZLWFKHGRQ
)DFWRU\VHWWLQJV

en 2SHUDWLRQ,QVWUXFWLRQ
■ 7RDFFHVVWKHEDVLFVHWWLQJV
6ZLWFKRQWKHKREE\SUHVV #V\PERO
:LWKLQ WHQ VHFRQGV WRXFK DQG KROG WKH 0 V\PERO XQWLO
EHHSVVRXQGDQG ÙÙOLJKWVXSRQWKHWLPHUGLVSOD\
7RXFKLQJWKH 0V\PERODJDLQ ™DQG ‚IODVK
DOWHUQDWHO\RQWKHGLVSOD\VRIULJKWKRWSODWHWDNHV\RX
WRWKHEDVLFVHWWLQJV
7RXFKWKH 0V\PEROUHSHDWHGO\XQWLOWKHUHTXLUHG
IXQFWLRQLVGLVSOD\HG
7KHQ VHOHFW WKH UHTXLUHG VHWWLQJ IURP WKH VHWWLQJV DUHD
7KHQHZVHWWLQJZLOODSSHDURQWKHWLPHLQGLFDWRU
GLVSOD\
7RXFKWKH 0V\PEROXQWLOEHHSVVRXQGWKHVHWWLQJ
KDYHEHHQVDYHG
1RWH
:KHQ\RXVHOHFWWKH ™‚ƒVHWWLQJWKH ™VWDWLFDOO\RQWKH
GLVSOD\ ‚DQG ƒDOWHUQDWHO\RQWKHGLVSOD\7KHUHVXOWIRU
WKHTXDOLW\DQGVSHHGRIWKHFRRNLQJSURFHVVZLOODSSHDU
RQWKHKRWSODWHGLVSOD\
7XUQRIIWKHKREE\WRXFK #V\PERO\RXFDQOHDYHWKH
EDVLFVHWWLQJEXWWKHQHZVHWWLQJZLOOQRWEHVDYHG
(QHUJ\FRQVXPSWLRQLQGLFDWRU
■ 7KLVIXQFWLRQLQGLFDWHVWKHWRWDODPRXQWRIHQHUJ\
FRQVXPHGE\WKLVKREWKHODVWWLPHLWZDVXVHGIRU
FRRNLQJ
2QFHVZLWFKHGRIIWKHHQHUJ\FRQVXPSWLRQLQN:KLV
GLVSOD\HGIRUVHFRQGV
<RXFDQILQGRXWKRZWRVZLWFKWKLVIXQFWLRQRQLQWKH
VHFWLRQRQ%DVLFVHWWLQJV
6XLWDELOLW\WHVWRIWDEOHZDUH
■ 7KLVIXQFWLRQFDQEHXVHGWRFKHFNWKHVSHHGDQG
TXDOLW\RIWKHFRRNLQJSURFHVVGHSHQGLQJRQWKH
FRRNZDUH
7KHUHVXOWLVDUHIHUHQFHYDOXHDQGGHSHQGVRQWKH
SURSHUWLHVRIWKHFRRNZDUHDQGWKHKRWSODWHEHLQJ
XVHG
™„ 'LVSOD\HQHUJ\FRQVXPSWLRQ
‹ 6ZLWFKHGRII
‚ 6ZLWFKHGRQ
™† $XWRPDWLFDOO\SURJUDPPLQJWKHFRRNLQJWLPH
‹‹ 6ZLWFKHGRII
‹‚ŠŠ 7LPHXQWLODXWRPDWLFVZLWFKRII
™‡ 'XUDWLRQRIWKHWLPHUHQGVLJQDOWRQH
‚ VHFRQGV
ƒ VHFRQGV
„ PLQXWH
™ˆ 3RZHUPDQDJHPHQWIXQFWLRQ/LPLWLQJWKHWRWDOSRZHURIWKHKRE
‹ 6ZLWFKHGRII
‚ :PLQLPXPSRZHU
‚ :
ƒ :
ŠRU Š 0D[LPXPSRZHURIWKHKRE
™Š 7LPHIRUVHOHFWLQJWKHKRWSODWH
‹ 8QOLPLWHG7KHKRWSODWHWKDWZDVVHWODVWUHPDLQVVHOHFWHG
‚ /LPLWHG7KHKRWSODWHRQO\UHPDLQVVHOHFWHGIRUDIHZVHFRQGV
™‚ƒ &KHFNLQJFRRNZDUHDQGFRRNLQJUHVXOWV
‹ 1RWVXLWDEOH
‚ 1RWSHUIHFW
ƒ 6XLWDEOH
™‹ 5HVWRULQJWKHIDFWRU\VHWWLQJV
‹ ,QGLYLGXDOVHWWLQJV
‚ 5HVWRUHIDFWRU\VHWWLQJV
'LVSOD\ )XQFWLRQ
)DFWRU\VHWWLQJV
&DUHDQG&OHDQLQJ HQ
:LWK WKH FRRNZDUH VWLOO FROG ILOO LW ZLWK DSSUR[ PO RI
ZDWHU DQG SODFH LW RQ WKH FHQWUH RI WKH KRWSODWH ZLWK WKH
GLDPHWHU WKDW PRVW FORVHO\ PDWFKHV WKDW RI WKH EDVH RI
WKHFRRNZDUH
*RWRWKHEDVLFVHWWLQJVDQGVHOHFWWKH ™‚ƒVHWWLQJ
$ZLOOIODVKRQWKHKRWSODWHGLVSOD\
7KHIXQFWLRQKDVQRZEHHQDFWLYDWHG
$IWHUVHFRQGVWKHUHVXOWIRUWKHTXDOLW\DQGVSHHG
RIWKHFRRNLQJSURFHVVZLOODSSHDURQWKHKRWSODWH
GLVSOD\
■ &KHFNWKHUHVXOWXVLQJWKHIROORZLQJWDEOH
1RWH
,IWKHGLDPHWHURIWKHKRWSODWHXVHGLVPXFKVPDOOHUWKDQ
WKHGLDPHWHURIWKHFRRNZDUHRQO\WKHPLGGOHRIWKH
FRRNZDUHFDQEHH[SHFWHGWRKHDWXS7KLVPD\UHVXOWLQ
WKHFRRNLQJUHVXOWVQRWEHLQJDVJRRGDVH[SHFWHGRU
EHLQJOHVVWKDQVDWLVIDFWRU\
■ <RX FDQ ILQG LQIRUPDWLRQ RQ WKLV IXQFWLRQ LQ WKH VHFWLRQ
RQ%DVLFVHWWLQJV
<RXFDQILQGLQIRUPDWLRQRQWKHW\SHVL]HDQG
SRVLWLRQLQJRIWKHFRRNZDUHLQWKHVHFWLRQVRQ
6XLWDEOHSDQV
2&DUHDQG&OHDQLQJ
&DUHDQG&OHDQLQJ
&OHDQWKHLQGXFWLRQKREDIWHUHDFKXVH7KLVZLOOSUHYHQW
VSLOODJHVIURPEXUQLQJDQGLWUHPDLQLQWKHEHVWZRUGLQJ
FRQGLWLRQ
&OHDQLQJVXUIDFHRIJODVVFHUDPLFV
■ 2QO\XVHFOHDQLQJSURGXFWVZKLFKDUHUHFRPPHQGIRU
FHUDPLFJODVV
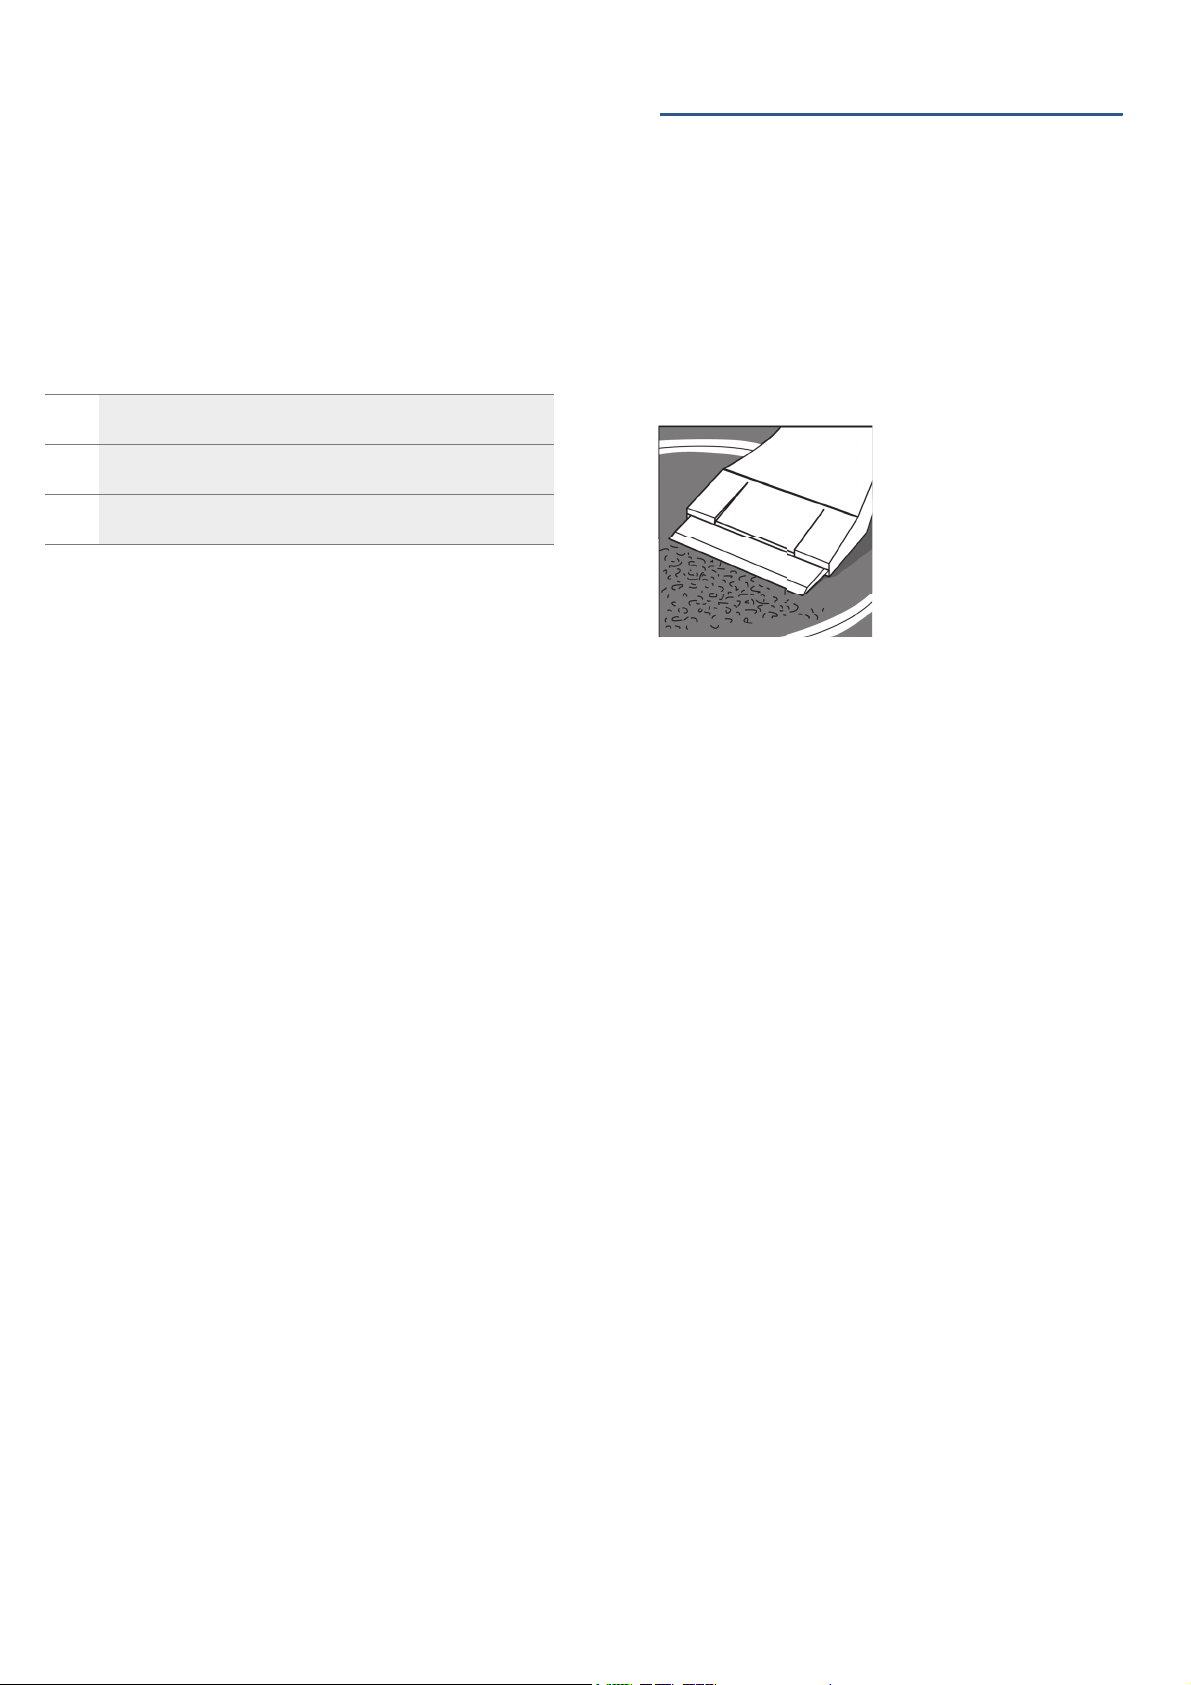
■ 5HPRYH VWXEERUQ VWDLQV ZLWK D JODVV VFUDSHU <RX FDQ
EX\LWIURPORFDOVHUYLFHFHQWUH
3XVKRXWWKHEODGHVRIWKHVFUDSHU
&OHDQWKHVXUIDFHRIWKHLQGXFWLRQKREZLWKWKHEODGH
'RQRWFOHDQWKHVXUIDFHRIWKHLQGXFWLRQKREZLWKWKH
VFUDSHUFRYHUDVWKLVFRXOGVFUDWFKWKHVXUIDFH
7KHEODGHLVYHU\VKDUSEHZDUHRIFXWV
.HHSLQDVDIHSODFHDIWHUXVH
■ 1HYHUXVH
&RUURVLYHFOHDQLQJSURGXFWVVXFKDVVWDLQUHPRYHUV
DQGRYHQVSUD\
$EUDVLYHSURGXFWV
+LJKSUHVVXUHFOHDQHUVRUVWHDPFOHDQHUV
&OHDQLQJGHFRUDWLYHVWULSVRILQGXFWLRQKRE
■ 2QO\XVHVOLJKWO\VRDS\ZDUPZDWHUWRFOHDQLQJWKH
GHFRUDWLYHVWULSV
■ 1HYHUXVHVKDUSRIDEUDVLYHSURGXFWVWRSUHYHQW
GDPDJHWRLW
■ 'RQRWXVHWKHJODVVVFUDSHU
‹ 7KHFRRNZDUHLVQRWVXLWDEOHIRUWKHKRWSODWHDQGZLOO
WKHUHIRUHQRWKHDWXS
‚ 7KHFRRNZDUHLVWDNLQJORQJHUWRKHDWXSWKDQH[SHFWHG
DQGWKHFRRNLQJSURFHVVLVQRWJRLQJDVZHOODVLWVKRXOG
ƒ 7KH FRRNZDUH LV KHDWLQJ XS FRUUHFWO\ DQG WKH FRRNLQJ SUR
FHVVLVJRLQJZHOO

en 0DLQWHQDQFHDQG6HUYLFH
4 0DLQWHQDQFHDQG6HUYLFH
0DLQWHQDQFHDQG6HUYLFH
)DXOWV$QDO\VLVDQG7URXEOHVKRRWLQJ
■ 0DOIXQFWLRQVDUHJHQHUDOO\FDXVHGE\PLQRUIDXOWV
%HIRUHFRQWDFWLQJWKHFXVWRPHUVHUYLFHPDNHVXUH
\RXKDYHUHDGWKHIROORZLQJ
1RWH
,I
“DSSHDUVLQWKHGLVSOD\WKHVHQVRUIRUWKHUHOHYDQW
KRWSODWHPXVWEHSUHVVHGDQGKHOGLQRUGHUWRUHDGWKH
IDXOWFRGHRIGLJLWV
■ ,I WKH IDXOW FRGH LV QRW OLVWHG LQ WKH WDEOH GLVFRQQHFW WKH
KREIURPWKHSRZHUVXSSO\ZDLWVHFRQGVDQG
FRQQHFWLWDJDLQ,IWKHGLVSOD\DSSHDUVDJDLQFRQWDFW
WHFKQLFDODIWHUVDOHVDQGWHOOWKHPWKHSUHFLVHIDXOW
FRGH
1RUPDOQRLVHZKLOHWKHDSSOLDQFHLVZRUNLQJ
,QGXFWLRQKHDWLQJWHFKQRORJ\LVEDVHGRQWKHFUHDWLRQRI
HOHFWURPDJQHWLF ILHOGV ZKLFK HQDEOH KHDW WR EH JHQHUDWHG
GLUHFWO\RQWKHEDVHRIWKHSDQ'HSHQGLQJRQWKH
FRQVWUXFWLRQ RI WKH SDQ WKHVH HOHFWURPDJQHWLF ILHOGV PD\
SURGXFHFHUWDLQQRLVHVRUYLEUDWLRQVDVGHWDLOHGEHORZ
■ $ORZEX]]LQJQRLVHOLNHDWUDQVIRUPHU
7KLVQRLVHLVSURGXFHGZKHQFRRNLQJZLWKKLJKSRZHU
OHYHOV,WLVWKHTXDQWLW\RIHQHUJ\WUDQVIHUUHGIURPWKH
LQGXFWLRQKREWRWKHSDQZKLFKFDXVHVWKHQRLVH7KLV
QRLVHZLOOGLVDSSHDURUOHVVHQDVWKHSRZHUOHYHOLV
UHGXFHG
■ $ORZZKLVWOH
7KLVQRLVHLVSURGXFHGZKHQWKHSDQLVHPSW\7KH
QRLVHGLVDSSHDUDVVRRQDVIRRGRUZDWHULVDGGHGWR
WKHSDQ
■ 6L]]OLQJ
7KLVQRLVHLVSURGXFHGE\SDQVPDGHRIFRPSRVLWH
PDWHULDOV7KHQRLVHLVFDXVHGE\WKHYLEUDWLRQRIWKH
FRQWDFW VXUIDFHV 7KLV QRLVH FRPHV IURP WKH FRRNZDUH
DQGPD\YDU\ZLWKWKHTXDQWLW\RIIRRGDQGPHWKRGRI
FRRNLQJ
■ +LJKSLWFKHGZKLVWOLQJ
7KLVQRLVHLVPRVWO\SURGXFHGE\SDQVPDGHRI
FRPSRVLWHPDWHULDOVZKHQHYHUWKH\DUHXVHGDWIXOO
KHDWLQJSRZHUDQGDWWKHVDPHWLPHRQWZR
KRWSODWHV7KLVZKLVWOLQJGLVDSSHDUVRUOHVVHQVZKHQ
WKHSRZHULVUHGXFHG
■ 1RLVHIURPWKHIDQ
)RU WKH HOHFWURQLF V\VWHP WR UXQ SURSHUO\ WKH LQGXFWLRQ
KREPXVWRSHUDWHXQGHUFRQWUROOHGWHPSHUDWXUHV
'LVSOD\ 0DOIXQFWLRQ PHDVXUH
1RLQGLFDWLRQ 3RZHUVXSSO\ZDVGLVFRQQHFWHG 8VHRWKHUHOHFWULFDOGHYLFHWRFKHFNLIWKHSRZHUVXSSO\ZDVGLV
FRQQHFWHG
7KHDSSOLDQFHKDVQRWEHHQFRUUHFWO\FRQQHFWHG &KHFNLIWKHDSSOLDQFHKDVEHHQFRQQHFWHGFRUUHFWO\
(OHFWURQLFV\VWHPHUURU ,IWKHFKHFNVDERYHGRQRWUHPHG\WKHPDOIXQFWLRQFRQWDFWWKH
DIWHUVDOHVVHUYLFHFHQWUH
“ ‹‚‹‰ )DQPDOIXQFWLRQ 3OHDVHFRQWDFWWKHDIWHUVDOHVVHUYLFHFHQWUH
”‡ 2YHUKHDWLQJRIHOHFWURQLFV\VWHPFRUUHVSRQGLQJ
KRWSODWHKDVVZLWFKHGRII
:DLWXQWLOWKHHOHFWURQLFV\VWHPKDVFRROHGGRZQWKHQSUHVVDQ\
EXWWRQ,IWKHLQGLFDWLRQFRQWLQXHVFRQWDFWWKHDIWHUVDOHVVHUYLFH
FHQWUH
”ƒ”…”† 2YHUKHDWLQJRIFRQWUROSDQHODOOKRWSODWHKDYH
VZLWFKHGRII
:DLW XQWLO WKH HOHFWURQLF V\VWHP RI FRQWURO SDQHO KDV FRROHG GRZQ
WKHQ SUHVV DQ\ EXWWRQ ,I WKH LQGLFDWLRQ FRQWLQXHV FRQWDFW WKH DIWHU
VDOHVVHUYLFHFHQWUH
”‚ +RWSODWHRYHUKHDWHGDQGZDVVZLWFKHGRIIWRSUR
WHFWWKHKRE
:DLWXQWLOWKHKRWSODWHKDVFRROHGGRZQDQGVZLWFKRQWKHKRE
DJDLQ
“ƒ‹„‹
“ƒ‚„‹
“ƒ‹„‚
“ƒ‚„‚
“ƒ‹„ƒ
“ƒ‚„ƒ
+RWSODWHWHPSHUDWXUHVHQVRUPDOIXQFWLRQ 6ZLWFKRIIWKHLQGXFWLRQKREWKHQVZLWFKRQWKHKREDJDLQDIWHUD
IHZVHFRQGV,IWKHLQGLFDWLRQFRQWLQXHVFRQWDFWWKHDIWHUVDOHV
VHUYLFHFHQWUH
“Š‹‹‹
“Š‹‚‹
9ROWDJHLQFRUUHFWRXWVLGHQRUPDORSHUDWLQJOLPLWV 3OHDVHFRQWDFWWKHORFDOSRZHUVXSSO\ERDUG
”‰ ,WZDVORQJWLPHZRUNLQJDVVDPHFRQGLWLRQWKH
KREZDVVZLWFKHGRIIDXWRPDWLFDOO\
3UHVVDQ\EXWWRQWKHHUURUGLVDSSHDU7KHQRSHUDWHWKHKRE
'RQRWSODFHKRWSDQVRQWKHFRQWUROSDQHO
,QVWDOODWLRQ,QVWUXFWLRQ HQ
7KXV WKH LQGXFWLRQ KRE LV ILWWHG ZLWK D IDQ ZKLFK VWDUWV
ZRUNLQJDIWHUGHWHFWLQJWKHWHPSHUDWXUHDWGLIIHUHQW
SRZHUOHYHOV
,I WKH WHPSHUDWXUH GHWHFWHG LV VWLOO WRR KLJK WKH IDQ ZLOO
FRQWLQXH WR ZRUN HYHQ DIWHU WKH LQGXFWLRQ KRE KDV EHHQ
VZLWFKHGRII
7KHQRLVHVGHVFULEHGLQWKLVVHFWLRQDUHQRUPDO7KH\
DUHSDUWRILQGXFWLRQKHDWLQJWHFKQRORJ\DQGGRQRW
LQGLFDWHDPDOIXQFWLRQ
7LSVZLWK*RRG,QWHQWLRQ
::DUQLQJ² 2QO\WHFKQLFLDQVZKRKDYHUHFHLYHG
SURIHVVLRQDOWUDLQLQJDQGREWDLQHGUHODWHGTXDOLILFDWLRQ
FDQPDLQWDLQWKHLQGXFWLRQKRE1RRWKHUSHUVRQVVKRXOG
PDLQWDLQWKHLQGXFWLRQKREZLWKRXWSHUPLVVLRQWRDYRLG
VHULRXVFRQVHTXHQFHV
■ :KHQ\RXULQGXFWLRQKRELVPDOIXQFWLRQLQJSOHDVH
UHIHU WR ´)DXOWV $QDO\VLV DQG 7URXEOHVKRRWLQJ´ ILUVWO\ ,I
\RXFDQQRWILQGDVROXWLRQWRWKHIDXOWVZLWFKRIIWKH
DSSOLDQFHDQGFRQWDFWORFDOVHUYLFHFHQWUH
■ :KHQ \RX FRQWDFW FXVWRPHU VHUYLFH VWDII SOHDVH VWDWH
WKH SURGXFW FRGH (1U WKH PDQXIDFWXULQJ FRGH )'
WKHVHULDOQXPEHU=1U7KLVLQIRUPDWLRQFDQKHOSXV
WRRIIHUEHWWHUVHUYLFH<RXZLOOILQGWKLVLQIRUPDWLRQRQ
WKHQDPHSODWHRILQGXFWLRQKREDVLOOXVWUDWHGEHORZ
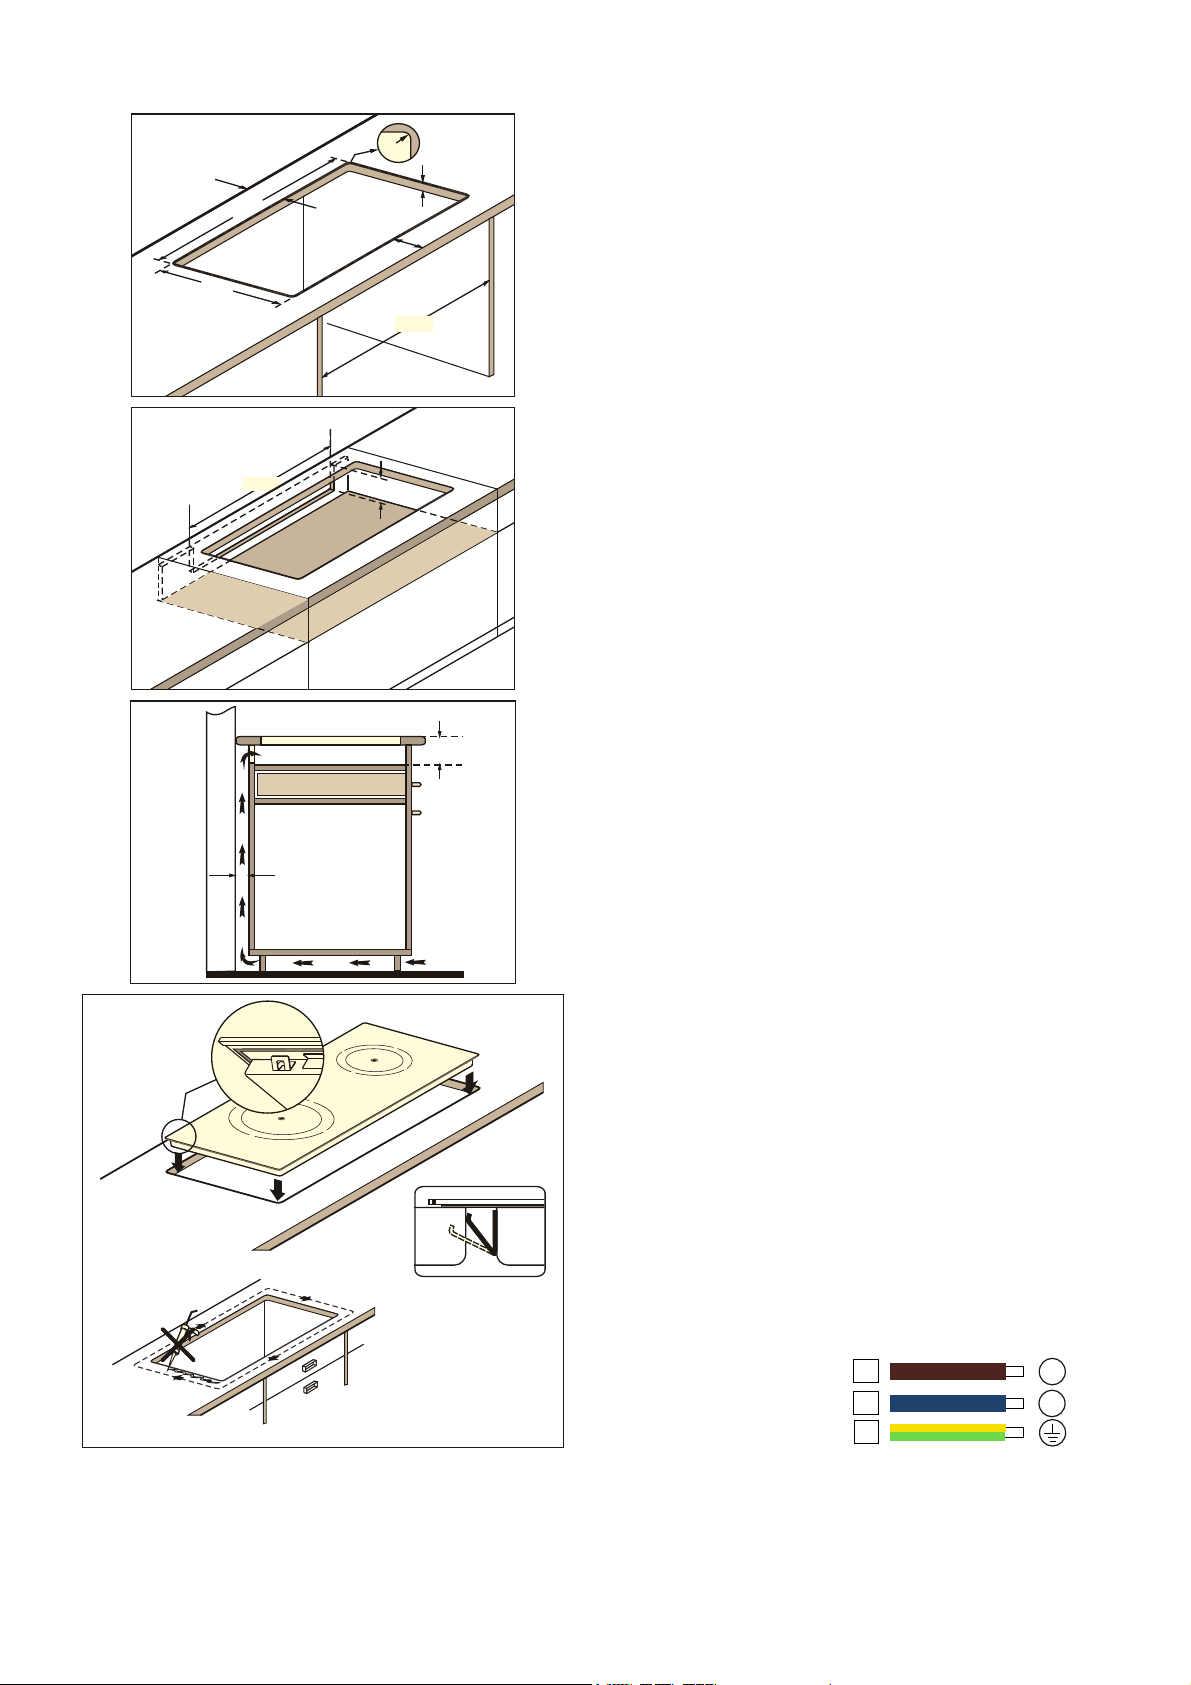
5,QVWDOODWLRQ,QVWUXFWLRQ
,QVWDOODWLRQ,QVWUXFWLRQ
6DIHW\3UHFDXWLRQV
■ 7KHLQVWDOODWLRQHOHFWULFDOLQVWDOODWLRQFRQQHFWWKH
DSSOLDQFHPXVWEHFDUULHGRXWE\WHFKQLFLDQVIURPRU
DXWKRULVHGE\ORFDOVHUYLFHFHQWUHWKHJXLGHOLQHVVHW
RXWE\WKHHOHFWULFLW\SURYLGHUPXVWEHIROORZHG7KH
PDQXIDFWXUHUVKDOOQRWEHOLDEOHIRUDQ\LQMXU\DQG
GDPDJHFDXVHGDVDUHVXOWRILPSURSHULQVWDOODWLRQ
■ 'RQRWLQVWDOOWKHLQGXFWLRQKRERQWKHWRSRID
UHIULJHUDWRUVGLVKZDVKHUVRYHQVZDVKLQJPDFKLQHV
RUVLPLODUDSSOLDQFHV
■ 7KLVDSSOLDQFHVKRXOGRQO\EHXVHGZLWKDQHDUWKHG
FRQQHFWLRQ
■ 7KH SRZHU FDEOH PXVW EH SRVLWLRQHG VR WKDW LW GRHV QRW
WRXFKDQ\RIWKHKRWSDUWVRIWKHLQGXFWLRQKRE
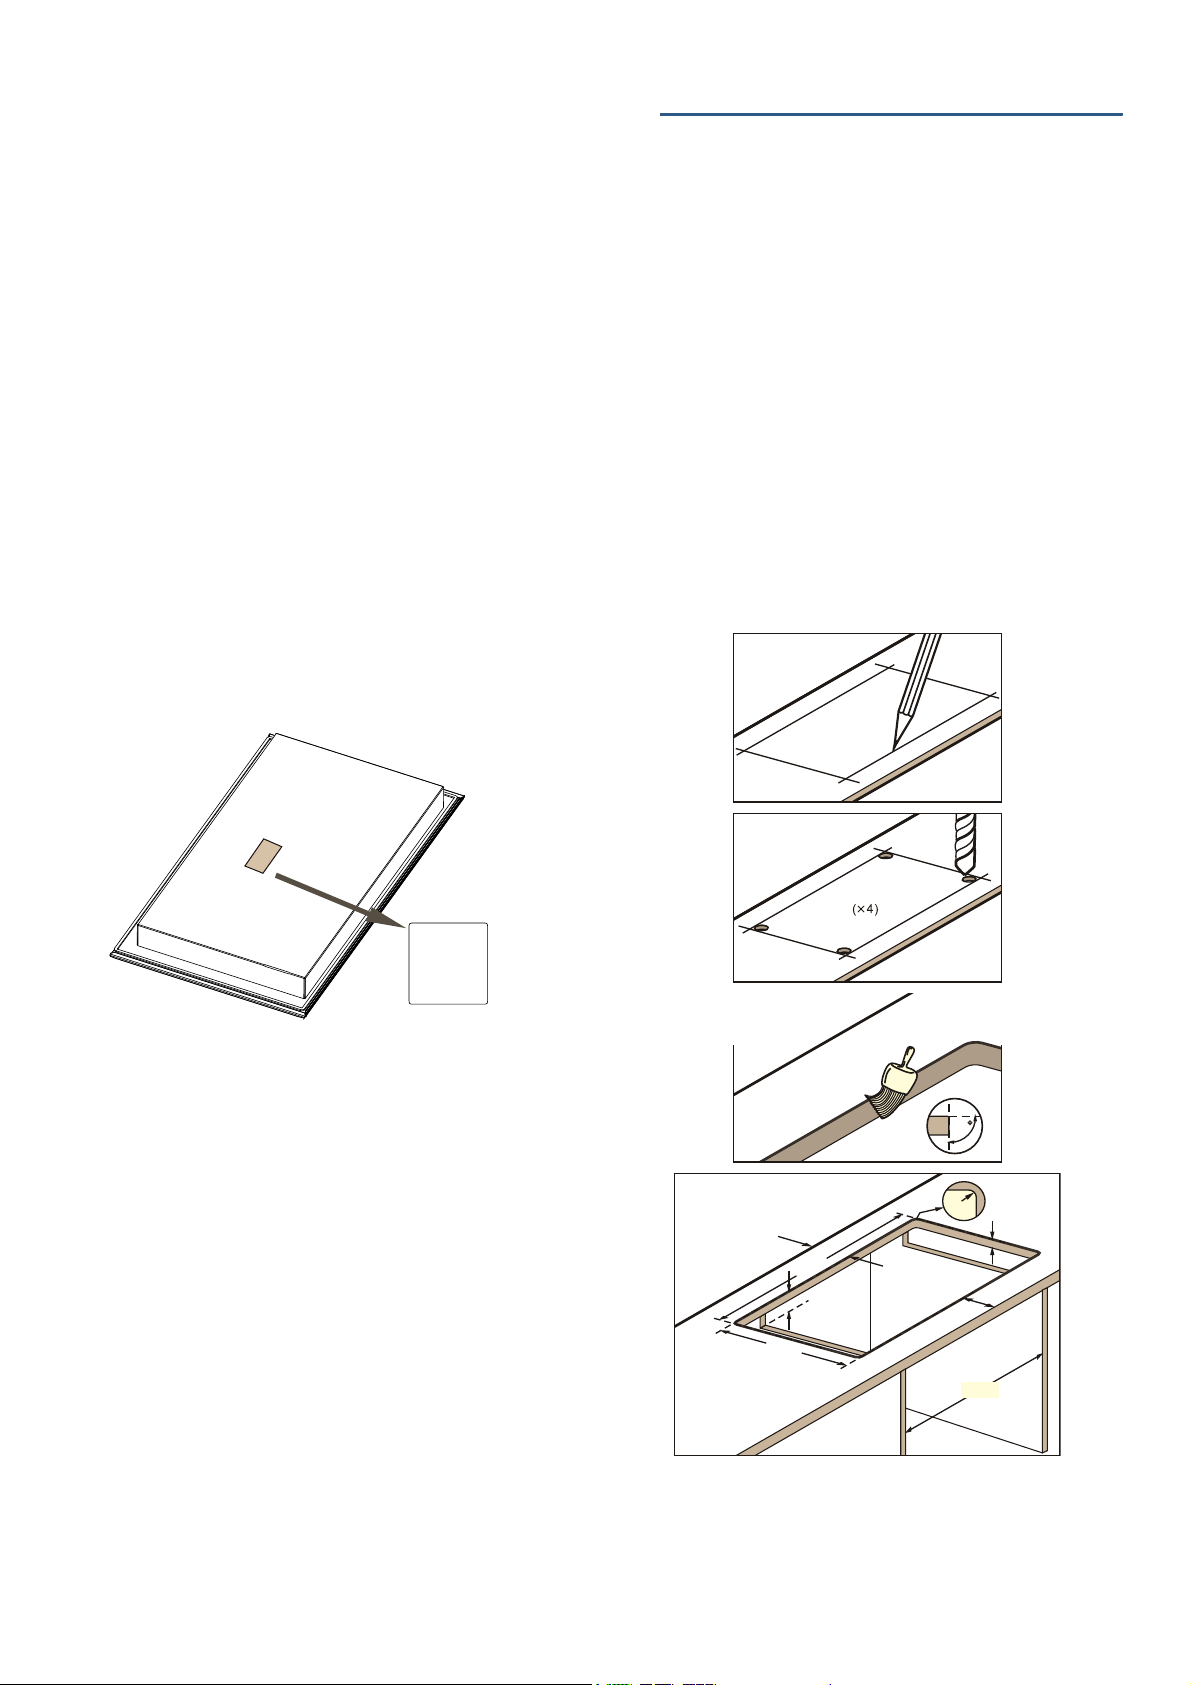
3UHSDUHWKHNLWFKHQFDELQHW
(1U
)'
=1U
5
5
en ,QVWDOODWLRQ,QVWUXFWLRQ
■ 7KHZRUNWRSVKRXOGEHIODWKRUL]RQWDODQGILUP$Q
DSHUWXUHVKRXOGEHFXWEHIRUHWKHDSSOLDQFHLV
LQVWDOOHG
5HPRYHDQ\VKDYLQJVDVWKHVHFDQDIIHFWWKH
RSHUDWLRQRIWKHHOHFWULFDOFRPSRQHQWV:KHQWKH
FXWWLQJKDVEHHQFRPSOHWHGWKHNLWFKHQFDELQHW·V
VWDELOLW\VKRXOGEHFKHFNHGDJDLQ
■ 7KHNLWFKHQFDELQHWWREHILWWHGPXVWUHVLVW
WHPSHUDWXUHVRIXSWR ઊ
■ 7KHZRUNWRSGLPHQVLRQZLGWKDWOHDVWPP
WKLFNQHVVPP6HHSLFWXUH
■ 7KHJDSEHWZHHQWKHDSHUWXUHDQGVLGHZDOOPXVWEH
DWOHDVWPP
,W LV QRW UHFRPPHQGHG WKDW WKH LQGXFWLRQ KRE EH SODFHG
EHWZHHQ WZR VLGH ZDOOV EXW LI WKLV LV WKH FDVH D JDS RI
DWOHDVWPPVKRXOGDOVREHOHIWRQRQHVLGH
■ ,IWKHLQGXFWLRQKRELVLQVWDOOHGDERYHDVWHULOL]HUWKHUH
PXVWEHDJDSRIPPIURPWKHWRSRIZRUNWRSWRWKH
WRSRIWKHVWHULOL]HU
■ ,IWKHLQGXFWLRQKRELVLQVWDOOHGDERYHDGUDZHUWKH
PLQLPXPZRUNWRSWKLFNQHVVDURXQGWKHKREPXVWEH
PP
■ ,IWKHJDSEHWZHHQWKHWZRVLGHSDQHOVRIWKHNLWFKHQ
FDELQHWLVOHVVWKDQPPDQDSHUWXUHPXVWEHFXW
PPIURPWKHWRSRIZRUNWRSEHWZHHQWKHWZRVLGH
SDQHOV6HHSLFWXUH
■ 7DNHWKHKREYHQWLODWLRQLQWRFRQVLGHUDWLRQ
$ PP ZLGH DQG PP KLJK DSHUWXUH PXVW EH FXW DW
WKHWRSVHFWLRQDWWKHEDFNRIWKHNLWFKHQFDELQHW6HH
SLFWXUH
7KHUH PXVW EH D JDS RI PP EHWZHHQ WKH EDFN RI WKH
NLWFKHQFDELQHWDQGWKHNLWFKHQZDOO6HHSLFWXUH
,I WKH LQGXFWLRQ KRE LV LQVWDOOHG DERYH D GUDZHU DOORZ D
JDSRIPPEHWZHHQWKHGUDZHUDQGWKHWRSVHFWLRQ
RIWKHKRE
■ ,QVWDOODWLRQPHWKRGFODPSWKHIRXUVSULQJVKHHWV
DWWDFKHGWRWKHSURGXFWWRWKHFRUUHVSRQGLQJIRU
LQVWDOODWLRQSRVLWLRQVRQWKHEDFNVKHOO
$VWKHUHDUHVHDOLQJVWULSVEHORZWKHLQGXFWLRQKRE·V
FRQWUROSDQHOWKHUHLVQRQHHGWRVHDOWKHLQGXFWLRQ
KREDQGZRUNWRSZLWKVLOLFRQHVHDODQW6HHSLFWXUH
,QVWDOOLQJDQGFRQQHFWLQJWKHKRE
■ 6HHWKHQDPHSODWHVHHERWWRPRILQGXFWLRQKREIRU
WKHYROWDJH
■ 0DNHVXUHWKHHOHFWULFDOFLUFXLWVRFNHWDQGIXVHDW
XVHU·VKRXVHFRPSOLHGZLWKUHTXLUHG$HOHFWULFDO
LQVWDOODWLRQ
)RU33,06
■ &RQQHFWDFFRUGLQJWRWKHFRQQHFWRUGLDJUDPVHH
ILJXUHRQO\
7KHHDUWKZLUHJUHHQDQG\HOORZVKRXOGEH
FRQQHFWHGILUVWO\DQGGLVFRQQHFWHGODVWO\,WVKRXOG
DOVREHORQJHUWKDQWKHRWKHUVVRWKDWHYHQLIWKHKRE
LVPRYLQJWKHRWKHUZLUHVFDQEHGLVFRQQHFWHGEHIRUH
WKHHDUWKZLUH
5
/
1
99a+]
%URZQ
%OXH
*UHHQDQG\HOORZ
3DFNDJH/LVW HQ
■ 'RQRWWUDSWKHOHDGGXULQJLQVWDOODWLRQDQGGRQRW
JXLGHLWRYHUVKDUSHGJHV
■ 5HPRYLQJWKHKRE
'LVFRQQHFWWKHFRRNHUIURPWKHSRZHUVXSSO\3XVK
RXWWKHKREIURPEHORZ
7KHGLVFRQQHFWLRQLVDFKLHYHGE\KDYLQJWKHSOXJ
DFFHVVLEOHRUE\LQFRUSRUDWLQJDVZLWFKLQWKHIL[HG
ZLULQJLQDFFRUGDQFHZLWKWKHZLULQJUXOHV6ZLWFKHV
LQWHQGHGWRHQVXUHDOOSROHGLVFRQQHFWLRQRIFRRNHU
VKDOO EH GLUHFWO\ FRQQHFWHG WR WKH VXSSO\ WHUPLQDOV DQG
VKDOOKDYHDFRQWDFWVHSDUDWLRQLQDOOSROHVSURYLGLQJ
IXOOGLVFRQQHFWLRQXQGHURYHUYROWDJHFDWHJRU\,,,
FRQGLWLRQV
)RU33,7:
■ 7KHKREPXVWEHJURXQGHG$WKUHHSLQSOXJLV
SURYLGHGDQGWKLVSOXJPXVWEHLQVHUWHGLQDWUXO\
JURXQGHGUHFHSWDFOH
■ 'RQRWWUDSWKHOHDGGXULQJLQVWDOODWLRQDQGGRQRW
JXLGHLWRYHUVKDUSHGJHV
■ 5HPRYLQJWKHKRE
7KHGLVFRQQHFWLRQLVDFKLHYHGE\KDYLQJWKHSOXJ
DFFHVVLEOHGLVFRQQHFWWKHFRRNHUIURPWKHSRZHU
VXSSO\3XVKRXWWKHKREIURPEHORZ
C 3DFNDJH/LVW
3DFNDJH/LVW
1R &RPSRQHQW1DPH 4XDQWLW\ 8QLW 5HPDUN
,QGXFWLRQKRE 3&
2SHUDWLRQDQGLQVWDOODWLRQLQVWUXFWLRQ 6HW
,QVWDOODWLRQWHPSODWHLQVWUXFWLRQ 3&
6SULQJVKHHW 3&
0DJQHW 3&

0DQXIDFWXUHU%6+(/(&75,&$/$33/,$1&(6-,$1*68&2/7'
$GGUHVV1R<DR[LQ5RDG1DQMLQJ(FRQRPLF7HFKQRORJLFDO'HYHORSPHQW=RQH-LDQJVX3URYLQFH35&
3RVW&RGH
*9001151145*