Loading ...
Loading ...
Loading ...

12
6.3 Circuit Information
The Band Saw should be connected to a dedicated
circuit with a circuit breaker or time delay fuse rated
“D” with the appropriate amperage rating. See Table
1 for recommended circuit sizes. Local codes take
precedence over recommendations.
Model
Voltage
Recommended
Circuit*
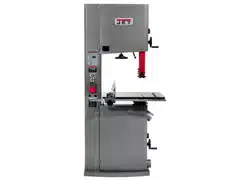
414428, VBS-18MWEVS
230 V
20A
* Local codes take precedence over
recommendations.
Table 1
7.0 Adjustments
7.1 Aluminum resaw fence
Refer to Figures 7-1 and 7-2.
Loosen knobs (A) until lock bar protrudes enough on
which to slide the aluminum fence plate from one
end, as shown in Figure 7-1. Retighten knobs.
Figure 7-1: vertical position
The aluminum fence plate can be installed in one of
two positions; vertically (resaw position), as shown
in Figure 7-1; or horizontally as shown in Figure 7-
2.
Horizontal position is useful for smaller workpieces.
(Zero setting of cursor cannot be used with
horizontal fence position.)
Figure 7-2: horizontal position
7.2 Fence fine adjust
Refer to Figure 7-3.
1. Loosen fence lock knob (A, Figure 7-3).
2. Loosen knob (B).
3. Slide fence to approximate position, based on
the scale measurement aligning with the right
side of resaw fence.
4. Tighten knob (B).
5. Rotate knurled knob (C) to achieve fine
adjustment.
6. When setting is reached, tighten fence lock
knob (A).
Figure 7-3
7.3 Table tilt
Refer to Figure 7-4.
1. Disconnect machine from power source.
2. Loosen lock handle (D).
3. Tilt table up to 45 degrees to the right (as
viewed from operator side), or up to 5 degrees
to the left.
4. Tighten lock handle.
Note: Table stop bolt (F, Figure 7-4) must be pivoted
out of the way to tilt table to the left.
Figure 7-4
A
D
G
E
F
Loading ...
Loading ...
Loading ...
