Home
Bookmarks
Home
Netgear
Netgear EAX80-100NAS User Manual
Page 7
Netgear EAX80-100NAS Nighthawk WiFi 6 Mesh Range Extender EAX80 - Add up to 2,500 sq. ft. and 30+ devices with AX6000 Dual-Band Wireless Signal Booster & Repeater (up to 6Gbps speed), plus Smart Roaming
User Manual - Page 7
For EAX80-100NAS.
PDF File Manual
,
65 pages
,
Read Online
|
Download pdf file
Contents
1. Overview
Unpack Your Extender
LEDs
Back Panel
System Requirements
How the Extender Works
2. Get Started
Install the WiFi extender
Place the extender and apply power
Connect to an existing WiFi network
Connect with the Nighthawk app
Connect with WPS
Connect with the NETGEAR installation assistant
Use the extender in access point mode
Connect a device to the extender network
Connect a device to the extender network using WiFi
Connect a device to the extender network using WPS
Log in to the extender after installation
Run the Smart Setup installation
3. Extender Network Settings
Enable or disable the One WiFi Name feature
Enable or disable Smart Connect
View connected devices
View WiFi settings
Change the WiFi network name
Turn off the SSID broadcast to create a hidden network
Disable or enable the WiFi radios
Change the WiFi speed
Use WPS to add a computer to the extenderâs WiFi network
Use WPS with the push button method
Use WPS with the PIN method
Deny access to a computer or WiFi device
Set up an access schedule
Change the extenderâs device name
Set up the extender to use a static IP address
Adjust the WiFi coverage
Enable FastLane technology
Configure a router with advanced MAC settings to work with your extender
4. Maintain and Monitor the Extender
Change the extender login user name and password
Turn password protection off and on
Recover a forgotten user name or password
Automatically adjust for daylight saving time
Manually set the extender clock
Back up and manage the extender configuration
Back up the configuration settings
Restore the configuration settings
Return the extender to its factory default settings
Use the Reset button
Log in and reset the extender to factory settings
Update the extender firmware
Check for new firmware and update the extender
Manually upload firmware to the extender
Restart the extender from the extender web interface
Turn the LEDs On or Off
5. FAQs and troubleshooting
FAQs
Find the Extenderâs IP address
Cannot Connect to the Extender
Cannot Join a WiFi Network and Receive an Error Message
Cannot access mywifiext.net
Cannot connect to extender using the Nighthawk app
6. Supplemental Information
Factory Default Settings
Technical and Environmental Specifications
Page 7/65
Page 1
Page 2
Page 3
Page 4
Page 5
Page 6
Page 7
Page 8
Page 9
Page 10
Page 11
Page 12
Page 13
Page 14
Page 15
Page 16
Page 17
Page 18
Page 19
Page 20
Page 21
Page 22
Page 23
Page 24
Page 25
Page 26
Page 27
Page 28
Page 29
Page 30
Page 31
Page 32
Page 33
Page 34
Page 35
Page 36
Page 37
Page 38
Page 39
Page 40
Page 41
Page 42
Page 43
Page 44
Page 45
Page 46
Page 47
Page 48
Page 49
Page 50
Page 51
Page 52
Page 53
Page 54
Page 55
Page 56
Page 57
Page 58
Page 59
Page 60
Page 61
Page 62
Page 63
Page 64
Page 65
Contents
Table of Contents
Search
Previous
Next
Troubleshooting
Bookmarks
Loading ...
Loading ...
Loading ...
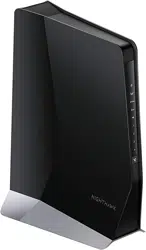
LEDs
The
following
table
describes
the
LEDs.
Figure
2.
Front
panel
User
Manual
7
Overview
AX1800
4-Stream
WiFi
Mesh
Extender
Loading ...
Loading ...
Loading ...
File type: PDF
File name: 87647091_eax80-100nas.pdf
File size: 850.37 KB
File Language: English
Pages: 65
Author: Netgear
File created: 2020-06-22
Published: 2023-02-17
Updated: 2023-03-29
Download File
Table of Contents
×
Contents
3
1. Overview
5
Unpack Your Extender
6
LEDs
7
Back Panel
9
System Requirements
10
How the Extender Works
10
2. Get Started
11
Install the WiFi extender
12
Place the extender and apply power
12
Connect to an existing WiFi network
12
Connect with the Nighthawk app
13
Connect with WPS
14
Connect with the NETGEAR installation assistant
17
Use the extender in access point mode
18
Connect a device to the extender network
19
Connect a device to the extender network using WiFi
19
Connect a device to the extender network using WPS
19
Log in to the extender after installation
19
Run the Smart Setup installation
20
3. Extender Network Settings
22
Enable or disable the One WiFi Name feature
23
Enable or disable Smart Connect
24
View connected devices
25
View WiFi settings
26
Change the WiFi network name
27
Turn off the SSID broadcast to create a hidden network
28
Disable or enable the WiFi radios
29
Change the WiFi speed
30
Use WPS to add a computer to the extenderâs WiFi network
31
Use WPS with the push button method
32
Use WPS with the PIN method
33
Deny access to a computer or WiFi device
34
Set up an access schedule
35
Change the extenderâs device name
36
Set up the extender to use a static IP address
37
Adjust the WiFi coverage
38
Enable FastLane technology
39
Configure a router with advanced MAC settings to work with your extender
40
4. Maintain and Monitor the Extender
42
Change the extender login user name and password
43
Turn password protection off and on
44
Recover a forgotten user name or password
45
Automatically adjust for daylight saving time
46
Manually set the extender clock
46
Back up and manage the extender configuration
47
Back up the configuration settings
48
Restore the configuration settings
49
Return the extender to its factory default settings
50
Use the Reset button
50
Log in and reset the extender to factory settings
50
Update the extender firmware
52
Check for new firmware and update the extender
52
Manually upload firmware to the extender
53
Restart the extender from the extender web interface
54
Turn the LEDs On or Off
55
5. FAQs and troubleshooting
57
FAQs
58
Find the Extenderâs IP address
59
Cannot Connect to the Extender
60
Cannot Join a WiFi Network and Receive an Error Message
60
Cannot access mywifiext.net
61
Cannot connect to extender using the Nighthawk app
62
6. Supplemental Information
63
Factory Default Settings
64
Technical and Environmental Specifications
65
Search:
×
Search