
Loading ...
Loading ...
Loading ...
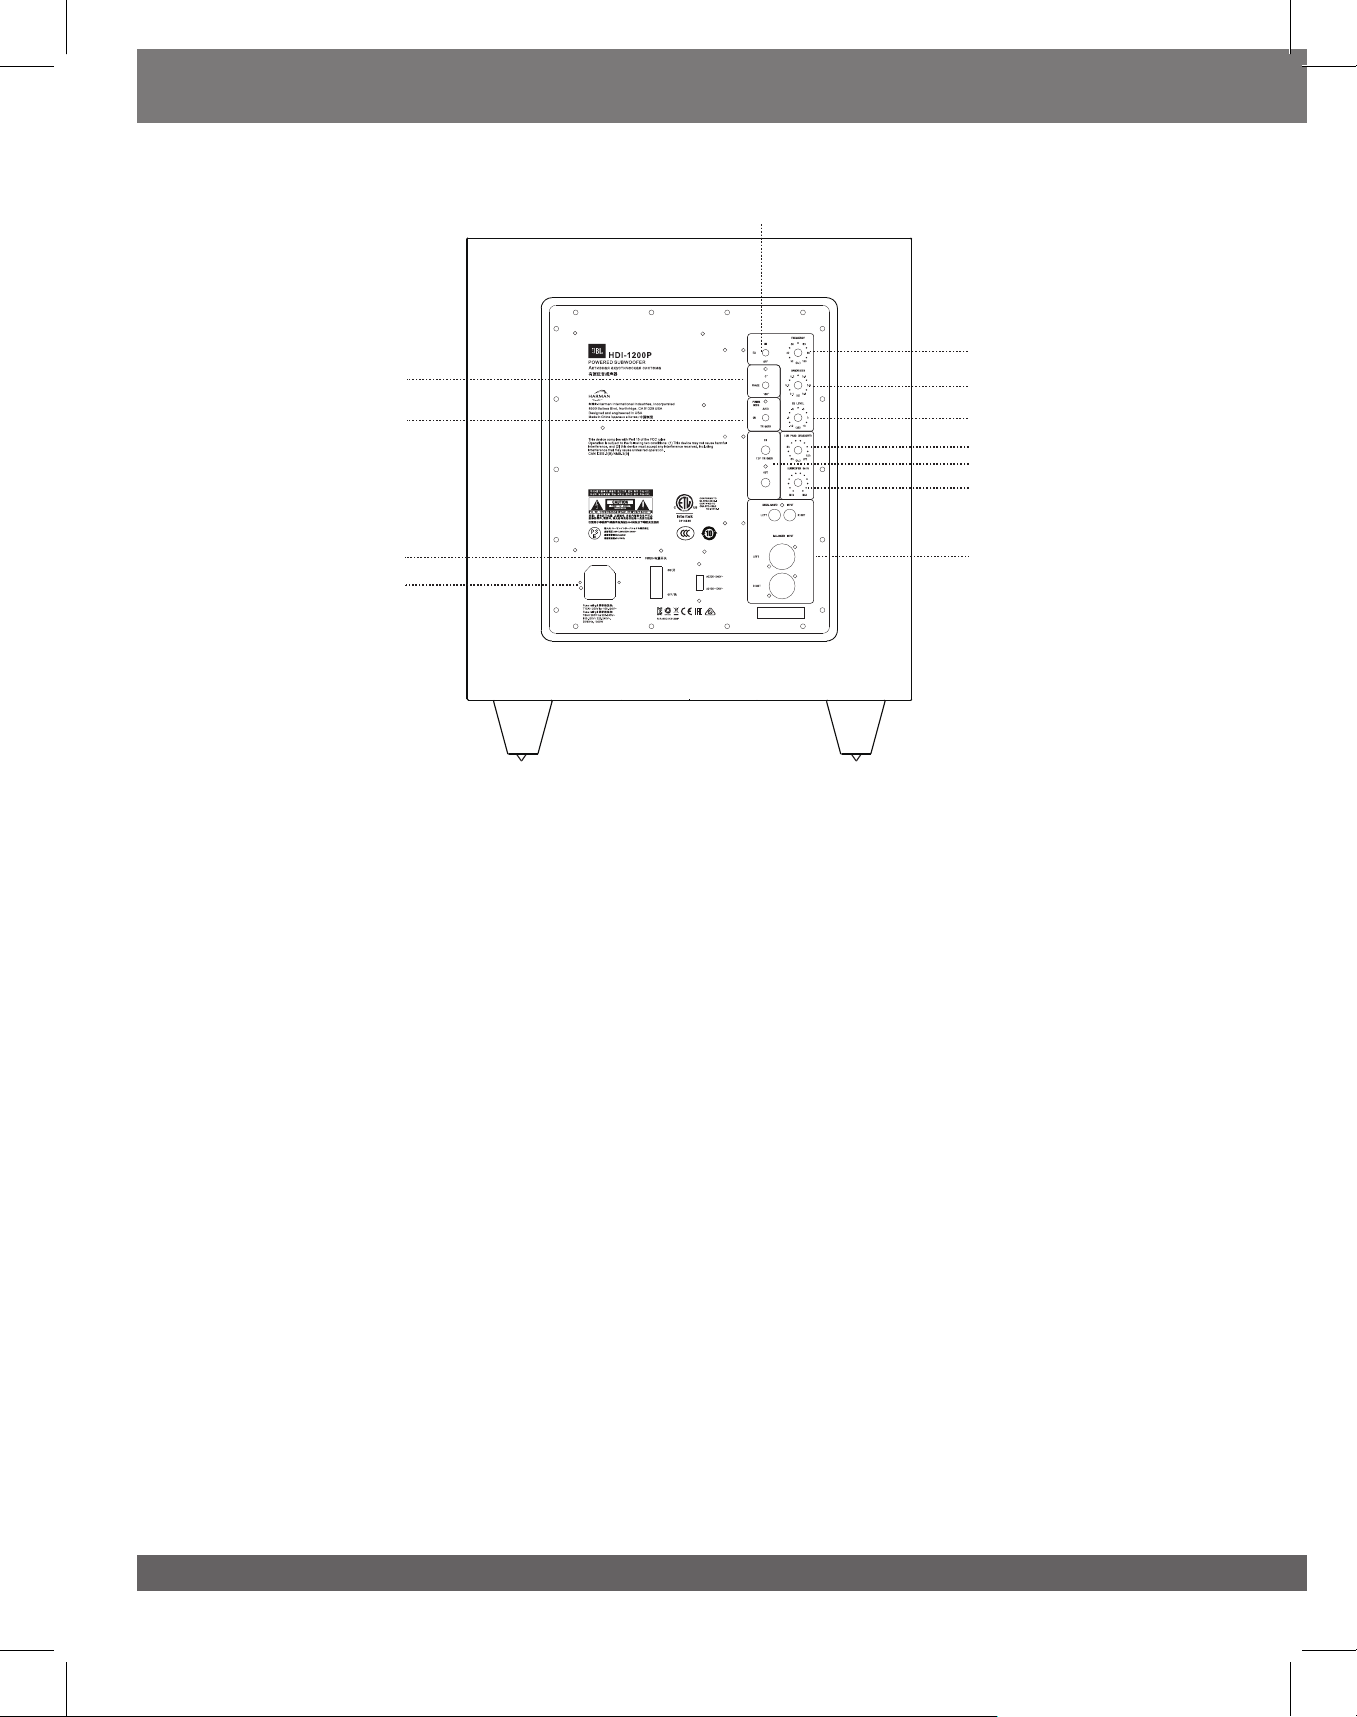
SUBWOOFER REAR-PANEL CONTROLS AND CONNECTION
1) Power Mode:
When switched to 'Auto' position, the subwoofer will then be in Standby
mode. It will automatically turn on when an audio signal is detected and
will return to the Standby mode when no audio signal is detected after
approximately 10 minutes. Setting this switch to ‘On’ keeps the
subwoofer powered until Power Switch is turned 'Off.'
2) On/Standby LED:
When the Power Switch is in the ‘On’ position, this LED indicates whether
the subwoofer is in the On or Standby state.
•
• When the LED glows red, the subwoofer is in the Standby mode.
4) Low Pass Crossover:
This control determines the highest frequency at which the subwoofer
reproduces sounds. The higher you set the Crossover control, the higher
in frequency the subwoofer will operate and the more its bass will
“overlap” that of the speakers. This adjustment helps achieve a smooth
transition of bass frequencies between the subwoofer and the speakers
for a variety of different rooms and subwoofer locations.
5) Subwoofer Gain:
Use this control to adjust the subwoofer’s volume. Turn the knob
clockwise to increase the volume; turn the knob counterclock-wise to
decrease the volume.
6) Input Connectors:
Connect these to the outputs of a stereo preamp or connect a surround
processor's subwoofer output to either the left or right input. Balanced
(XLR) and unbalanced (RCA) connectors are available. The inputs are
0dBV nominal to +12dBV max unbal/+18dBV max bal. The XLR input
is pin 2 hot.
7) Power Switch:
Set this switch in the ‘On’ position to turn the subwoofer on. If you will
be away from home, or will not be using the subwoofer for an extended
period, set this switch in the ‘Off’ position to conserve energy.
8) Power Cord Connector:
After you have made and verified the subwoofer’s input connection,
plug the power cord into an active, unswitched electrical outlet for
proper operation of the subwoofer.
DO NOT plug the power cord into the accessory outlets found on some
audio components.
3) Phase Switch:
This switch determines whether the subwoofer transducer’s piston-like
action moves in and out in phase with the main speakers. If the
subwoofer were to play out of phase with the main speakers, the sound
waves from the main speakers could partially cancel out the sound waves
from the subwoofer, reducing bass performance and sonic impact. This
phenomenon depends in part on the placement of all the speakers relative
to the listening position and to each other in the room.
9) 12V Trigger In/Out connectors:
When the subwoofer’s Power Mode Switch is set to “Trigger”, the subwoofer will
automatically turn on when 5V-12V is present at the 12V Trigger “in-connection”,
and will turn off when the voltage at this connection is removed. Whenever the
subwoofer in on, a 12V trigger signal is available at it’s 12V Trigger Out connector.
It is for use with additional HDI-1200P subwoofers, or another triggerable device.
11) EQ Frequency control:
Selects the center frequency of the particular problem area. The range is from
32HZ to100Hz.
12) EQ Bandwidth control:
Sets the range of frequencies over which the equalizer will have an effect. The
range is from 0.1 octaves to 0.6 octaves; the higher the number the broader
the range of frequencies that will be affected.
13) EQ Level control:
Allows you to adjust how much boost or cut is applied to the selected frequency
by the EQ Frequency Control. This control adjusts from-12dB to a maximum of
+3dB.
14) EQ On/Off switch:
Enables/Disables the parmetric EQ controls (Frequency, Bandwidth, and EQ
Level, but not Phase)
7
8
1,2
3
4
12
11
10
5
6
9
13
10) Parametric Equalization (PEQ) controls:
This set of equalization controls adjust for the dominant room mode at your
listening position in your specific listening room. The parametric equalizer includes
variable controls to adjust Frequency, Bandwidth, and EQ Level of one band of
frequencies. To use these controls, you must first set the EQ switch to “ON”.
NOTE: Specific measurement equipment is required to properly adjust
the Equalization controls. Your authorized JBL dealer can make the
appropriate measurements, using suitable equipment to ensure optimal
results.
3
When the LED glows green, the subwoofer is turned On.
In Denmark: “Apparatets stikprop skal tilsluttes en stikkontakt med jord, som giver forbindelse
til stikproppens jord.”
In Finland: "Laite on liitettävä suojakoskettimilla varustettuun pistorasiaan"
In Norway: “Apparatet må tilkoples jordet stikkontakt”
In Sweden: “Apparaten skall anslutas till jordat uttag”
Loading ...
Loading ...
Loading ...