
© ®
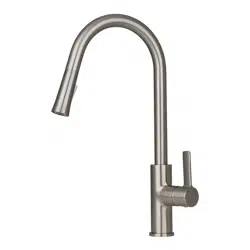
Single Handle Pull-out Kitchen Faucet
STANDARDS
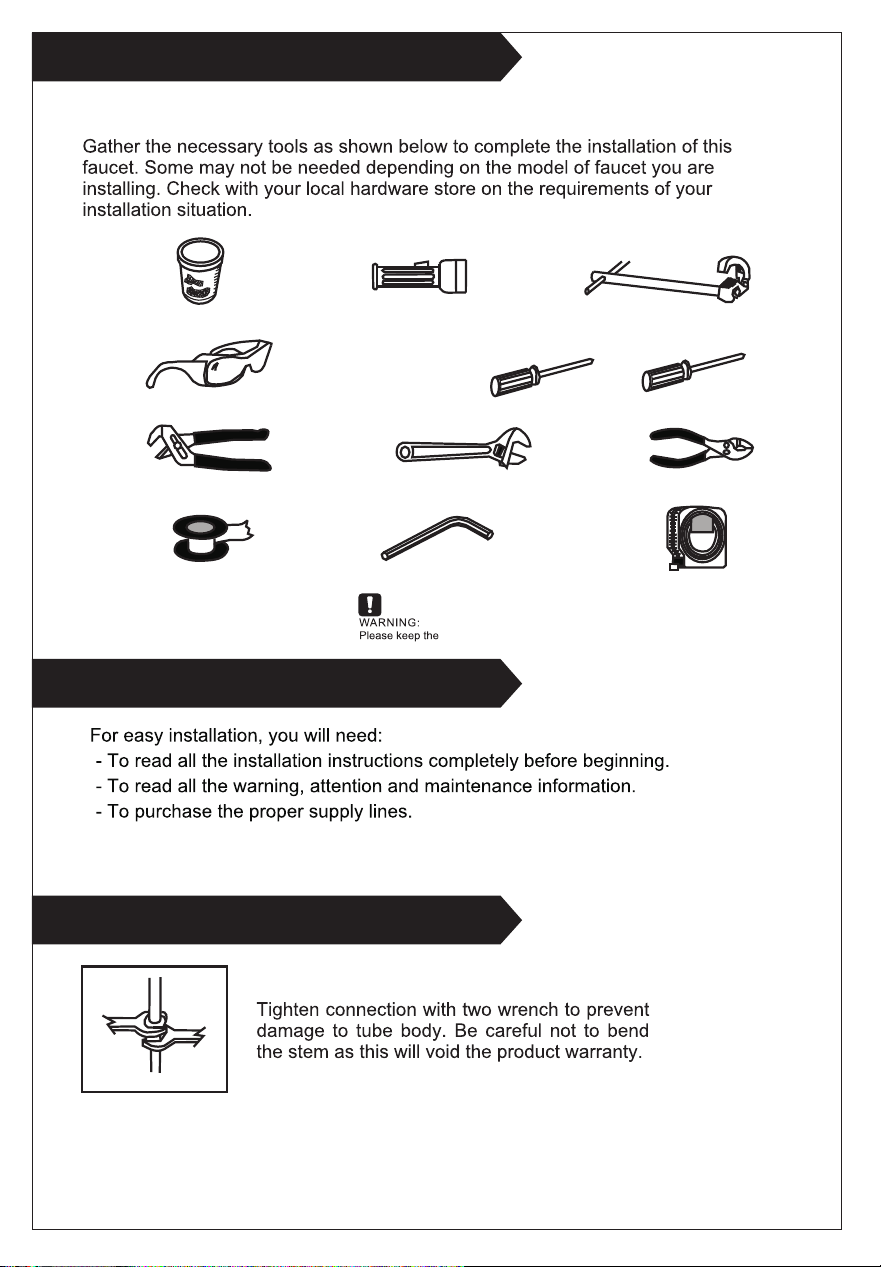
Tools:
PLUMBERS PUTTY FLASHLIGHT BASIN WRENCH
SAFETY GLASSES SCREWDRIVER
PLIERSCHANNELLOCKS ADJUSTABLE WRENCH
HEX-KEY TAPE
Attention:
Helpful Information
Important
Aria
2020-07-02 MAAN4118-3
SEALED-TUBE
tools for future use!
1.8 gpm/6.8 L/min
© ®
Single Handle Pull-out Kitchen Faucet
STANDARDS
Tools:
PLUMBERS PUTTY FLASHLIGHT BASIN WRENCH
SAFETY GLASSES SCREWDRIVER
PLIERSCHANNELLOCKS ADJUSTABLE WRENCH
HEX-KEY TAPE
Attention:
Helpful Information
Important
Aria
2020-07-02 MAAN4118-3
SEALED-TUBE
tools for future use!
1.8 gpm/6.8 L/min
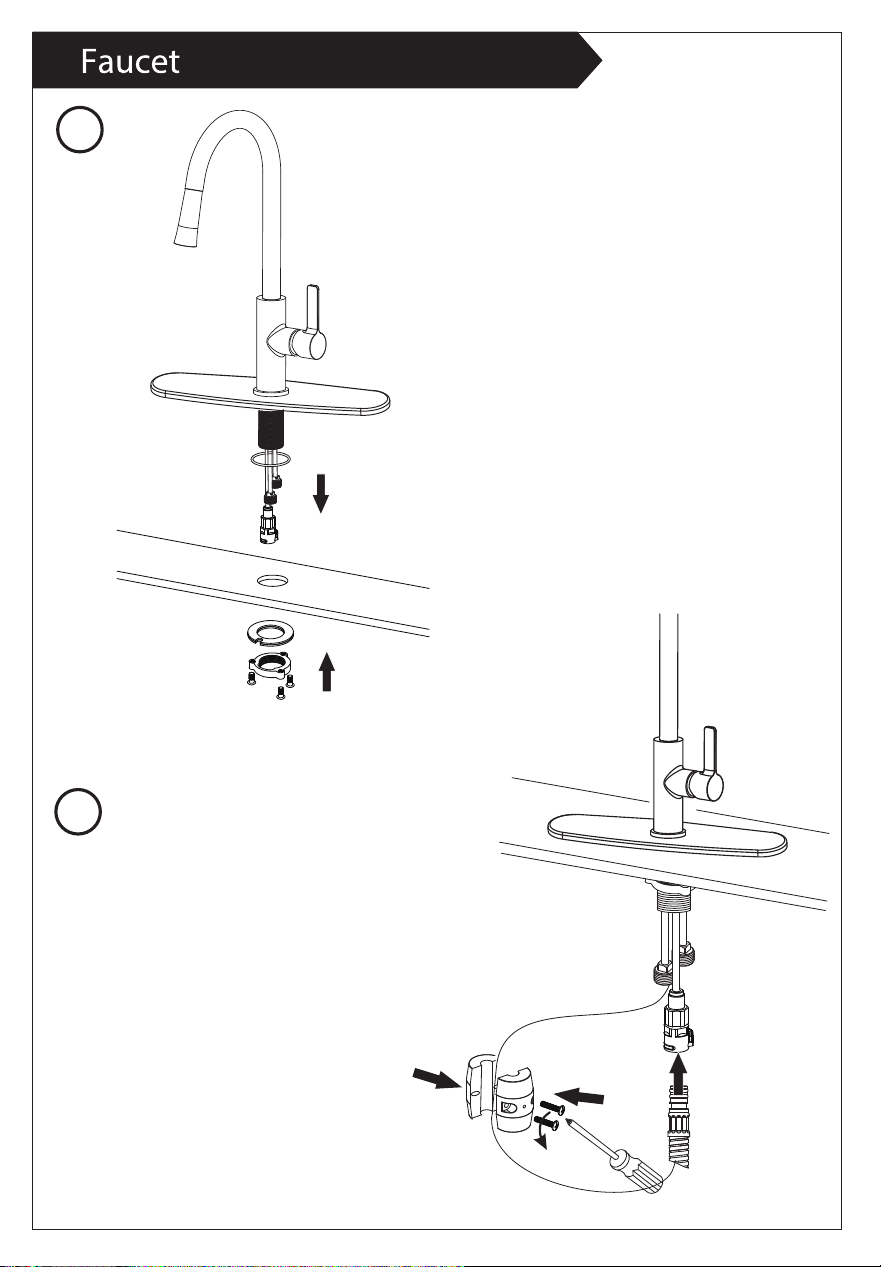
Installation
1
Position the faucet in order on the
counter top as shown. Don't forget the
O-ring. Assemble gasket assembly
and lock nut to faucet threaded sleeve
by hand and tighten the screws with
screwdriver.
2
Connect the shower hose to quick
connect. CAUTION: MAKE SURE THE
HOSE IS PROPERLY ENGAGED AND
SECURED IN THE QUICK CONNECT.
Disassemble the weight and put it on
the shower hose. Then fix screws with
screwdriver.
1
8
/
8
)mm
7
/
16
1.281
)mm
7
/
16
(
87.1
mm)
8 7/8
(226 mm)
/
16
(
267.8
mm)
1 1/2
( mm)
1/
1 /8
( mm)
1
/
( mm)
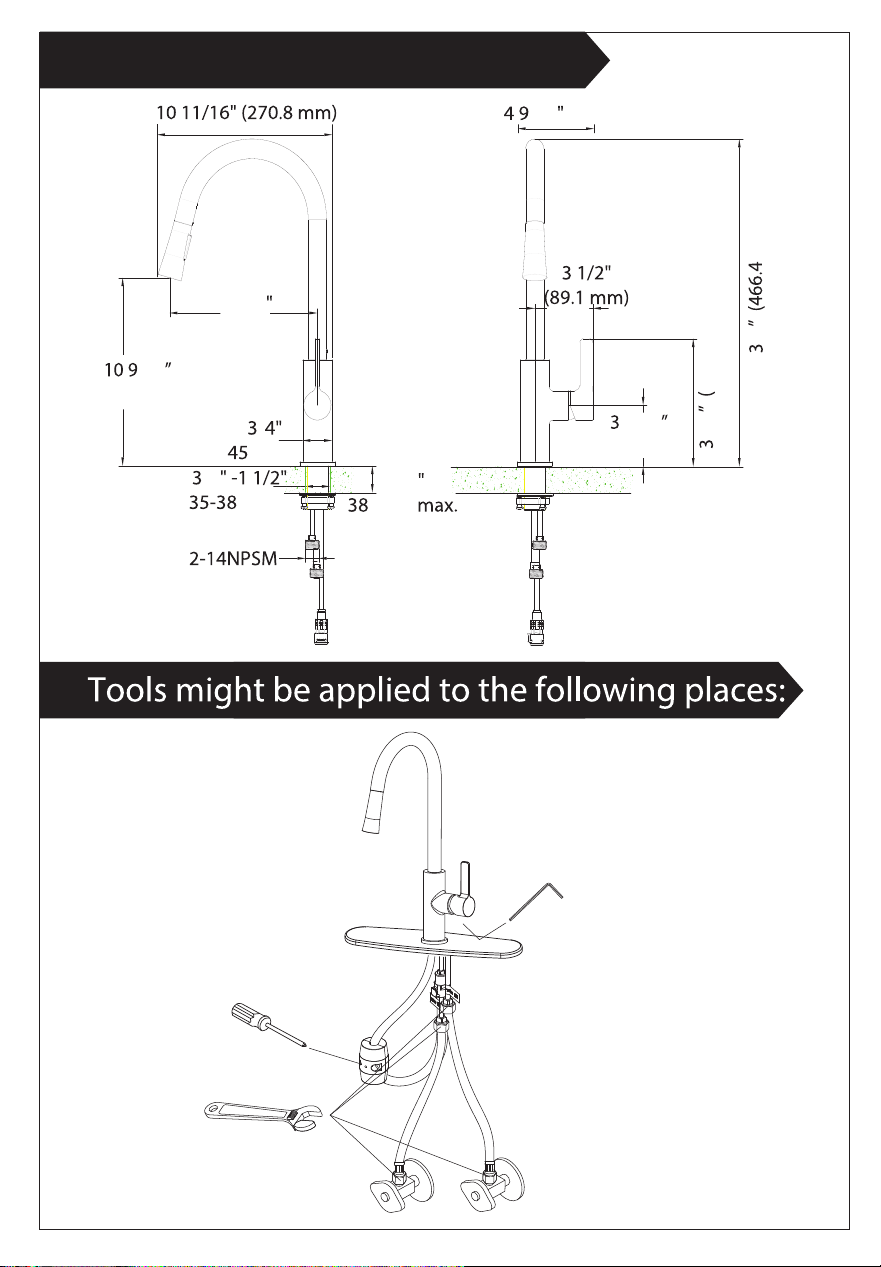
Installation size map
/16 (116.1 mm)
Installation
1
Position the faucet in order on the
counter top as shown. Don't forget the
O-ring. Assemble gasket assembly
and lock nut to faucet threaded sleeve
by hand and tighten the screws with
screwdriver.
2
Connect the shower hose to quick
connect. CAUTION: MAKE SURE THE
HOSE IS PROPERLY ENGAGED AND
SECURED IN THE QUICK CONNECT.
Disassemble the weight and put it on
the shower hose. Then fix screws with
screwdriver.
1
8
/
8
)mm
7
/
16
1.281
)mm
7
/
16
(
87.1
mm)
8 7/8
(226 mm)
/
16
(
267.8
mm)
1 1/2
( mm)
1/
1 /8
( mm)
1
/
( mm)
Installation size map
/16 (116.1 mm)
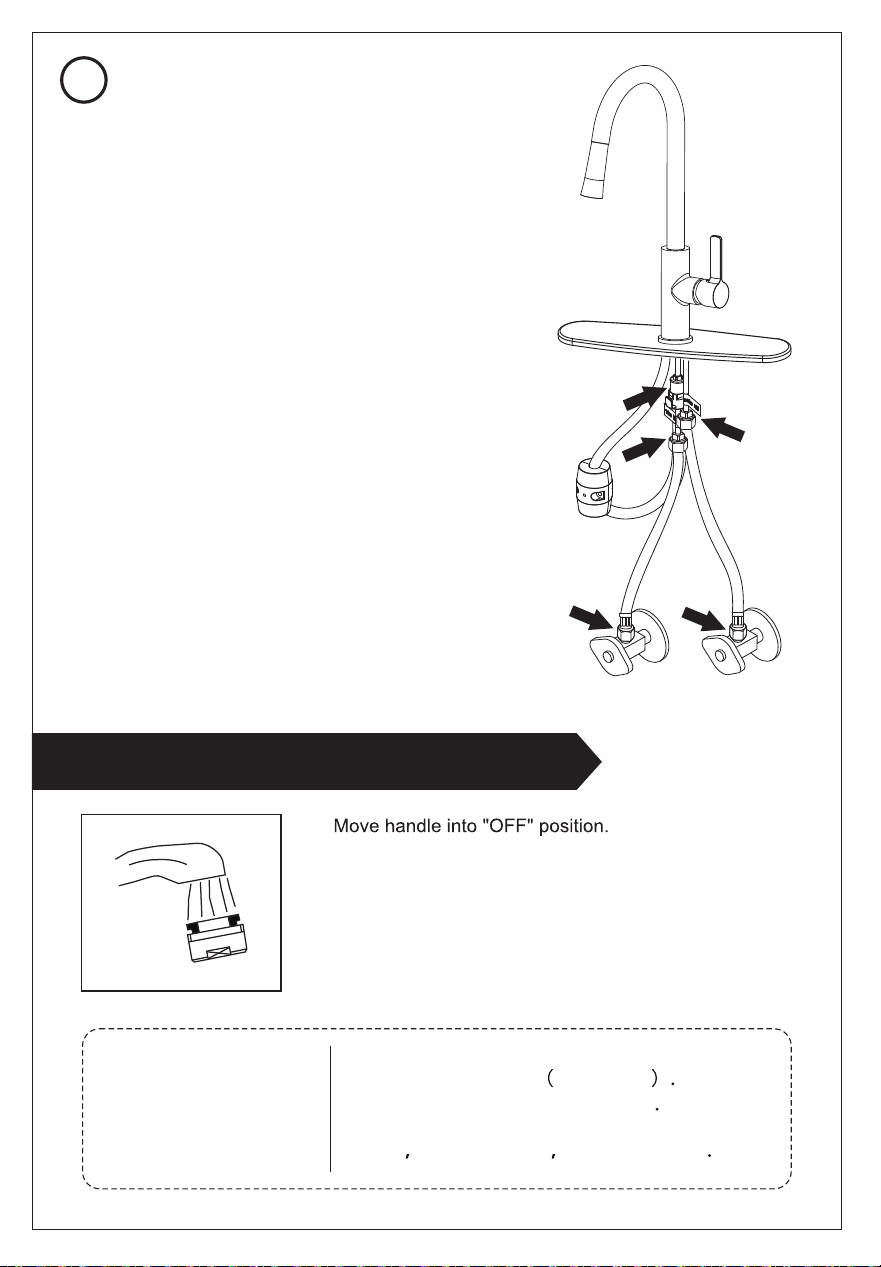
A.
B. Turn on water supplies. Check connections for leaks.
C. Remove hand shower and let both hot and cold water
run for one minute. This will help clean any debris that
might otherwise clog the system. Replace hand shower.
D. Operate handle up and down, in cold and hot positions,
to flush water lines thoroughly.
Checking and Testing
Test Faucet Installation
Simply rinse the surface with clear water or
mild liquid detergents
if necessary Dry the
faucet withaclean soft cotton cloth
Do not
use any cleaning agents containing
acids
polish abrasives or harsh cleaners
Maintenance:
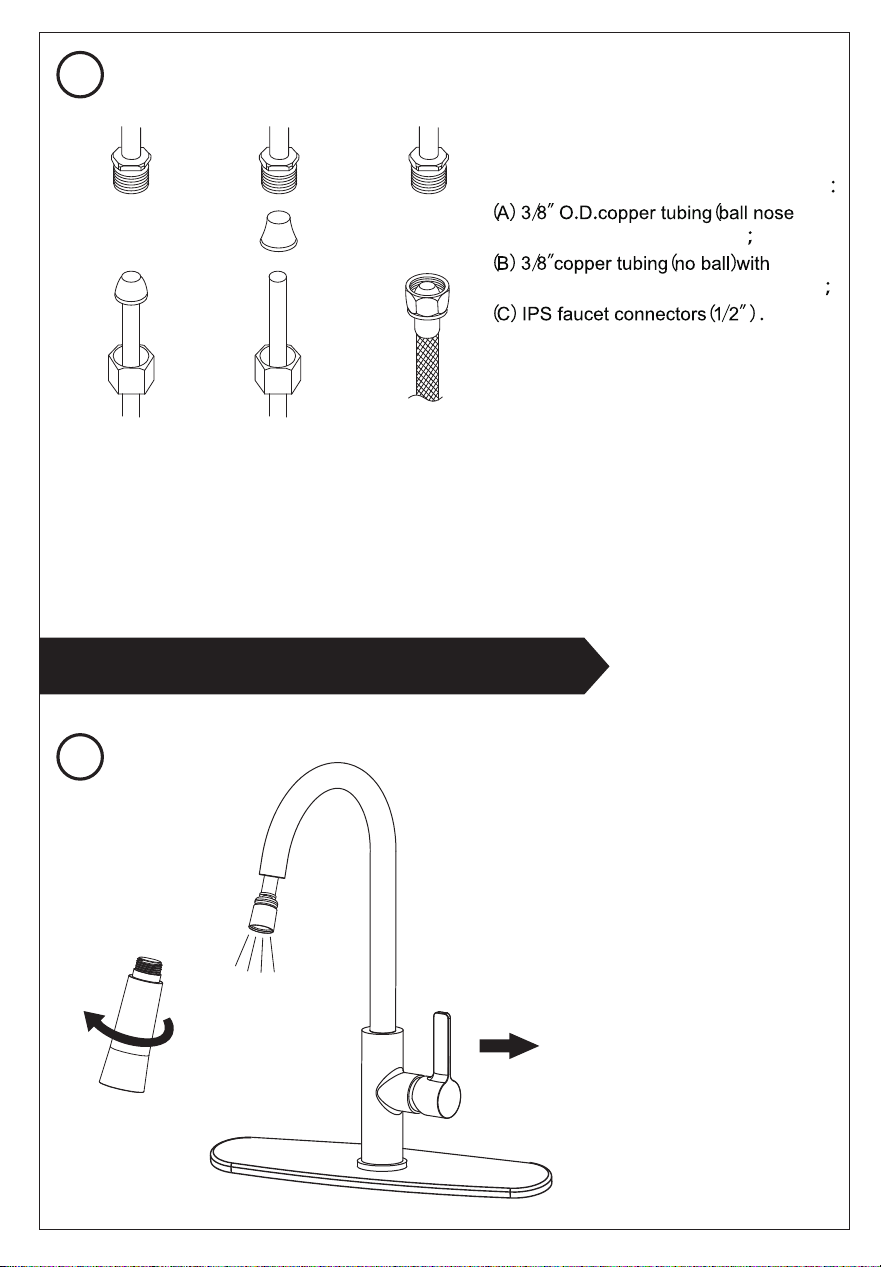
3
A. B. C.
Connect to water supply lines with either
risers with the coupling nuts or
supplied tube head interior connector or
4
Remove the shower by hand. Turn the
faucet handle all the way on, turn on hot
and cold water supply and flush water
lines for one minute. Reinstall shower
by hand.
5
Check all connections at arrows for
leaks and retighten if necessary. BUT
DON'T OVERTIGHTEN
A.
B. Turn on water supplies. Check connections for leaks.
C. Remove hand shower and let both hot and cold water
run for one minute. This will help clean any debris that
might otherwise clog the system. Replace hand shower.
D. Operate handle up and down, in cold and hot positions,
to flush water lines thoroughly.
Checking and Testing
Test Faucet Installation
Simply rinse the surface with clear water or
mild liquid detergents
if necessary Dry the
faucet withaclean soft cotton cloth
Do not
use any cleaning agents containing
acids
polish abrasives or harsh cleaners
Maintenance:
3
A. B. C.
Connect to water supply lines with either
risers with the coupling nuts or
supplied tube head interior connector or
4
Remove the shower by hand. Turn the
faucet handle all the way on, turn on hot
and cold water supply and flush water
lines for one minute. Reinstall shower
by hand.
5
Check all connections at arrows for
leaks and retighten if necessary. BUT
DON'T OVERTIGHTEN

1. Clean it with water and dry it with soft cloth.
2. Clean the product with gentle liquid or glass cleaner.
3. Don't use acid cleaner.
4. Don't clean with abrasive material, abrasive paper or knife.
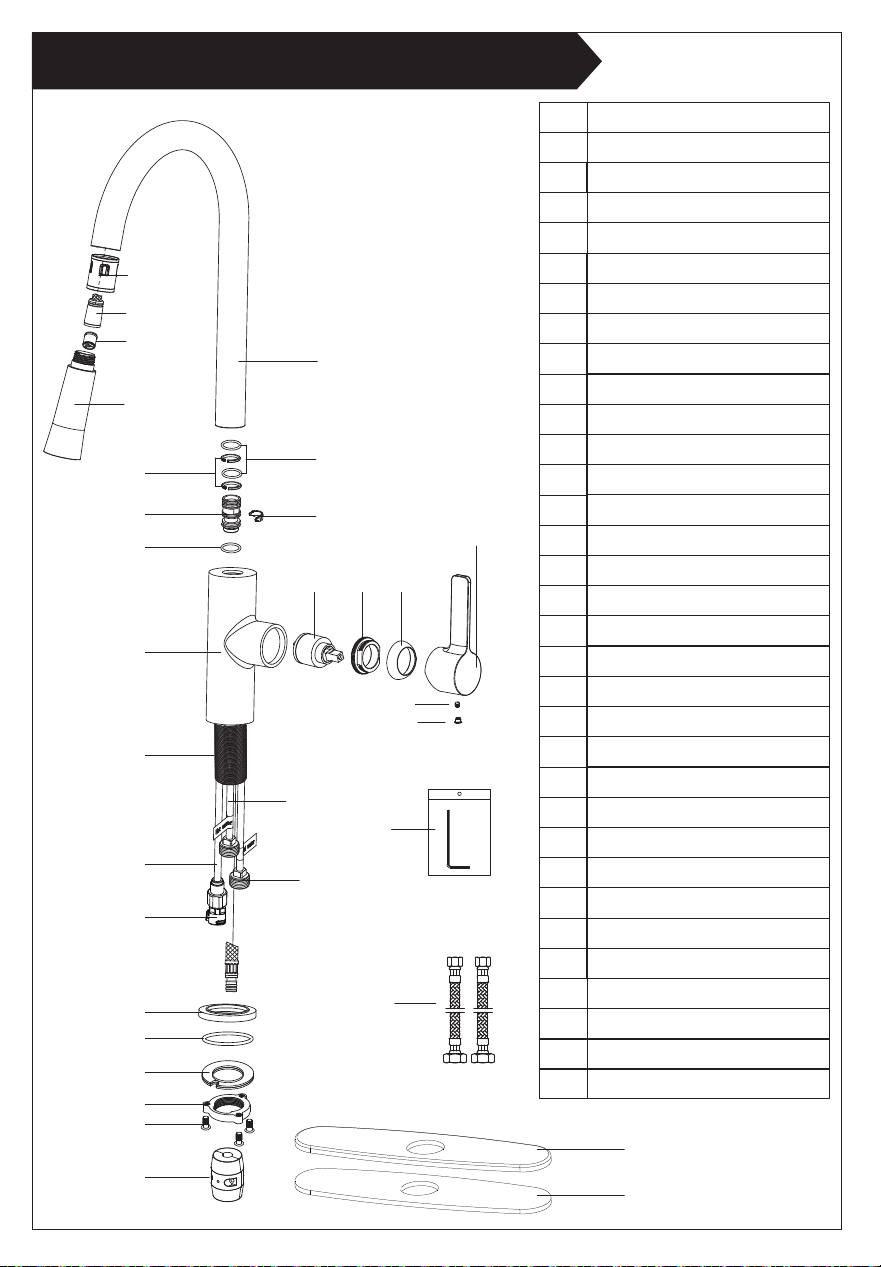
Parts listCleaning and care
Daily cleaning and care are required in order to keep the product shining and working properly.
NO. PART NAME
Shower1
2
3
4
5
6
7
8
9
10
11
12
13
14
15
16
17
18
19
20
21
22
23
24
25
26
27
28
29
30
Check valve
Shower hose
Shower sleeve
Spout
Ring
O-ring
Connector
Retainer
O-ring
Body
Cartridge
Cartridge lock nut
Trim cap
Handle
Screw
Index
Threaded shank
Copper tube(hot water)
Copper tube
Copper tube(cold water)
Quick connect
Base
O-ring
Gasket assembly
Lock nut
Screw
Weight
Allen key
Flexible hose
Face plate
Washer
5
6
7
4
1
3
2
8
9
10
11
12
13
14
15
16
17
23
24
25
27
26
20
21
22
18
19
29
28
30
31
32
31
32
1. Clean it with water and dry it with soft cloth.
2. Clean the product with gentle liquid or glass cleaner.
3. Don't use acid cleaner.
4. Don't clean with abrasive material, abrasive paper or knife.
Parts listCleaning and care
Daily cleaning and care are required in order to keep the product shining and working properly.
NO. PART NAME
Shower1
2
3
4
5
6
7
8
9
10
11
12
13
14
15
16
17
18
19
20
21
22
23
24
25
26
27
28
29
30
Check valve
Shower hose
Shower sleeve
Spout
Ring
O-ring
Connector
Retainer
O-ring
Body
Cartridge
Cartridge lock nut
Trim cap
Handle
Screw
Index
Threaded shank
Copper tube(hot water)
Copper tube
Copper tube(cold water)
Quick connect
Base
O-ring
Gasket assembly
Lock nut
Screw
Weight
Allen key
Flexible hose
Face plate
Washer
5
6
7
4
1
3
2
8
9
10
11
12
13
14
15
16
17
23
24
25
27
26
20
21
22
18
19
29
28
30
31
32
31
32