Loading ...
Loading ...
Loading ...
!
4
6
G: The required tempe-
rature on the left, the
measured temperature
on the right.
F: When the 4-digit
stops blinking, the set-
ting has been locked to
the indicated value.
B FILLING FUEL
Fill the removable tank in a suitable place since there can always be some
spillage. Follow the procedure below:
1
Make sure that the heater is switched off.
2
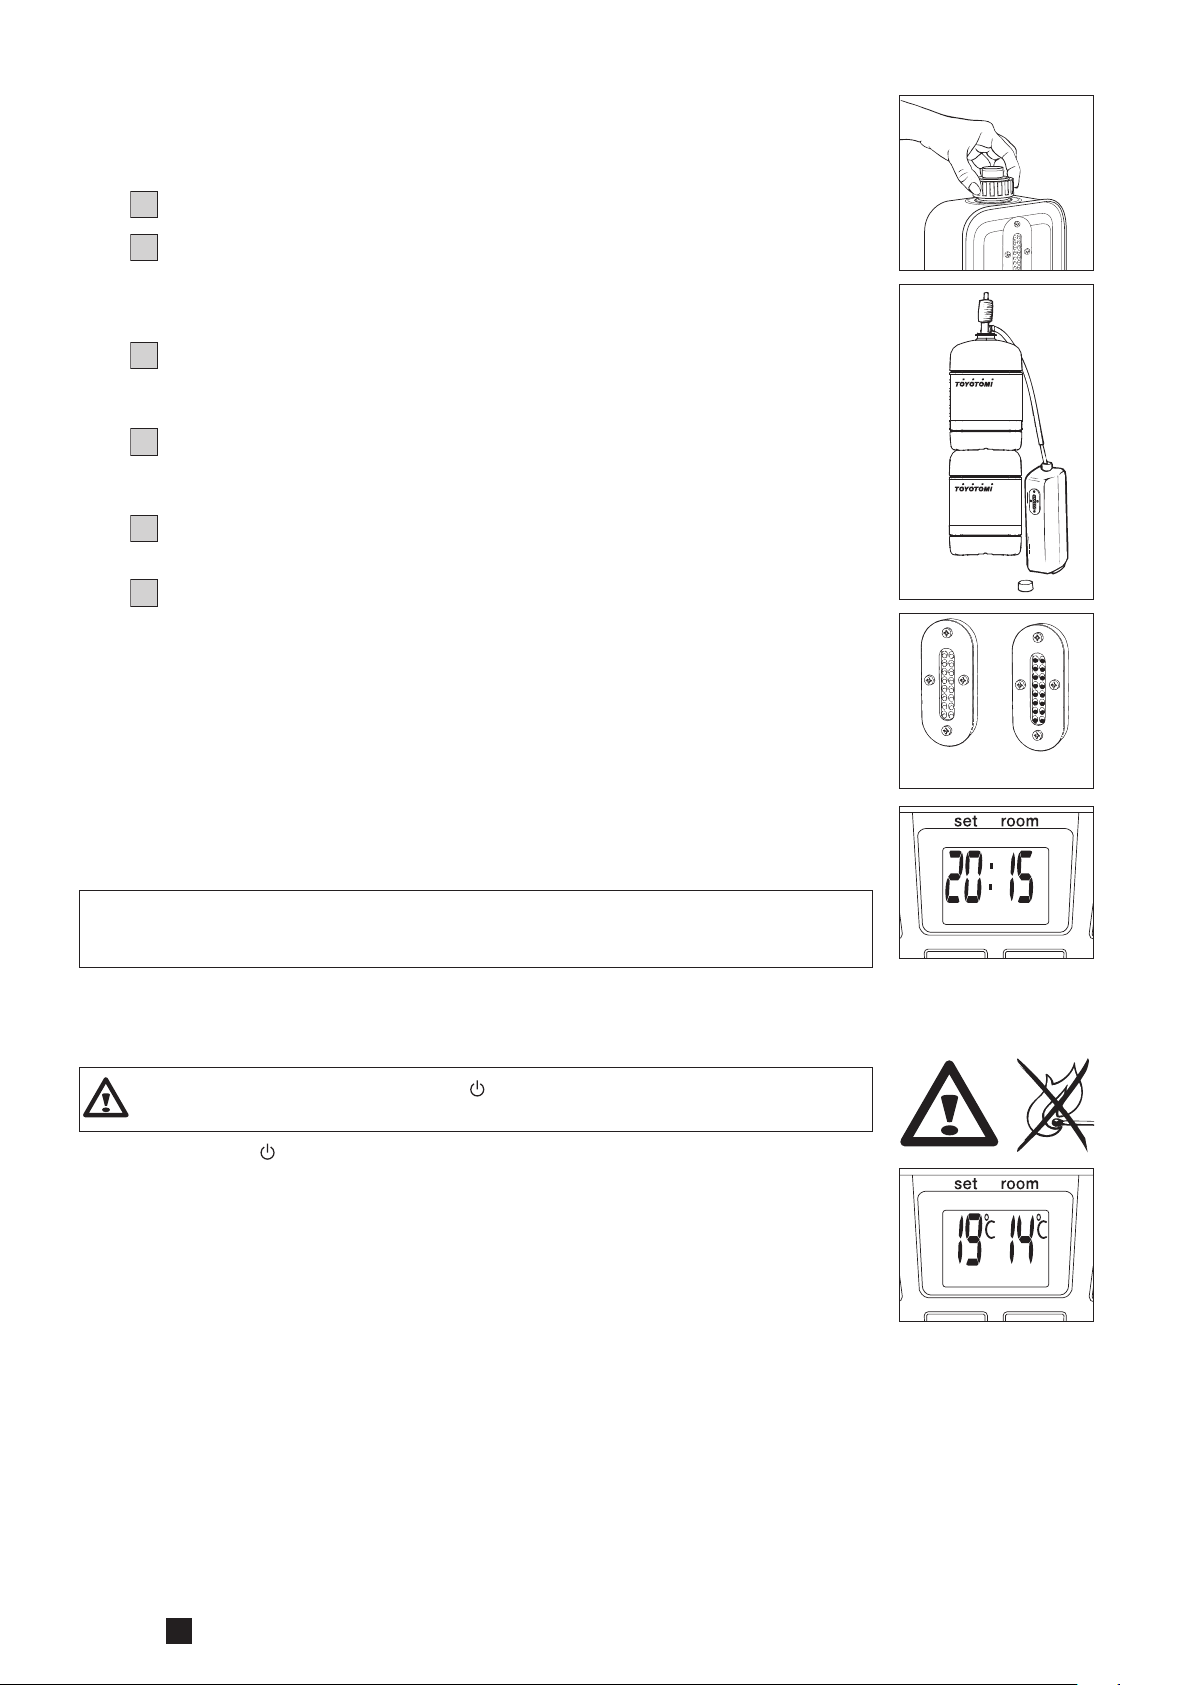
Open the upper lid and lift the removable tank out of the heater (Fig. B).
Put down the removable tank (cap pointing upwards, handle on floor) and
screw off the fuel cap (Fig. C).
NOTE: Some drops may leak from the tank.
3
Fill the removable tank using a fuel pump (refer to fuel pump operation
instructions.) Make sure that it is in a higher position than the removable tank
(Fig. D). Insert the ribbed hose into the opening of the removable tank.
4
Check the removable tank fuel gauge while filling the tank (Fig. E). Stop
filling once the gauge indicates that the tank is full. Never overfill the tank,
especially not when the fuel is very cold (fuel expands when it heats up).
5
Let the remaining fuel in the pump flow back into the jerrycan and carefully
remove the pump. Carefully screw the fuel cap back on the tank. Clean off
any spilled fuel.
6
Check whether the fuel cap is straight and tightened properly. Reinstall the
removable tank in the heater (cap down). Close the lid.
C SETTING THE CLOCK
It is only possible to set the correct time, when the heater is connected to the
mainsandnotburning.Usetheadjustmentkeys to set the time. First press
either of the two keys to switch on the function (the 4-digit will start blinking).
Next, set the hours using the key on the left (hour) and the minutes using the
key on the right (min.). Press once to increase the value by one step. When you
hold down the key, the value will continue going up, until you release the key
again. After approximately 10 seconds the 4-digit will stop blinking and the set-
ting will be locked (Fig. F). 5 minutes after switching off the heater, the informa-
tion on the display will disappear and the heater will automatically switch into the
stand-by position.
When the heater has been unplugged (or after a power failure), the time needs
to be set again.
D IGNITING THE HEATER
When used for the first time, a new heater may give out a smell for a short while.
You should therefore provide extra ventilation.
Always ignite the heater with the
button
. Never use matches or a
cigarette lighter.
Just press the button to ignite the heater. The POWER lamp will start blinking,
indicating that the ignition procedure has started. This will take a short while.
Once the heater is burning, the POWER lamp will remain lit (red). The information
display will show two numbers. The light next to them indicates that these
numbers refer to the temperatures (Fig. G). The actual room temperature is
indicated below ROOM, while the temperature setting is indicated below SET. The
latter can be changed with the adjustment keys (refer to Section E).
Prior to igniting the heater, always check for sufficient fuel in the removable tank.
E SETTING THE REQUIRED TEMPERATURE
Thetemperaturesettingcanonlybeadjusted,whentheheaterisburning.Use
the adjustment keys to adjust the temperature. First press either of the two
keys to switch on the function (the °C mark will start blinking). Next, adjust the
temperature using the key on the right (min.) to set the temperature to a higher
setting and the key on the left (hour) to lower the temperature. Press once to
increase the value one step. After approximately 10 seconds the °C mark will stop
blinking and the setting will be locked (Fig. G).
The available temperature settings range from 6°C minimum to 28°C maximum.
When the heater has been unplugged (or after a power failure), the temperature
will reset to the factory setting of 20°C.
E
empty
full
C
D
Loading ...
Loading ...
Loading ...