Loading ...
Loading ...
Loading ...
5
6. It is recommended to use metal/aluminum duct/pipe with a uniform size (ex. 6” round pipe from
range hood to the outside).
7. If an elbow is necessary, a minimum of 12” straight run is necessary before the elbow.
8. Clearance is the distance between the cooktop and the bottom of the range hood. The
recommended minimum clearance is 26” and the maximum clearance is 30”.
9. It is important to install the hood at the recommended clearance. Installing too low could result
in damage and/or fire hazard while installing too high may result in reduced performance and
efficiency.
10. Remove any protective film off the hood, if any.
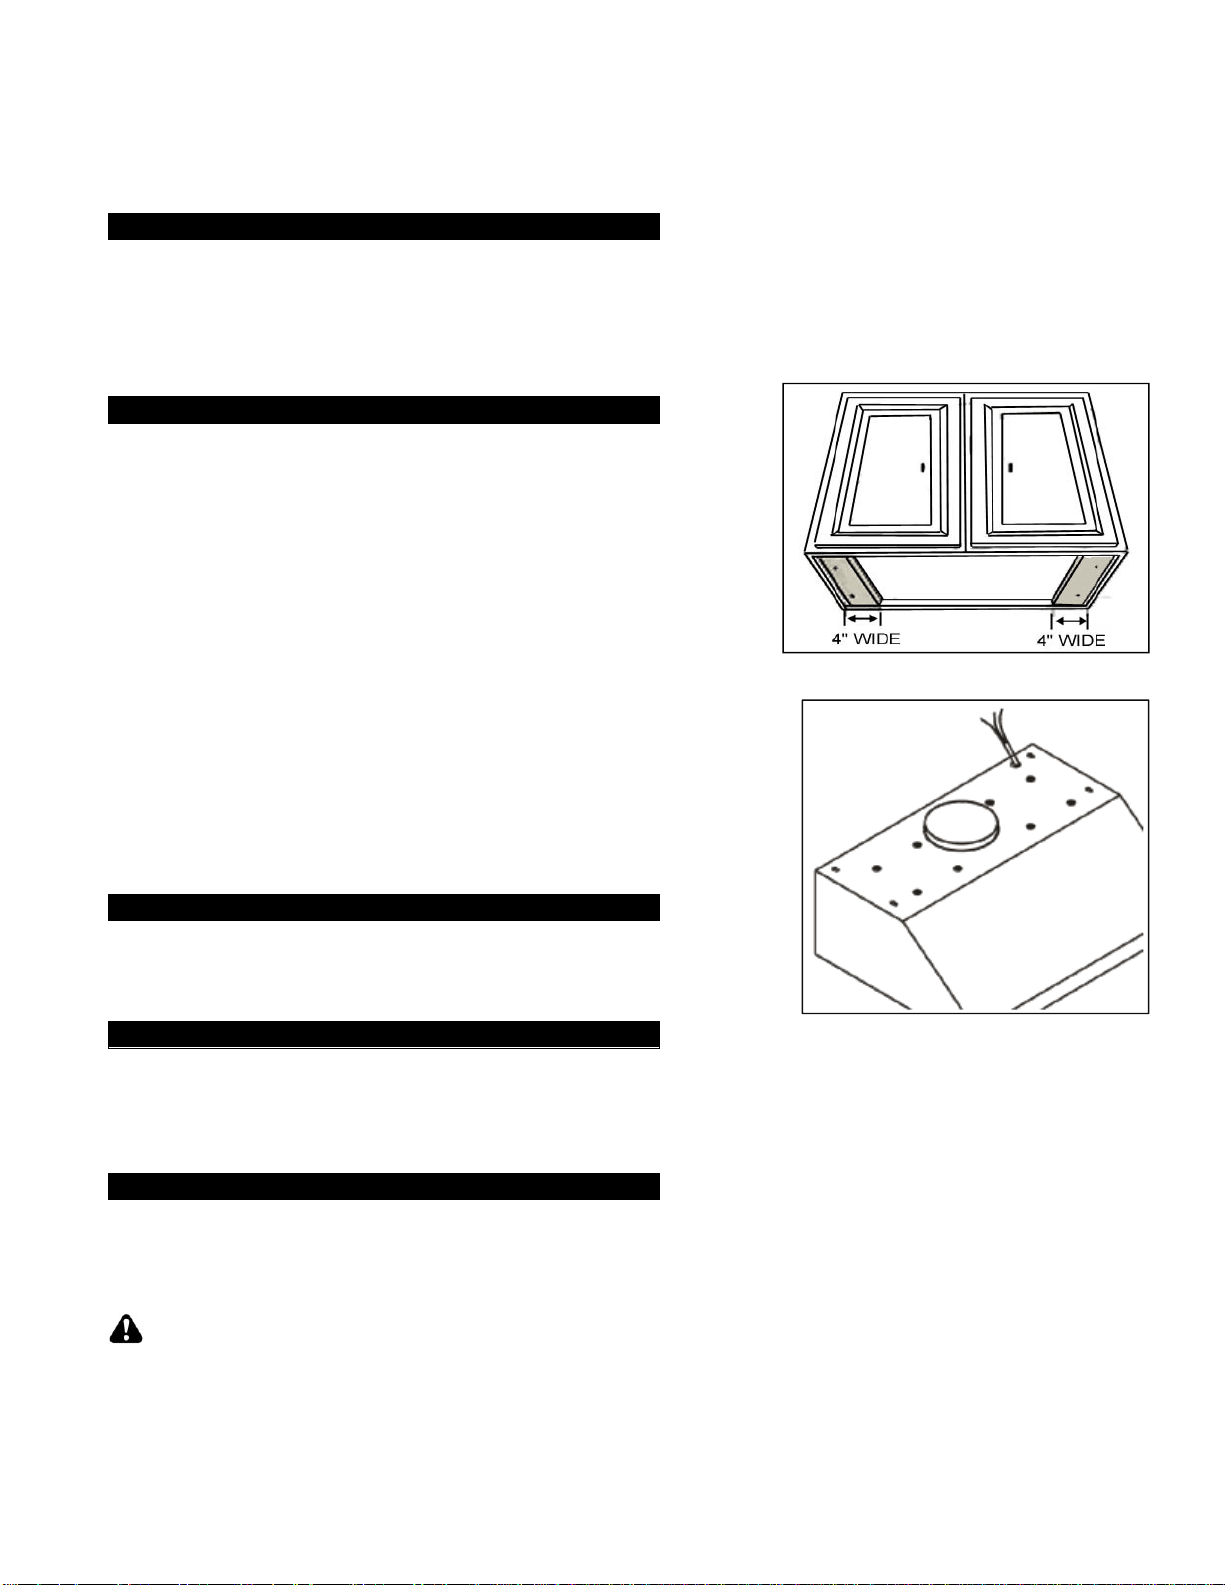
11. For installing under the cabinet with recessed bottom,
attach 4-inch wide wood filler strips (not included) on each
side (refer to figure 1).
12. Create access opening for electrical wires (refer to figure 2)
and hood exhaust under the cabinet.
13. If applicable, puncture the knockout holes on top of the
hood. It is recommended to use an electric drill with an
appropriate drill bit for steel to puncture the knockout holes.
14. Align the hood in the center of the cabinet. As an optional
step, you may position a flat-surfaced object below the hood
as a support. Alternatively, another person can temporarily
hold the hood.
15. Attach the screws through the knockout holes from the
bottom to the top. The best way is to do this in a diagonal
pattern: front left screw first then back right screw or vice
versa. Make sure all the screws are tightened and the hood
is secured before releasing hold/support.
16. Once the hood is attached to the cabinet, connect the pipe
onto the hood exhaust and secure the joint with duct tape.
Make sure that it is completely air tight.
17. Connect the range hood to an outlet.
18. If hardwired is desired, cut off the plug and connect three wires (black, white, green) to the
outlet wires and cap with wire connectors. Connect the wires according to color (ex: black to
black).
19. Before using, make sure that any accessories such as filters are properly installed where
applicable.
20. Test the range hood to see if it is working properly.
THIS RANGE HOOD MUST BE PROPERLY GROUNDED. MAKE SURE THIS IS DONE BY
QUALIFIED ELECTRICIAN IN ACCORDANCE WITH ALL APPLICABLE NATIONAL AND LOCAL
ELECTRICAL CODES. BEFORE CONNECTING WIRES, SWITCH POWER OFF AT SERVICE PANEL
AND LOCK SERVICE PANEL TO PREVENT POWER FROM BEING SWITCHED ON ACCIDENTALLY.
Clearance
Hood Installation
Ductwork
Electrical Wire
Finish
Figure
1
Figure
2
Loading ...
Loading ...
Loading ...