
Loading ...
Loading ...
Loading ...
5
English
6
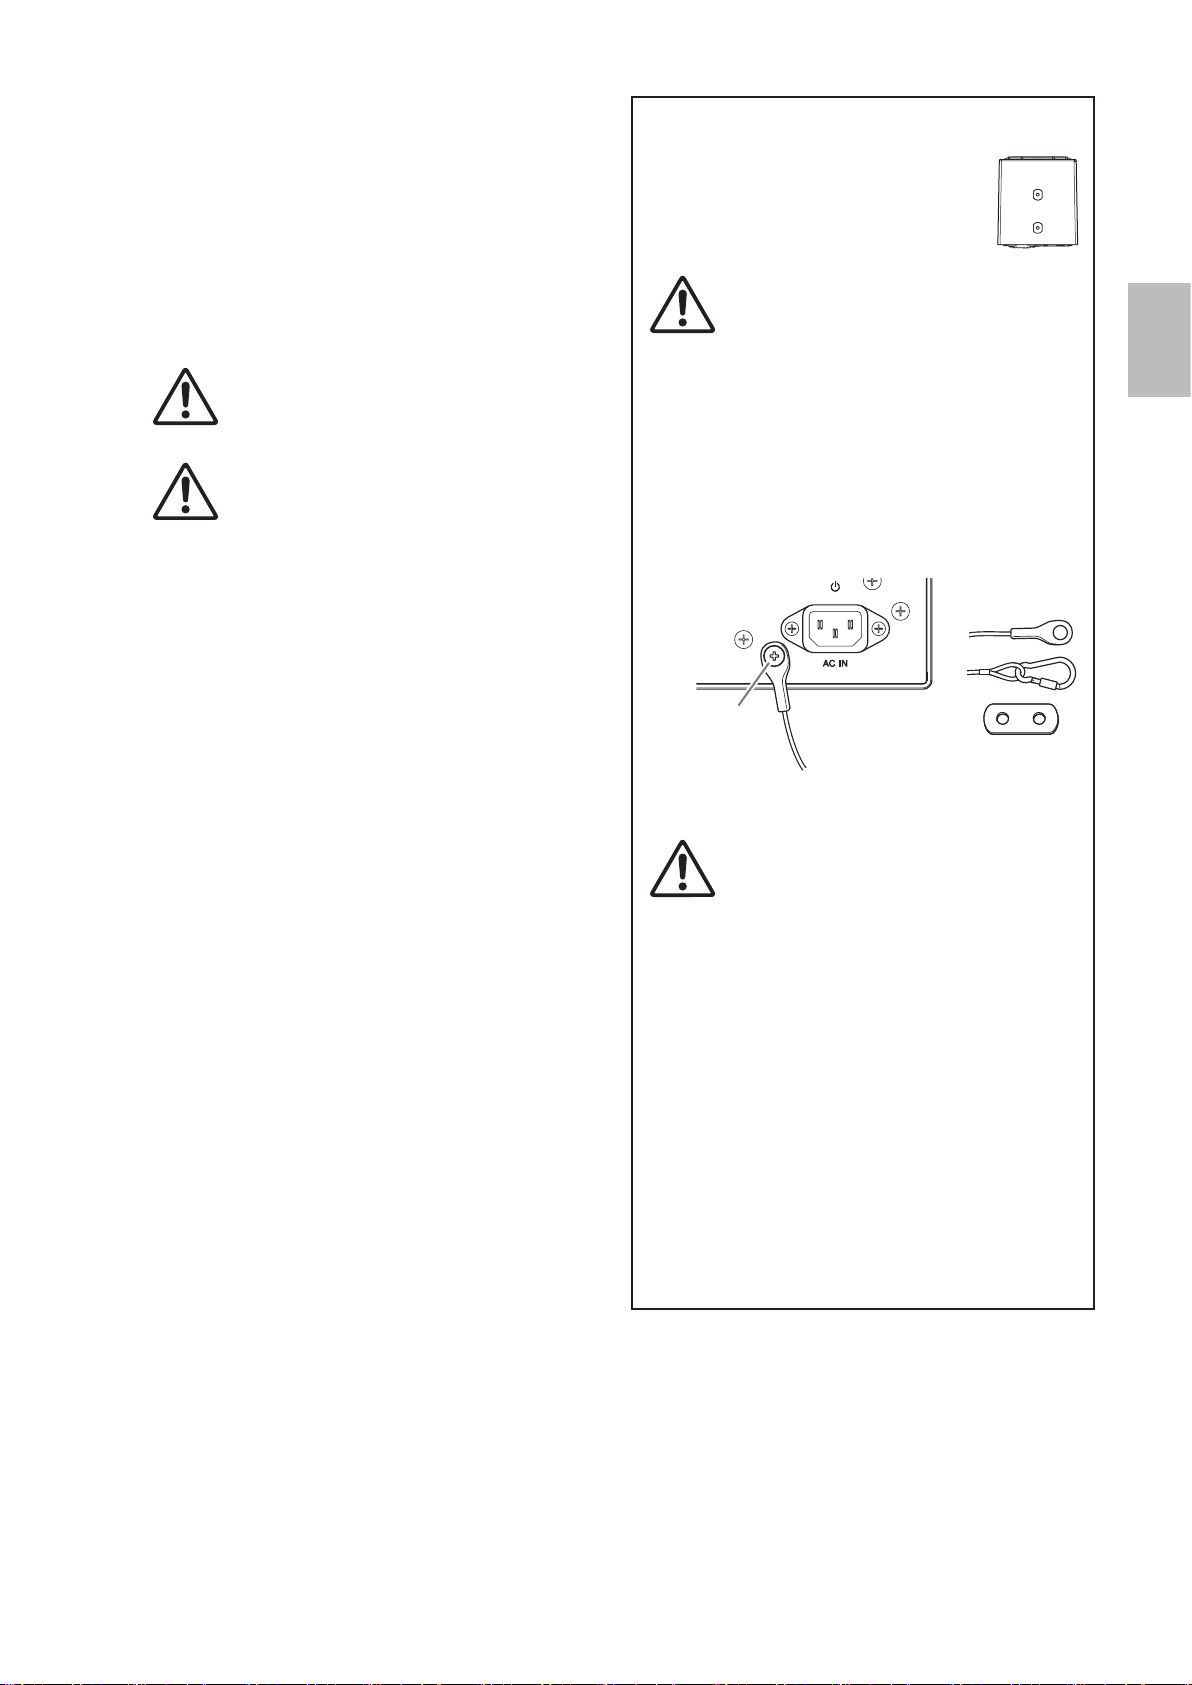
[AC IN] connector
Connect the supplied power cord in the order
below. Before connecting the power cord,
make sure that the MSP3A power is turned off.
1. Insert the plug of the power cord into this
socket.
2. Plug the other end of the cord into the AC
outlet.
When removing the power cord, perform this
procedure in reverse order.
WARNING
Use only the supplied power cord.
CAUTION
Turn off the power before you connect or disconnect
the power cord.
7
Power switch
This switch turns the power to the MSP3A
on(
I
) and off (
A
). When you turn this switch
on, the power indicator (
3
) lights up green.
NOTICE
Rapidly turning the unit on and off in succession
can cause it to malfunction. After turning the unit off,
wait for about 6 seconds before turning it on again.
8
INPUT LINE 1 jack
This input jack is used to connect an RCA pin
plug.
9
INPUT LINE 2 jack
This balanced combo jack is used to connect
an XLR-3-32 type connector or a TRS phone
plug to input line-level signals from a mixing
console.
Mounting on ceiling or wall
You can mount the MSP3A on a
ceiling or wall by attaching an
optional bracket to the bottom panel
of the MSP3A, using two screws
(M5 x 12-15 mm).
CAUTION
Make sure to secure the bracket so that the speaker
does not move.
0
Safety wire fastening screw
When using the optional bracket, remove
this screw (
0
) from the bottom panel (as
shown), thread it through one end of the
safety wire, and tighten them together.
0
Safety wire
installation example
Safety wire
example
CAUTION
•
Make sure to take precautionary measures using
wires to prevent the speaker from falling down in
the event of an installation failure.
•
The wire is not included. Prepare and assemble it
referring to the illustration.
•
When choosing the installation location, suspension
wire and mounting hardware, make sure all are
strong enough to support the weight of the speaker.
•
When installing the safety wire to the wall, install
it higher than the wire’s attachment point on the
speaker, with as little slack as possible. If the wire is
too long, and the speaker happens to fall, the wire
may snap as a result of too much strain.
•
The installation should be checked thoroughly at
regular intervals. Some ttings may deteriorate
over extended periods of time due to wear and/or
corrosion.
Loading ...
Loading ...
Loading ...