Loading ...
Loading ...
Loading ...
Operation Guide 3220
E-39
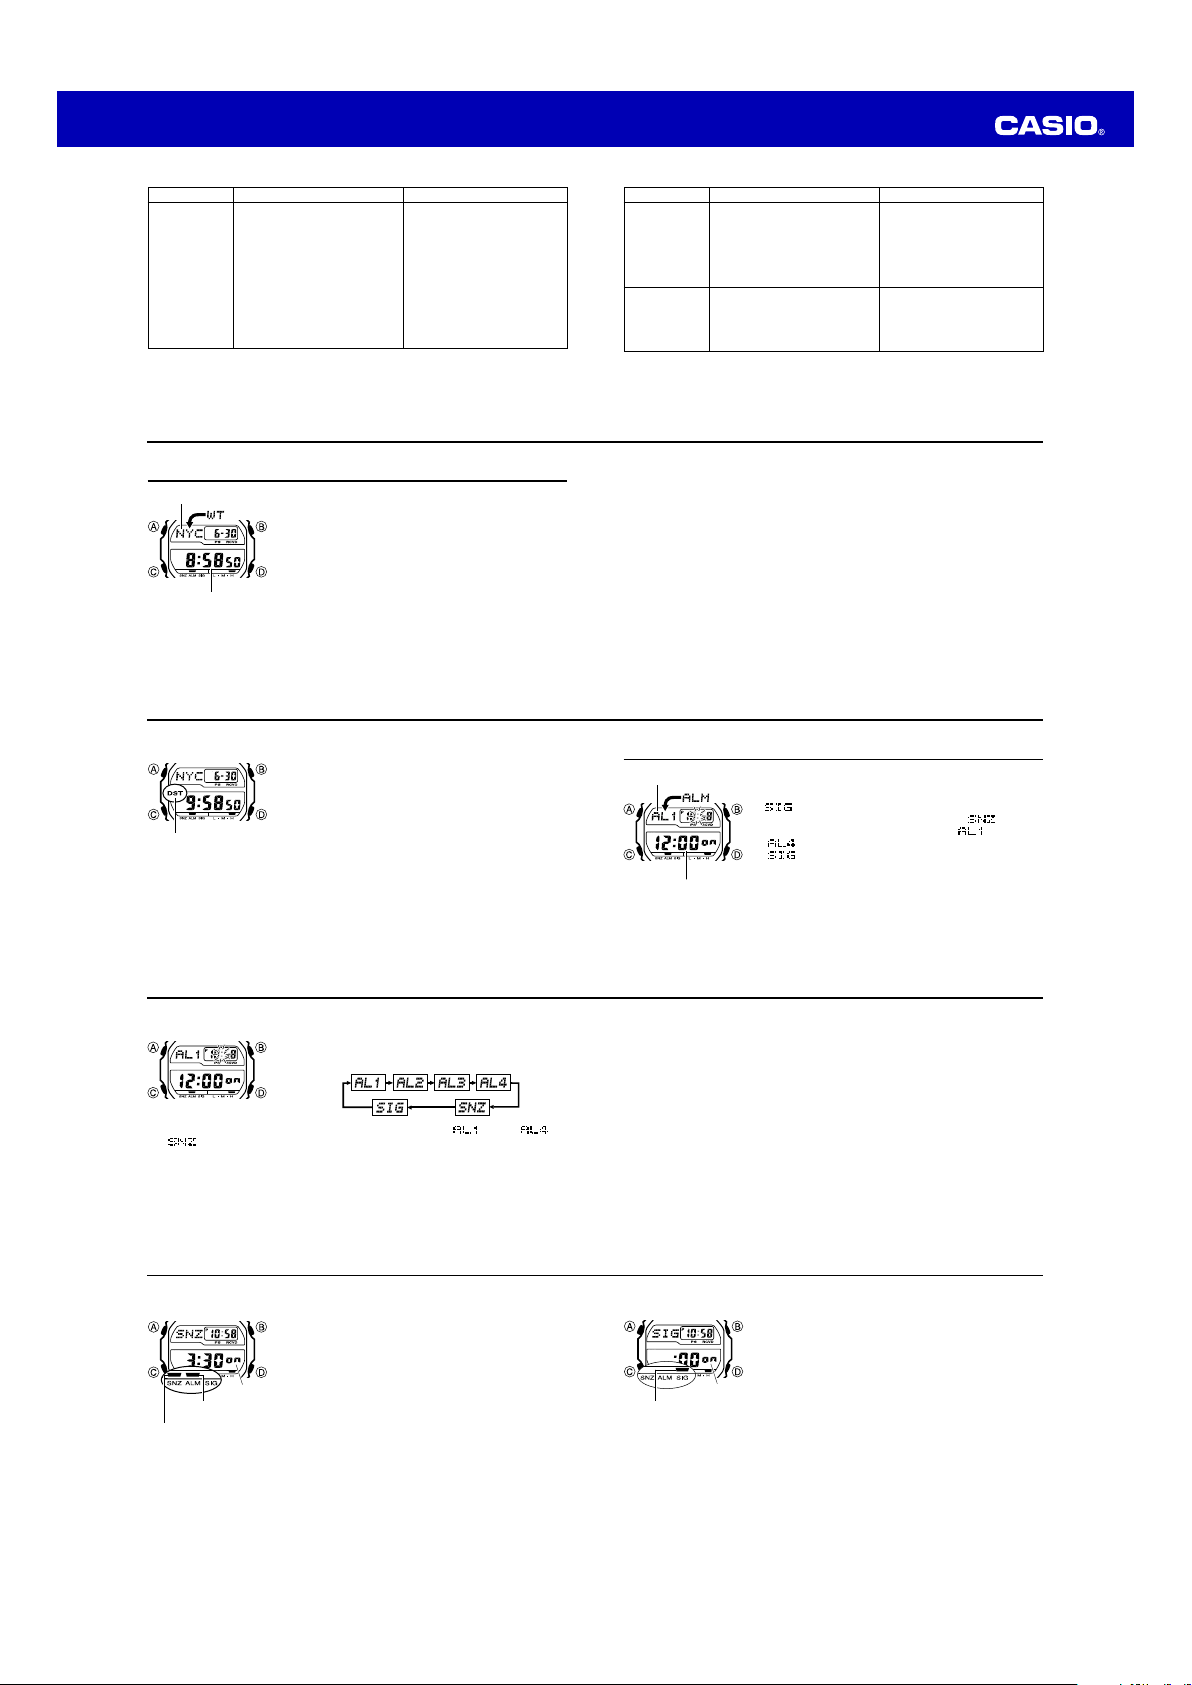
To turn the Hourly Time Signal on and off
1. In the Alarm Mode, press D to select the Hourly Time
Signal (
SIG).
2. Press A to toggle it on and off.
• The Hourly Time Signal on indicator is shown on the
display in all modes while this function is turned on.
l
l
l
l
l
l
l
l
l
l
Hourly time signal
on indicator
ON
E-38
To turn an alarm on and off
1. In the Alarm Mode, press D to select an alarm.
2. Press A to toggle it on and off.
• Turning on an alarm (
AL1, AL2, AL3, AL4 or
SNZ) displays the alarm on indicator on its Alarm Mode
screen.
• In all modes, the alarm on indicator is shown for any
alarm that currently is turned on.
• The alarm on indicator flashes while the alarm is
sounding.
• The snooze alarm indicator flashes while the snooze
alarm is sounding and during the 5-minute intervals
between alarms.
l
l
l
l
l
l
l
l
l
l
Alarm on indicator
ON
Snooze alarm
indicator
E-37
Alarm Operation
The alarm tone sounds at the preset time for 10 seconds, regardless of the mode the
watch is in. In the case of the snooze alarm, the alarm operation is performed a total
of seven times, every five minutes, until you turn the alarm off (page E-38).
• Alarm and Hourly Time Signal operations are performed in accordance with the
Timekeeping Mode time.
• To stop the alarm tone after it starts to sound, press any button.
• Performing any one of the operations below during a 5-minute interval between
snooze alarms cancels the current snooze alarm operation.
Displaying the Timekeeping Mode setting screen (page E-58)
Displaying the
SNZ
setting screen (page E-36)
To test the alarm
In the Alarm Mode, hold down D to sound the alarm.
E-36
To set an alarm time
1. In the Alarm Mode, press
'
to scroll through the alarm
screens until the one whose time you want to set is
displayed.
x
To set an alarm time, display the applicable alarm screen (
through , or
).
x
The snooze alarm operation repeats every fi ve minutes.
2. After you select an alarm, hold down
$
until the hour setting of the alarm time
starts to fl ash, which indicates the setting screen.
x
This operation turns on the alarm automatically.
3. Press
&
to move the fl ashing between the hour and minute settings.
4. While a setting is fl ashing, press
'
(+) and
%
(–) to change it.
x
With the 12-hour format, set the time correctly as a.m. or p.m. (
P
indicator).
5. Press
$
to exit the setting screen.
E-35
Alarms
The Alarm Mode gives you a choice of fi ve daily alarms,
one of which is a snooze alarm.
Also use the Alarm Mode to turn the Hourly Time Signal
(
) on and off.
x
The snooze alarm screen is indicated by
, while
the other alarm screens are numbered
through
. The Hourly Time Signal screen is indicated by
.
x
All of the operations in this section are performed in
the Alarm Mode, which you enter by pressing
&
(page
E-9).
Alarm number
Alarm time
(Hour : Minutes)
E-34
To toggle a city code time between Standard Time and Daylight Saving Time
1. In the World Time Mode, press D to display the city
code (time zone) whose Standard Time/Daylight Saving
Time setting you want to change.
2. Hold down A to toggle between Daylight Saving Time
(DST indicator displayed) and Standard Time (DST
indicator not displayed).
• The DST indicator is shown on the World Time Mode
screen while Daylight Saving Time is turned on.
• Note that the Standard Time/Daylight Saving Time
setting affects only the currently displayed city code.
Other city codes are not affected.
• Note that you cannot switch between Standard Time
and Daylight Saving Time while UTC is selected as the
city code.
DST indicator
E-33
• All of the operations in this section are performed in the World Time Mode, which
you enter by pressing C (page E-9).
To view the time in another city
While in the World Time Mode, press D (eastward) to scroll through the city codes
(time zones).
• Pressing D and B at the same time will jump to the UTC time zone.
E-32
World Time
World Time shows the current time in 48 cities (31 time
zones) around the world.
• The times kept in the World Time Mode are
synchronized with the time being kept in the
Timekeeping Mode. If you feel that there is an error in
any World Time Mode time, check to make sure you
have the correct city selected as your Home City. Also
check to make sure that the current time as shown in
the Timekeeping Mode is correct.
• Select a city code in the World Time Mode to display the
current time in any particular time zone around the
globe. See the “City Code Table” at the back of this
manual for information about the UTC differential
settings that are supported.
Current time in
selected city
City code
E-31
• For further information, see “Important!” (page E-14) and “Radio-controlled Atomic
Timekeeping Precautions” (page E-68).
What you should doProblem Probable Cause
• Time data (hour, minutes,
seconds) only was received
during the last receive
operation. The RCVD indicator
appears only when time data
and date data (year, month,
day) are both received.
• If the time is one hour off, the
DST setting may be incorrect.
• The Home City code setting is
not correct for the area where
you are using the watch.
• Perform manual signal receive
or wait until the next auto
signal receive operation is
performed.
• Check to make sure the watch
is in a location where it can
receive the signal (page E-14).
• Change the DST setting to
Auto DST (page E-62).
• Select the correct Home City
code (page E-11).
Auto receive is
turned on, but
the RCVD
indicator does
not appear on
the display.
Time setting is
incorrect
following signal
reception.
E-30
What you should doProblem Probable Cause
Auto receive is
turned on, but
the RCVD
indicator does
not appear on
the display.
• You changed the time setting
manually.
• The DST setting was changed
manually.
• You pressed a button while
signal receive was in progress.
• Even if receive is successful,
the RCVD indicator will
disappear from the display each
day when the first auto receive
operation of the day is
performed.
• Perform manual signal receive
or wait until the next auto
signal receive operation is
performed.
• Check to make sure the watch
is in a location where it can
receive the signal (page E-14).
Loading ...
Loading ...
Loading ...