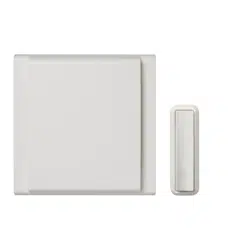
MODEL LA553WH
Page 1
PORTABLE PILOT™
WIRELESS CHIME
Installation & Operating Instructions
IMPORTANT: This wireless pushbutton and chime set is for
residential use, only. It will operate at an unobstructed distance
of 300 feet, minimum. Building materials may reduce operating
distance. Certain building materials; such as, but not limited to
metal, concrete, brick, stucco and foil-lined insulation; cause
greater interference than others; for example, wood or vinyl siding.
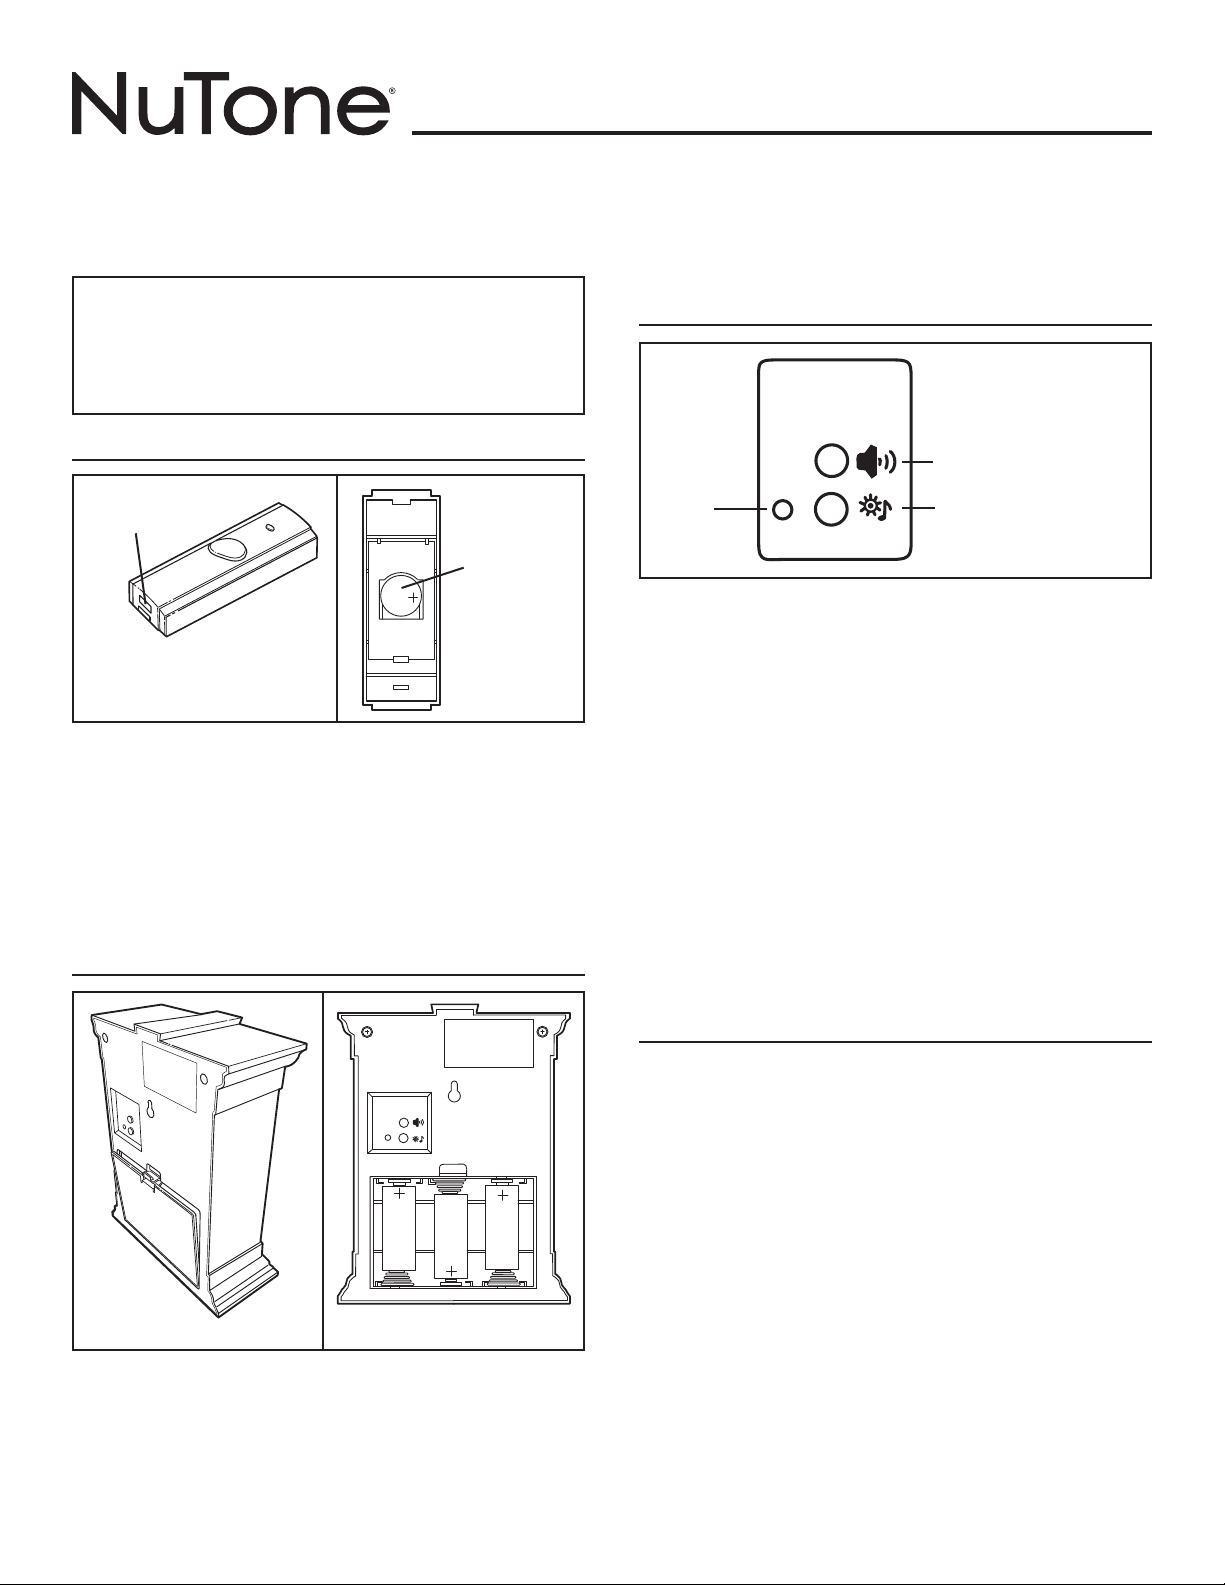
INSTALL PUSHBUTTON BATTERY
Refer to Figures 1 and 2.
1. Remove pushbutton and 3V lithium coin-battery from packaging.
2. Insert small, flat-blade screwdriver into bottom of pushbutton and twist
to separate its base.
3. Orient battery with “+” side viewable.
4. Insert battery into holder and press to seat.
5. Insert top of mounting base onto pushbutton and press bottom
together until mounting base snaps securely onto pushbutton.
Use only 3V (volt) lithium CR2032 style coin-battery for replacement.
INSTALL CHIME BATTERIES
Refer to Figures 3 and 4.
1. Remove chime from packaging.
2. Orient chime face-down.
3. Insert small, flat-blade screwdriver into top of battery cover, push
towards bottom of chime and tilt screwdriver to unlock battery cover
latch.
4. Lift battery cover and remove it from chime; set cover aside.
Figure 1
“PUSH”
TO OPEN COVER
3V LITHIUM
CR2032-STYLE
COIN
BATTERY
Figure 2
SLOT
5. Insert three (3) 1.5V “D” alkaline batteries (not supplied) oriented as
shown on front of battery compartment.
6. Replace and secure battery cover by inserting two (2) tabs into bottom
of battery compartment and pressing back-top of cover to latch.
“LEARN” PROCEDURE
Refer to Figure 5.
1. Set pushbutton and chime next to each other.
2. Press and release “Learn” button on chime.
3. LED lights to indicate “Learn” mode was entered.
4. Press and release pushbutton.
5. Confirm chime-tone is heard.
6. Repeat Step 4 to cycle through available chime-tones.
7. When desired chime-tone is heard, press and release “Learn” button
(Note: Chime may not respond to this button being pressed if it is too
soon after chime-tone sounds).
8. Press and release pushbutton; LED should turn off to confirm “Learn”
mode exited.
9. Press and release pushbutton and confirm chime-tone hasn’t change
from desired one.
• Up to four (4) pushbuttons can be used with a single chime by
selecting different chime-tones for each pushbutton.
• Chime can erase all “Learned” pushbuttons and tones by pressing
and holding “Learn” button; LED will light; within 15 seconds, LED will
turn off; release “Learn” button.
DETERMINE USABLE LOCATIONS
Do not plan to mount pushbutton directly on metal or concrete
surfaces; install a 1/8-1/4” wood spacer between pushbutton and
metal or concrete mounting surface.
Some stucco houses have metal mesh in the wall structure, which
will affect the wireless chime performance.
Experiment with various pushbutton and chime locations to
determine location that gives best performance before mounting
permanently.
Chime must not be located within 1-foot of any metal.
Pushbutton and chime should be located within 300-feet of each
other.
1. Place chime near desired mounting location.
2. Select a level location and hold pushbutton in desired mounting
location.
3. Press and release pushbutton.
4. Confirm chime-tone sounded.
5. If chime-tone does not sound, temporarily affix pushbutton to
mounting surface with double-stick or folded-over tape; repeat Steps 3
and 4.
6. If chime-tone still does not sound, move location of chime closer to
pushbutton; repeat Steps 3 and 4.
Figure 3 Figure 4
Figure 5
VOLUME BUTTON
LEARN BUTTON
LED
MODEL LA553WH
Page 2
Figure 6
MOUNT PUSHBUTTON
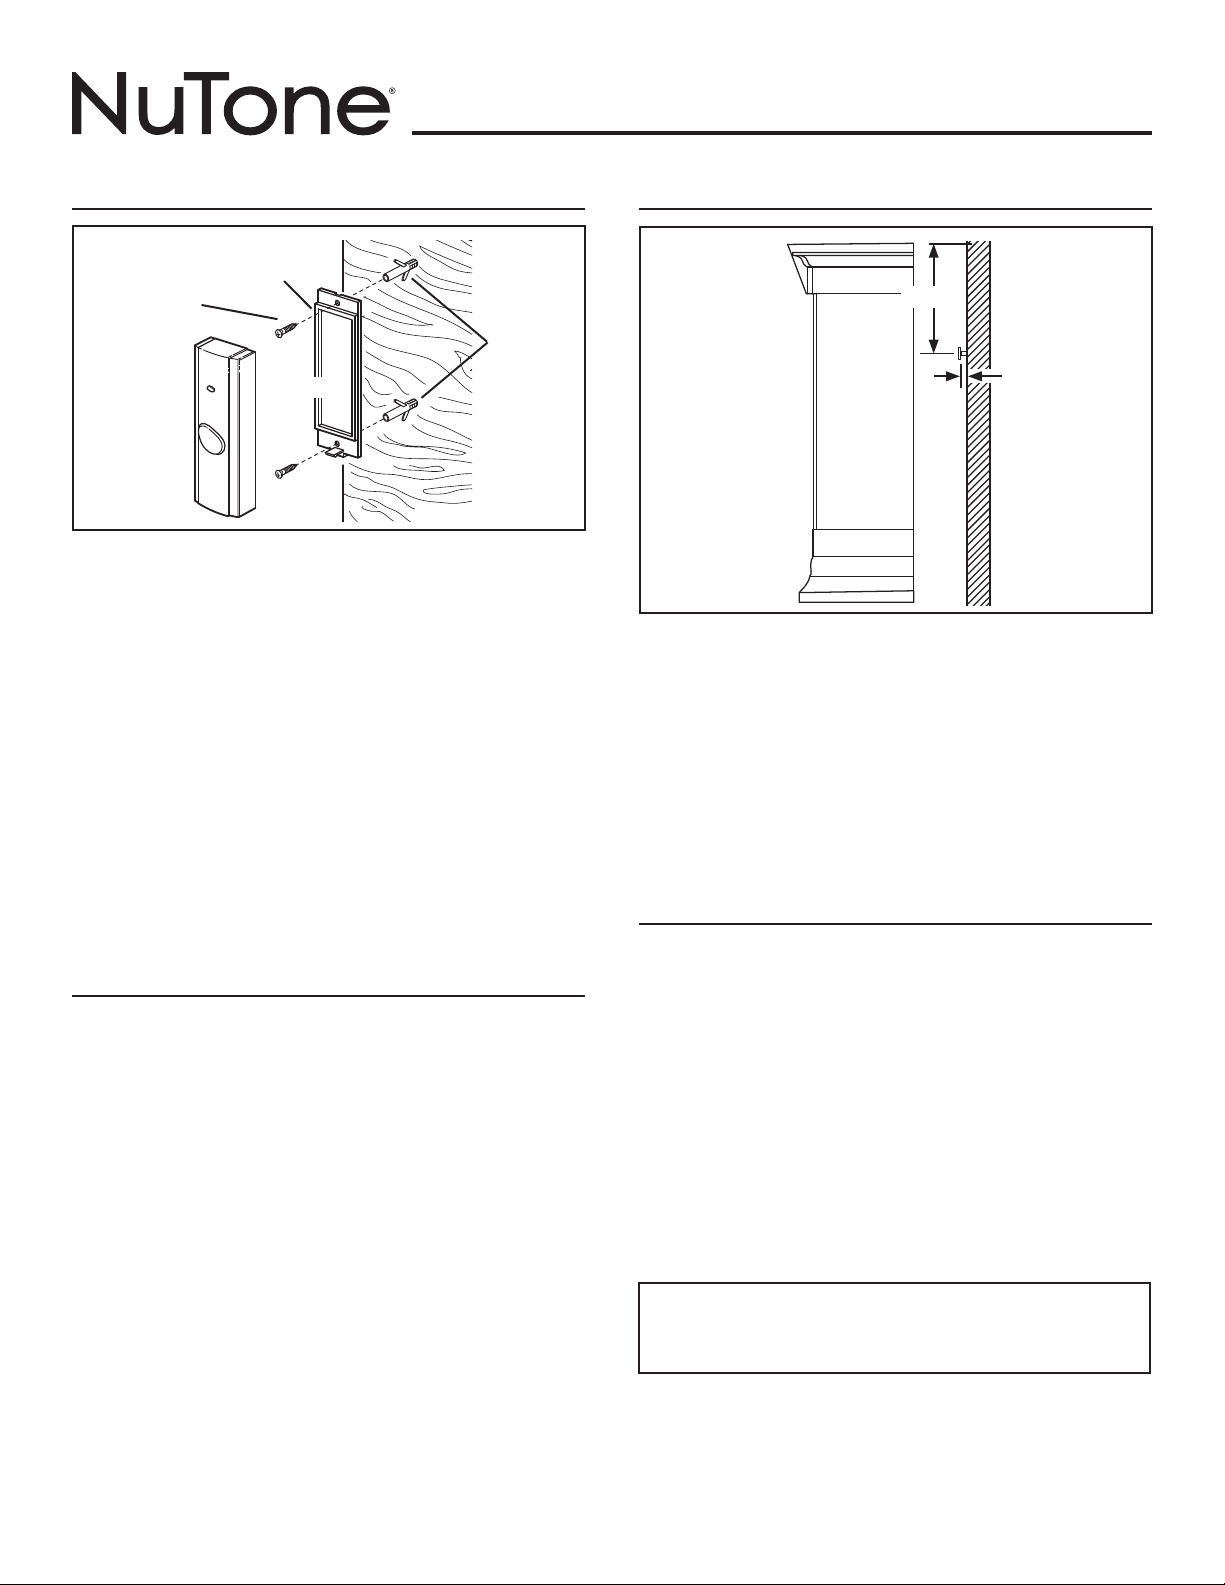
Refer to Figures 1 and 6.
1. After selecting usable locations in previous section, go to pushbutton
location.
2. Insert small, flat-blade screwdriver into bottom of pushbutton and twist
to separate its mounting base.
3. Make sure pushbutton mounting location is level.
4. Position pushbutton mounting base with “TOP” arrow correctly
oriented and mark base mounting holes locations.
5. Drill two (2) holes, 1/16” diameter if using supplied screws alone or
3/16” diameter if using supplied plastic anchors and screws, at base
mounting hole locations.
6. If 3/16” diameter holes were drilled, insert supplied plastic anchors.
7. Secure pushbutton base to mounting location with two (2) supplied
screws.
8. Make sure black O-ring is completely seated in its mounting base
groove with round edge at top and flat edge at bottom.
9. Hook pushbutton top catch onto top of base, swing pushbutton into
position and press bottom of pushbutton until it securely snaps onto
base.
SET VOLUME PROCEDURE
Refer to Figure 5.
There are four (4) volume levels which are accessed sequentially.
1. Press and release pushbutton to sound chime tone.
2. Press and release “Volume” button to hear the next volume setting.
3. If chime tone is not sounding when “Volume” button is pressed then
chime will sound a beep to indicate volume setting.
4. Volume setting cycles from loud to medium-loud, medium-soft and soft
then back to loud.
5. Repeat Step 2 until desired volume level is set.
6. Last volume setting is remembered.
7. Press and release pushbutton to sound chime tone and confirm
desired volume setting.
BASE
PLASTIC
ANCHORS
TOP
BLACK
“O” RING
MOUNTING
SCREWS
This device complies with Part 15 of the FCC rules.
Operation is subject to the following two conditions:
1. This device may not cause harmful interference, and
2. This device must accept any interference received, including
interference that may cause undesired operation.
Regulatory Information
The user is cautioned that changes or modifications not expressly
approved by the party responsible for regulatory compliance
could void the user’s authority to operate this equipment.
MOUNT CHIME
Refer to Figure 7.
1. Go to selected chime location.
2. Measure 1-15/16” down and centered from top of chime location and
mark mounting screw position.
3. Drill a hole, 1/16” diameter if using supplied screw alone or 3/16”
diameter if using supplied plastic anchor and screw, at marked
mounting screw location.
4. If 3/16” diameter hole was drilled, insert supplied plastic anchor.
5. Insert and tighten top mounting screw until 1/8” remains protruding.
6. Place chime keyhole slot over mounting screw and apply slight
downward force to seat keyhole slot on mounting screw.
7. Level chime.
TROUBLESHOOTING GUIDE
1. Chime does not sound:
a. If pushbutton LED doesn’t light when pushbutton is pressed then:
1. Check battery polarity in pushbutton.
2. Replace battery in pushbutton.
b. Replace batteries in chime.
c. Bring pushbutton in area of chime and test:
1. If chime sounds then change location of chime.
2. If chime does not sound then conduct erase procedure per note
at end of “Learn” Procedure then conduct “Learn” Procedure,
Steps 1 through 9.
2. Chime loses volume or changes tone:
a. Change batteries in chime.
3. Chime sounds when pushbutton is not pressed:
a. Release pushbutton catch at bottom and check inside for signs of
moisture; check O-ring for cracks or damage.
b. Conduct erase procedure per note at end of “Learn” Procedure then
conduct “Learn” Procedure, Steps 1 through 9.
Figure 7
1/8”
1-15/16”
MODÈLE LA553WH
Page 3
CARILLON SANS FIL
PORTABLEPILOT™
Directives d’installation et d’utilisation
IMPORTANT : Cet ensemble de bouton-poussoir et de carillon sans fil est
conçu uniquement pour un usage résidentiel. Il fonctionne jusqu’à une
distance sans obstruction d’au moins 91 mètres (300 pi). Des matériaux
de construction peuvent en réduire la portée. Certains matériaux de
construction comme le métal, le béton, la brique, le stucco et l’isolant
couvert de papier aluminium causent plus d’interférences que d’autres
comme le parement de bois ou de vinyle.
INSTALLATION DE LA PILE
DU BOUTON-POUSSOIR
Voir les figures 1 et 2.
1. Sortez de l’emballage le bouton-poussoir et la pile bouton de 3V au lithium.
2. Insérez un petit tournevis plat au bas du bouton-poussoir et tournez-le pour
en séparer la base.
3. Placez la pile avec le côté « + » visible.
4. Insérez la pile dans son logement et pressez pour l’appuyer.
5. Insérez la base dans le bouton-poussoir et pressez les deux parties
ensemble pour bien les emboîter.
N’utilisez qu’une pile bouton de 3V (volts) au lithium CR2032 comme pile
de remplacement.
INSTALLATION DES PILES DU CARILLON
Voir les figures 3 et 4.
1. Sortez le carillon de l’emballage.
2. Placez le carillon face vers le bas.
3. Insérez un petit tournevis plat dans le haut du couvercle des piles,
appuyez vers le bas du carillon et inclinez le tournevis pour dégager
lecouvercle.
Figure 1
« POUSSER »
POUR OUVRIR
LE COUVERCLE
PILE BOUTON
AU LITHIUM
CR2032 3V
Figure 2
FENTE
4. Soulevez le couvercle des piles et enlevez-le du carillon; mettez-le decôté.
5. Insérez trois (3) piles alcalines « D » de 1,5 V (non comprises) dans le
compartiment à piles dans le sens indiqué au fond du compartiment.
6. Replacez le couvercle des piles et fixez-le en insérant les deux (2) ergots
au bas du compartiment et en pressant le haut du couvercle pour l’engager.
PROCÉDURE D’« APPRENTISSAGE »
Voir la figure 5.
1. Placez le bouton-poussoir et le carillon l’un à côté de l’autre.
2. Appuyez sur le bouton « Apprendre » sur le carillon puis relâchez-le.
3. La DEL s’allume pour indiquer que vous êtes entré en mode
« Apprentissage ».
4. Appuyez sur le bouton-poussoir et relâchez-le.
5. Confirmez que vous avez bien entendu le carillon.
6. Répétez l’étape 4 pour passer entre les tonalités du carillon.
7. Lorsque vous entendez le type de carillon souhaité, appuyez sur le bouton
« Apprendre ». (Remarque : le carillon risque de ne pas réagir si vous
appuyez trop tôt sur ce bouton après que le carillon ait résonné).
8. Appuyez sur le bouton-poussoir et relâchez-le; la DEL devrait s’éteindre
pour confirmer que vous avez quitté le mode « Apprentissage ».
9. Appuyez sur le bouton-poussoir et relâchez-le pour vérifier que la tonalité
du carillon n’a pas changé.
• Vous pouvez utiliser jusqu’à quatre (4) boutons-poussoirs avec le même
carillon en choisissant des tonalités différentes pour chacun.
• Le carillon peut effacer tous les boutons-poussoirs et tonalités « Appris »
si vous maintenez appuyé le bouton « Apprendre »; la DEL s’allume alors;
après 15 secondes au maximum, la DEL s’éteindra; relâchez alors le bouton
« Apprendre ».
CHOIX DES EMPLACEMENTS UTILISABLES
Ne fixez pas le bouton-poussoir directement sur une surface en métal ou
en béton; installez une petite cale en bois de 3,2 à 6,4 mm (1/8 à 1/4 po)
entre le bouton et la surface métallique ou en béton.
Certaines maisons à revêtement en stucco ont un treillis métallique
dans leur charpente, ce qui nuira au fonctionnement du carillon.
Essayez divers emplacements pour le bouton-poussoir et le carillon
pour déterminer le meilleur endroit possible avant de les fixer en
permanence.
Le carillon ne doit pas être situé à moins de 30,5 cm (1 pi) de toute
surface métallique.
Le bouton-poussoir et le carillon ne doivent pas être séparés de plus
de91 mètres (300 pi).
1. Placez le carillon près de l’endroit où il sera fixé.
2. Choisissez un endroit de niveau et tenez le bouton-poussoir à l’emplacement
voulu.
3. Appuyez sur le bouton-poussoir et relâchez-le.
4. Vérifiez que le carillon a bien sonné.
5. Si le carillon ne sonne pas, fixez temporairement le bouton-poussoir àla
surface de montage avec du ruban double face ou un ruban replié; répétez
les étapes 3 et 4.
6. Si le carillon ne sonne toujours pas, rapprochez le carillon du bouton-
poussoir; répétez les étapes 3 et 4.
Figure 3 Figure 4
Figure 5
BOUTON DE VOLUME
BOUTON APPRENDRE
DEL

MODÈLE LA553WH
Page 4
Figure 6
MONTAGE DU BOUTON-POUSSOIR
Voir les figures 1 et 6.
1. Après avoir choisi les endroits utilisables à la section précédente, allez
àl’emplacement du bouton-poussoir.
2. Insérez un petit tournevis plat au bas du bouton-poussoir et tournez-le
pour en séparer la base.
3. Assurez-vous que son emplacement de montage est de niveau.
4. Positionnez la base de montage du bouton-poussoir avec la flèche du
« HAUT » pointant dans la bonne direction et marquez la position des
trous de fixation.
5. Percez deux (2) trous de 1,6 mm (1/16 po) de diamètre si vous utilisez
uniquement les vis fournies ou de 4,8 mm (3/16 po) de diamètre si vous
utilisez les chevilles de plastique et les vis à l’emplacement des tous de
fixation de la base.
6. Si des trous de 4,8 mm (3/16 po) de diamètre ont été percés, insérez-y les
chevilles de plastique.
7. Fixez la base du bouton-poussoir avec les deux (2) vis fournies.
8. Assurez-vous que le joint torique est bien appuyé dans la rainure dela
base de montage, la partie arrondie vers le haut et la partie plate en bas.
9. Accrochez le haut du bouton-poussoir sur le haut de la base, basculez-le
en place et pressez pour l’emboîter sur la base.
RÉGLAGE DU VOLUME
Voir la figure 5.
Il y a quatre (4) niveaux de volume accessibles en séquence.
1. Appuyez sur le bouton-poussoir et relâchez-le pour faire sonner le carillon.
2. Appuyez sur le bouton « Volume » et relâchez-le pour entendre le prochain
niveau de volume.
3. Si le carillon ne sonne pas lorsque vous appuyez sur le bouton « Volume »,
il émettra un bip pour indiquer le réglage du volume.
4. Le volume passe de l’intensité forte, à moyenne-forte, à moyenne-douce,
àdouce pour revenir à forte.
5. Répétez l’étape 2 jusqu’ à l’obtention du volume voulu.
6. Le dernier volume réglé est mémorisé.
7. Appuyez sur le bouton-poussoir et relâchez-le pour faire sonner le carillon
et vérifier le réglage du volume.
BASE
CHEVILLES
EN
PLASTIQUE
HAUT
JOINT
TORIQUE NOIR
VIS DE
MONTAGE
Cet appareil est conforme aux normes énoncées à la section 15 des règlements
de la FCC.
Son fonctionnement est assujetti aux conditions suivantes :
1. Cet appareil ne doit pas provoquer d’interférences, et
2. il doit tolérer les interférences reçues, notamment celles susceptibles
deprovoquer un fonctionnement non souhaité.
Avis relatif à la réglementation
L’utilisateur est informé que toute modification non expressément
approuvée par la partie responsable du respect de la réglementation
peut annuler son droit d’utiliser cet équipement.
MONTAGE DU CARILLON
Voir la figure 7.
1. Allez à l’emplacement choisi du carillon.
2. Mesurez 49,2 mm (1-15/16 po) vers le bas à partir du haut de l’emplacement
carillon au centre et tracez la position de la vis.
3. Percez un trou de 1,6 mm (1/16 po) de diamètre si vous utilisez uniquement
la vis fournie ou de 4,8 mm (3/16 po) de diamètre si vous utilisez la cheville
de plastique et la vis à l’emplacement du tous defixation.
4. Si un trou de 4,8 mm (3/16 po) de diamètre a été percé, insérez-y
lacheville de plastique fournie.
5. Insérez la vis du haut et tournez-la jusqu’à ce qu’elle dépasse de 3,2 mm
(1/8 po) de la surface.
6. Placez la fente en forme de trou de serrure du carillon sur la vis et
appuyez légèrement vers le bas pour forcer la fente à glisser sur la vis.
7. Ajustez le niveau du carillon.
GUIDE DE DÉPANNAGE
1. Le carillon ne sonne pas :
a. Si la DEL du bouton-poussoir ne s’allume pas lorsque vous appuyez sur
le bouton :
1. Vérifiez la polarité de la pile dans le bouton-poussoir.
2. Remplacez les piles du carillon et du bouton-poussoir.
b. Remplacez la pile du bouton-poussoir.
c. Approchez le bouton-poussoir du carillon et faites un essai :
1. Si le carillon sonne, changez l’emplacement du carillon.
2. Si le carillon ne sonne pas, appliquez la procédure d’effaçage
conformément à la note figurant à la fin de la section « Apprentissage »,
puis reprenez les étapes 1 à 9 de la procédure d’apprentissage.
2. Le son du carillon perd du volume ou change de tonalité :
a. Remplacez les piles du carillon.
3. Le carillon sonne sans que l’on appuie sur le bouton-poussoir :
a. Ouvrez le bouton-poussoir par le dessous et vérifiez qu’il n’y a pas de
signes d’humidité à l’intérieur ou que le joint torique n’est pas fendillé ou
endommagé.
b. Appliquez la procédure d’effaçage conformément à la note figurant à la
fin de la section « Apprentissage », puis reprenez les étapes 1 à 9 de la
procédure d’apprentissage.
Figure 7
3,2 mm (1/8 po)
49,2 mm
(1-15/16 po)
MODELO LA553WH
Página 5
TIMBRE INALÁMBRICO
PORTABLE PILOT™
Instrucciones de instalación y operación
IMPORTANTE: Este conjunto de timbre y botón inalámbrico es
únicamente para uso residencial. Funcionará a una distancia sin
obstrucciones de 300 pies (91 m) como mínimo. Los materiales del
edificio pueden reducir la distancia de operación. Ciertos materiales
de construcción, que incluyen, entre otros: metal, concreto, ladrillo,
estuco y aislamiento de aluminio provocan mayor interferencia que
otros, como por ejemplo, madera o paneles de vinilo.
INSTALE LA BATERÍA DEL BOTÓN
Consulte las figuras 1 y 2.
1. Retire del paquete el botón y la batería redonda de litio de 3 V.
2. Inserte un destornillador pequeño de punta plana en la parte inferior del
botón y gire para separar la base.
3. Oriente la batería con el lado “+” visible.
4. Inserte la batería en el soporte y presione para asentar.
5. Inserte la parte superior de la base de montaje en el botón y presione junto
con la parte inferior, hasta que la base se sujete firmemente sobre el botón.
Use solamente una batería redonda CR2032 de litio de 3 V (voltios) como
reemplazo.
INSTALE LAS BATERÍAS DEL TIMBRE
Consulte las figuras 3 y 4.
1. Retire el timbre de su empaque.
2. Oriente el timbre boca abajo.
3. Inserte un destornillador pequeño de punta plana en la parte superior
de la cubierta de las baterías, empuje hacia la parte inferior del timbre
eincline el destornillador para destrabar la cubierta de las baterías.
4. Levante la cubierta de las baterías y despréndala del timbre; déjela a un
lado.
Figura 1
“PRESIONE”
PARA ABRIR
LA CUBIERTA
BATERÍA
REDONDA
CR2032 DE LITIO
DE 3 V
Figura 2
RANURA
5. Inserte tres (3) baterías alcalinas tamaño “D” de 1.5 V (no se incluyen),
con la orientación mostrada, sobre el frente del compartimiento.
6. Regrese a su lugar y asegure la cubierta de las baterías insertando
dos (2) lengüetas en la parte inferior del compartimiento de las baterías y
presionando la parte superior de la cubierta para que se sujete.
PROCEDIMIENTO DE “APRENDIZAJE”
Vea la figura 5.
1. Coloque el botón y el timbre uno junto al otro.
2. Presione y suelte el botón de “Aprendizaje” en el timbre.
3. El LED se enciende para indicar que se ingresó al modo de “Aprendizaje”.
4. Presione y suelte el botón.
5. Confirme que escucha un tono de timbre.
6. Repita el paso 4 para recorrer los diversos tonos del timbre disponibles.
7. Cuando escuche el tono de timbre deseado, presione y suelte el botón de
“Aprendizaje” (Nota: Tal vez el timbre no responda al presionar este botón
si es demasiado pronto después de que suene el tono del timbre).
8. Presione y suelte el botón; el LED debe apagarse para confirmar que salió
del modo de “Aprendizaje”.
9. Presione y suelte el botón y confirme que el tono del timbre no haya
cambiado del que desea.
• Se pueden usar hasta cuatro (4) botones con un solo timbre, seleccionando
tonos de timbre diferentes para cada botón.
• El timbre puede borrar todos los botones y los tonos “Aprendidos”
presionando y sosteniendo presionado el botón de “Aprendizaje”; el LED
se encenderá; en menos de 15 segundos, el LED se apagará; suelte el
botón de “Aprendizaje”.
DETERMINE LOS LUGARES DONDE
LOPUEDA UTILIZAR
No haga planes de montar el botón directamente sobre superficies de
metal o concreto: instale un separador de madera de 1/8 a ¼ de pulgada
(3.2 a 6.4 mm) entre el botón y la superficie de montaje de metal o
concreto.
Algunas casas de estuco tienen una malla metálica en la estructura
dela pared, lo cual afectará el desempeño del timbre inalámbrico.
Antes de hacer el montaje permanente, experimente con varias
ubicaciones del botón y el timbre para determinar el lugar que tenga el
mejor desempeño.
El timbre no debe colocarse a menos de 1 pie (30.5 cm) de cualquier
metal.
El botón y el timbre deben colocarse a menos de 300 pies (91 m) uno
del otro.
1. Coloque el timbre cerca del sitio de montaje deseado.
2. Seleccione un lugar nivelado y coloque el botón en la ubicación de montaje
deseada.
3. Presione y suelte el botón.
4. Confirme que se escuche el tono del timbre.
5. Si no suena el tono, fije temporalmente el botón sobre la superficie de
montaje con una cinta con adhesivo por los dos lados o una cinta doblada
sobre sí misma; repita los pasos 3 y 4.
6. Si todavía no suena el timbre, cambie la ubicación del timbre más cerca
del botón y repita los pasos 3 y 4.
Figura 3 Figura 4
Figura 5
BOTÓN DE VOLUMEN
BOTÓN DE APRENDIZAJE
LED

MODELO LA553WH
Página 6
Figura 6
MONTAJE DEL BOTÓN
Consulte las figuras 1 y 6.
1. Después de seleccionar lugares utilizables en la sección anterior, vaya
ala ubicación del botón.
2. Inserte un destornillador pequeño de punta plana en la parte inferior del
botón y gire para separar la base de montaje.
3. Asegúrese de que la ubicación de montaje del botón esté nivelada.
4. Coloque la base de montaje del botón con la flecha que indica “TOP”
(Parte superior) orientada correctamente y marque las ubicaciones
de los orificios de montaje de la base.
5. Perfore dos (2) orificios de 1/16 pulg. (1.6 mm) de diámetro si utiliza
solamente los tornillos suministrados, o de 3/16 pulg. (4.8 mm) de diámetro
si utiliza las anclas de plástico y los tornillos suministrados para los orificios
de montaje de la base.
6. Si perforó orificios de 3/16 pulg. (4.8 mm) de diámetro, inserte las anclas
de plástico suministradas.
7. Asegure la base del botón en el sitio de montaje con dos (2) tornillos
suministrados.
8. Asegúrese de que la junta tórica negra esté totalmente asentada en la
ranura de la base de montaje con el borde redondo en la parte superior y
el borde plano en la parte inferior.
9. Enganche la ranura superior del botón en la parte superior de la base,
deslice el botón en su posición y presione la parte inferior del botón hasta
que se sujete firmemente en la base con un chasquido.
PROCEDIMIENTO PARA AJUSTAR
ELVOLUMEN
Vea la figura 5.
Cuenta con cuatro (4) niveles de volumen que se pueden acceder de manera
secuencial.
1. Presione y suelte el botón para que se escuche el tono del timbre.
2. Presione y suelte el botón “Volume” para escuchar el siguiente ajuste
devolumen.
3. Si no suena el tono del timbre al presionar el botón “Volume”, entonces el
timbre emitirá un pitido para indicar el ajuste de volumen.
4. El ajuste del volumen pasa de nivel alto a medio-alto, medio bajo y bajo;
luego regresa al nivel alto.
5. Repita el paso 2 hasta que configure el nivel de volumen deseado.
6. El timbre recuerda el último ajuste de volumen.
7. Presione y suelte el botón para que se escuche el tono del timbre y
confirme el ajuste de volumen deseado.
BASE
ANCLAS DE
PLÁSTICO
JUNTA
TÓRICA NEGRA
TORNILLOS
DE MONTAJE
Este dispositivo cumple con la Parte 15 de las reglas de la FCC.
La operación está sujeta a las dos condiciones siguientes:
1. Este dispositivo no puede ocasionar interferencia nociva, y
2. Este dispositivo debe aceptar toda interferencia recibida, incluida la
interferencia que pueda ocasionar una operación indeseada.
Información normativa
Se advierte al usuario que cualquier cambio o modificación no
aprobado específicamente por las autoridades normativas podría dar
lugar a la anulación del permiso del usuario para operar este equipo.
MONTAJE DEL TIMBRE
Vea la figura 7.
1. Vaya al lugar seleccionado para el timbre.
2. Mida 1-15/16 pulg. (49.2 mm) hacia abajo y centrado desde la ubicación
superior del timbre, y marque la posición del tornillo de montaje.
3. Perfore un orificio de 1/16 pulg. (1.6 mm) de diámetro si utiliza solamente
el tornillo suministrado, o de 3/16 pulg. (4.8 mm) de diámetro si utiliza el
ancla de plástico y el tornillo suministrados para la ubicación marcada del
tornillo de montaje.
4. Si perforó el orificio de 3/16 pulg. (4.8 mm) de diámetro, inserte el ancla
de plástico suministrada.
5. Inserte y apriete el tornillo de montaje superior hasta que solo sobresalga
1/8 pulg. (3.2 mm).
6. Coloque la ranura en forma de ojo de cerradura del timbre sobre el tornillo
de montaje y aplique una ligera fuerza hacia abajo para asentar la ranura
en forma de ojo de cerradora sobre el tornillo de montaje.
7. Nivele el timbre.
GUÍA DE SOLUCIÓN DE PROBLEMAS
1. El timbre no suena:
a. Si el LED del botón no se enciende al presionar el botón, entonces:
1. Verifique la polaridad de la batería en el botón.
2. Reemplace la batería en el botón.
b. Reemplace las baterías en el timbre.
c. Lleve el botón al área del timbre y pruebe lo siguiente:
1. Si suena el timbre, entonces cambie la ubicación del timbre.
2. Si no suena el timbre, entonces realice el procedimiento de borrado
según la nota al final del procedimiento de “Aprendizaje” y realice el
procedimiento de “Aprendizaje”, pasos 1 a 9.
2. El timbre pierde volumen o cambia de tono:
a. Cambie las baterías en el timbre.
3. El timbre suena cuando no se presiona el botón:
a. Suelte la ranura del botón por la parte inferior y revise el interior por si
hubiera signos de humedad; revise la junta tórica por si hubiera grietas
o daños.
b. Realice el procedimiento de borrado según la nota al final del
procedimiento de “Aprendizaje” y luego realice el procedimiento
de“Aprendizaje”, pasos 1 a 9.
Figura 7
1/8 pulg. (3.2 mm)
PARTE
SUPERIOR
1 -15/16 pulg.
(49.2 mm)
MODEL / MODÈLE / MODELO LA553WH
Page / Página 7
Limited Warranty
Warranty Period and Exclusions: Broan-NuTone LLC (the “Company”) warrants to the original consumer purchaser of its product (“you”) that the product (the “Product”) will be free from material defects in the
Product or its workmanship for a period of one (1) year from the date of original purchase.
The limited warranty period for any replacement parts provided by the Company and for any Products repaired or replaced under this limited warranty shall be the remainder of the original warranty period.
This warranty does not cover speed controls, fluorescent lamp starters, tubes, halogen and incandescent bulbs, fuses, filters, ducts, roof caps, wall caps and other accessories for ducting that may be purchased
separately and installed with the Product. This warranty also does not cover (a)normal maintenance and service, (b)normal wear and tear, (c)any Products or parts which have been subject to misuse, abuse, abnormal
usage, negligence, accident, improper or insufficient maintenance, storage or repair (other than repair by the Company), (d)damage caused by faulty installation, or installation or use contrary to recommendations
or instructions, (e)any Product that has been moved from its original point of installation, (f)damage caused by environmental or natural elements, (g)damage in transit, (h)natural wear of finish, (i)Products in
commercial or nonresidential use, or (j)damage caused by fire, flood or other act of God. This warranty covers only Products sold to original consumers in the United States by the Company or U.S. distributors
authorized by the Company.
This warranty supersedes all prior warranties and is not transferable from the original consumer purchaser.
No Other Warranties: This Limited Warranty contains the Company’s sole obligation and your sole remedy for defective products. The foregoing warranties are exclusive and in lieu of any other warranties, express
or implied. THE COMPANY DISCLAIMS AND EXCLUDES ALL OTHER EXPRESS WARRANTIES, AND DISCLAIMS AND EXCLUDES ALL WARRANTIES IMPLIED BY LAW, INCLUDING WITHOUT LIMITATION THOSE
OF MERCHANTABILITY AND FITNESS FOR A PARTICULAR PURPOSE. To the extent that applicable law prohibits the exclusion of implied warranties, the duration of any applicable implied warranty is limited to the
period specified for the express warranty above. Some states do not allow limitations on how long an implied warranty lasts, so the above limitation may not apply to you. Any oral or written description of the Product
is for the sole purpose of identifying it and shall not be construed as an express warranty.
Whenever possible, each provision of this Limited Warranty shall be interpreted in such manner as to be effective and valid under applicable law, but if any provision is held to be prohibited or invalid, such provision
shall be ineffective only to the extent of such prohibition or invalidity, without invalidating the remainder of such provision or the other remaining provisions of the Limited Warranty.
Remedy: During the applicable limited warranty period, the Company will, at its option, provide replacement parts for, or repair or replace, without charge, any Product or part thereof, to the extent the Company finds
it to be covered by and in breach of this limited warranty under normal use and service. The Company will ship the repaired or replaced Product or replacement parts to you at no charge. You are responsible for all
costs for removal, reinstallation and shipping, insurance or other freight charges incurred in the shipment of the Product or part to the Company. If you must send the Product or part to the Company, as instructed
by the Company, you must properly pack the Product or part—the Company is not responsible for damage in transit. The Company reserves the right to utilize reconditioned, refurbished, repaired or remanufactured
Products or parts in the warranty repair or replacement process. Such Products and parts will be comparable in function and performance to an original Product or part and warranted for the remainder of the original
warranty period.
Exclusion of Damages: THE COMPANY’S OBLIGATION TO PROVIDE REPLACEMENT PARTS, OR REPAIR OR REPLACE, AT THE COMPANY’S OPTION, SHALL BE YOUR SOLE AND EXCLUSIVE REMEDY UNDER THIS
LIMITED WARRANTY AND THE COMPANY’S SOLE AND EXCLUSIVE OBLIGATION. THE COMPANY SHALL NOT BE LIABLE FOR INCIDENTAL, INDIRECT, CONSEQUENTIAL OR SPECIAL DAMAGES ARISING OUT OF
OR IN CONNECTION WITH THE PRODUCT, ITS USE OR PERFORMANCE.
Some states do not allow the exclusion or limitation of incidental or consequential damages, so the above limitation or exclusion may not apply to you. This warranty gives you specific legal rights, and you may also
have other rights, which vary from state to state.
This warranty covers only replacement or repair of defective Products or parts thereof at the Company’s main facility and does not include the cost of field service travel and living expenses.
Any assistance the Company provides to or procures for you outside the terms, limitations or exclusions of this limited warranty will not constitute a waiver of such terms, limitations or exclusions, nor will such
assistance extend or revive the warranty.
The Company will not reimburse you for any expenses incurred by you in repairing or replacing any defective Product, except for those incurred with the Company’s prior written permission.
How to Obtain Warranty Service: To qualify for warranty service, you must (a)notify the Company at the address or telephone number stated below within seven (7)days of discovering the covered defect, (b)give
the model number and part identification and (c)describe the nature of any defect in the Product or part. At the time of requesting warranty service, you must present evidence of the original purchase date. If you
cannot provide a copy of the original written limited warranty, then the terms of the Company’s most current written limited warranty for your particular product will control.The most current limited written warranties
for the Company’s products can be found at www.broan.com .
Broan-NuTone LLC 926 West State Street, Hartford, WI 53027 www.broan.com 800-637-1453
Garantie limitée
Période de garantie et exclusions : Broan-NuTone LLC (la « Société ») garantit au consommateur acheteur initial (« vous ») de son produit (le « Produit ») que celui-ci est exempt de tout vice de matériau ou de fabrication
pour une période de un (1) an à compter de la date d’achat originale.
La période de la garantie limitée sur toute pièce de remplacement fournie par la Société et sur tout produit réparé ou remplacé en vertu de la présente garantie limitée correspond au reste de la période de garantie originale.
La présente garantie ne s’applique pas aux commandes de vitesse, tubes fluorescents et aux démarreurs, ni aux ampoules halogènes ou incandescentes, fusibles, filtres, conduits, capuchons de toit, capuchons muraux et
autres accessoires pour conduits pouvant avoir été achetés séparément et installés avec le produit. La présente garantie ne couvre pas (a) les travaux d’entretien et de service normaux, (b) l’usure normale, (c) tout produit
ou toute pièce ayant fait l’objet d’une mauvaise utilisation, d’un abus, d’un usage anormal, d’une négligence, d’un accident, d’un entretien, rangement ou réparation inadéquats ou insuffisants (autre que par la Société),
(d) les dommages dus à une mauvaise installation, ou à une installation ou utilisation contraires aux recommandations ou instructions, (e) tout produit déplacé de son lieu d’installation original, (f) les dommages dus à
des éléments environnementaux ou naturels, (g) les dommages dus au transport, (h) l’usure naturelle du fini, (i) les produits utilisés à des fins commerciales ou non-résidentielles ou (j) les dommages dus à un incendie,
à une inondation ou à un événement fortuit. La présente garantie ne couvre que les produits vendus au consommateur initial aux États-Unis par la Société ou par les distributeurs américains autorisés par la Société.
La présente garantie remplace toute garantie précédente et le consommateur et acheteur initial ne peut la céder à quiconque.
Aucune autre garantie : La présente garantie limitée stipule les seules obligations de la Société et votre seul recours en cas de produits défectueux. La garantie ci-dessus est exclusive et remplace toute autre garantie,
expresse ou tacite. LA SOCIÉTÉ EXCLUT TOUTE AUTRE GARANTIE EXPRESSE ET TOUTE GARANTIE DÉCOULANT IMPLICITEMENT DE LA LOI, Y COMPRIS, SANS S’Y LIMITER, LES GARANTIES DE VALEUR
MARCHANDE ET D’ADÉQUATION À UN USAGE PARTICULIER. Dans la mesure où la loi en vigueur interdit l’exclusion des garanties tacites, la durée de toute garantie tacite est limitée à la période stipulée ci-dessus pour
la garantie expresse. Certaines juridictions interdisant de limiter la durée d’une garantie tacite, la limitation ci-dessus peut ne pas s’appliquer à votre situation. Toute description verbale ou écrite du produit a pour seule
fin de l’identifier et ne doit pas être interprétée comme une garantie expresse.
Si possible, chaque disposition de cette garantie limitée doit être interprétée de sorte à être en vigueur et valide en vertu des lois applicables, mais si une disposition s’avère interdite ou invalide, elle le sera seulement dans
la mesure de cette interdiction ou invalidité, sans invalider le reste de cette disposition ni les autres dispositions de la présente garantie limitée.
Recours : Pendant la période de garantie limitée applicable, la Société pourra, à son choix, fournir des pièces de rechange ou réparer ou remplacer, sans frais, tout produit ou toute pièce, dans la mesure où la Société
constate qu’il est couvert et contrevient à la présente garantie limitée dans des conditions normales d’utilisation et de service. La Société vous enverra gratuitement le produit réparé ou remplacé ou les pièces de rechange.
Vous êtes responsable des frais de démontage, de remontage, d’expédition, d’assurance ou de tous autres frais de transport pour l’envoi du produit ou de la pièce à la Société. Si vous devez envoyer le produit ou la pièce
à la Société, tel que la Société vous l’indiquera, vous devrez l’emballer correctement. La Société n’est pas responsable des dommages subis lors du transport. La Société se réserve le droit d’utiliser des produits ou des
pièces remis en état, remis à neuf, réparés ou réusinés dans le processus de réparation ou de remplacement sous garantie. Lesdits produits ou pièces seront comparables en fonction et en performance aux produits et
pièces d’origine et seront garantis pendant le reste de la période de garantie originale.
Exclusion de dommages : L’OBLIGATION DE LA SOCIÉTÉ DE FOURNIR DES PIÈCES DE RECHANGE, OU DE RÉPARER OU REMPLACER LE PRODUIT, À SON CHOIX, CONSTITUE VOTRE SEUL ET UNIQUE RECOURS EN
VERTU DE LA PRÉSENTE GARANTIE LIMITÉE ET LA SEULE ET UNIQUE OBLIGATION DE LA SOCIÉTÉ. LA SOCIÉTÉ NE PEUT ÊTRE TENUE RESPONSABLE DE TOUT DOMMAGE INDIRECT, CONSÉCUTIF, ACCESSOIRE
OU SPÉCIAL DÉCOULANT DE L’UTILISATION OU DU RENDEMENT DU PRODUIT.
Certains territoires ou provinces ne permettant pas la limitation ou l’exclusion des dommages indirects ou consécutifs, la limitation ci-dessus peut ne pas s’appliquer à votre situation. La présente garantie vous confère
des droits spécifiques reconnus par la loi. D’autres droits pourraient également vous être accordés selon la législation locale en vigueur.
La présente garantie ne couvre que le remplacement ou la réparation des produits ou pièces défectueux à l’usine principale de la Société et ne comprend pas les frais de voyage et ni les dépenses quotidiennes pour une
réparation à domicile.
Toute aide que la Société vous fournit en dehors des dispositions, limitations ou exclusions de cette garantie limitée ne constituera en rien une renonciation auxdites dispositions, limitations ou exclusions, et ne prolongera
aucunement cette garantie pas plus qu’elle ne la remettra en vigueur.
La Société ne vous remboursera aucune dépense encourue par vous pour la réparation ou le remplacement de tout produit défectueux, sauf celles que vous avez encourues avec la permission écrite préalable de la Société.
Comment bénécier du service de garantie : Pour vous prévaloir de cette garantie, vous devez (a) aviser la Société à l’adresse ou au numéro de téléphone indiqués ci-dessous dans les sept (7) jours du constat de la
défectuosité couverte, (b) donner le numéro de modèle du produit et le numéro d’identification de la pièce et (c) décrire la nature de la défectuosité du produit ou de la pièce. Lors de votre demande de garantie, vous
devez présenter une preuve de la date d’achat originale. Si vous ne pouvez pas fournir une copie écrite de la garantie limitée originale, les dispositions de la garantie limitée écrite la plus récente de la Société concernant
ce produit particulier s’appliqueront. Vous trouverez les garanties limitées écrites les plus récentes des produits de la Société sur le site www.broan.ca.
Broan-NuTone Canada, Inc. 1140 Tristar Drive, Mississauga, Ontario L5T 1H9 www.broan.ca 800-637-1453
MODEL / MODÈLE / MODELO LA553WH
Page / Página 8
99528569A
Garantía limitada
Periodo y exclusiones de la garantía: Broan-NuTone LLC (la “Compañía”) garantiza al consumidor comprador original de su producto (“usted”) que el producto (el “Producto”) estará libre de defectos en
materiales o en mano de obra, por un periodo de un (1) año a partir de la fecha de compra original.
El periodo de garantía limitada para cualquier pieza de repuesto proporcionada por la compañía y para cualquier Producto reparado o reemplazado bajo esta garantía limitada debe ser lo que reste del periodo
de garantía original.
Esta garantía no cubre controles de velocidad, arrancadores de lámparas fluorescentes, tubos, bombillas de halógeno e incandescentes, fusibles, filtros, conductos, tapas de techo, tapas de pared ni otros
accesorios que pudieran ser comprados por separado e instalados con el producto. Esta garantía tampoco cubre (a) mantenimiento y servicio normal, (b) uso y desgaste normal, (c) Productos o piezas sujetos a
mal uso, abuso, uso anormal, negligencia, accidente, mantenimiento inadecuado o insuficiente, almacenamiento o reparación (que no sea reparación por parte de la Compañía), (d) daños causados por instalación
defectuosa, o bien instalación o uso contrario a las recomendaciones o instrucciones, (e) cualquier Producto que se haya movido de su punto de instalación original, (f) daños ocasionados por el medio ambiente
o los elementos naturales, (g) daños en tránsito, (h) desgaste natural del acabado, (i) Productos en uso comercial o no residencial, o (j) daños ocasionados por incendio, inundación u otro caso fortuito. Esta
garantía cubre solamente Productos vendidos a clientes originales en los Estados Unidos por la Compañía o a distribuidores de EE. UU. autorizados por la Compañía.
Esta garantía sustituye todas las garantías anteriores y no es transferible del comprador consumidor original.
No hay otras garantías: Esta garantía limitada contiene la única obligación de la Compañía y su único recurso ante productos defectuosos. Las garantías anteriores son exclusivas y en lugar de cualquier otra
garantía, expresa o implícita. LA COMPAÑÍA NIEGA Y EXCLUYE CUALQUIER OTRA GARANTÍA EXPRESA, Y NIEGA Y EXCLUYE TODAS LAS GARANTÍAS IMPLÍCITAS POR LEY, INCLUYENDO, ENTRE OTRAS,
LAS DE COMERCIALIZACIÓN Y APTITUD PARA UN PROPÓSITO EN PARTICULAR. Hasta el grado en que la ley aplicable prohíba la exclusión de las garantías implícitas, la duración de cualquier garantía implícita
aplicable está limitada al periodo especificado para la garantía expresa antes mencionada. Algunos estados no permiten limitaciones en la duración de una garantía implícita, así que la limitación anterior tal vez
no aplique en su caso. Cualquier descripción verbal o escrita del Producto es para el único propósito de identificarlo y no deberá considerarse como una garantía expresa.
Siempre que sea posible, toda disposición de esta garantía limitada deberá ser interpretada de tal forma que sea efectiva y válida de conformidad con la ley aplicable, pero si alguna disposición fuera considerada
prohibida o inválida, quedará sin efecto solo en virtud de dicha prohibición o invalidez, sin invalidar el resto de dicha disposición o las demás disposiciones restantes de la garantía limitada.
Recurso: Durante el periodo de garantía limitada aplicable, la Compañía, a su opción, suministrará piezas de repuesto, o reparará o reemplazará, sin cargo alguno, cualquier Producto o pieza del mismo, hasta
el grado en que la Compañía lo encuentre cubierto bajo esta garantía limitada y en incumplimiento de la misma en condiciones normales de uso y servicio. La Compañía le enviará el Producto reparado o
reemplazado o las piezas de repuesto sin cargo. Usted es responsable de todos los costos de retiro, reinstalación y envío, seguro u otros cargos de flete incurridos en el envío del Producto o pieza a la Compañía.
Si debe enviar el Producto o la pieza a la Compañía, tal como lo indique la Compañía, debe empaquetar adecuadamente el Producto o la pieza: la Compañía no se hace responsable por los daños en tránsito.
La Compañía se reserva el derecho de utilizar Productos o piezas reacondicionados, renovados, reparados o refabricados en el proceso de reemplazo o reparación de garantía. Dichos Productos y piezas serán
comparables en función y desempeño a un Producto o una pieza original y tendrán garantía durante el resto del periodo de la garantía original.
Exclusión de daños: LA OBLIGACIÓN DE LA COMPAÑÍA DE SUMINISTRAR PIEZAS DE REPUESTO, O DE REPARAR O REEMPLAZAR, A OPCIÓN DE LA COMPAÑÍA, SERÁ SU ÚNICO Y EXCLUSIVO RECURSO
BAJO ESTA GARANTÍA LIMITADA, Y LA ÚNICA Y EXCLUSIVA OBLIGACIÓN DE LA COMPAÑÍA. LA COMPAÑÍA NO SERÁ RESPONSABLE POR DAÑOS INCIDENTALES, INDIRECTOS, RESULTANTES O ESPECIALES
QUE SURJAN POR EL USO O DESEMPEÑO DEL PRODUCTO, O EN RELACIÓN CON EL MISMO.
Algunos estados no permiten la exclusión o limitación de daños incidentales o resultantes, por lo que la limitación antes mencionada podría no aplicarse a usted. Esta garantía le otorga derechos legales
específicos, y usted podría tener otros derechos que varían de un estado a otro.
Esta garantía cubre únicamente el reemplazo o la reparación de Productos defectuosos o piezas de los mismos en la planta principal de la Compañía, y no incluye el costo del viaje para el servicio de campo ni
los viáticos.
Cualquier asistencia que proporcione o procure la Compañía para usted fuera de los términos, limitaciones o exclusiones de esta garantía limitada no constituirá una renuncia a dichos términos, limitaciones o
exclusiones, ni dicha asistencia extenderá o renovará la garantía.
La Compañía no le reembolsará ningún gasto en el que usted haya incurrido al reparar o reemplazar cualquier Producto defectuoso, excepto los incurridos con el permiso previo por escrito de la Compañía.
Cómo obtener el servicio cubierto por la garantía: Para tener derecho al servicio cubierto por la garantía, usted debe (a) notificar a la Compañía a la dirección o número de teléfono que aparecen abajo en un
plazo de siete (7) días después de descubrir el defecto cubierto, (b) proporcionar el número de modelo y la identificación de la pieza y (c) describir la naturaleza de cualquier defecto en el Producto o la pieza.
En el momento de solicitar el servicio cubierto por la garantía, debe presentar un comprobante de la fecha de compra original. Si usted no puede presentar una copia de la garantía limitada original por escrito,
entonces regirán los términos de la garantía limitada por escrito más actualizada de la compañía para su producto en particular. Las garantías limitadas por escrito más actualizadas para los productos de la
Compañía se pueden encontrar en www.broan.com.
Broan-NuTone LLC 926 West State Street, Hartford, WI 53027 www.broan.com 800-637-1453