Loading ...
Loading ...
Loading ...
Oven Control Functions
For satisfactory use of your oven, become familiar with the various key pad functions and features of the oven.
(b
/ \
®
Select
Clean
@
®
Timer
Set/Off
®
Cook
Time
® ®
f.-×
<7j *ovEN ...... ........... *
..............
f8 m @ PREHEAT ..............................
Delay .... ' V- _ Warm&
_ STOP Hold
Start \%_. DOOR_.OCKED ........................................................................................_4) ....
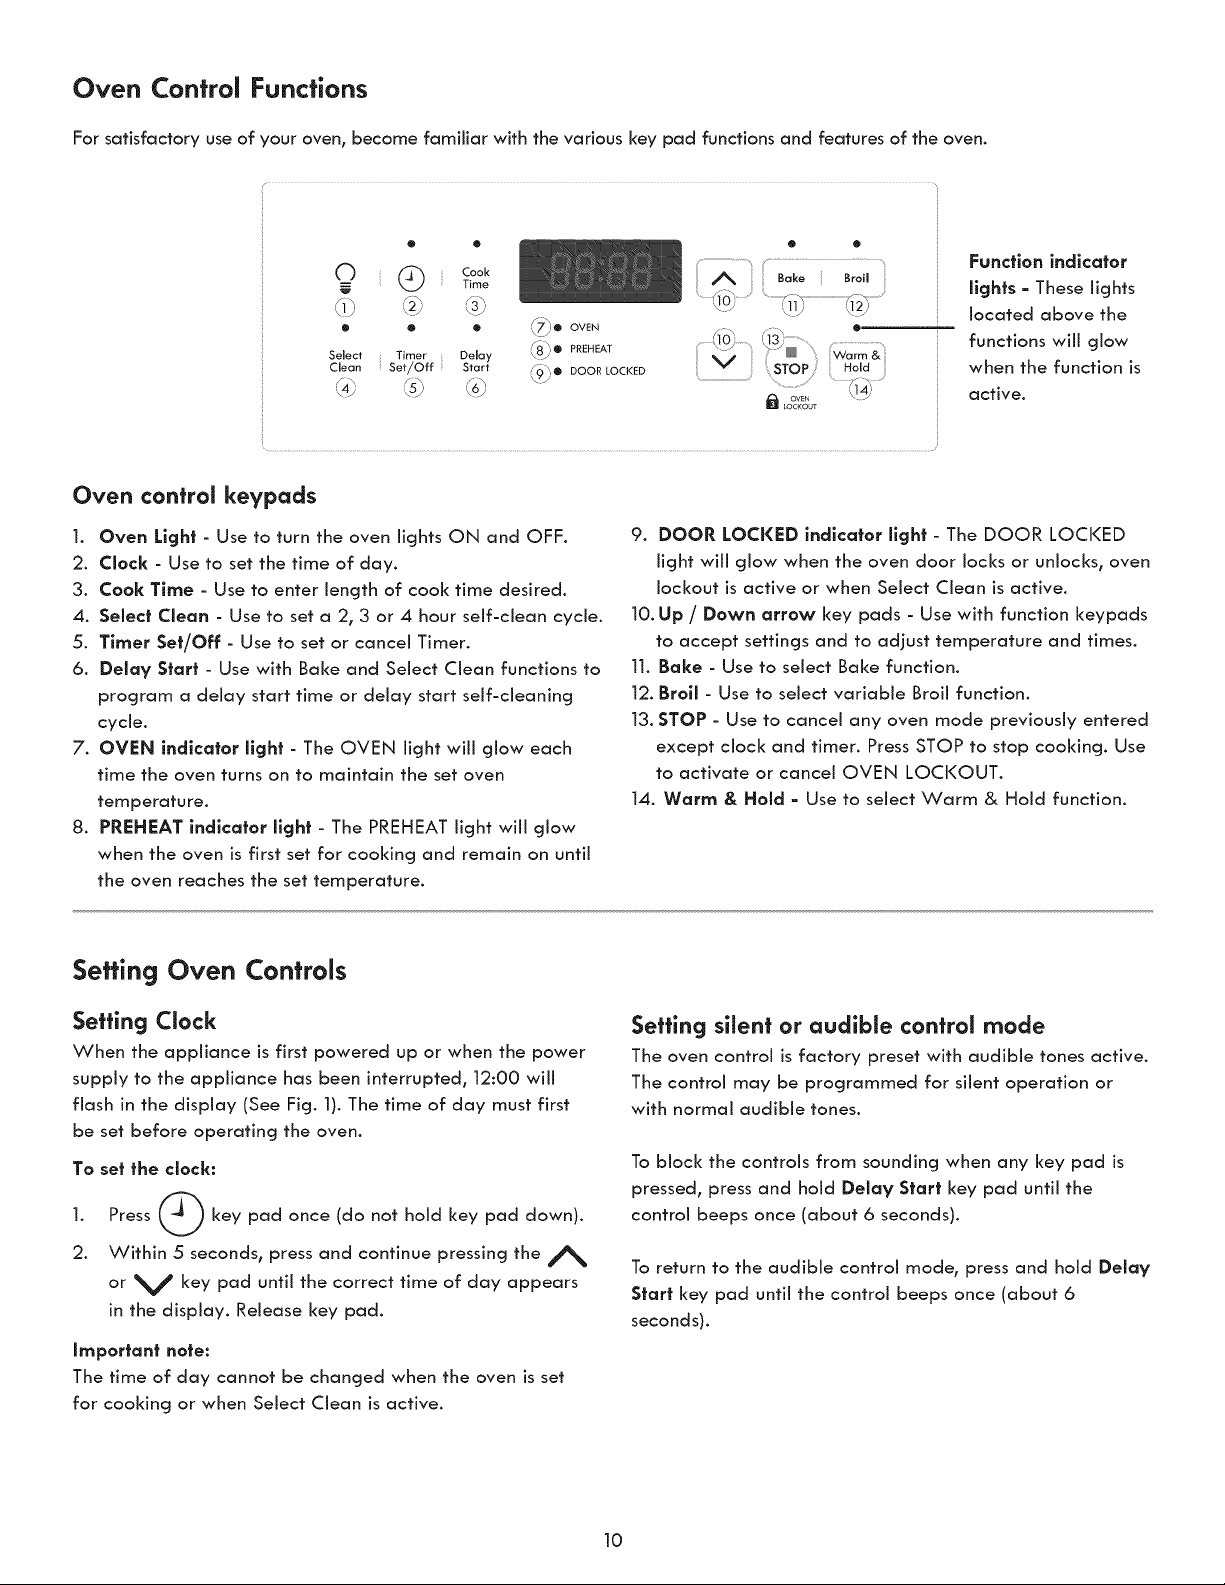
Function indicator
lights - These lights
located above the
functions will glow
when the function is
active.
Oven control keypads
1. Oven Light - Use to turn the oven lights ON and OFF.
2. Clock - Use to set the time of day.
3. Cook Time - Use to enter length of cool( time desired.
4. Select Clean - Use to set a 2, 3 or 4 hour self-clean cycle.
5. Timer Set/Off - Use to set or cancel Timer.
6. Delay Start - Use with Bake and Select Clean functions to
program a delay start time or delay start self-cleaning
cycle.
7. OVEN indicator light - The OVEN light will glow each
time the oven turns on to maintain the set oven
temperature.
8. PREHEAT indicator light - The PREHEAT light will glow
when the oven is first set for cooking and remain on until
the oven reaches the set temperature.
9. DOOR LOCKED indicator light - The DOOR LOCKED
light will glow when the oven door locks or unlocks, oven
lockout is active or when Select Clean is active.
10. Up / Down arrow key pads - Use with function keypads
to accept settings and to adjust temperature and times.
11. Bake - Use to select Bake function.
12. Broil - Use to select variable Broil function.
13. STOP - Use to cancel any oven mode previously entered
except clock and timer. Press STOP to stop cooking. Use
to activate or cancel OVEN LOCI<OUT.
14. Warm & Hold - Use to select Warm & Hold function.
Setting Oven Controls
Setting Clock
When the appliance is first powered up or when the power
supply to the appliance has been interrupted, 12:00 will
flash in the display (See Fig. 1). The time of day must first
be set before operating the oven.
To set the clock:
.
2.
Press _J key pad once (do not hold key pad down).
Within 5 seconds, press and continue pressing the A
or V key pad until the correct time of day appears
in the display. Release key pad.
Important note:
The time of day cannot be changed when the oven is set
for cooking or when Select Clean is active.
Seffing sitent or audible control mode
The oven control is factory preset with audible tones active.
The control may be programmed for silent operation or
with normal audible tones.
To block the controls from sounding when any key pad is
pressed, press and hold Delay Start key pad until the
control beeps once (about 6 seconds).
To return to the audible control mode, press and hold Delay
Start key pad until the control beeps once (about 6
seconds).
10
Loading ...
Loading ...
Loading ...