Loading ...
Loading ...
Loading ...
SiUS091133 Outdoor Unit: RXS24LVJU
Removal Procedure 344
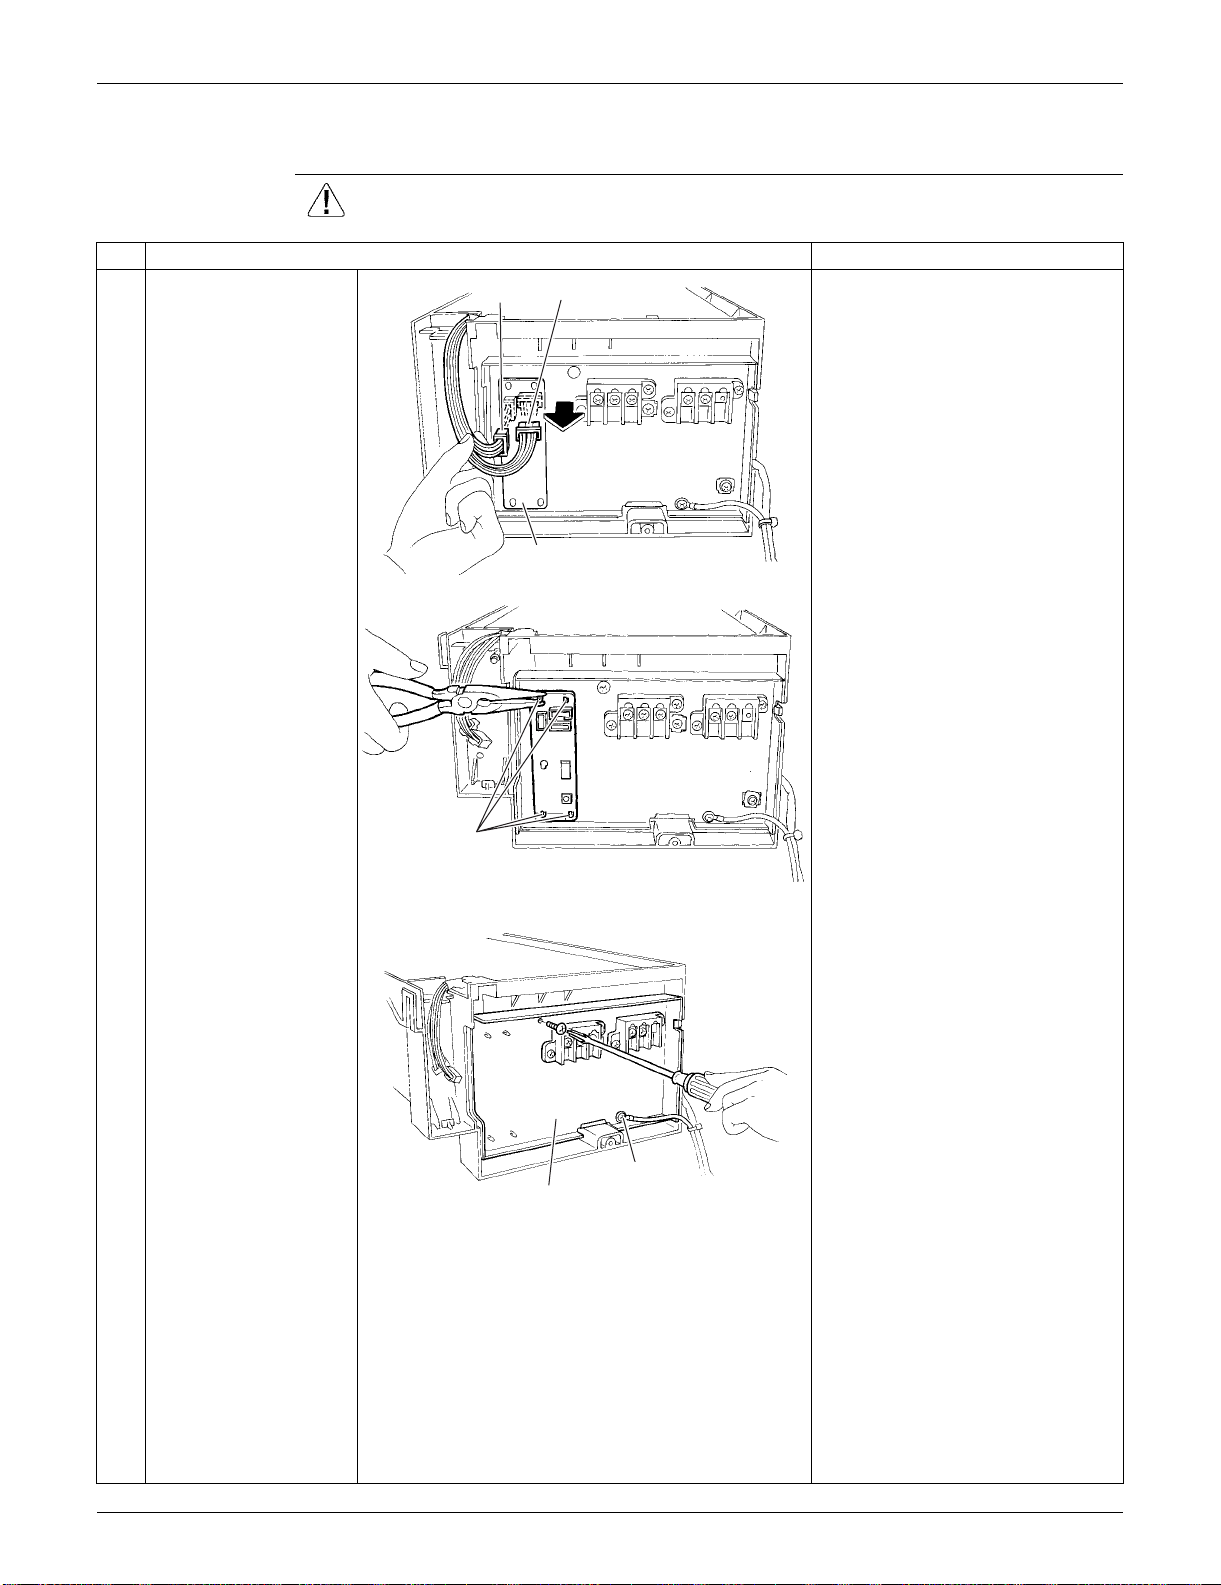
6.3 Removal of PCBs
Procedure Warning Be sure to wait for 10 minutes or more after turning off all power supplies
before disassembling work.
Step
Procedure Points
1
Disconnect the
connectors [S52]
[S102] from the service
monitor PCB.
Preparation
Remove the electrical box
according to the "Removal of
Electrical Box".
2
Detach the 4 clamps
with pliers and remove
the service monitor
PCB.
3
Remove the screws of
the terminal board and
the ground wire.
Service monitor PCB
[S52]
[S102]
(R16707)
Clamp
(R16708)
Terminal board
(R16709)
Ground wire
Loading ...
Loading ...
Loading ...