Loading ...
Loading ...
Loading ...

PREPARATION
Plan where the ductwork will be located. Install proper-sized ductwork, and roof or wall cap, depending on where
you will be venting your hood. Adjust your measurements to accommodate heights of ceilings, cabinets, or range-
tops. Remember to plug in and test the hood prior to installation. When planning for the installation of the vent
hoodplease include an opportunity to access the top of the hood when the installation i s complete. This i s necessary
for service or replacing parts over time as there are several fasteners that will need to be accessed over time.
Electrical Requirements - Hood comes with
foot
cord, and will plug into the top of the hood and then into an
GFI protected outlet that should be wired to a AMP breaker.
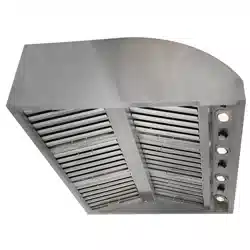
STEP1
wall hood installation
3-
15
110V
Secure hood to wall using appropriate screws and parts.
Different wall material situation using different method.
Wooden wall without studs:
Using three mounting bracket (pictured) to help secure the
hood to the wall.
1. Using 8pcs of flat screws #1 through hole “A” to secure the
3pcs of mounting brackets on the back of the hood.
2. Using 2pcs of mounting screws #3 through top of the hole
“B” to secure the hood on the wall.
3. Using 2pcs f mounting screws #2 through hole “C” into the
Wall to make double secure.
Dry wall or sheet rock wall:
1. Using 8pcs of flat screws #1 through hole “A” to secure the 3pcs
of mounting brackets on the back of the hood.
2. Beat 2pcs of wall anchors #3 (make sure the inside screws are
taking out) into the wall first, screw the wall anchor’s screw
into the wall anchors (leave a space to hang the mounting bracket).
3. Hang the hood on the wall, then tighten the screws #3 into the wall
anchors.
Install the range hood on the wall studs:
Using 4pcs of mounting screws #2 directly to the wall studs.
-OPTIONAL-
If not using a duct cover, using #4 of shorter mounting screws,
make sure top mounting screws are secured into soffit or cabinet
framing use additional mounting screws, if necessary.
USER MANUAL |
8
Loading ...
Loading ...
Loading ...