Loading ...
Loading ...
Loading ...
1110
1. To download the VeSync app, scan the
QR code or search “VeSync” in the Apple
App Store
®
or Google Play Store.
Basket Tips
VeSync App Setup
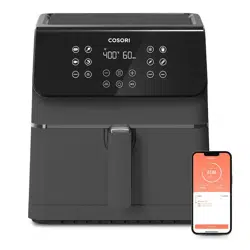
• Only separate the baskets to clean or
after cooking.
• The button guard protects the release
button from being pressed accidentally.
Slide the button guard forward to press
the basket release button. [
Figure 2.2
]
• Never press the release button while
carrying the baskets.
• Only press the basket release button
with the baskets resting on a counter, or
any level, heat-resistant surface.
• The handle is attached to the inner
basket, not the outer basket. [
Figure 2.3
]
When you press the release button, the
outer basket will drop.
Note:
• Do not unscrew the basket handle from
the baskets.
• To order accessories, please contact
Customer Support (see page 25).
Note:
• You can change the name and icon at any
time by going to the smart air fryer screen and
tapping
.
• You can use the VeSync app to connect your
smart air fryer to Amazon Alexa or Google
Assistant™.
Note: You must create your own VeSync account
to use third-party services and products. These
will not work with a guest account. With a VeSync
account, you can also allow your family and friends
to control your smart air fryer.
Note: Due to ongoing updates and improvements,
the VeSync app may be slightly dierent than
shown in the manual. In case of any dierences,
follow the in-app instructions.
Note: For Android
™
users, choose “Allow” to use
VeSync.
2. Open the VeSync app. If you already
have an account, tap Log In. To create a
new account, tap Sign Up.
3. Tap + and select your smart air fryer.
4. Follow the in-app instructions to set up
your smart air fryer.
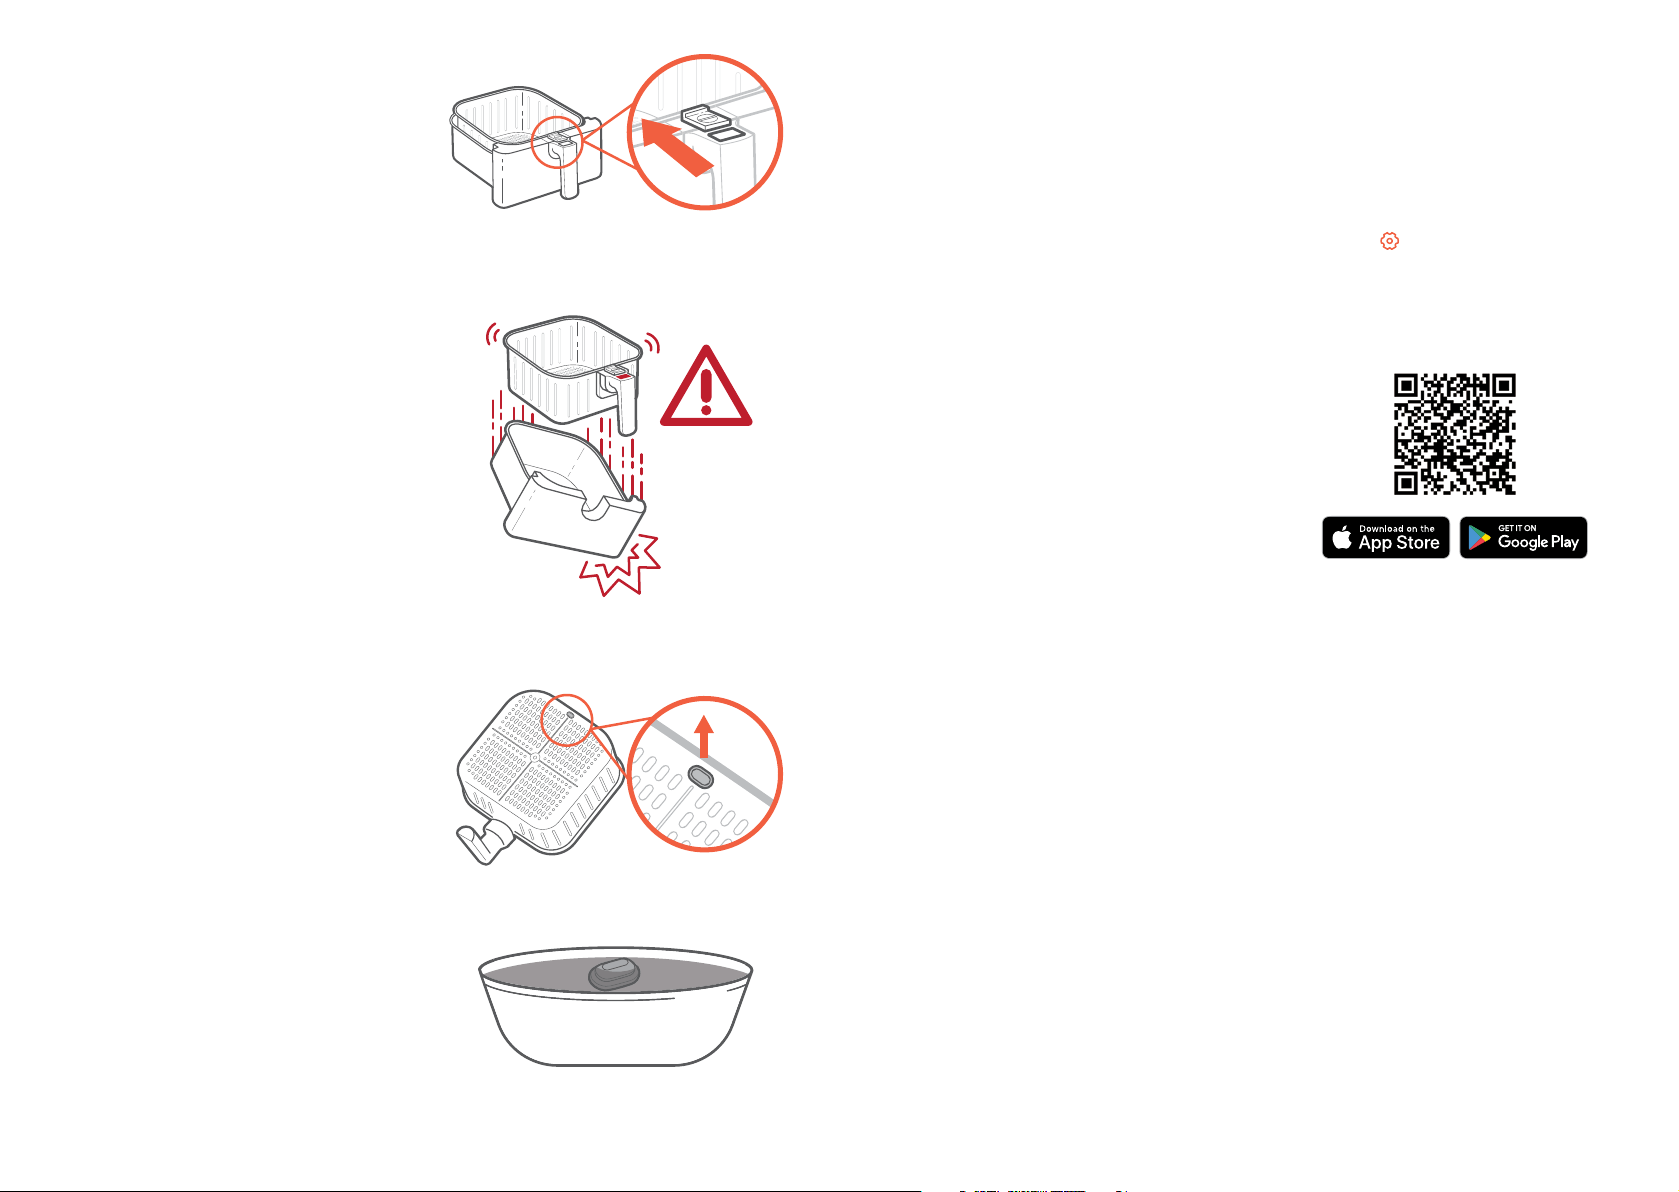
Rubber Stopper
• The inner basket contains a rubber
stopper made of safe, FDA-approved
material. This stopper prevents the
inner basket from directly touching
the outer basket and, in rare cases,
damaging the non-stick coating on
the baskets.
• The stopper can safely be removed
based on user preference. For easy
removal, start from the bottom of the
inner basket and pull out one side of the
stopper at a time. [
Figure 2.4
]
• If you want to place the rubber stopper
back in the inner basket, first soak it
in water. [
Figure 2.5
] Then push the
stopper back in through the bottom
of the basket. Push in one side of the
stopper at a time.
Figure 2.2
Figure 2.3
Figure 2.4
Figure 2.5
Loading ...
Loading ...
Loading ...