Loading ...
Loading ...
Loading ...
Operation Guide 5595
E-39
Specifications
Accuracy at normal temperature:
±
30 seconds a month
Digital Timekeeping: Hour, minutes, seconds, p.m. (P), month, day, day of the
week
Time format: 12-hour and 24-hour
Calendar system: Full Auto-calendar pre-programmed from the year 2000 to 2039
Other: 4 screen formats (Day of the Week, Month - Day, Hour : Minutes,
Seconds); Home City code (can be assigned one of 31 city codes);
Standard Time/Daylight Saving Time (summer time)
Analog Timekeeping: Hour, minutes (hand moves every 20 seconds)
World Time: 27 cities (29 time zones)
Other: Daylight Saving Time/Standard Time
Stopwatch:
Measuring unit: 1 second
Measuring capacity: 59' 59"
Measuring modes: Elapsed time, split time, two finishes
E-38
Troubleshooting
Time Setting
■ The current time setting is off by hours.
Your Home City setting may be wrong (page E-12). Check your Home City setting and
correct it, if necessary.
■ The current time setting is off by one hour.
You may need to change your Home City’s standard time/daylight saving time
(DST) setting. Use the procedure under “Adjusting the Digital Time and Date
Settings” (page E-15) to change the standard time/daylight saving time (DST) setting.
World Time Mode
■ The time for my World Time City is off in the World Time Mode.
This could be due to incorrect switching between standard time and daylight saving
time. See “To specify standard time or daylight saving time (DST) for a city” (page E-20)
for more information.
E-37
To change the illumination duration
1. In the Timekeeping Mode, hold down A until the seconds start to flash. This is
the setting screen.
2. Press C nine times so the illumination duration setting screen is on the display.
3. Press D to toggle the illumination duration between 1.5 seconds (
) and
3seconds (
).
4. After the settings are the way you want, press A to exit the setting screen.
Illumination Precautions
x Illumination may be hard to see when viewed under direct sunlight.
x Illumination turns off automatically whenever an alarm sounds.
x Frequent use of illumination runs down the battery.
E-36
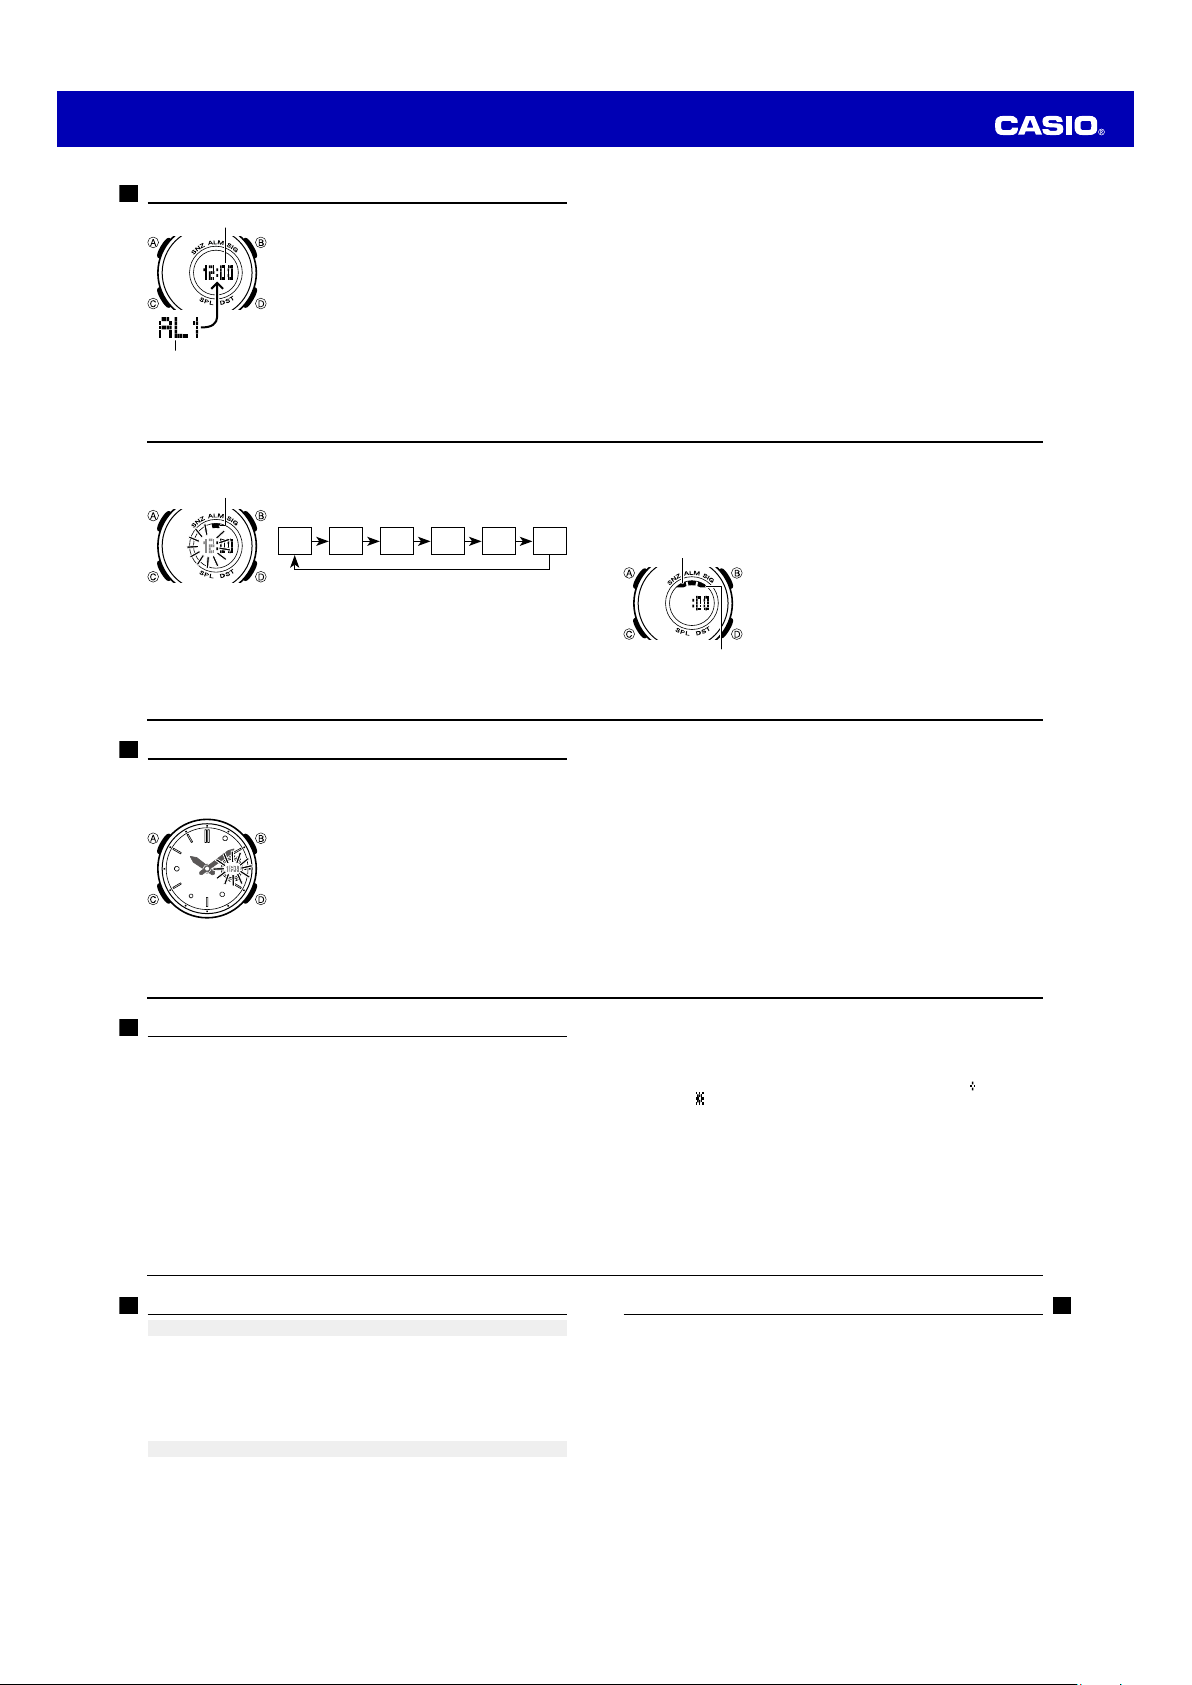
Illumination
The face of the watch is illuminated for easy reading in the dark.
To turn on illumination
In any mode (except when a setting screen, with flashing digits is on the display),
press B to illuminate the display.
x You can use the procedure below to select either 1.5seconds or 3 seconds as
the illumination duration. When you press B, the display will remain illuminated for
about 1.5seconds or 3 seconds, depending on the current illumination duration
setting.
E-35
x If you need to advance the analog time setting a long way, hold down D until
the time starts advancing at high speed, and then press B. This locks the high-
speed hand movement, so you can release the two buttons. High-speed hand
movement continues until you press any button. It will also stop automatically
after the time advances 12hours or if an alarm (daily alarm, Hourly Time Signal,
or countdown beeper) starts to sound.
4. Press A to exit the setting screen.
x The watch will automatically adjust the minute hand slightly to match its internal
second count when you exit the setting screen.
x To return to the Timekeeping Mode, press C.
E-34
Adjusting the Analog Hand Setting
Use the following procedure to adjust the analog hands so their settings match the
digital time.
To adjust the analog time
1. Use C to select the Hand Setting Mode as shown
on page E-9.
2. Hold down A until the current digital time starts to
flash, which indicates the analog setting screen.
3. Press D to advance the analog time setting by
20seconds.
x Holding down D advances the analog time setting
at high speed.
E-33
5. Press A to exit the setting screen.
To test the alarm
In the Alarm Mode, hold down D to sound the alarm.
To turn an alarm and the Hourly Time Signal on and off
1. In the Alarm Mode, use D to select an alarm or the
Hourly Time Signal.
2. When the alarm or the Hourly Time Signal you want is
selected, press A to toggle it between on and off.
x The alarm on indicator (when any alarm is on), snooze
alarm indicator (when the snooze alarm is on), and the
Hourly Time Signal on indicator (when the Hourly Time
Signal is on) are shown on the display in all modes.
To stop the alarm
Press any button.
Snooze alarm indicator
Hourly time signal on
indicator
E-32
To set an alarm time
1. In the Alarm Mode, use D to scroll through the alarm
screens until the one whose time you want to set is
displayed.
AL1 AL3 SNZAL2 AL4 SIG
DDDDD
D
2. Hold down A for about two seconds until the alarm time starts to flash. This is
the setting screen.
3. Press C to move the flashing between the hour and minute settings.
4. While a setting is flashing, use D (+) and B (–) to change it.
x When setting the alarm time using the 12-hour format, take care to set the time
correctly as a.m. (no indicator) or p.m. (P indicator).
Alarm ON/OFF indicator
E-31
To enter the Alarm Mode
Use C to select the Alarm Mode as shown on page E-9.
x The snooze alarm screen is indicated by SNZ, while the other alarm screens are
numbered AL1 through AL4. The Hourly Time Signal screen is indicated by SIG.
x When you enter the Alarm Mode, the data you were viewing when you last exited
the mode appears first.
E-30
Using the Alarm
When an alarm is turned on, the alarm tone will sound
when its alarm time is reached. One of the alarms is a
snooze alarm, while the other four are daily alarms. You
also can turn on an Hourly Time Signal that causes the
watch to beep twice every hour on the hour.
Alarm number
Alarm time (Hour : Minutes)
Loading ...
Loading ...
Loading ...