Loading ...
Loading ...
Loading ...
10
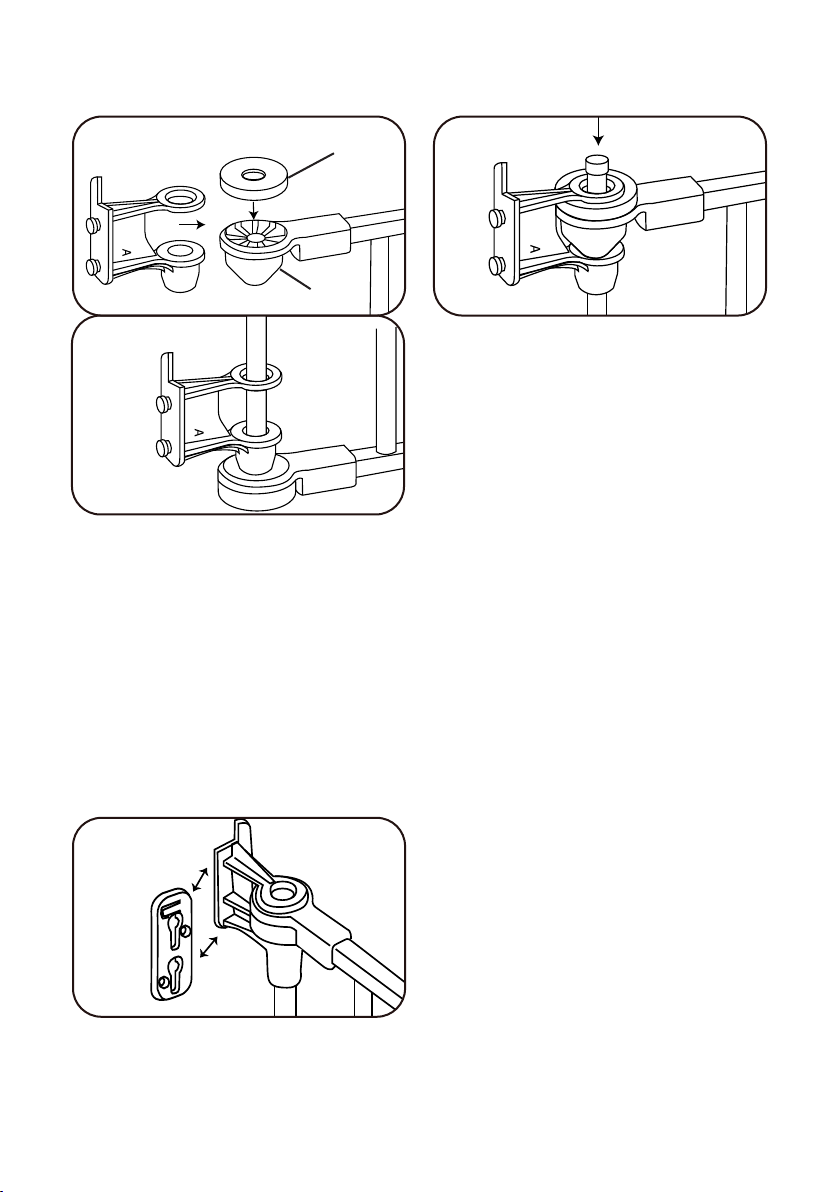
Step 8
For the other end of the gate with the “recessed” hinges,
you will use Hinge Bracket A both at the top and bottom.
Place the Top Hinge Covers on both the top and bottom
hinges. Slide Wall Bracket A over the top hinge and insert
Connecting Spindle. Slide the second Wall Bracket A
onto the Connecting Spindle with the cone shaped end
down.
Step 9
Attach the Wall Plates to the Wall Brackets by aligning
the key slots and slide in until the Wall Plate locks into
place.
Wall Bracket A
Recessed
Hinge
Cover
Recessed hinge
Wall Bracket A
Loading ...
Loading ...
Loading ...