Loading ...
Loading ...
Loading ...

6
1. Make sure all equipment being connected is powered off.
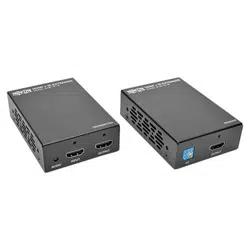
2. Connect the HDMI source to the transmitter unit’s HDMI Input port.
3. Optional: Connect an HDMI monitor to the transmitter unit’s OUTPUT
port using a P569-XXX-LOCK* High Speed HDMI Cable with Ethernet and
Locking Connector.
4. Connect the IR-TX cable to the IR port on the transmitter unit.
Note: The IR-TX cable transmits the IR signal to the device being controlled.
Locate the IR-TX unit in an area with clear line of sight to the source (e.g. Blu-ray
player).
5. Connect the external power supply to the transmitter unit, then plug the
external power supply into a Tripp Lite Surge Protector, Uninterruptible
Power Supply (UPS) or Power Distribution Unit (PDU).
6. Using Cat5e/6 cable, connect the transmitter unit’s RJ45 Output port to
the receiver unit’s RJ45 Input port.
7. Using a P569-XXX-LOCK* High Speed HDMI Cable with Ethernet and
Locking connector, connect the HDMI monitor to the receiver unit’s
HDMI Output port.
8. Connect the IR-RX cable to the IR port on the receiver unit.
Note: The IR-RX cable receives the IR signal from a remote control. Locate the
IR-RX unit in an area with a clear line of sight to the remote control.
9. Connect the external power supply to the receiver unit, then plug the
external power supply into a Tripp Lite Surge Protector, UPS or PDU.
10. Turn on the power to all connected equipment.
11. If necessary, use the equalization control to adjust the video image.
Note: An improper Equalization setting can result in no image being displayed at
all. If an image is not displayed on your monitor, try adjusting the Equalization.
* Available in lengths up to 15 ft., with XXX referring to length
(e.g. 015 = 15 ft., 006 = 6 ft., etc.)
Installation
16-03-172-9334FF.indd 6 3/23/2016 9:18:53 AM
Loading ...
Loading ...
Loading ...