
Loading ...
Loading ...
Loading ...
5
ENGLISH
ASSEMBLY AND ADJUSTMENTS
WARNING: To reduce the risk of serious personal
injury, turn unit off and disconnect it from
power source before making any adjustments or
removing/installing attachments or accessories.
An accidental start-up can causeinjury.
5. Slide the washer over the bolt of the upper-handle
attachment knobs and loosely assemble the
entireassembly.
6. Rotate the upper handle into its operating position.
7. Tighten the upper handle knobs. If it is too tight or too
loose, adjust the upper-handle attachment knobs to
adjust the clamping. They should be tight enough so
the handles are held firmly.
Fig.D
5
4
3
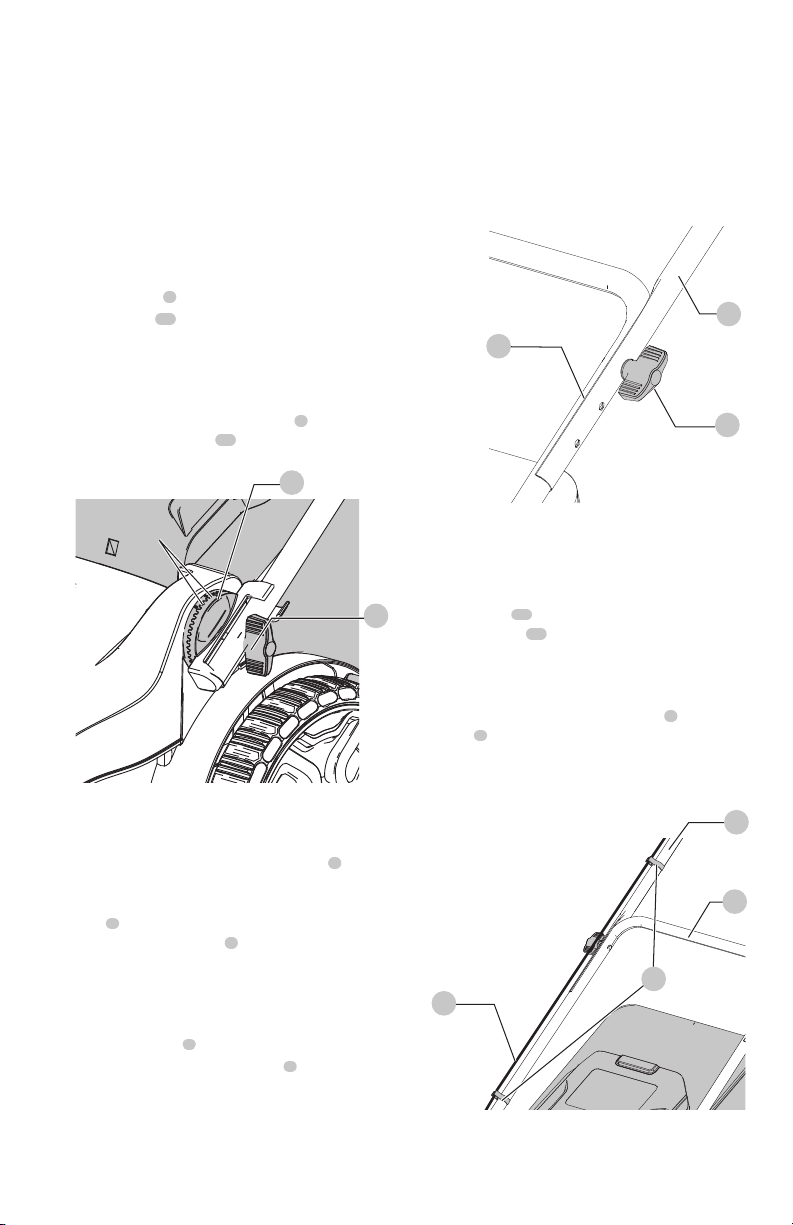
Securing the Motor Cable (Fig. E)
CAUTION: Attach cable so that it does not become
stretched or pinched in the joints of the handles during
use or folding. This can cause damage to the cord.
The motor cable
13
has to be fixed to the handles using
the cable restraints
14
that are already attached to
thehandle.
1. Place the handles in operating position, see Adjusting
Lower Handle section.
2. Run the cable up the front of the lower
4
and
upper
3
handles.
3. Pull back the cable restraint.
4. Slide the motor cable under the clip and ensure it is fully
held in place by the restraint.
Fig.E
13
14
4
3
WARNING: Before assembly, make sure the bail
handle is released and the mower is unplugged.
Adjusting Lower Handle (Fig. A, C)
There are 2 operating heights for the handle to
accommodate multiple operators.
1. Lift lower handle
4
into place.
2. Align the arrow
11
on the base of the mower with 1 or
2 on the base of thehandle.
CAUTION: Ensure each side of the lower handle is set
on the same number. The arrow must be lined up with
1 or 2 for operation.
3. Tighten the handle height adjust knobs
6
. As you close
each, make sure the teeth
12
are engaged. Tighten the
lower handle knobs to secure the lower handle in place.
Fig.C
11
12
6
Attaching/Adjusting Upper Handle
(Fig.A,D)
1. Remove the upper-handle attachment knobs
5
,
washers, and bolts from the handle.
2. Line up the holes on the bottom of the upper
handle
3
with one of the three handle height holes on
the top of the lower handle
4
.
NOTE: Make sure the cord is located on the front of both
handles. If it is not it may result in the cord tangling and the
inability to easily store the mower.
3. Fit the upper handle part to the lower handle using the
upper handle knobs
5
, washers and bolts.
4. From the outside of the upper handle
3
, slide the lever
bolt through the holes.
Loading ...
Loading ...
Loading ...