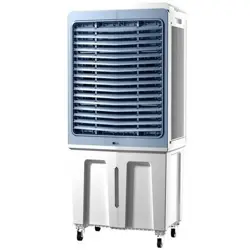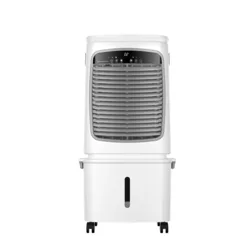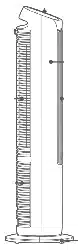

User Manual
Evaporative Air Cooler
Before using your TOSOT Evaporative Air Cooler,
please read this user manual in its entirety.
MODEL NUMBER
KSWA-04S63Dg

Welcome to the TOSOT Direct Family!
Keep the original packaging material including packing foam, carton and printed
material until you decide to keep the unit. If you need to return the unit, having all of
the original packaging material will make it much easier.
1. If you have not operated the humidification function within the last month, please
clean the water tank before powering on.
We're extremely happy to welcome you as a new member of our family! Please
read the tips below before using your product.
2. Replace the water in the water tank every day to prevent the growth of bacteria.
Tips

Table of Contents
Installation and Setup
Electrical Safety Warning
Specifications
Parts List
Installation
Features
Using the Ice Pack
Using the Aromatherapy Box
Half-Light Display
Memory Function
Auto Standby
Operation
Adding Water
Control Panel
Remote Control
Maintenance
Troubleshooting
Warranty&Customer Support
--------------------------------------------
---------------------------------------
------------------------------------------------------------
----------------------------------------------------------------
-------------------------------------------------
------------------------------------
----------------------------------------------------
----------------------------------------------------
----------------------------------------------------------
-----------------------------------------------------------------
----------------------------------------------------------
----------------------------------------------------------
-------------------------------------------------------
-------------------------------------------------------------
-------------------------------------------------------
--------------------------------------
--------------------------------------------------------
Important Safety Instructions
01
01
02
03
04
05
07
07
08
08
08
08
09
09
10
12
13
14
15
--------------------------------------
---------------------------------------------------------------

Safety and Instructions
01
Installation and Setup
Your safety and the safety of others are very important to us. Please read the
following safety precautions before use and installation. A digital version can be
obtained from customer support.
This appliance is not intended for use by persons (including children) with
reduced physical, sensory, or mental capabilities or lack of experience and
knowledge unless they have been given supervision or instruction concerning
the use of the appliance by a person responsible for their safety. Children
should be supervised to ensure they do not play with the appliance.
Do not place the unit under high temperature or low temperature. In the
summertime, the water may evaporate and cause odor, so please add fresh
water regularly. In the wintertime when the indoor temperature is below 32°F,
please add warm water into the water tank if you want to use it. After
operation, use a towel to dry the water tank.
Don’t insert foreign objects
into air inlet or air outlet.
Do not let liquid get into the air cooler. Do not wash the product in water.
The water level in the tank should not exceed the highest water level, and
during humidification, the total water level in the tank should not drop below
the lowest water level.
After the water tank is filled with water, do not tilt the unit when placing or
moving it. To move the unit, please move it slowly to prevent water overflow.
To Reduce The Risk Of Fire, Electric Shock Or Injury To Persons, Do Not Use
Replacement Parts That Have Not Been Recommended By The Manufacturer
(e.g. Parts Made At Home Using A 3D Printer).

02
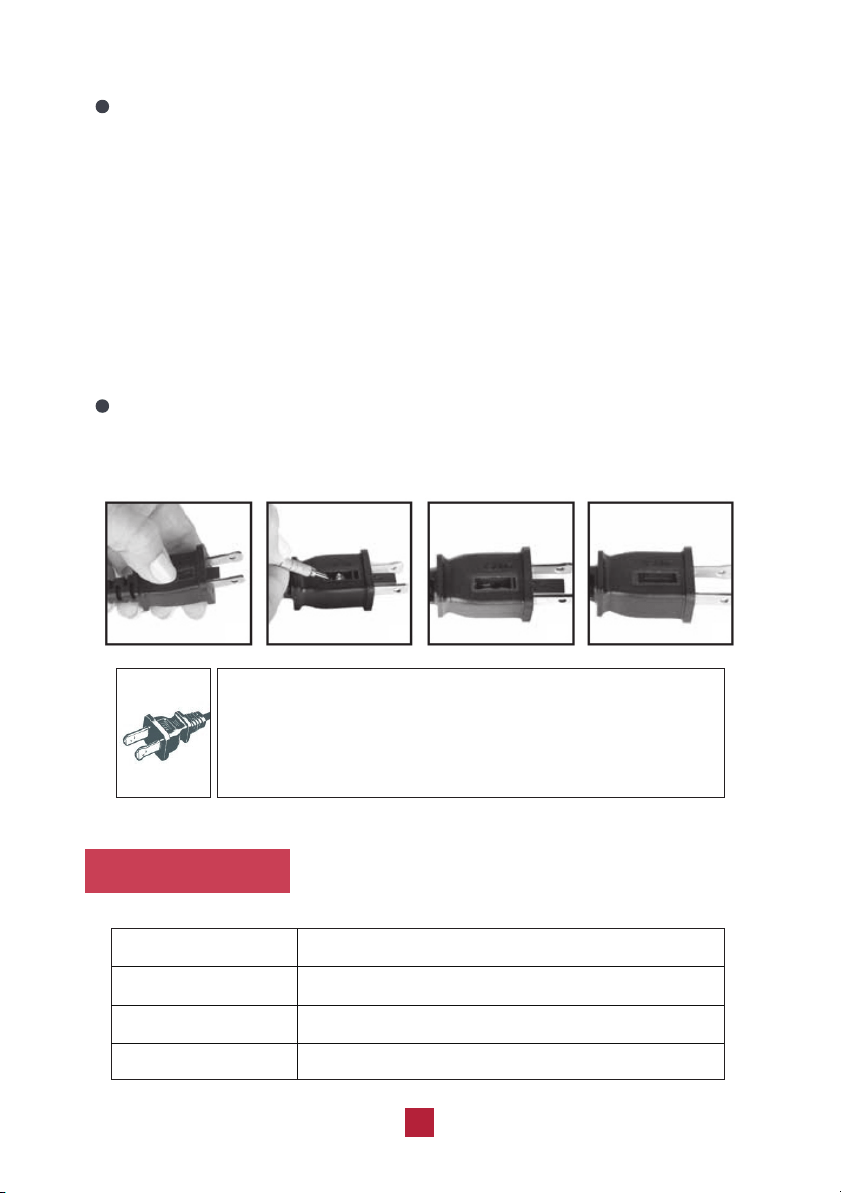
Electrical Safety Warning
power socket should be the same as that of the plug of electric appliances.
The plug must be inserted into the socket tightly.
Always plug into a fixed 120V 60 Hz AC outlet.
To prevent overload, do not use a multi-plug power strip. The capacity of the
WARNING: To reduce the risk of fire or electric shock, do not use this air
cooler with any solid-state speed control device.
Do not use the air cooler if the cord or plug is damaged.
Do not wind the appliance with the power cord; otherwise, the insulating
coating of the power cord may be damaged.
Do not cover the power cord with a rug or carpeting. Do not route the cord
under furniture or appliances.
Only for household use. Do not use the unit outdoors or for commercial use.
When you do not use the product, please unplug the power plug. Please be
careful when inserting or plugging the plug. Do not pull the power cord
by hand.
When using the humidification function, do not operate it in an enclosed
space for a long time to prevent high humidity.
Do not bend the power cord or put heavy objects on the power cord.
This product employs overload protection (fuse). A blown fuse indicates an
overload or short-circuit situation. If the fuse blows, unplug the product from
the outlet. Replace the fuse as per the user servicing instructions (follow
product marking for proper fuse rating) and check the product. If the
replacement fuse blows, a short-circuit may be present and the product
should be discarded or returned to an authorized service facility for exam-
ination and/or repair.
03
THIS APPLIANCE HAS A POLARIZED PLUG (one blade is wider than the other).
To reduce the risk of electric shock, this plyg is intended to fit in a polarized
outlet only one way. If the plug dose not fit fully in the outlet, reverse the plug.
If it still does not fit, contact a qualified electrician to install the proper outlet
Always use AC 120V~,60Hz power supply.
DO NOT ATTEMPT TO MODIFY THIS PLUG OR DEFE AT THIS SAFETY
FEATURE IN ANY WAY.
Specifications
Power Supply
Rated Power
Tank Capacity
Max Noise Level
AC120V, 60Hz
50W
1.06Gal / 4L
63dB(A)
User Servicing Instructions
a) Grasp plug and remove it from the receptacle or other outlet device. Do not
unplug by pulling on the cord.
b) Open the fuse cover. Slide open fuse access cover on top of attachment
plug towards blades.
c) Remove the fuse carefully. Push the fuse from the other side to remove the
fuse.
d) Risk of fire. Replace fuse only with 2.5 Amp, 125 Volt fuse.
e) Close fuse cover. Slide closed the fuse access cover on top of attachment
plug.
Risk of fire. Do not replace the attachment plug. Contains a safety device
(fuse, AFCI, LCDI) that should not be removed. Discard the product if the
attachment plug is damaged.
04
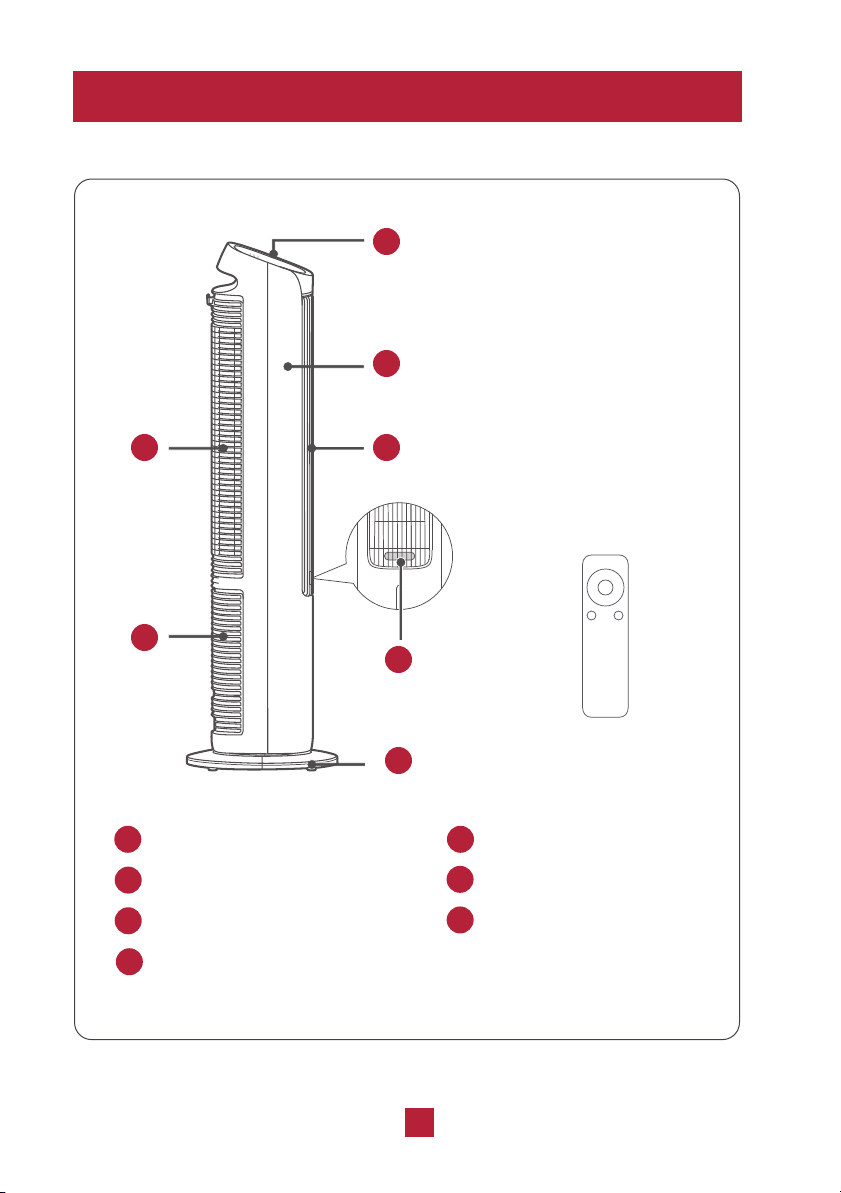
Parts List
1
2
3 4
5
6
7
Remote Control
Control Panel Front Case
Cooling Pad and Grill
Air Outlet
Water Tank Aromatherapy Box
Base
1 2
3
4
5
7
6
TIMERPRES
+
-
OSC.
ET
MODE HUM.
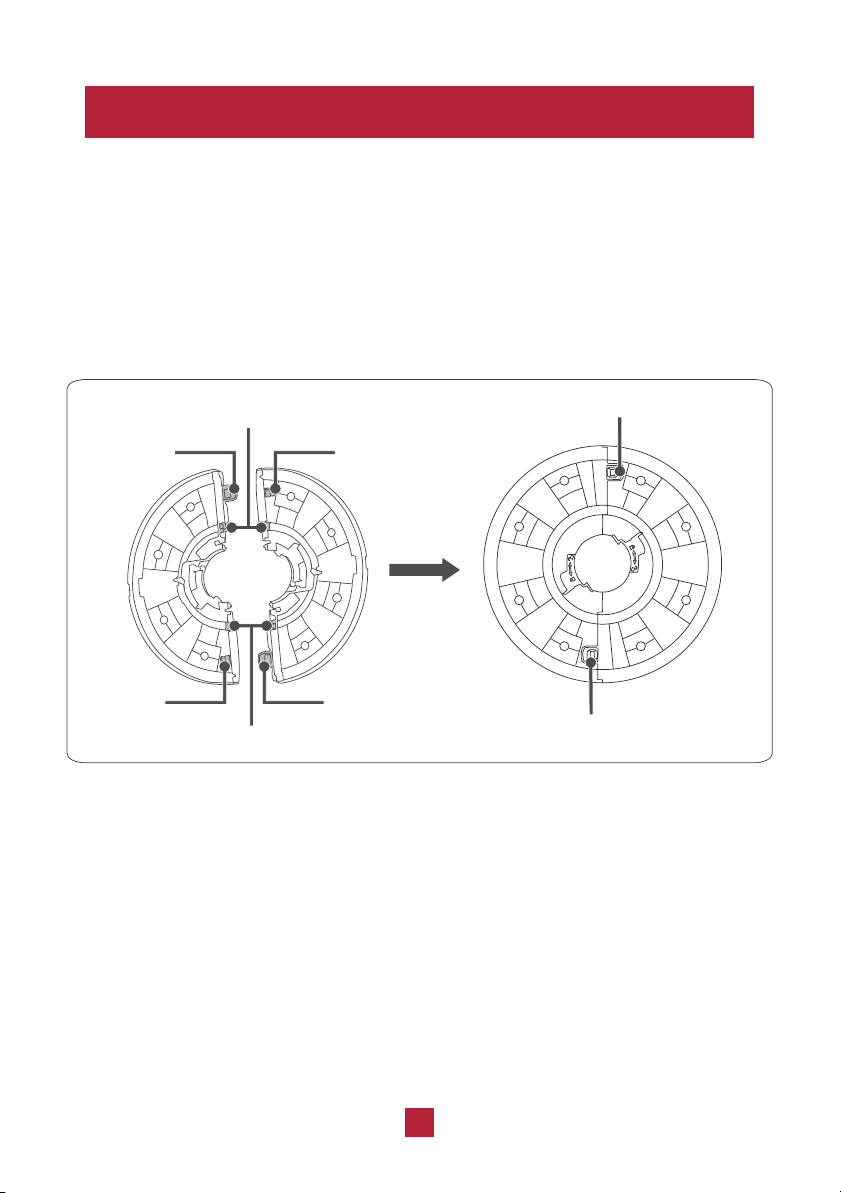
Installation
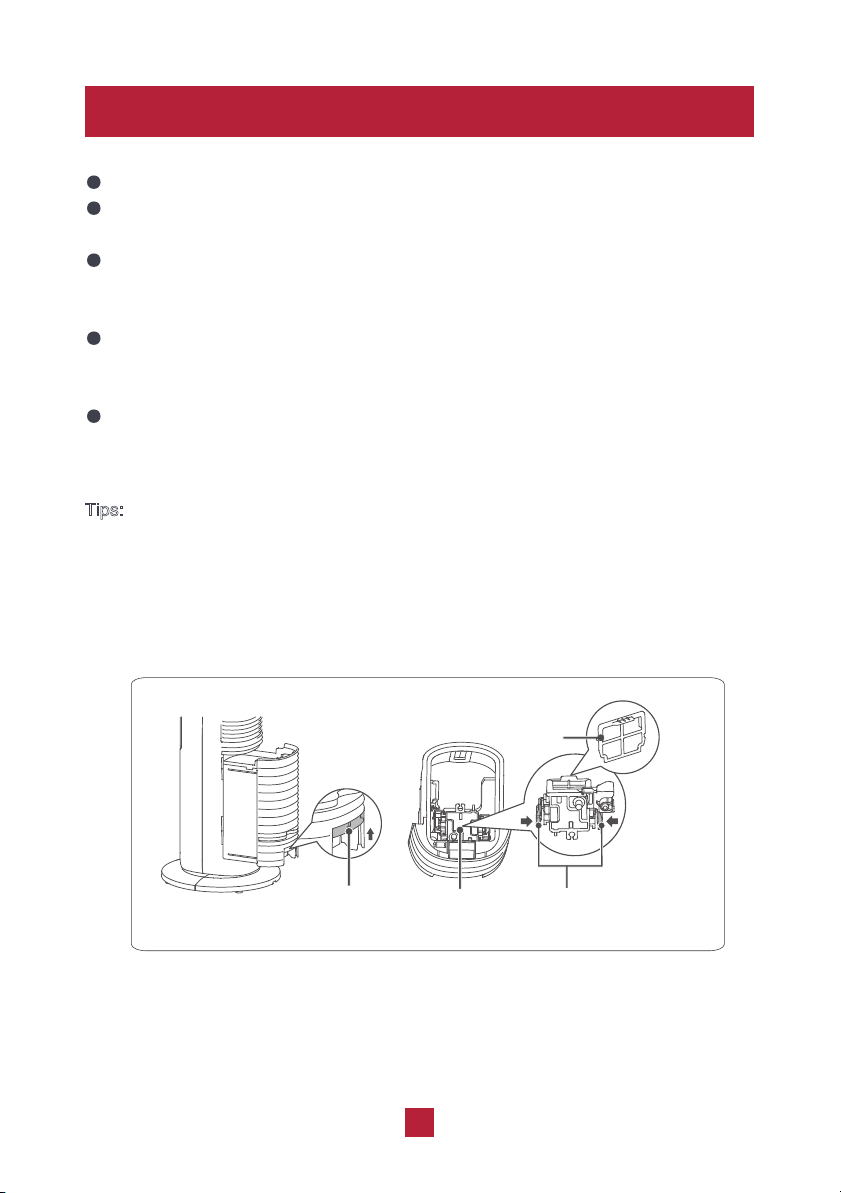
Please assemble the base according to the following installation method. Do not use it
if not assembled properly.
1. Take the two parts of the base and the unit body out of the box. Rotate the two part
of the base along the semicircular positioning slot until they are at the same level as
the bottom surface and the clasps at the two sides are locked.
05
Semicircular Positioning Slot
Clasp Hole Clasp
Semicircular Positioning Slot
Clasp Clasp Hole
Lock the Clasp Hole
Lock the Clasp Hole
2. Let the power cord of the unit pass through the cable hole of the base.
3. After aligning the long base slot with the long clasp on the bottom of fan, rotate it
counterclockwise and then install the power cord on the cable groove of the base.
Pay attention to fixing the power cable in the cable clasp and straightening it.
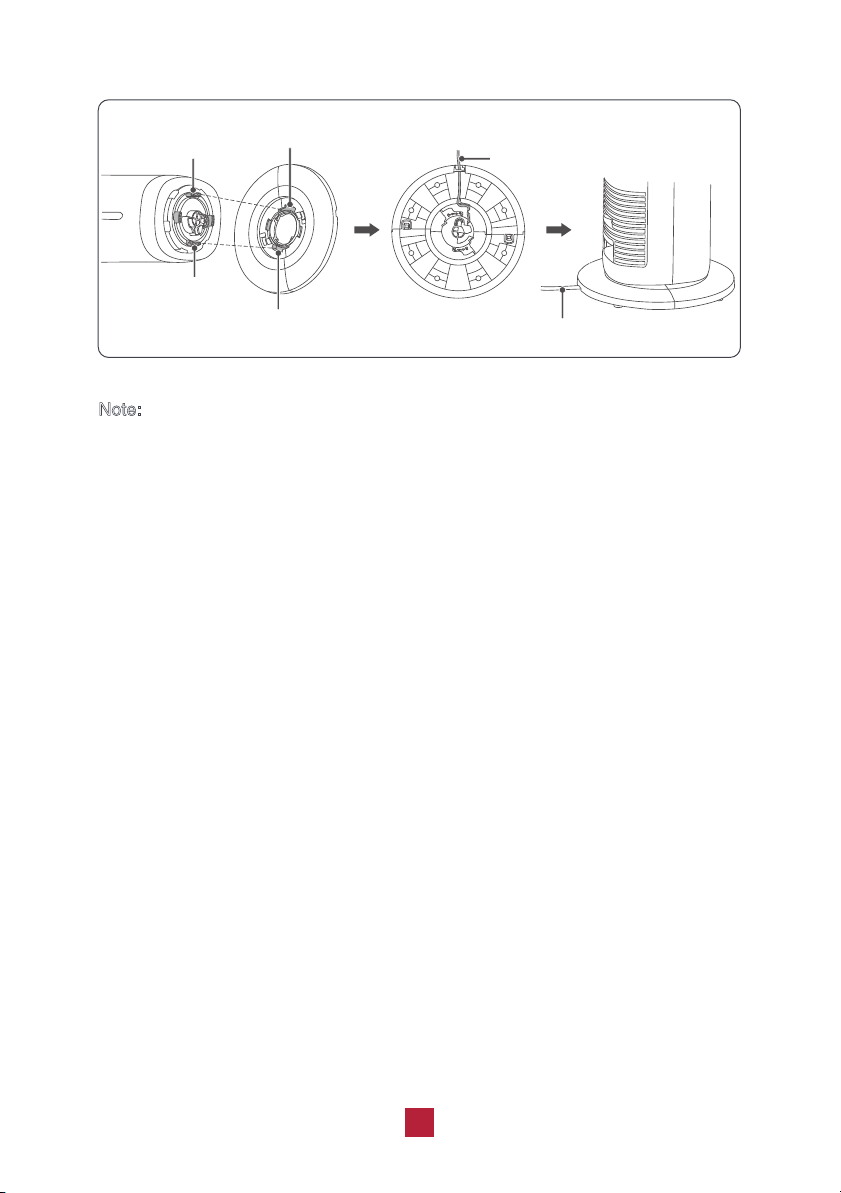
Note:
1. When you hear a “click” sound while rotating the base, it indicates that the
base is assembled. Do not rotate it forcibly to avoid damaging the oscillation
function.
2. When the unit is operating, do not turn the unit body or base forcibly.
06
Long Clasp
Long Clasp
Long Base Slot
Long Base Slot
Power Cord
Cable Clasp of Base
You can also choose to use it or not based on the temperature.The ice pack can
be frozen repeatedly and reused.
Before using, please place the ice pack in the freezer for about 4 hours, then
place it in the water of the internal water tank. Make sure the water level does
not exceed the highest water level mark after placing the ice pack inside.
If you don’t want to use the ice pack, pull out the water tank from the back side
and then remove
Note:
1. Before placing or taking out the ice pack, make sure to turn off the unit and
remove the power cord from the power outlet.
2. Do not open the cover of the ice pack or eat the ice crystal inside the ice
pack.
the ice pack.
Using the Ice Pack
07
Features
Ice Pack

Under operating status, if
there is no operation in 15 hours, the unit will automatically
enter standby mode.
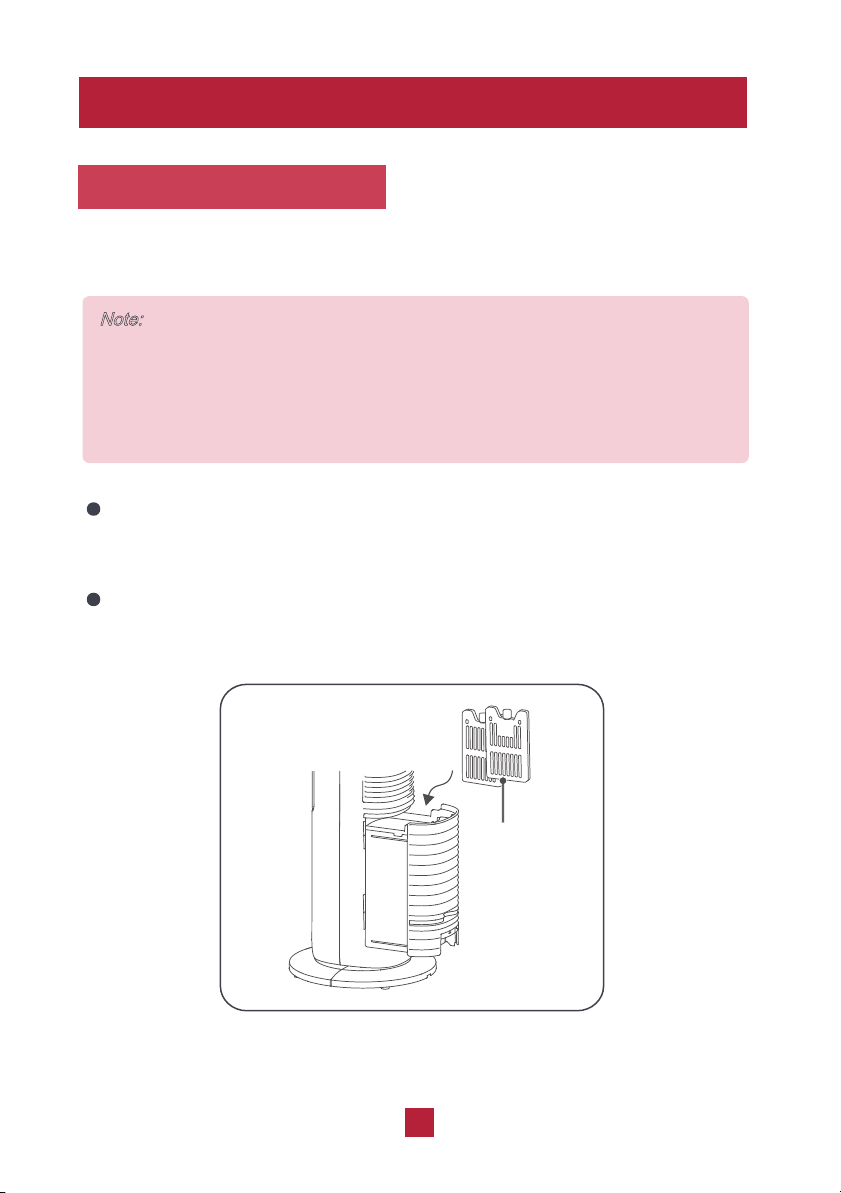
Using the Aromatherapy Box
Under standby status, the previous setting will be memorized and the unit will work
If there is no operation ifor 40 seconds, the light will reduce the brightness by 50%.
Press any button
Pull out the aromatherapy box from the fan and take out one piece of the cotton
inside.
Drop 1-2 drops of essential oil onto the cotton and put the aromatherapy box back
into the fan.
Note:
Do not let the aromatherapy oil contact other parts except the aromatherapy
box (such as the air louver, body, etc.) to prevent damage. If it has contacted
other parts, please clean and wipe them with a dry cloth.
to exit the half-on status.
according to the memorized setting when it is turned on again.
08
Half-Light Display
Memory Function
Auto standby

Operation
Adding water
Before pulling out the water tank, please be sure to turn off the power.
Add water but do not exceed the highest water level.
Don't exert too much force when removing or inserting the water tank to avoid
damaging the components. When removinig, please make sure the residual
water inside the honeycomb cooling pad has dripped back to the water tank to
prevent it from spilling outside the unit.
09
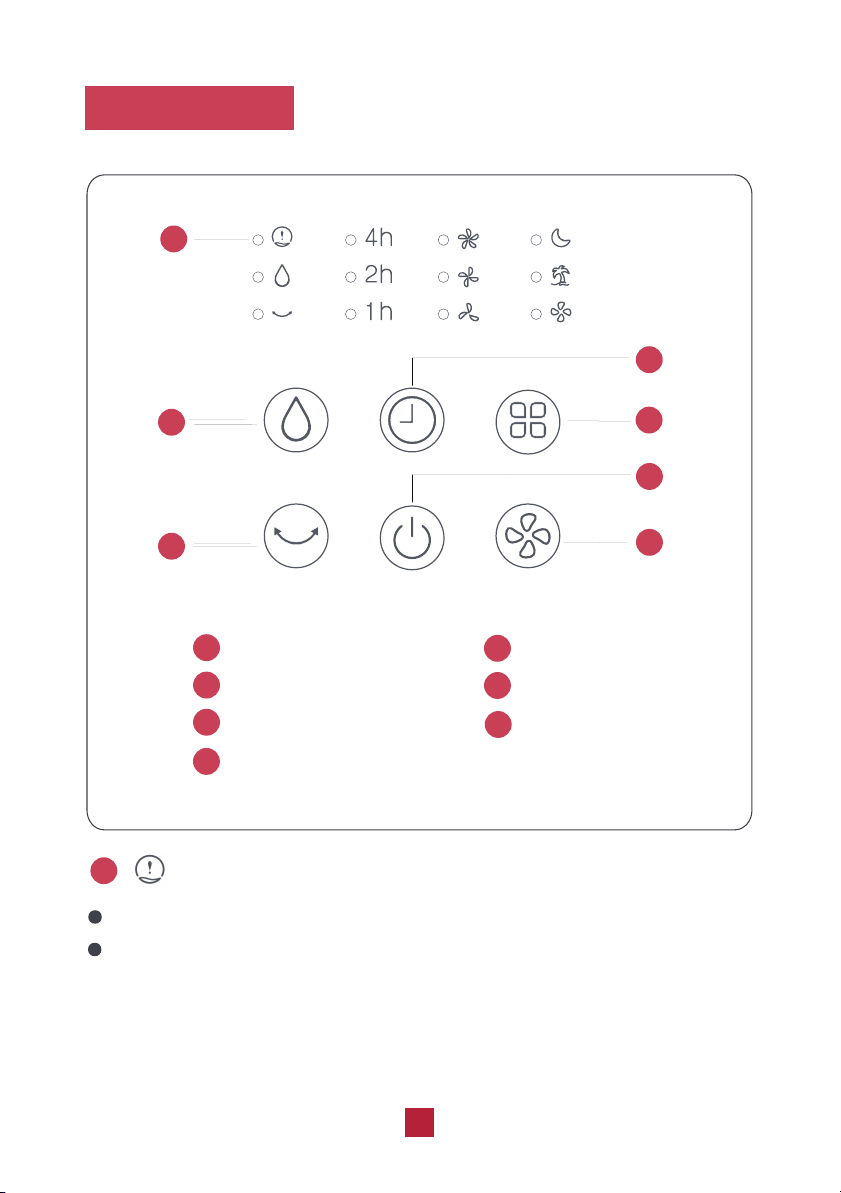
Control Panel
1
2
2
3
3
4
4
5
5
6
6
1
Water Alert Indicator
Flashes to indicate there is not enough water in the water tank.
Please add water according to the “Adding water” section and press the
humidification button to restart the function.
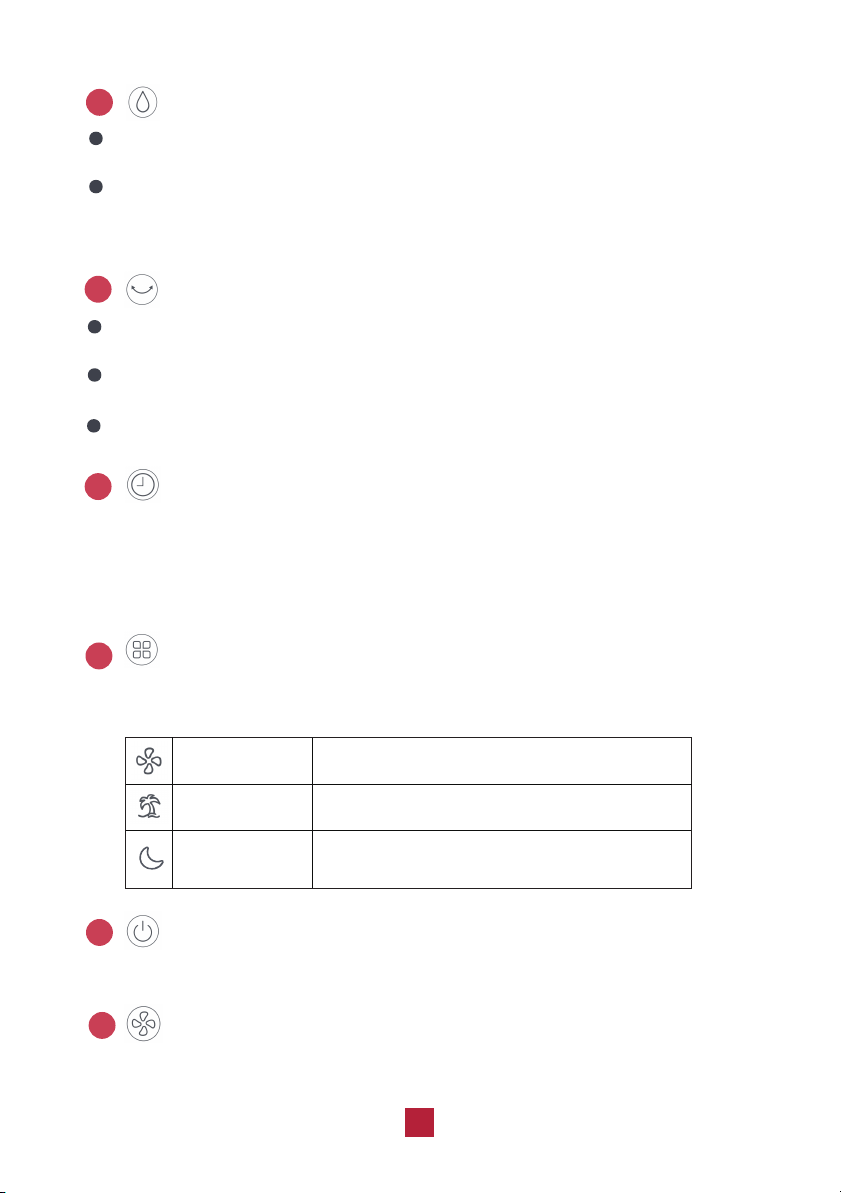
Humidification Button
Oscillation Button
Timer Button
Mode Button
Power Button
Fan Speed Button
Water Alert Indicator
1
10
7
7
2
Press this button to turn on/off the humidification function and the humidification
indicator will be on.
Before starting the humidification function, please check the water level
inside the water tank. If the water level is close to or below the lowest water
level mark, please add water.
Humidification Button
Oscillation Button
Press this button to turn on/off the oscillation function. When the oscillation
function is set, the oscillation indicator will light up.
Don't twist the fan forcibly to change the air supply direction which will
The oscillation range is 80°.
damage the product.
Timer Button
Press this button to activate the timer function. The time setting range is 1-7 hours.
Holding the button for 2 seconds will cause the timer to change rapidly. The
corresponding time indicator will be on. After reaching 7h, press the button again to
cancel the timer function and the indicator will turn off.
Mode Button
Press this button to choose among 3 modes: general wind, natural wind, and
sleeping wind.
Power Button
Press this button to power on/off the fan.
6
3
4
5
11
General wind
Natural wind
The fan speed will decrease automatically
Sleeping wind
Blow wind on the set fan speed.
The fan speed will change automatically.
according to the preset program.
Fan Speed Button
Press this button to cycle the fan speed between low, mid, and high.
7
1
1
2
2
3
4
5
4
6
3
+/-
+/- Button
Oscillation Button
Mode Button
Timer Button
Power Button
Humidification Button
Button
Press this button to increase/decrease the fan speed.
Power Button
Press this button to power on/off the unit.
1
2
12
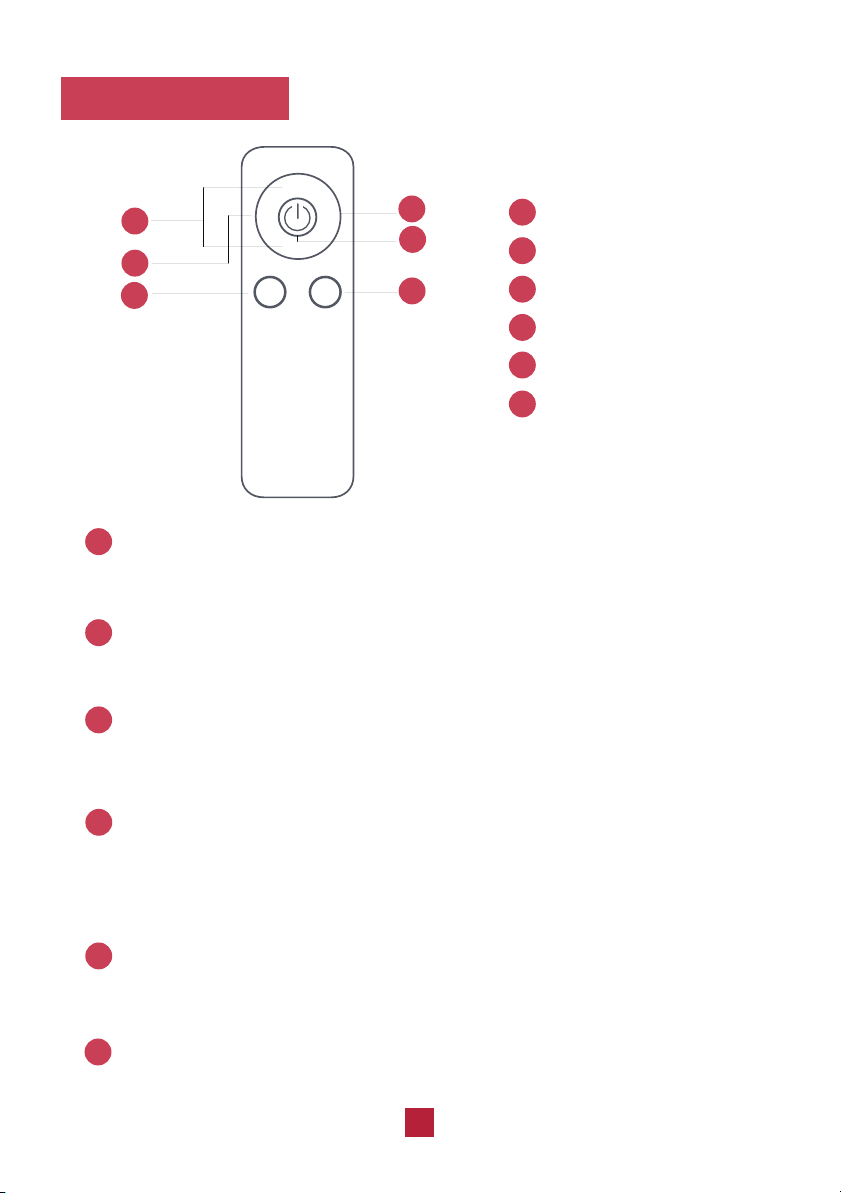
Remote Control
+
-
OSC.
TIMERP
RESET
MODE HUM.
5
Oscillation Button
Press this button to turn on/off the oscillation function.
3
Press the button to set the timer from 1 to 7 hours. Holding the button for 2
seconds will cause the timer to change rapidly. After reaching 7h, press the
Timer Button
button again to cancel the timer function and the indicator will be off.
4
Press this button to choose among 3 modes: general wind, natural wind, and
Mode Button
sleeping wind.
5
Humidification Button
Press this button to turn on/off the humidification function.
6
6
Maintenance
Please be sure to cut off the power before maintenance.
Use a wet cloth to wipe the surface of the unit. Do not wash the unit with water. Do
not use a corrosive detergent to clean the unit.
Place your thumb in the pressing groove of the water tank, and squeeze the
clasp of the water tank upward with the remaining four fingers to pull out the
water tank completely. Do not pull the water tank with excessive force.
The water pump is fixed at the bottom of the water tank. When you reach into the
water tank with one hand, gently pinch the pressing plates on both sides of the
water pump to take out the water pump and pull out the filter of the water pump.
Use a soft brush or soft cloth to clean the water tank and the filter of the water
pump, and then clean them up with clear water.
T
ips:
In order to keep the unit in the best condition and prolong the service life of the unit,
please clean the water tank and the filter of the water pump once every two weeks. If
the unit is used in a poor environment (such as too much dust or scale, or poor water
quality), please increase the cleaning frequency appropriately.
13
Clasp of Water Tank
Pump
Filter
Press plates
at both sides
Issues Self check Possible solutions
14
No water in the water
tank, or water quantity is
below than the lowest
water level of the water
Internal wiring is loose
Power cord is not
connected or connected
poorly
tank
The pump can't draw
water
Disconnect the power and
add water, make sure the
water level is between the
highest and lowest water
Contact our support team
Make sure it is well connected
level
The unit can't
Press the Humidification
button repeatedly until the
pump can draw water
normally
operate
No humidification
/ pump has
abnormal sound
Troubleshooting
The filter of the pump is
blocked
Clean the filter of the pump
according to “Maintenance”
Warranty & Customer Support
Warranty Information
You can get a 6-month warranty extension by registering your new product
1. 1-Year warranty:
TOSOT Evaporative Air Cooler comes with a 1-year warranty from the date
of purchase.
This warranty covers manufacturing and material defects. Please visit
https://tosotdirect.com/warranty for more details.
2. Additional 6-Month warranty extension:
at www.tosotdirect.com/extend.
Customer Support
Questions? We are here to help
www.tosotdirect.com
Share your experience
@tosotdirect
15
VTST20230407