Loading ...
Loading ...
Loading ...

11
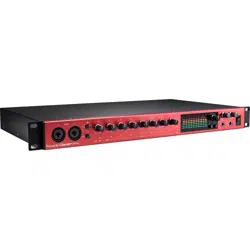
Connecting your Clarett+ 8Pre
The Clarett+ 8Pre should be connected to AC mains with the supplied AC power cable. Plug the IEC
connector into the rear panel IEC receptacle and turn the unit on with the front panel power switch.
The Clarett+ 8Pre has a USB-C™ port (on the rear panel). Once the software installation is complete,
simply connect the Clarett+ 8Pre to your computer using a USB cable.
Computer audio setup
When you connect your Clarett+ 8Pre to your computer for the first time, you will need to select it as
the audio input/output device.
• macOS: selection is made in System Preferences > Sound: select the Focusrite device on
both the Input and Output pages.
• Windows: selection is made in Control Panel > Sound: right-click on the Focusrite device
and select Set as Default Device in both Recording and Playback tabs.
If you have any problems, full details of how to select the Clarett+ 8Pre as the audio device can be
found at focusrite.com/get-started/ClarettPlus-8Pre.
After the first connection, your OS should automatically select the Clarett+ 8Pre as the default audio
device.
Audio Setup in your DAW
After installing the drivers and connecting the hardware, you can start using the Clarett+ 8Pre with
your DAW.
Please note - your DAW may not automatically select the Clarett+ 8Pre as its default I/O device. In this
case, you must manually select the driver on your DAW’s Audio Setup* page, and select Clarett+
8 Pre USB (Mac) or Focusrite USB ASIO (Windows). Please refer to your DAW’s documentation or
Help files if you are unsure where to select the Clarett+ 8Pre as your audio device.
* Typical name – page names may vary with DAW
Loading ...
Loading ...
Loading ...