Loading ...
Loading ...
Loading ...
17
CARE AND MAINTENANCE
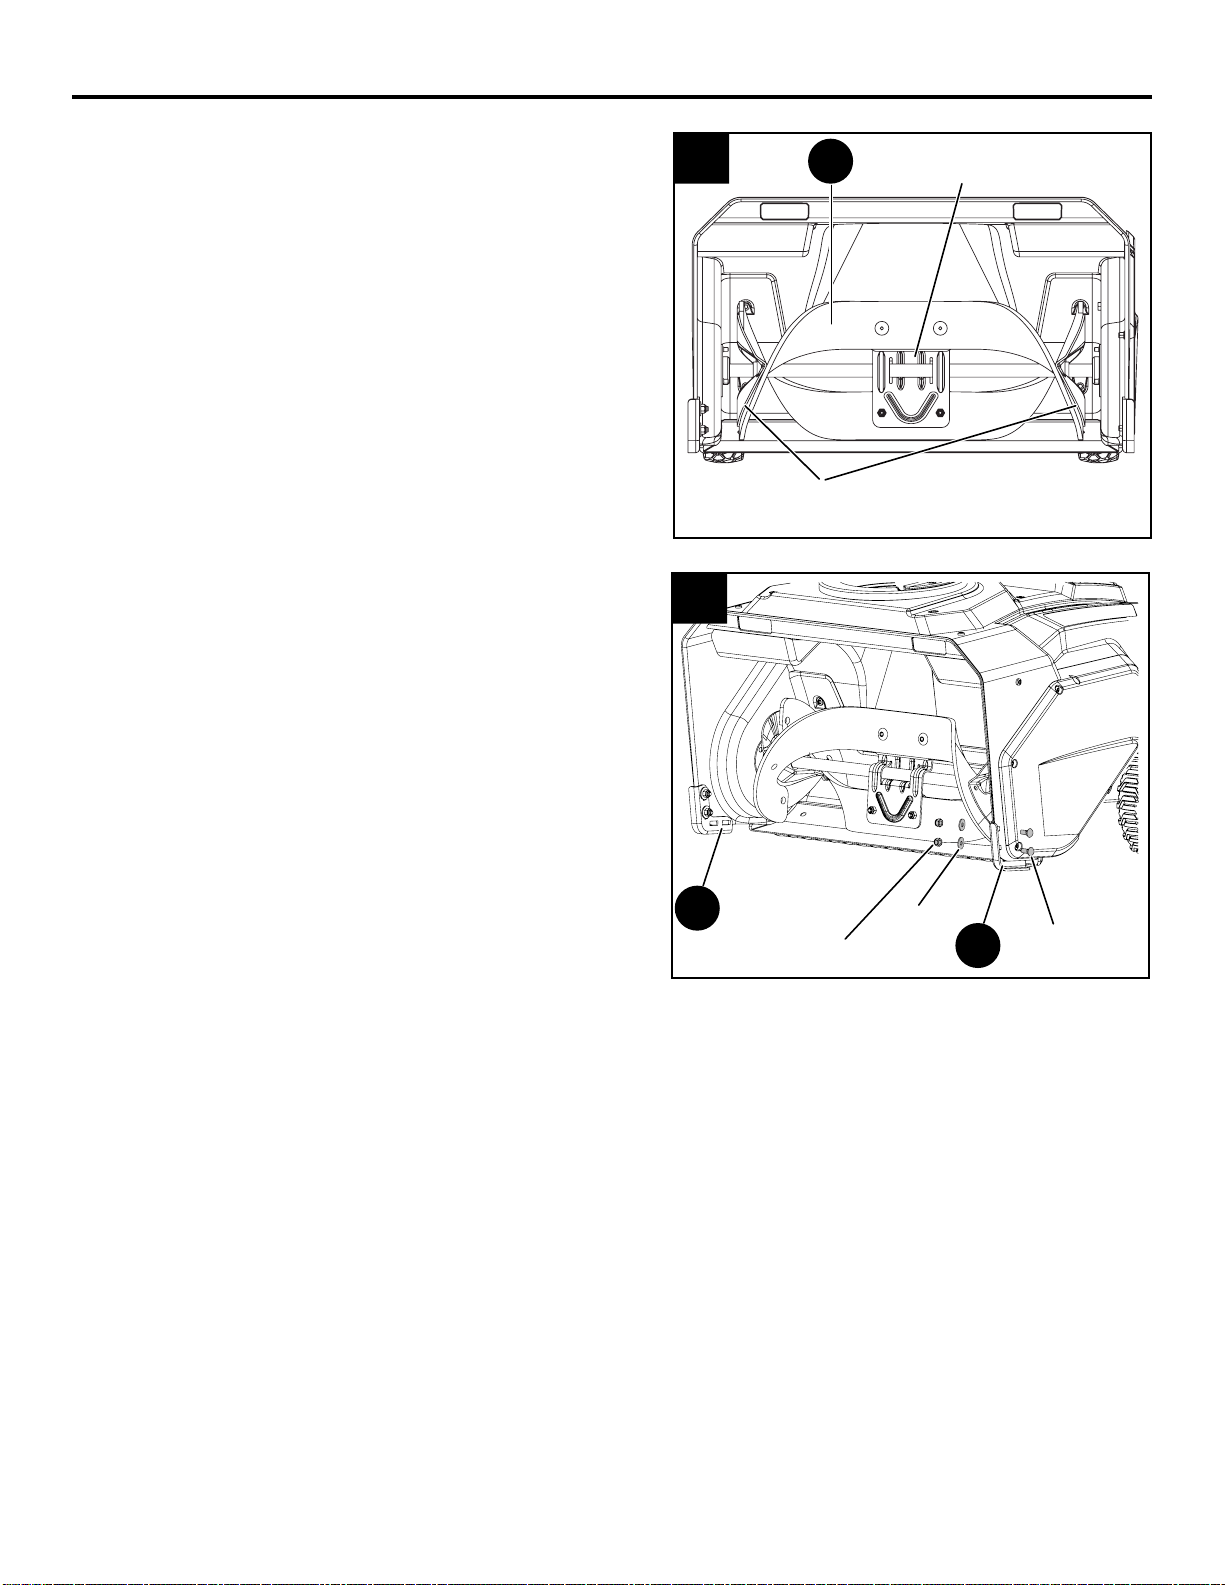
3. REPLACING THE IMPELLER
• Remove the 4 sets of nuts and bolts on the
middle steel plate.
• Remove the 4 sets of nuts and bolts on each
side.
• Remove the impellers (R).
• Install the new impellers.
• Tigthen the 8 sets of nuts and bolts that you
removed.
4. REPLACING THE SKID PLATES
• Loosen the 2 sets of bolts, spacers and nuts
that attach the skid plates to the snow thrower
housing.
• Remove the skid plates (U).
• Install the new skid plates.
• Tigthen the 2 sets of bolts, spacers and nuts
that you removed.
• Do the same operation on the other side.
3
4
R
4 sets of bolts and nuts
on each side (total of 8 sets)
Nut
Bolt
Spacer
4 sets of nuts and bolts on the
middle steel plate
SERVICE
Servicing requires extreme care and knowledge and should be performed only by a qualied service
technician. For service, it is suggested you return the product to your nearest AUTHORIZED
SERVICE CENTER for repair. When servicing, use only identical replacement parts.
STORAGE
• Run the snow thrower for a few minutes in order to melt any snow that may be left on the snow
thrower.
• Wipe the snow thrower off with a dry cloth before storage. This will help prevent ice building up on
the unit and parts freezing.
• Remove the battery and store it in a cool dry location, if possible. Charge the battery every six-
months when not in use in order to increase its life.
• Inspect the snow thrower thoroughly for worn, loose, or damaged parts. If any parts must be re-
paired or replaced, contact 1-888-356-2258.
• Store the snow thrower in a clean, dry place. Cover it in order to provide added protection.
• Always store battery and charger indoors.
U
U
Loading ...
Loading ...
Loading ...