
Loading ...
Loading ...
Loading ...
-8-
Disconnect the plug from
the power source before
making any assembly, adjustments or
changing accessories. Such preventive
safety measures reduce the risk of starting the
tool accidentally.
Only use Bosch
accessories rated 21000
OPM or greater. Using accessories not
designed for this power tool may result in
serious personal injury and property damage.
For all work or when
changing accessories
always wear protective gloves. Such
preventive safety measures reduce the risk of
injury from sharp edges of the accessories.
Accessories can become very hot while
working. Danger of burns!
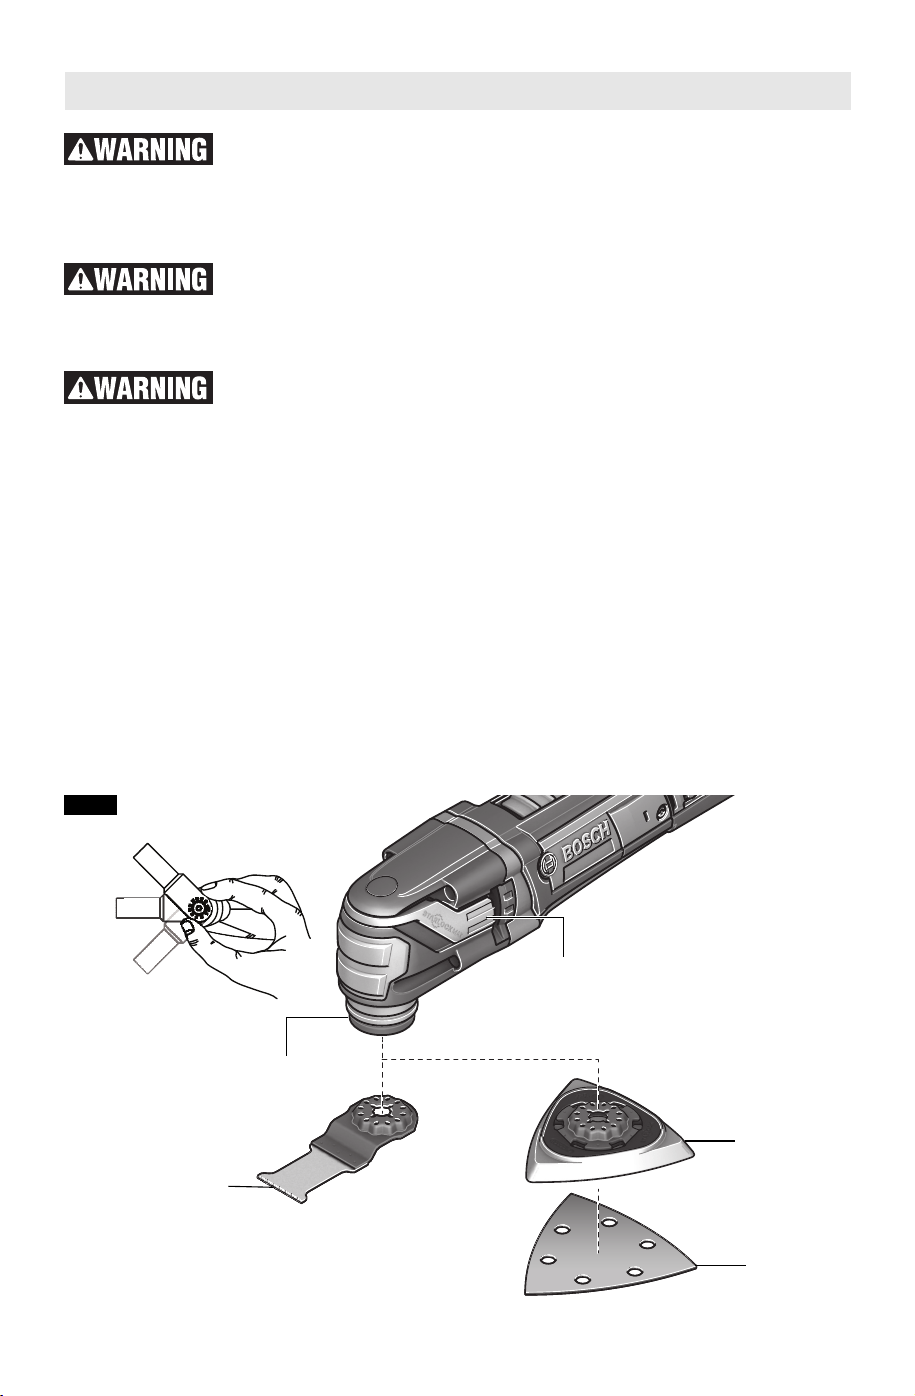
INSTALLING ACCESSORIES
If necessary, remove an already-mounted
accessory. (See REMOVING ACCESSORIES
below)
1. Position the accessory such that its model
number will face the oscillating tool’s
accessory holder (Fig. 2).
2. Determine the desired angle of the
accessory to the tool. Accessories can be
mounted such that they are oriented with
their working edge straight ahead of the tool,
or angled to the left or right to enhance
usability. (Fig. 2)
3. Press the oscillating tool into the accessory
holder until the holder’s clamping jaws
“snaps” into the accessory. It is not
necessary to open the accessory release
lever to install an accessory.
REMOVING ACCESSORIES
To remove accessory, open accessory release
lever, and the accessory off will be released and
ejected off of the tool.
In order to help ensure that the tool has a solid
grip of the accessory, clean the accessory
holder and accessories as necessary with a
clean cloth.
INSTALLING AND REMOVING
SANDING SHEETS
Your backing pad uses hook-and-loop backed
accessories, which firmly grip the backing pad
when applied with moderate pressure.
1. Align the sanding sheet and press it onto the
sanding backing pad by hand.
2. Firmly press the power tool with the sanding
sheet against a flat surface and briefly
switch the power tool on. This will promote
good adhesion and helps to prevent
premature wear.
3. To change, merely peel off the old sanding
sheet, remove dust from the backing pad if
Assembly
SANDING
BACKING PAD
SANDING
SHEET
PLUNGE CUT
BLADE
FIG. 2
ACCESSORY
HOLDER*
ACCESSORY
RELEASE
LEVER
* See pages 10 - 14 for compatible accessory types.
2610041405.qxp_GOP 3/14/16 7:56 AM Page 8
Loading ...
Loading ...
Loading ...