Loading ...
Loading ...
Loading ...
MAINTENANCE INSTRUCTIONS
FRONT TO REAR LEVEL ADJUSTMENT
at SECTOR PLATES
Remove Hair-Pins and Washers securing Sector
Plates to rear Lift Arms. See Figure 52.
Move Sector Plates the same number of holes as
required to raise or lower the Deck.
The Deck should be set 1/4" lower at the rear than at
the front.
If the Sector Plates are in the lowest possible setting
and the correct front to rear level is not obtained, adjust
according to section about front Lift Rods.
PLATES
"-" HIGHEST
DECK SETTING
LOWEST
SETTING
REMOVE
& WASHER
FIGURE 52
FRONT TO REAR LEVEL ADJUSTMENT
at FRONT LIFT CABLE
If the Sector Plates are in their lowest setting and
proper level cannot be obtained, adjust the front
Lift Rod as follows:
Move Deck Lift Lever to the highest position.
Place a 2" wooden block or similar object under front
center of Deck.
Place a 3" wooden block or similar object under rear
center of Deck.
Remove Hair-Pins and Washers securing Sector
Plates (See Figure 52). Lower rear of Deck onto the 3"
block.
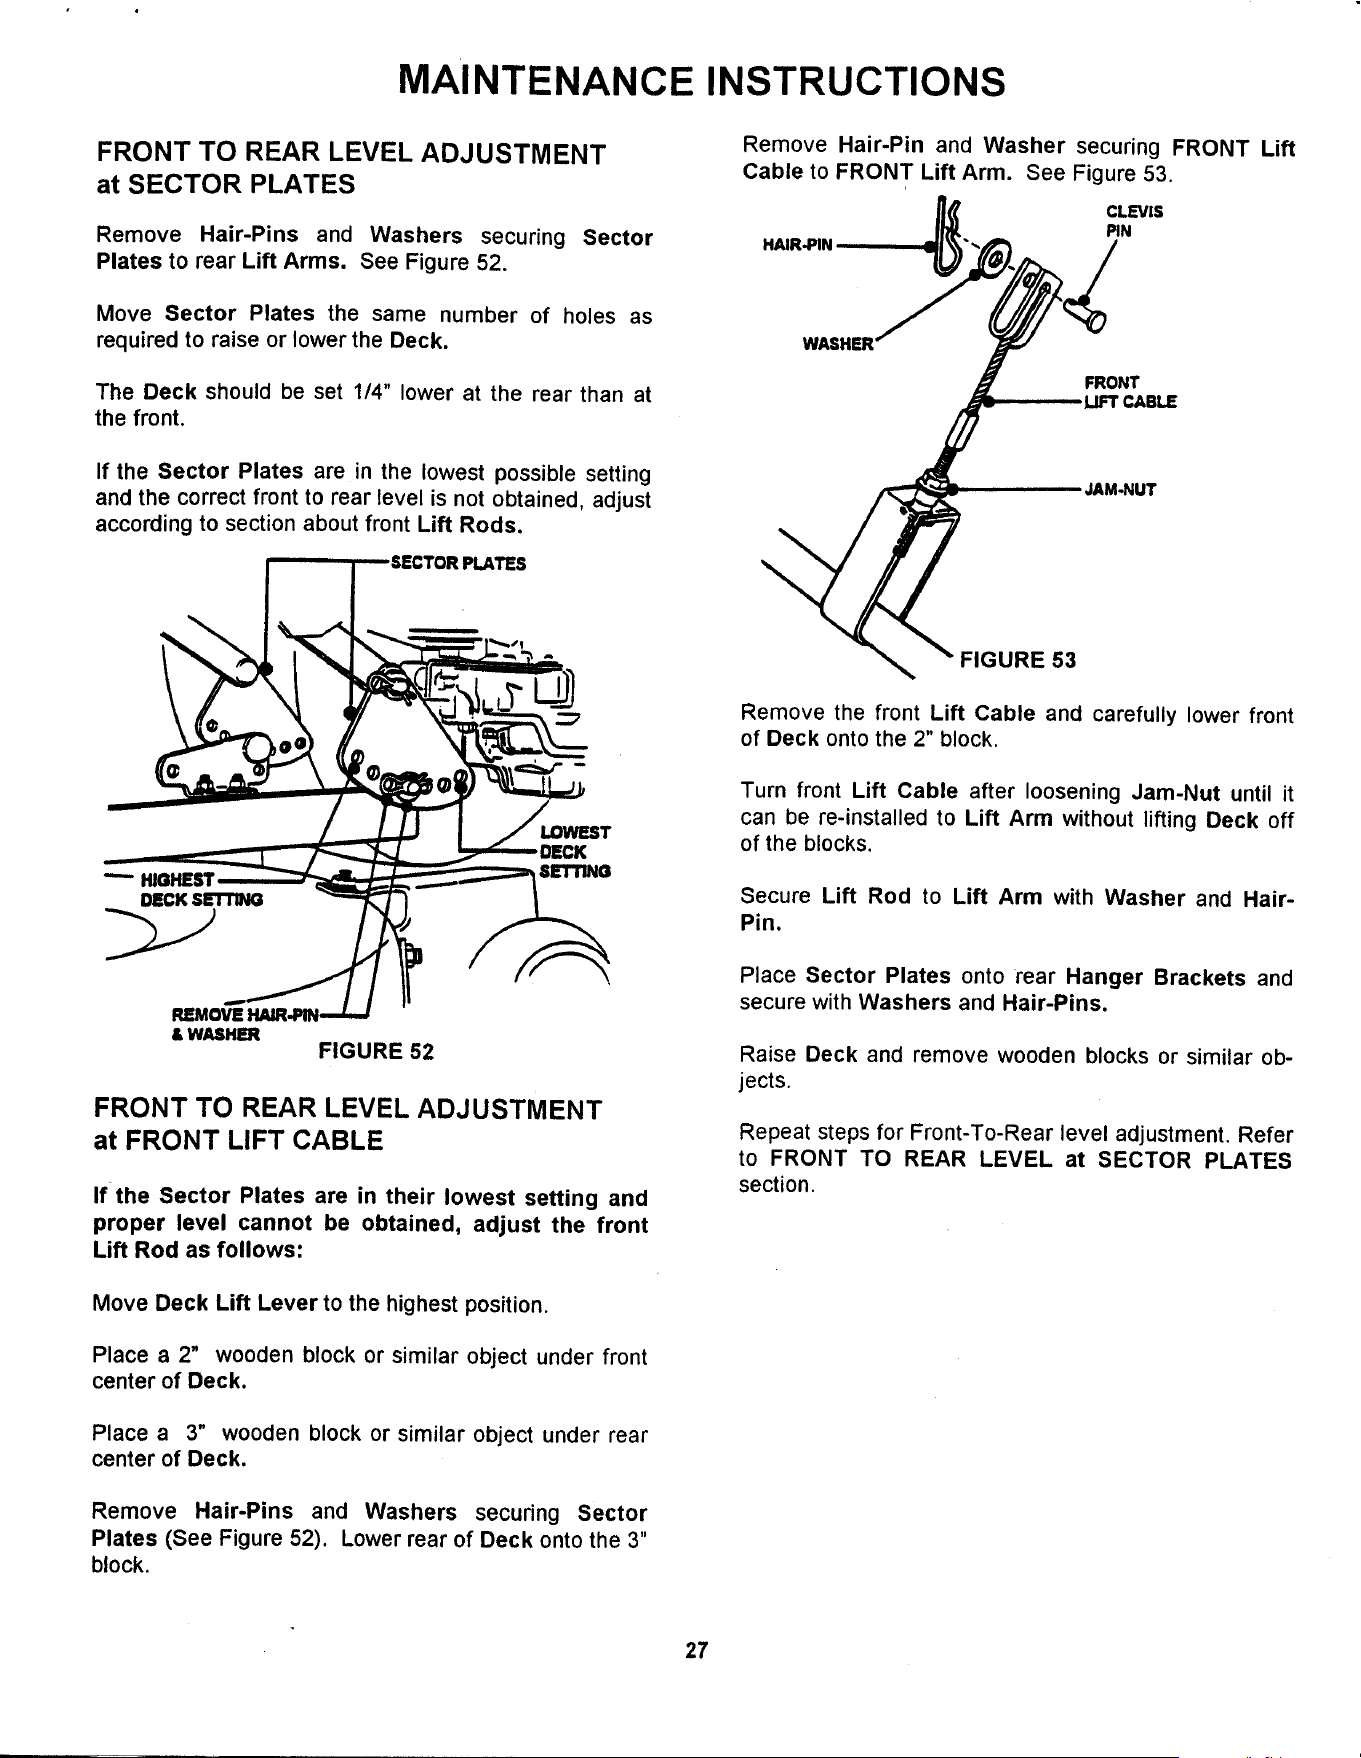
Remove Hair-Pin and Washer securing FRONT Lift
Cable to FRONT Lift Arm. See Figure 53.
CLEVIS
PIN
HAIR4PIN
FRONT
LIFT CABLE
JAM-NUT
FIGURE 53
Remove the front Lift Cable and carefully lower front
of Deck onto the 2" block.
Turn front Lift Cable after loosening Jam-Nut until it
can be re-installed to Lift Arm without lifting Deck off
of the blocks.
Secure Lift Rod to Lift Arm with Washer and Hair-
Pin.
Place Sector Plates onto rear Hanger Brackets and
secure with Washers and Hair-Pins.
Raise Deck and remove wooden blocks or similar ob-
jects.
Repeat steps for Front-To-Rear level adjustment. Refer
to FRONT TO REAR LEVEL at SECTOR PLATES
section.
27
Loading ...
Loading ...
Loading ...