
Loading ...
3
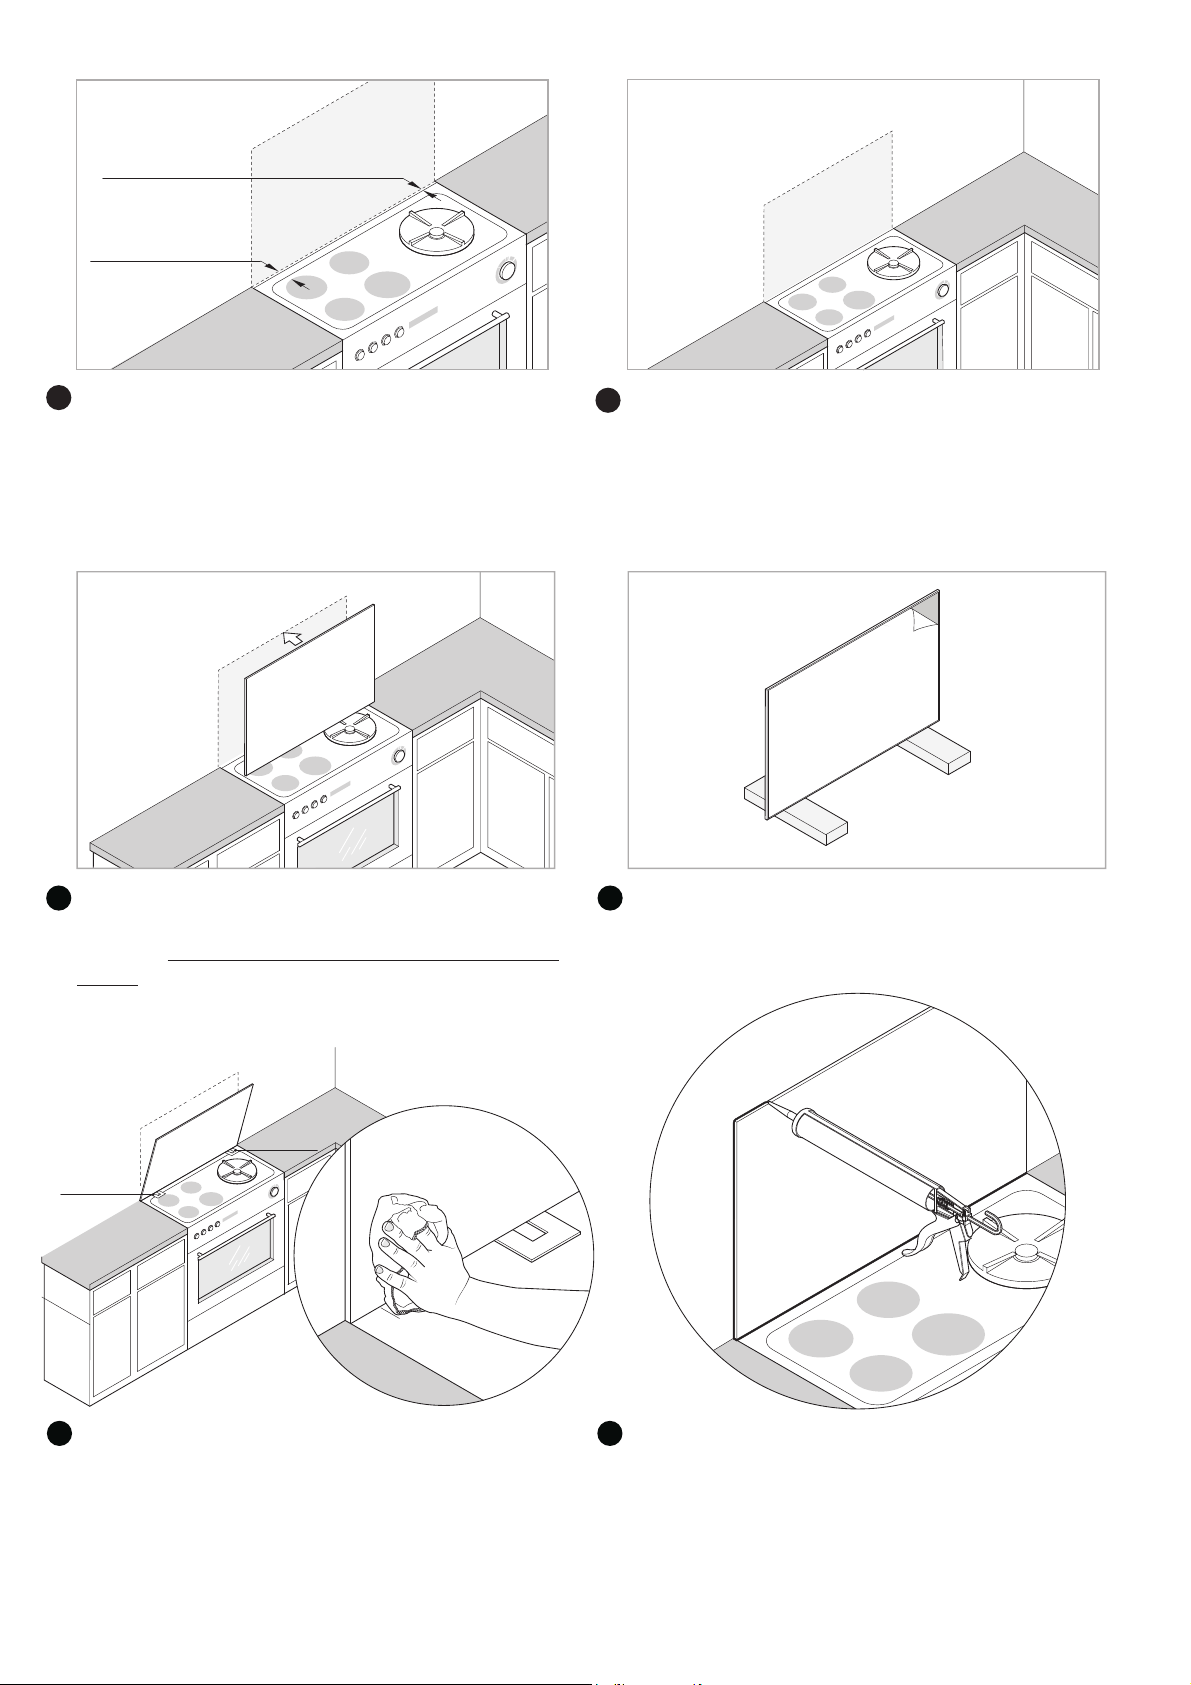
Firstly offer up the back of the Splashback to the worktop
/wall to check the fit. Use the spacers provided to achieve
a good fit. There needs to be a gap of 2-3 mm around all
4 sides.
4
Take the Splashback away from the wall making sure to
keep all corners safe from hard surfaces.
Remove the covering from the self adhesive backing.
Place the bottom edge of the splashback to the back lip
of the worktop / wall on the spacers provided then push
the splashback to the wall and apply firm pressure evenly
over the whole surface area. Please note once the adhesive
has made contact with the wall you will not be able to adjust
or remove. Please take extra care when fitting.
Ensure that the 3mm spacers are left while the sealant bonds
to the wall. Finally after 2-3 hours remove the spacers.
5
The 4 exposed edges of the Splashback must be sealed with a
bead of silicone sealant no less than 2-3 mm in thickness.
6
Spacer
A
p
p
l
y
f
i
r
m
p
r
e
s
s
u
r
e
e
v
e
n
l
y
o
v
e
r
t
h
e
w
h
o
l
e
s
u
r
f
a
c
e
a
r
e
a
.
Spacer
110mm min.
40mm min.
Firstly check the dimensions. The minimum distance
from the rear of the hob should be no less than 40mm or
110mm to a heat source dependant on the installation.
1
Ensure that the wall being fixed to is completely flat, non
porous, dry, dust and grease free. Any gap between the
worktop and the wall must be sealed to exclude moisture.
PLEASE NOTE: This product should not be fitted over
any existing tiling or splashbacks.
2