
Loading ...
Loading ...
Loading ...
E-48
How does the altimeter work?
Generally, air pressure decrease as altitude increases. This watch bases its altitude reading on
International Standard Atmosphere (ISA) values stipulated by the International Civil Aviation Organization
(ICAO). These values defi ne relationships between altitude and air pressure.
0 m
500 m
1000 m
1500 m
2000 m
2500 m
3000 m
3500 m
4000 m
899 hPa
795 hPa
701 hPa
616 hPa
1013 hPa
About 8 hPa per 100 m
About 9 hPa per 100 m
About 10 hPa per 100 m
About 11 hPa per 100 m
About 12 hPa per 100 m
Altitude Air Pressure
0 ft.
2000 ft.
4000 ft.
6000 ft.
8000 ft.
10000 ft.
12000 ft.
14000 ft.
25.84 inHg
22.23 inHg
19.03 inHg
29.92 inHg
About 0.15 inHg per 200 ft.
About 0.17 inHg per 200 ft.
About 0.192 inHg per 200 ft.
About 0.21 inHg per 200 ft.
Source: International Civil Aviation Organization
E-49
• Note that the following conditions will prevent you from obtaining accurate readings:
When air pressure changes because of changes in the weather
Extreme temperature changes
When the watch itself is subjected to strong impact
There are two standard methods of expressing altitude: absolute altitude, which expresses an absolute
height above sea level, and relative altitude, which expresses the difference between the altitudes of two
different places. This watch expresses altitudes as relative altitude.
Height of building 130 m
(relative altitude)
Rooftop at an altitude of
230 m above sea level
(absolute altitude)
Sea Level
How the Altimeter Measures Altitude
The altimeter can measure altitude based on its own preset values (initial default method) or using a
reference altitude specifi ed by you.
E-50
When you measure altitude based on preset values
Data produced by the watch’s barometric pressure sensor is converted to approximate altitude based on
ISA (International Standard Atmosphere) conversion values stored in watch memory.
When you measure altitude using a reference altitude specifi ed by you
After you specify a reference altitude, the watch uses that value to convert
barometric pressure readings to altitude (page E-44).
• When mountain climbing, you can specify a reference altitude value in
accordance with a marker along the way or altitude information from a
map. After that, the altitude readings produced by the watch will be more
accurate than they would without a reference altitude value.
Altimeter Precautions
• This watch estimates altitude based on air pressure. This means that altitude readings for the same
location may vary if air pressure changes.
• Do not rely upon this watch for altitude reading or perform button operations while sky diving, hang
gliding, or paragliding, while riding a gyrocopter, glider, or any other aircraft, or while engaging in any
other activity where there is the chance of sudden altitude changes.
• Do not use this watch for measuring altitude in applications that demand professional or industrial level
precision.
• Remember that the air inside of a commercial aircraft is pressurized. Because of this, the readings
produced by this watch will not match the altitude readings announced or indicated by the fl ight crew.
400
A
B
400
A
B
E-51
Precautions Concerning Simultaneous Altitude and Temperature Readings
For the more accurate altitude readings, leaving the watch on your wrist is recommended in order to
maintain the watch at a constant temperature.
• When taking temperature readings, keep the watch at as stable a temperature as possible. Changes in
temperature can affect temperature readings. See product specifi cations (page E-100) for sensor
accuracy information.
E-52
Taking Direction Readings
You can use the watch to take direction readings to determine a direction (north, south, east, west) or to
fi nd out your bearing to a destination.
• For information about what you can do to ensure direction readings are accurate, see “Magnetic
Declination Correction” (page E-58) and “Digital Compass Precautions” (page E-59).
Correcting Direction Reading Error (2-point Calibration)
Use 2-point calibration to correct for measurement error due to local magnetism or other causes.
Important!
• Keep the watch level during the calibration process.
• Keep the watch away from electrical household appliances and offi ce equipment, cellphones, and
other sources of strong magnetism during calibration. Such items can make proper calibration
impossible.
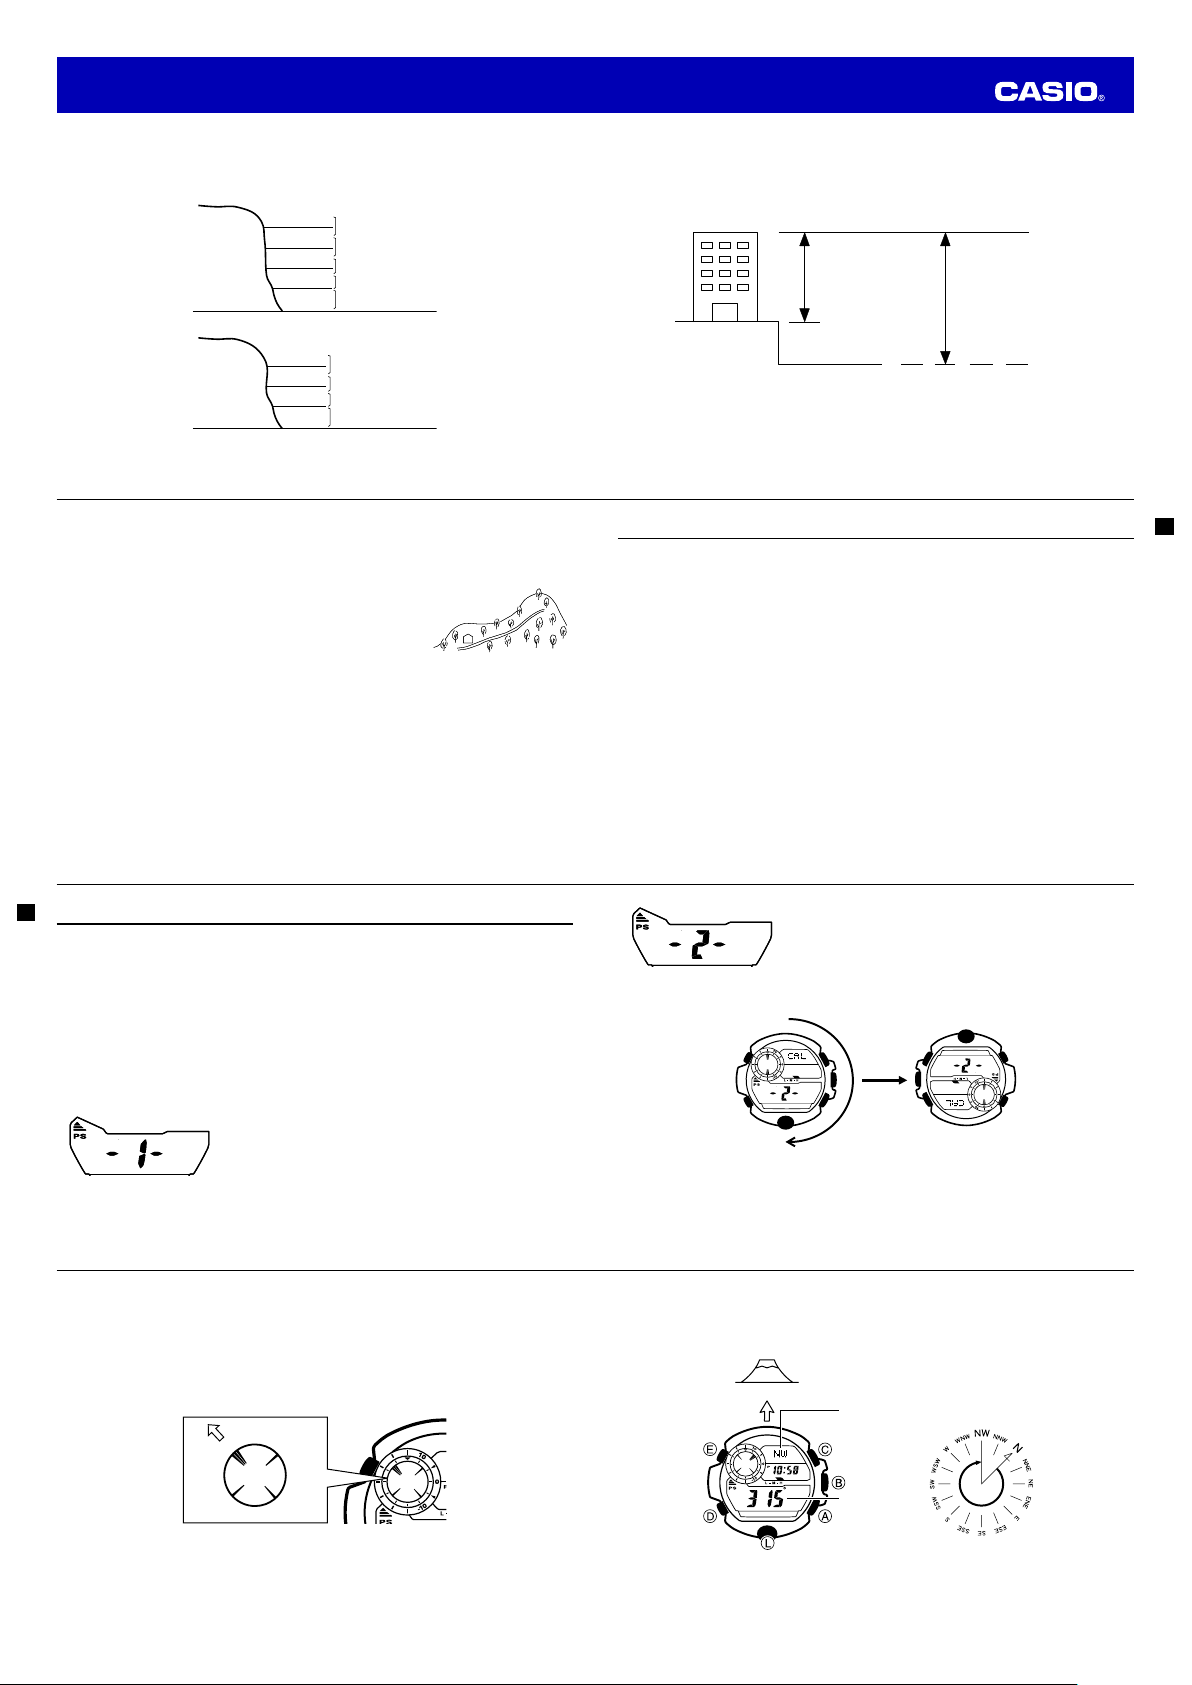
To perform 2-point calibration
1. Enter the Digital Compass Mode (page E-27).
2. Hold down
E
for at least two seconds. Release the button when
-1-
appears on the display.
E-53
3. Press
C
.
• This starts calibration of point 1. After calibration of point 1 is
complete, TURN 180° appears on the display, followed by -2-.
• If ERR appears on the display, press
C
and then perform calibration of point 1 again.
4. Rotate the watch as precisely as possible 180 degrees from point 1.
5. Press
C
.
• This starts calibration of point 2. OK appears on the display after calibration is complete. After one
second, the watch will return to the direction reading screen.
• If ERR appears on the display, perform the procedure from step 3 again.
E-54
To take a direction reading
Important!
• To ensure accuracy, be sure to perform 2-point calibration under actual measurement conditions
before taking direction readings.
1. Enter the Digital Compass Mode (page E-27).
• The watch will automatically start taking direction readings. Readings will be taken and the display
will be updated every second for about 60 seconds. At this point you can check the direction (north,
south, east west) reading.
North
East
South
West
E-55
2. During the approximately 60 seconds that the above reading operation is in progress, point 12 o'clock
on the watch in the direction of the bearing you want to read.
• About one second later, the direction and bearing to your objective will appear on the display.
• If 60 seconds elapse before you can take a bearing reading, press
C
to restart the direction
reading operation.
315°
0°
Objective Bearing Indication
Meaning
N: North
E: East
W: West
S: South
Bearing to Objective:
Northwest
Bearing Angle
to Objective
Note
• The north indicated by the watch is magnetic north (page E-59).
If you want to display true north, see “Magnetic Declination Correction” (page E-58).
• If only north is indicated on the display (without south, east, or west), it means that bearing
memory contents are displayed. Press
A
to clear bearing memory contents (page E-56).
• You can return to the Timekeeping Mode by pressing
D
any time a reading operation is in
progress or stopped.
Operation Guide 3410
Loading ...
Loading ...
Loading ...