Loading ...
Loading ...
Loading ...
7
English
WARNING: To reduce the risk of injury, turn miter saw or
planer off, disconnect the tool from the power source before
assembling the miter saw or planer to the stand. An accidental
start-up can cause injury.
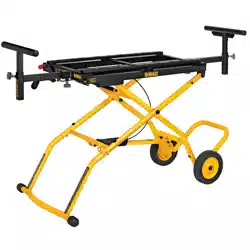
1. Close stand before attaching the tool.
2. Loosen the 6 rail screws (AA) with the supplied hex wrench.
Remove the mounting bolts/flat washers (BB) from the mounting
rails.
AA
AA
BB
A
FIG. 13
BB
3. Slide the mounting rails (A) to fit the width of the tool. Ensure the
mounting slots align
with the holes in the tool’s feet.
WARNING: Planers MUST be mounted in the orientation shown
in Figure 16.
4. Place miter saw or planer on the mounting rails (A). Center the tool,
both forward and backward and side to side, on the stand.
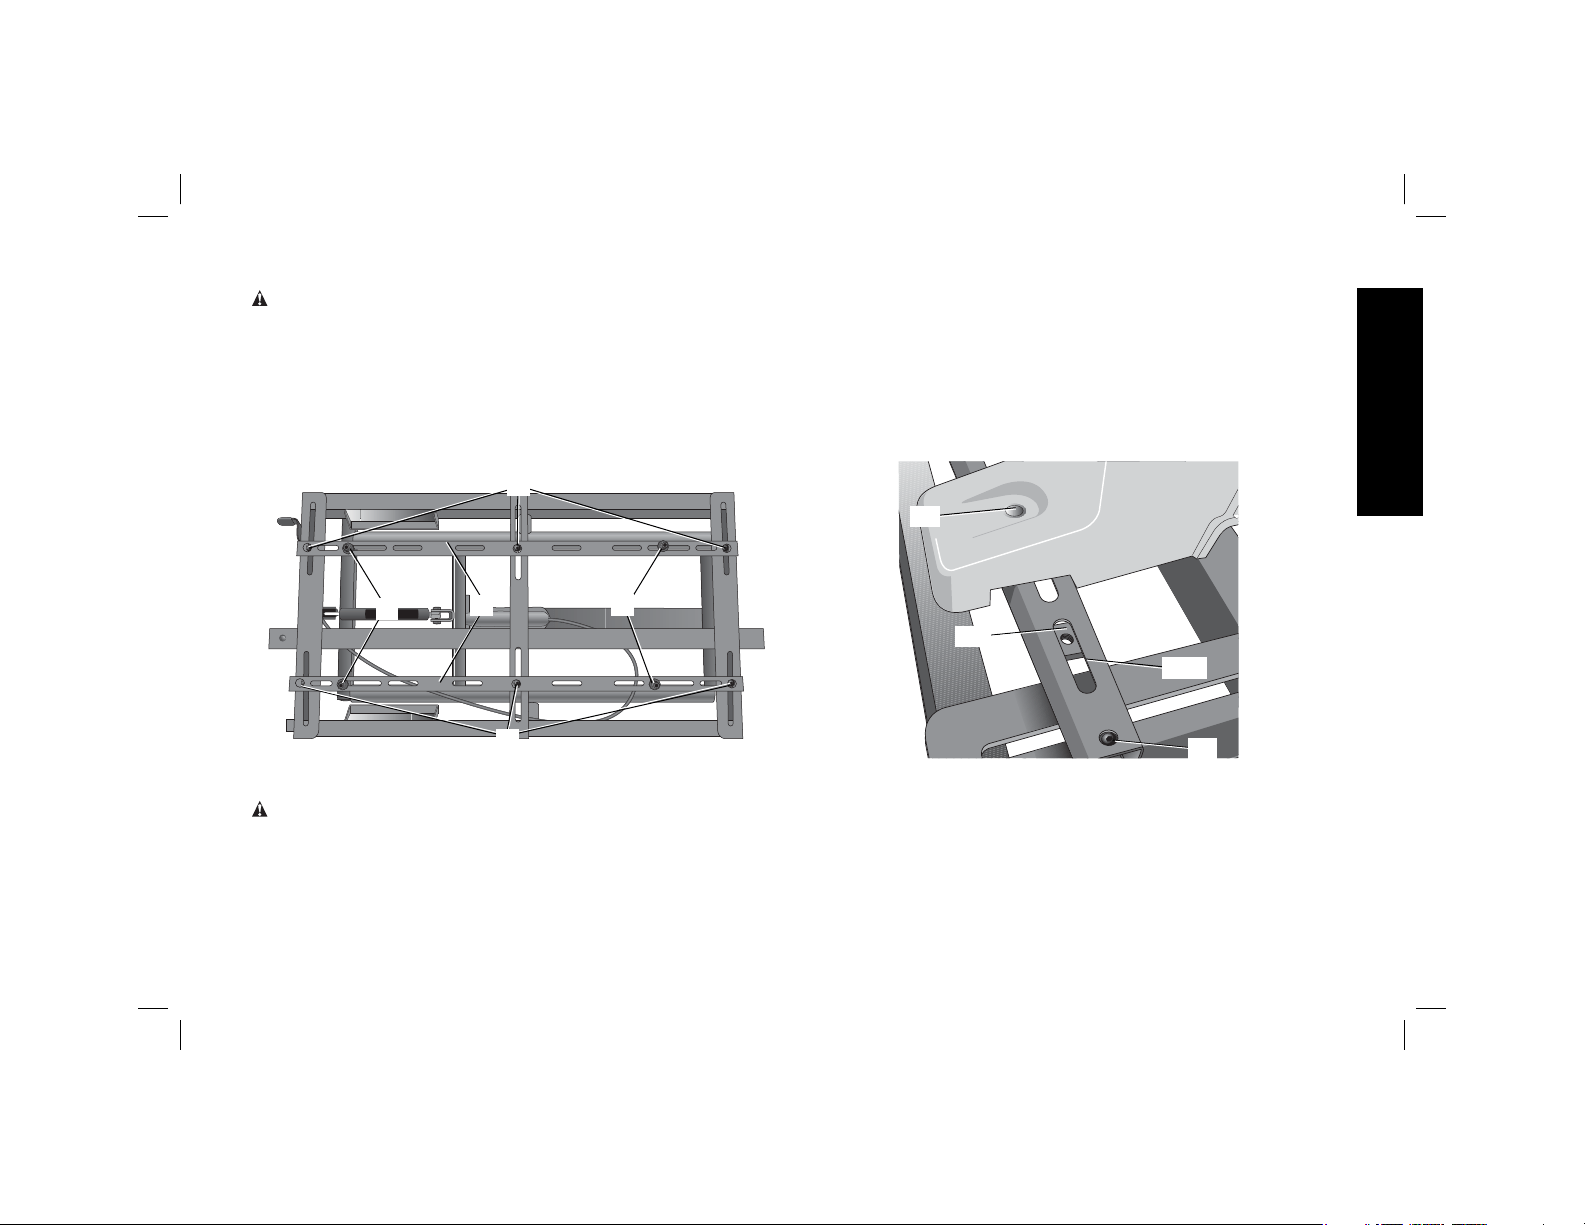
5. Ensure the mounting holes (CC) in the tool’s feet align with the rail
slots (DD) and the captured nuts (EE) located in the mounting rails.
6. Once the two rails are in place, tighten the rail screws (AA)
loosened in STEP
2.
7. Insert the mounting bolts/flat washers (BB) (removed in STEP2)
through each of the tool’s feet into the captured nut (EE). Tighten
securely.
CC
EE
DD
AA
FIG. 14
IMPORTANT: The miter saw or planer MUST be positioned so the tool
is bolted squarely to the mounting rails. If this is not possible, please
call 1-800-4-D
EWALT (1-800-433-9258) for technical assistance.
Loading ...
Loading ...
Loading ...