Loading ...
Loading ...
Loading ...

en PowerBoost function
8
vPowerBoost function
Power Boost f unc t i on
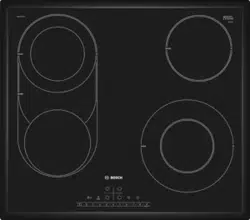
PowerBoost lets you heat up large volumes of water
even faster than on heat setting 9.
PowerBoost is only available on hotplates marked with
the boost and the G symbols.
With dual-circuit hotplates the second filament circuit
has to be activated for use with the PowerBoost
function.
Switching on PowerBoost
1. Select the hotplate.
2. Select heat setting 9, touch 9 again. The › display
lights up.
The PowerBoost function is switched on.
Switch off PowerBoost
1. Select the cooking zone.
2. Select any ongoing cooking setting. The › display
goes out.
PowerBoost is switched off.
Notes
■ If you do not turn off the PowerBoost function, it
switches off automatically after a certain period of
time. The hotplate switches back to the heat setting
9.
■ Please remember that oil and fat heat up quickly with
PowerBoost. Never leave the hob unattended. Oil
and fat that have overheated will catch fire quickly,
see section "Important safety information".~ Page 3
AChildproof lock
Childproof lock
You can use the childproof lock to prevent children
from switching on the hob.
Switching the childproof lock on and off
The hob must be switched off.
To switch on: touch the - D symbol for approx.
4 seconds. The display light above the - D symbol
lights up for 10 seconds. The hob is locked.
To switch off: touch the - D symbol for approx.
4 seconds. The lock is released.
Automatic childproof lock
This function automatically activates the childproof lock
every time you switch the hob off.
Switching on and off
Find out how to switch the automatic childproof lock on
and off in the Basic settings section.~ Page 9
OTime-setting options
Ti me- set t i ng opt i ons
There are 2 different time-setting options:
■ A hotplate should switch off automatically
■ Kitchen timer
Automatic hotplate switch-off
Enter a cooking time for the relevant hotplate. When the
cooking time has elapsed, the hotplate switches off
automatically.
Setting the cooking time
The hotplate must be selected and set.
1. Touch the 0 symbol. The x display for the hotplate
lights up.
‹‹ lights up on the timer display.
2. Within the next 10 seconds, set the desired cooking
time on the control panel.
The cooking time counts down. If you have set a
cooking time for more than one hotplate, the cooking
time of the selected hotplate is always displayed.
When the time has elapsed
When the cooking time has elapsed, the hotplate
switches off. You will hear an audible signal and ‹‹
lights up in the display for 10 seconds. The x display
lights up brightly. Touch any symbol. The displays go
out and the audible signal ceases.
Changing or cancelling the cooking time
Select the hotplate and touch the 0 symbol. The x
display lights up brightly. Change the cooking time or
set to ‹‹ in the settings range.
Note: You can set a cooking time of up to 99 minutes.
Automatic timer
You can use this function to preselect a cooking time
for all hotplates. Each time a hotplate is switched on,
the pre-selected cooking time then counts down. When
the cooking time has elapsed, the hotplate switches off
automatically.
You can find out how to switch on the automatic timer in
the Basic settings section.~ Page 9
Note: You can change the cooking time for a hotplate
or switch off the automatic timer for the hotplates.
Select the hotplate and touch the 0 symbol. The
desired x display lights up brightly. Change the
cooking time or set to ‹‹ in the settings range.
Loading ...
Loading ...
Loading ...
