Loading ...
Loading ...
Loading ...
INTERIOR LIGHT
The light comes on automatically when the door is
opened. To replace the light bulb, turn the temperature
control to OFF and unplug the electrical cord. Replace
the old bulb with a bulb of the same wattage.
ADJUSTABLE
INTERIOR SHELVES
Multi-position adjustable
interior shelves can be
moved to any position for
larger or smaller packages.
The shipping spacers that
stabilize the shelves for
shipping may be removed
and discarded.
Adjustable Interior Shelves - Upright Models
TO ADJUST CANTILEVER SHELVES
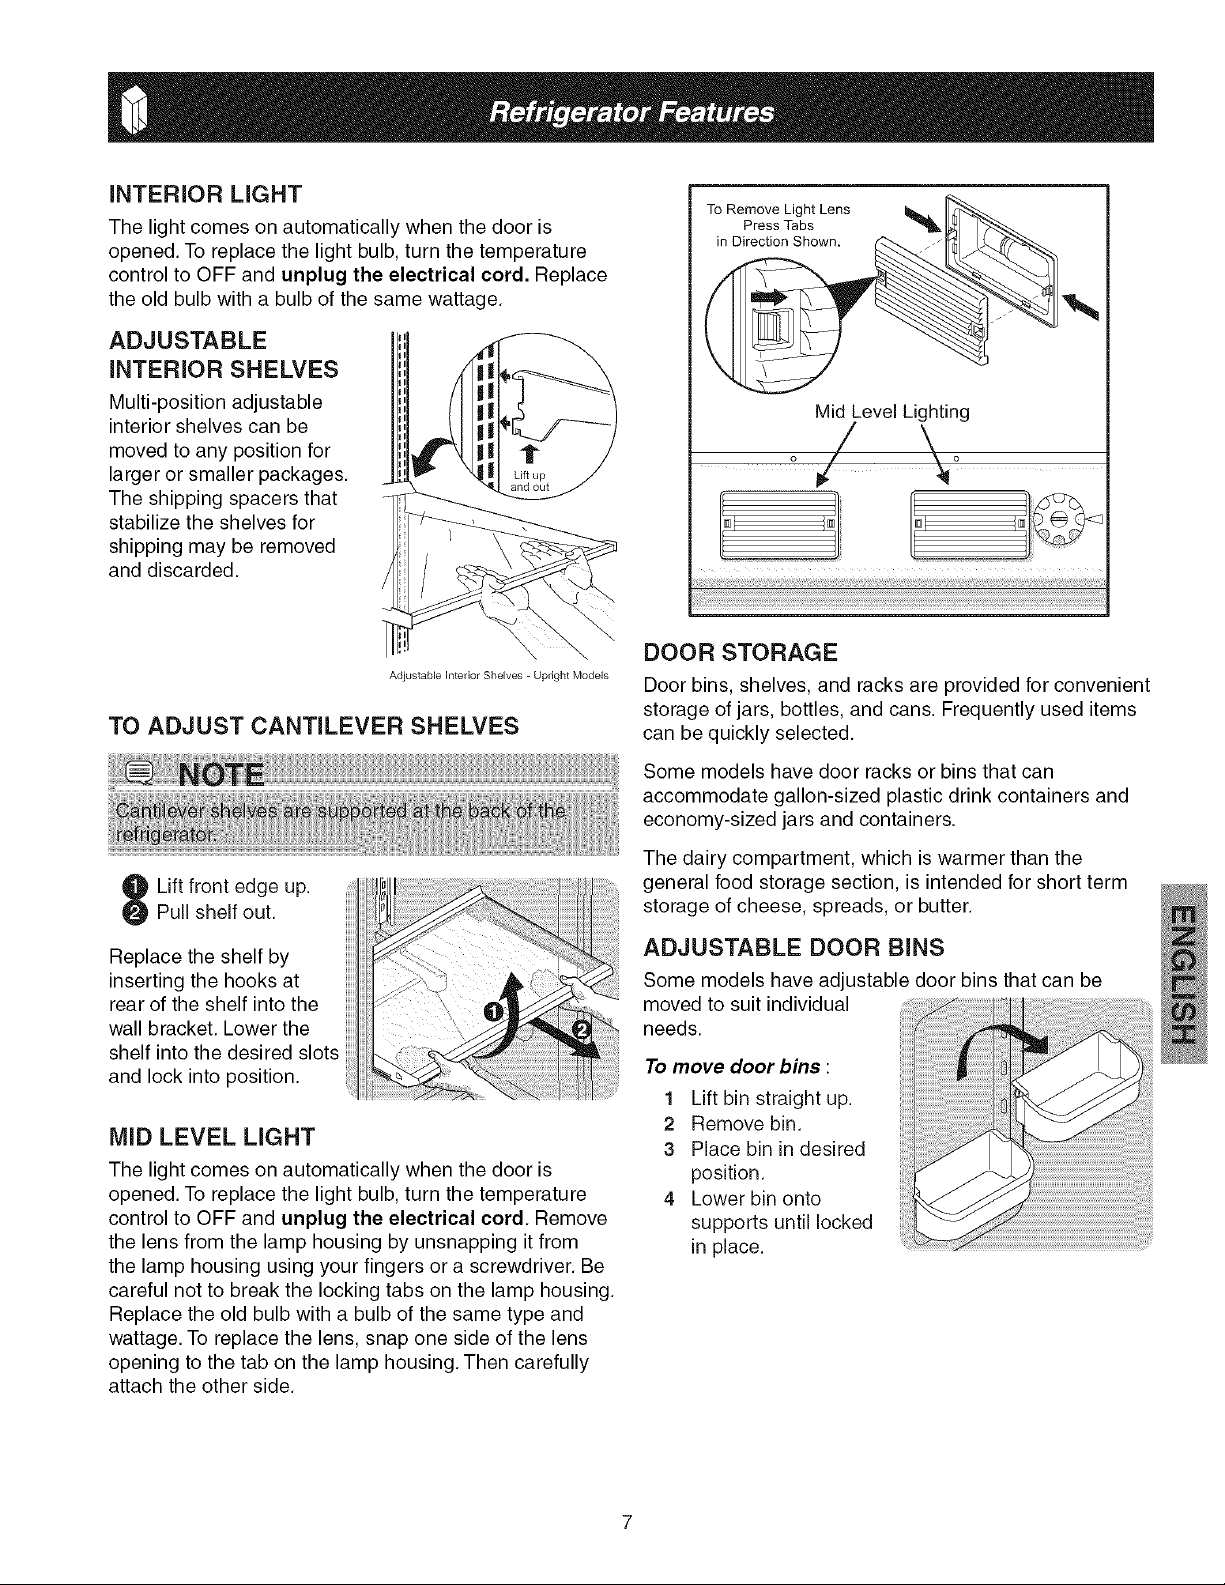
To Remove Light Lens _,
Press Tabs
in Direction Shown.
,%
Mid Level Lighting
o/ \o
DOOR STORAGE
Door bins, shelves, and racks are provided for convenient
storage of jars, bottles, and cans. Frequently used items
can be quickly selected.
Some models have door racks or bins that can
...... accommodate gallon-sized plastic drink containers and
economy-sized jars and containers.
The dairy compartment, which is warmer than the
general food storage section, is intended for short term
storage of cheese, spreads, or butter.
ADJUSTABLE DOOR BINS
Some models have adjustable door bins that can be
moved to suit individual
needs.
Lift front edge up.
Pull shelf out.
To move door bins :
1 Lift bin straight up.
2 Remove bin.
3 Place bin in desired
position.
4 Lower bin onto
supports until locked
in place.
Replace the shelf by
inserting the hooks at
rear of the shelf into the
wall bracket. Lower the
shelf into the desired slots
and lock into position.
MID LEVEL LIGHT
The light comes on automatically when the door is
opened. To replace the light bulb, turn the temperature
control to OFF and unplug the electrical cord. Remove
the lens from the lamp housing by unsnapping it from
the lamp housing using your fingers or a screwdriver. Be
careful not to break the locking tabs on the lamp housing.
Replace the old bulb with a bulb of the same type and
wattage. To replace the lens, snap one side of the lens
opening to the tab on the lamp housing. Then carefully
attach the other side.
Loading ...
Loading ...
Loading ...