
I www.russellhobbs.com
26710

2
k
j
i
f
e
1500ml
h
A
h
C
h
B
h
D

3
Read the instructions, keep them safe, pass them on if you pass the appliance on. Remove all
packaging before use.
IMPORTANT SAFEGUARDS
Follow basic safety precautions, including:
This appliance can be used by persons with reduced physical,
sensory or mental capabilities or lack of experience and knowledge
if they have been supervised/instructed and understand the
hazards involved. Children must not use or play with the appliance.
Keep the appliance and cable out of reach of children.
c To avoid injury, take care when handling the blades, emptying
the jug, and cleaning.
h Don’t add hot liquid (over 40°C) as it may be ejected due to
sudden steaming.
Misuse of the appliance may cause injury.
Unplug the appliance before assembly, disassembly, or cleaning.
Don’t leave the appliance unattended while plugged in.
If the cable is damaged, it must be replaced by the manufacturer, its
service agent, or someone similarly qualified to avoid a hazard.
This appliance must not be connected to a switching device like a
timer, or connected to a mains supply that may become interrupted
by the electricity provider. This prevents a hazard, which may occur
if the thermal cut-out becomes activated for any reason, and is
then reset by disconnection of the supply, causing the appliance to
reheat once the supply is restored.
i Do not immerse in any liquid.
• Switch off (O) before fitting or removing the jug to the motor unit.
• Don’t use accessories or attachments other than those we supply.
• Don’t use the appliance for any purpose other than those described in these instructions.
• Don’t operate the appliance if it’s damaged or malfunctions.
• Don’t run your blender continuously for more than 2 minutes because it may overheat.
After 2 minutes switch off your blender for at least 2 minutes, to allow it to cool down.
HOUSEHOLD USE ONLY

4
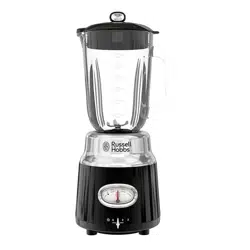
DIAGRAMS
1. Speed control
2. Motor unit
3. Blade assembly
4. Jug
5. Lid
6. Cap
BEFORE USING FOR THE FIRST TIME
Turn to “CARE AND MAINTENANCE” and clean the appliance, to remove manufacturing dust, etc.
USING YOUR BLENDER
In use, treat the jug and blade unit as a single unit.
1. Sit the motor unit on a stable, level surface.
2. Check that the speed control is set to O.
3. If required, screw the jug and blade unit together. Tighten firmly.
4. Lower the jug on to the motor unit with the markings as shown (Fig. A).
5. Twist the jug as shown (Fig. B) until the markings align.
6. Remove the lid.
7. Put the ingredients into the jug. Don’t fill past the 1500 ml mark. If you do, the contents may
force the lid off when you start the motor.
8. Replace the lid. Don’t operate the appliance without fitting the lid.
9. Put the plug into the power socket.
10. Turn the speed control to the speed you want (1 = low, 2 = high).
11. Turn the speed control back to O to turn the motor off.
• Generally, large quantities, thick mixes, and a high ratio of solids to liquids require longer
timings and slower speeds.
• Smaller quantities, thinner mixes, and more liquids than solids require shorter timings and
higher speeds.
• Setting 2 is more useful for thicker foods.
• Turning the speed control anti-clockwise to Y will give you a short burst at high speed. In
this direction, the knob is spring-loaded. When you let go, it’ll return to O.
• To add ingredients while the blender is working, remove the cap, pour the new ingredients
through the hole, then replace the cap.
• Check that the added ingredients don’t increase the volume in the jug past the 1500ml
mark.
When you have finished:
1. Switch the appliance off (O) and unplug it.
2. Twist the jug in the opposite direction to Fig. B until the markings are aligned as Fig. A.
3. Lift the jug off the motor unit.
Blade Boost Function
The blade boost function helps you to free up ingredients that may have become stuck around
the blade during blending.
1. With the motor running, place your hand on top of the jug lid and press the whole jug and
blade assembly down (Fig. C).
2. Release the pressure and allow the jug to come back up again (Fig D).
3. Repeat this as required until the ingredients are processed to your satisfaction.

5
CARE AND MAINTENANCE
1. Switch the appliance off (O) and unplug it.
2. Wipe the outside of the motor unit with a clean damp cloth.
3. Wash the blade assembly as soon as possible, to prevent ingredients from drying and
getting stuck.
4. To help clean the jug and blades add water and washing detergent to the jar, blend on high
speed while pushing the jug up/down a few times.
` You may wash these parts in the dishwasher.
If you use a dishwasher, the harsh environment inside the dishwasher will affect the surface
finishes. The damage should be cosmetic only, and should not affect the operation of the
appliance.
BLADE ASSEMBLY
The blade assembly can be removed for more thorough cleaning.
1. Remove the lid.
2. Turn the jug upside down.
3. Unscrew the blade assembly and lift it off the jug.
4. Handle only the plastic – don’t touch the metal parts of the blade.
5. Wash the blade assembly in warm soapy water, rinse, and air dry.
6. Replace the blade assembly and screw it firmly onto the bottom of the jug.

6
RECYCLING
W
To avoid environmental and health problems due to hazardous substances,
appliances and rechargeable and non-rechargeable batteries marked with
one of these symbols must not be disposed of with unsorted municipal
waste. Always dispose of electrical and electronic products and, where
applicable, rechargeable and non-rechargeable batteries, at an appropriate
official recycling/collection point.
SERVICE
If you ring Customer Service, please have the Model Number to hand, as we won’t be able to
help you without it. It’s on the rating plate (usually underneath the product).
The product isn’t user-serviceable. If it’s not working, read the instructions, check the plug fuse
and main fuse/circuit breaker. If it’s still not working, consult your retailer.
If that doesn’t solve the problem – ring Customer Service – they may be able to offer technical
advice.
If they advise you to return the product to us, pack it carefully, include a note with your name,
address, day phone number, and what’s wrong. If under guarantee, say where and when
purchased, and include proof of purchase (till receipt). Send it to:
Customer Service
Spectrum Brands (UK) Ltd
Fir Street, Failsworth, Manchester M35 0HS
email: support@russellhobbs.com
telephone: 0345 658 9700 (local rate number)
Please note: If you have purchased the product within the last 6 months, please contact the
retailer in the first instance to deal with any matters relating to warranty.
GUARANTEE
Defects affecting product functionality appearing within the guarantee period will be corrected
by replacement or repair at our option provided the product is used and maintained in
accordance with the instructions. Your statutory rights are not affected.
This warranty shall not be valid where it is contrary to U.S. and other applicable laws, or where
the warranty would be prohibited under any economic sanctions, export control laws,
embargos, or other restrictive trade measures enforced by the United States or other applicable
jurisdictions. This includes, without limitation, any warranty claims implicating parties from, or
otherwise located in, Cuba, Iran, North Korea, Syria and the Crimea region.
Guarantee period = 2 years from first retail purchase.
To claim an extra 1 year guarantee, register your product online within 28 days of purchase.
Register at: uk.russellhobbs.com/product-registration
Consumables are guaranteed only for their recommended lifecycle. Replacement/Spare parts*
are excluded and are only covered by a 1 year warranty.
* Examples include filters, removable grill plates, drip trays/crumb trays etc.
J ONLINE
www.russellhobbs.com for more products

7

T22-9002779