Loading ...
Loading ...
Loading ...
Section 4 - ADJUSTMENTS & REPAIR
4.6 MOWER DRIVE BELT, ENGINE BELT & HYDRO
PUMP BELT REPLACEMENT
Inspect all belts Replace belt if it shows signs of
excessive wear, damage and/or is broken.
WARNING
DO NOT attempt any adjustments, maintenance or
service with the engine or blades running. Stop
blades. Stop engine. Set brake. Remove key.
Remove spark plug wires from spark plugs and (gas
only) secure wires away from spark plugs. Engine
and components are HOT. Avoid serious burns by
allowing all parts sufficient time to cool.
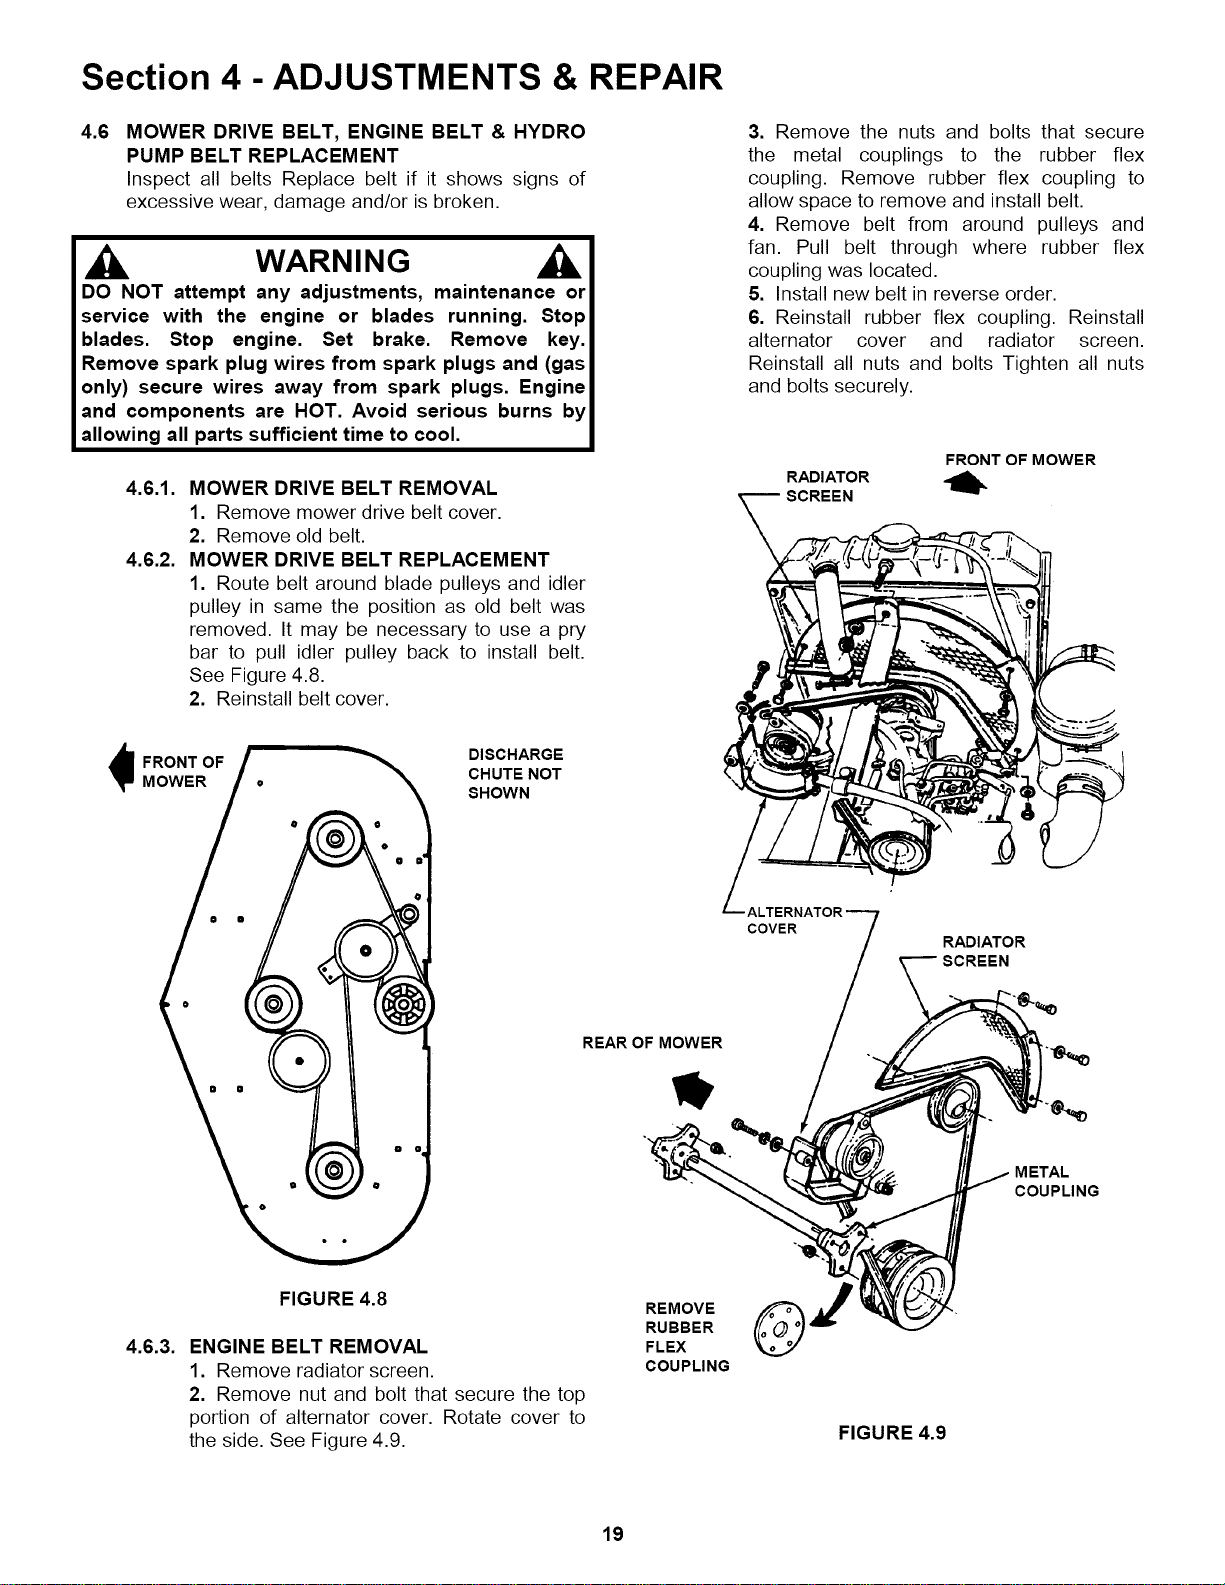
4.6.1.
4.6.2.
MOWER DRIVE BELT REMOVAL
1. Remove mower drive belt cover.
2. Remove old belt.
MOWER DRIVE BELT REPLACEMENT
1. Route belt around blade pulleys and idler
pulley in same the position as old belt was
removed. It may be necessary to use a pry
bar to pull idler pulley back to install belt.
See Figure 4.8.
2. Reinstall belt cover.
iFRONT OF
MOWER
DISCHARGE
CHUTE NOT
SHOWN
REAR OF MOWER
3. Remove the nuts and bolts that secure
the metal couplings to the rubber flex
coupling. Remove rubber flex coupling to
allow space to remove and install belt.
4. Remove belt from around pulleys and
fan. Pull belt through where rubber flex
coupling was located.
5. Install new belt in reverse order.
6. Reinstall rubber flex coupling. Reinstall
alternator cover and radiator screen.
Reinstall all nuts and bolts Tighten all nuts
and bolts securely.
RADIATOR
SCREEN
FRONT OF MOWER
COVER RADIATOR
SCREEN
METAL
COUPLING
FIGURE 4.8
4.6.3. ENGINE BELT REMOVAL
1. Remove radiator screen.
2. Remove nut and bolt that secure the top
portion of alternator cover. Rotate cover to
the side. See Figure 4.9.
REMOVE
RUBBER
FLEX
COUPLING
FIGURE 4.9
19
Loading ...
Loading ...
Loading ...