Loading ...
Loading ...
Loading ...
Safety instructions for assembly
WARNING: Read, understand and
obey these instructions carefully before you
use the product.
• Remove the battery from the product before you
assemble the product.
• Use approved protective gloves.
• A damaged or incorrect guard can cause injury. Do
not use a cutting attachment that does not have an
approved guard attached.
• The drive disc and support flange must engage
correctly in the centre hole of the cutting attachment.
A cutting attachment that is attached incorrectly can
cause injury or death.
• If a harness is supplied with the attachment, the
harness must be correctly attached to the product.
The harness makes operation safe and prevents
injury to the operator or other persons.
Safety instructions for maintenance
WARNING: Read the warning
instructions that follow before you do
maintenance on the product.
• Remove the battery before you do maintenance,
other checks or assemble the product.
• The operator must only do the maintenance and
servicing shown in this operator's manual. Turn to
your servicing dealer for maintenance and servicing
of a larger extension.
• Do not clean the battery or the battery charger with
water. Strong detergent can cause damage to the
plastic.
• If you do not do maintenance, it decreases the
life cycle of the product and increases the risk of
accidents.
• Special training is necessary for all servicing and
repair work, especially for the safety devices on the
product. If not all checks in this operator's manual
are approved after you have done maintenance, turn
to your servicing dealer. We guarantee that there are
professional repairs and servicing available for your
product.
• Only use original spare parts.
• Always use heavy duty gloves when you repair the
cutting attachment. The blades are very sharp and
can easily cause injuries.
Assembly
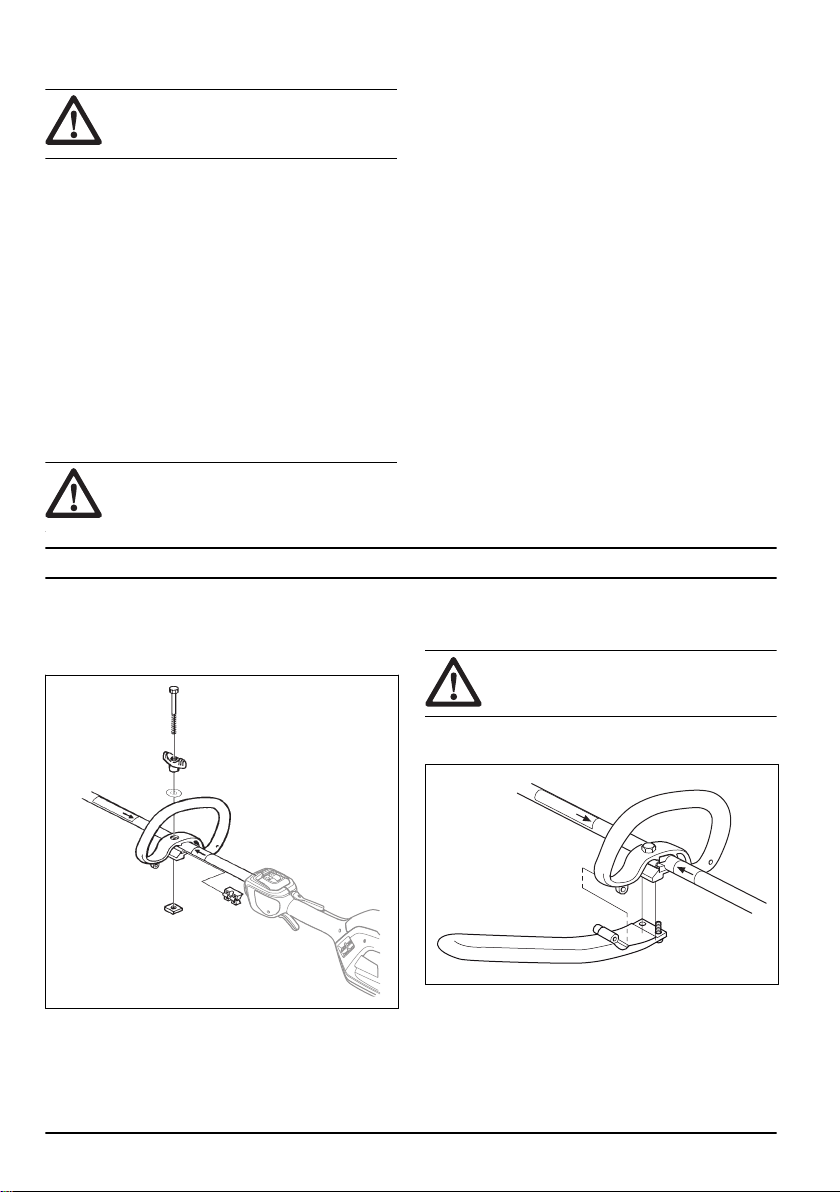
To assemble the loop handle
1. Attach the loop handle onto the shaft between the
arrows. Do not place loop handle or suspension ring
on label.
2. Move the spacer into the slot of the loop handle.
3. Attach the nut, the knob and the screw, do not make
it to tight.
4. Adjust the product to a comfortable position.
5. Tighten the bolt.
To assemble the J-handle
WARNING: Do not use saw blades
with the J-handle.
1. Attach the J-handle to the loop handle with 3 screws.
Do not tighten the screws fully.
2. Adjust the product to a comfortable position.
12 1858 - 004 - 02.06.2023
Loading ...
Loading ...
Loading ...