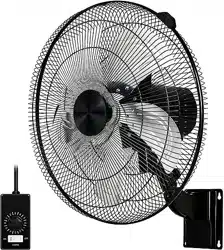
16''WALL FAN ·
INSTRUCTION/OPERATING MANUAL

mu~
ALLIN
:TING
F
~i
CAUTION
Read and follow all instruction before operating fan. Do not use fan if any part is damage or
missing.
WARNING
1.To reduce the risk
of
fire
or
electric shock, do not use this fan with any solid state speed
control device.
2.This appliance has a polarized plug which is intended to fit
in
an
outlet only one way. If this
does not fit outlet, contact a qualified electrician. Do not attempt to by-pass this procedure.
3.This product is to be used indoors.
4.Unplug from electrical supply source before cleaning.
S.
lf
the power cord is damaged, contact your local service center
or
a qualified electrician to
install an appropriate replacement cord to prevent any injury
or
damage.
6.This appliance
is
not intended
for
use by persons(including children) with reduced physical,
sensory or. mental capabilities,
or
lack of experience and knowledge, unless they have
been given supervision
or
instruction concerning use of the appliance by a person
responsible for their safety.
?.Children should be supervised to ensure that they do not play with the appliance.
1.Never insert fingers, pencils, or any other object through the guard when fan is running.
2.Disconnect the fan when moving from one location
to
another.
3.Disconnect the fan when removing grills
for
cleaning.
4.Be sure fan is
on
a stable surface when operating to avoid overturning.
S.DO NOT use fan
in
window. Rain may create electrical hazard.
6.The fan is for home use only.
?.Do not leave the fan running unattended.
Before commencing assembly familiarize yourself
wi
th all the assembly components
("See
chart and diagram).

1.
Drill two holes
in
the wall first, the distance between the holes
is
32mm(1.3") (fig.4);
2.
Put two drywall plugs(17) (fig.2) into the hole, and then lock the screws(18) (fig.3),the
distance between the wall and the screw
is
5mm(0.2");
3.
Align the holes
on
the fan hanging board(12) plate with the two screws
on
the wall, and
then hang the subject(1 0).
4. Remove the securing ring(5)
of
the back net from the motor cover and rotate it clockwise
to loosen
it.
5.
Install the rear grill(6)
to
the corresponding position
of
the motor cover, then lock the
securing ring(5), lock it counterclockwise, and lift the handle(?) upward;(see fig11)
6.
Insert the fan blades(4) onto the motor shaft(8) pin(9), securing the fan blades using the
fan blade securing cap(3), turning counter-clockwise to tighten;
7.
Install front
gri11(1)
over top of the rear
gri11(6).
Fasten the two grills with the clips(2)
attached to the front grill.
8.
Fully tighten the small nut(16) and bolt(15) that passes through the rim
of
the grills.
Attention: Notches
on
fan blade assembly must be seated firmly
on
arms of fan shaft.
Fasten retaining cap securely before use.
1.
front grill
2.
clips
3.
fan blade securing cap
4. fan blades
5.
securing ring
6.
rear grill
7.
handle
8.
motor shaft
9.
pin
10. subject
11
. power cord Fig.2 Fig.3 Fig.4
12. hanging board
drywall plugs
screws
hanging board
13. knob
14. drawstring
15. bolt
16. nut
17. drywall plugs
18. screws

INSTRUCCIONES
DE
OPER.A_c
1.
To
adjust the tilt angle
of
fan head upward or downward by simply moving the guard up
or
down.
2. For a vertical angle, pull the operating knob until the desired angle is achieved.
3.
Pu
ll
the rope to choose the desired speed (high-medium"low-off). Pull the rope to turn
off the fan.
1.Grasp plug and remove from the receptacle
or
other outlet device. Do not unplug by
pulling
on
cord
2.
0pen
fuse cover. Slide open fuse access cover on top
of
attachment plug towards blades,
(see fig.5)
3.Remove fuse carefully. Remove the
fuse
by
prying it out carefully, (see fig.6)
4.Risk
of
fire. Replace fuse only with 5Amp max, 125 Volt fuse.
5.Ciose fuse cover. Slide closed the fuse access cover on top
of
attachment plug, (see fig.?).
6.Risk
of
fire. Do not replace attachment plug. Contains a safety device (fuse) that should
not be removed. Discard product if the attachment plug
is
damaged.
Fig: 5 Fig:6 Fig:?
Tips: Do not overexert when replacing the fuse or damage may occur.
If
it's hard to close the
access cover, make sure the fuse is fully inserted.
1.Be sure to unplug from the electrical supply source before cleaning.
2.Piastic parts should be cleaned with mild soap and damp cloth
or
sponge. Thoroughly
remove soap film with clean water.
3.Be sure not to get water
or
other liquid into the motor.
Fig:
11