
Loading ...
Loading ...
Loading ...
ENGLISH
9
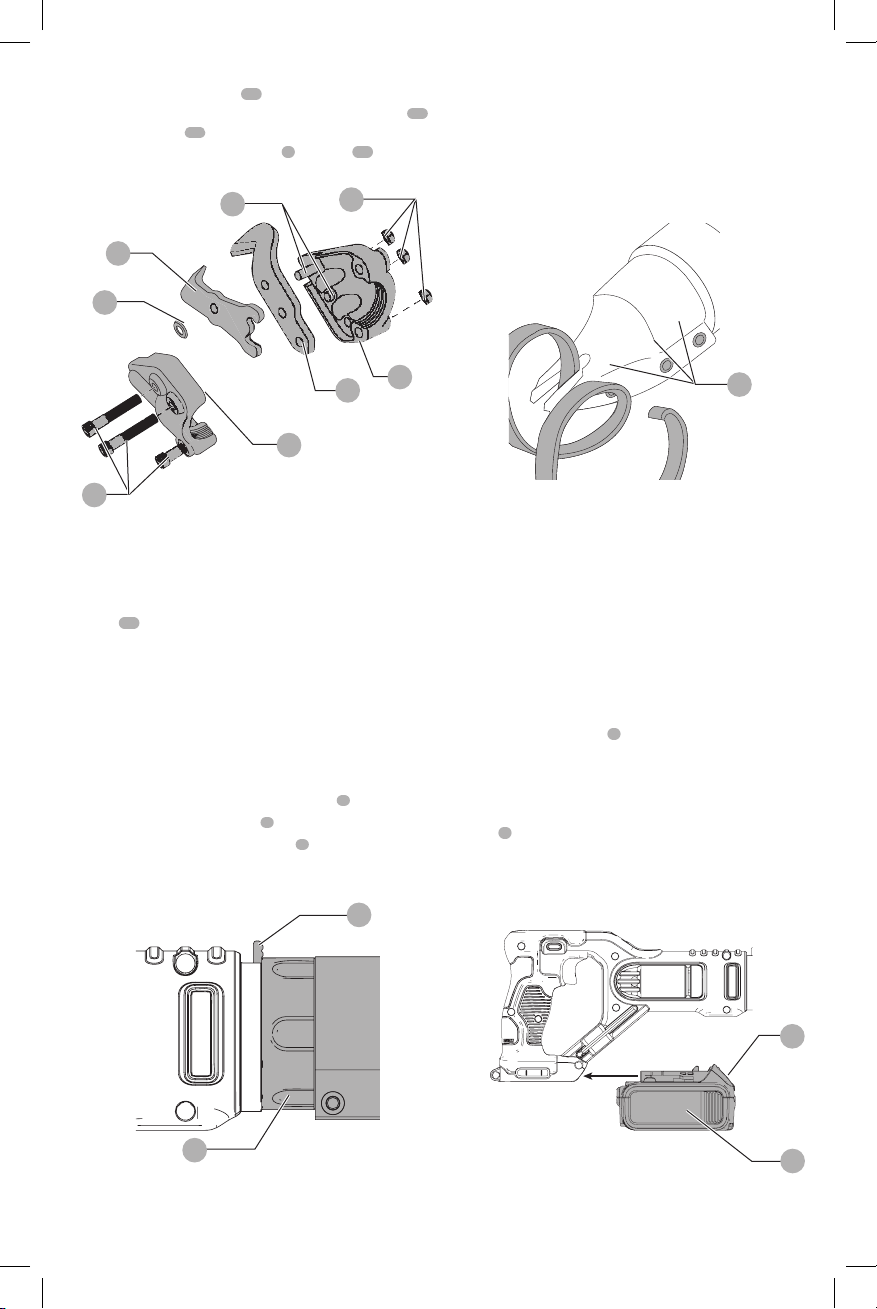
Install replacement washer
21
, cone side up, over the pin
on top of the moving blade. Place top half of head back
22
onto bottom half
23
, making sure to align the pin to the
hole. Reinstall all three cap screws
7
and nuts
24
, but DO
NOT tighten completely.
Fig. H
9
19
21
20
24
22
18
23
Slide shear head back onto motor unit, making sure that
the eccentric engages the moving blade. Once the head is
on the motor unit and aligned, tighten all three screws and
follow adjustment procedure below.
To ensure proper blade tension, tighten tensioning
screw
17
by turning clockwise to seat the blades. Next,
loosen tensioning screw by turning counterclockwise
slightly to allow blade movement.
NOTE: The tensioning screw should be adjusted to
correspond to material thickness.
Swivel Head (Fig. I, J)
To better accommodate safe cutting at any angle, the shear
head can be easily and quickly repositioned.
1. Press and hold the collar release button
8
.
2. Rotate the head and collar
7
to desired position.
3. Release the collar release button
8
.
NOTE: Continue rotating the head until it clicks into the
nearest locking detent posotion.
8
7
Fig. I
DCS491, DCS494
To adjust the curl of waste material, the left side knife
has elongated holes. Adjustment may be necessary after
changing blades or material being cut. Loosen cap screws
and tap side knife either forward or backward so that curl
of waste does not hit shear housing or work material while
cutting.
Fig. J
9
OPERATION
WARNING: To reduce the risk of serious personal
injury, turn unit off and remove the battery pack
before making any adjustments or removing/
installing attachments or accessories. An
accidental start-up can causeinjury.
Installing and Removing the Battery Pack
(Fig. K)
NOTE: For best results, make sure your battery pack is
fullycharged.
To install the battery pack
5
into the tool handle, align the
battery pack with the rails inside the tool’s handle and slide
it into the handle until the battery pack is firmly seated in
the tool and ensure that it does notdisengage.
To remove the battery pack from the tool, press the release
button
6
and firmly pull the battery pack out of the tool
handle. Insert it into the charger as described in the charger
section of thismanual.
Fig. K
6
5
Loading ...
Loading ...
Loading ...