Loading ...
Loading ...
● Stopwatch Mode
In this mode, the main hour and minute hands
indicate the current time in your current
location (Home City), while the other hands
show elapsed time as measured by the
stopwatch.
30
①
②
③
④
Split/Reset
Start/Stop
Battery level indicator
A Stopwatch seconds
B Stopwatch hours
C Stopwatch minutes
D Stopwatch 24-hour hand
The hand points to the A-side for hours 0
through 11, and to the P-side for hours 12
through 23.
Battery level indicator :
Movement synchronized with Stopwatch
minutes.
● Timer Mode
The main hour and minute hands indicate the
current time.
The second hand, and the small hour and
minute hands indicate the current countdown
time.
30
①
②
③
④
Battery level indicator
Reset
Start/Stop
A Timer seconds
B Timer minutes
C Timer hours
D Timer 24-hour hand
The hand points to the A-side for hours 0
through 11, and to the P-side for hours 12
through 23.
Battery level indicator :
Movement synchronized with Timer minutes.
●
Alarm Mode
In this mode, the main hour and minute hands
indicate the current time in your current
location (Home City), while the dial hour and
minute hands show the alarm time setting.
30
①
②
③
Battery level indicator
Enabling/
Disabling the
Alarm
Illumination
A Alarm enable/disable
The second hand will point to “ON” while
the alarm is turned on, and to “OFF” while
it is turned off.
l
Turning an Alarm On or Off
B Alarm time
C Alarm 24-hour hand
The hand points to the A-side for a.m.
times, and to the P-side for p.m. times.
Battery level indicator :
Indicates alarm on/off status.
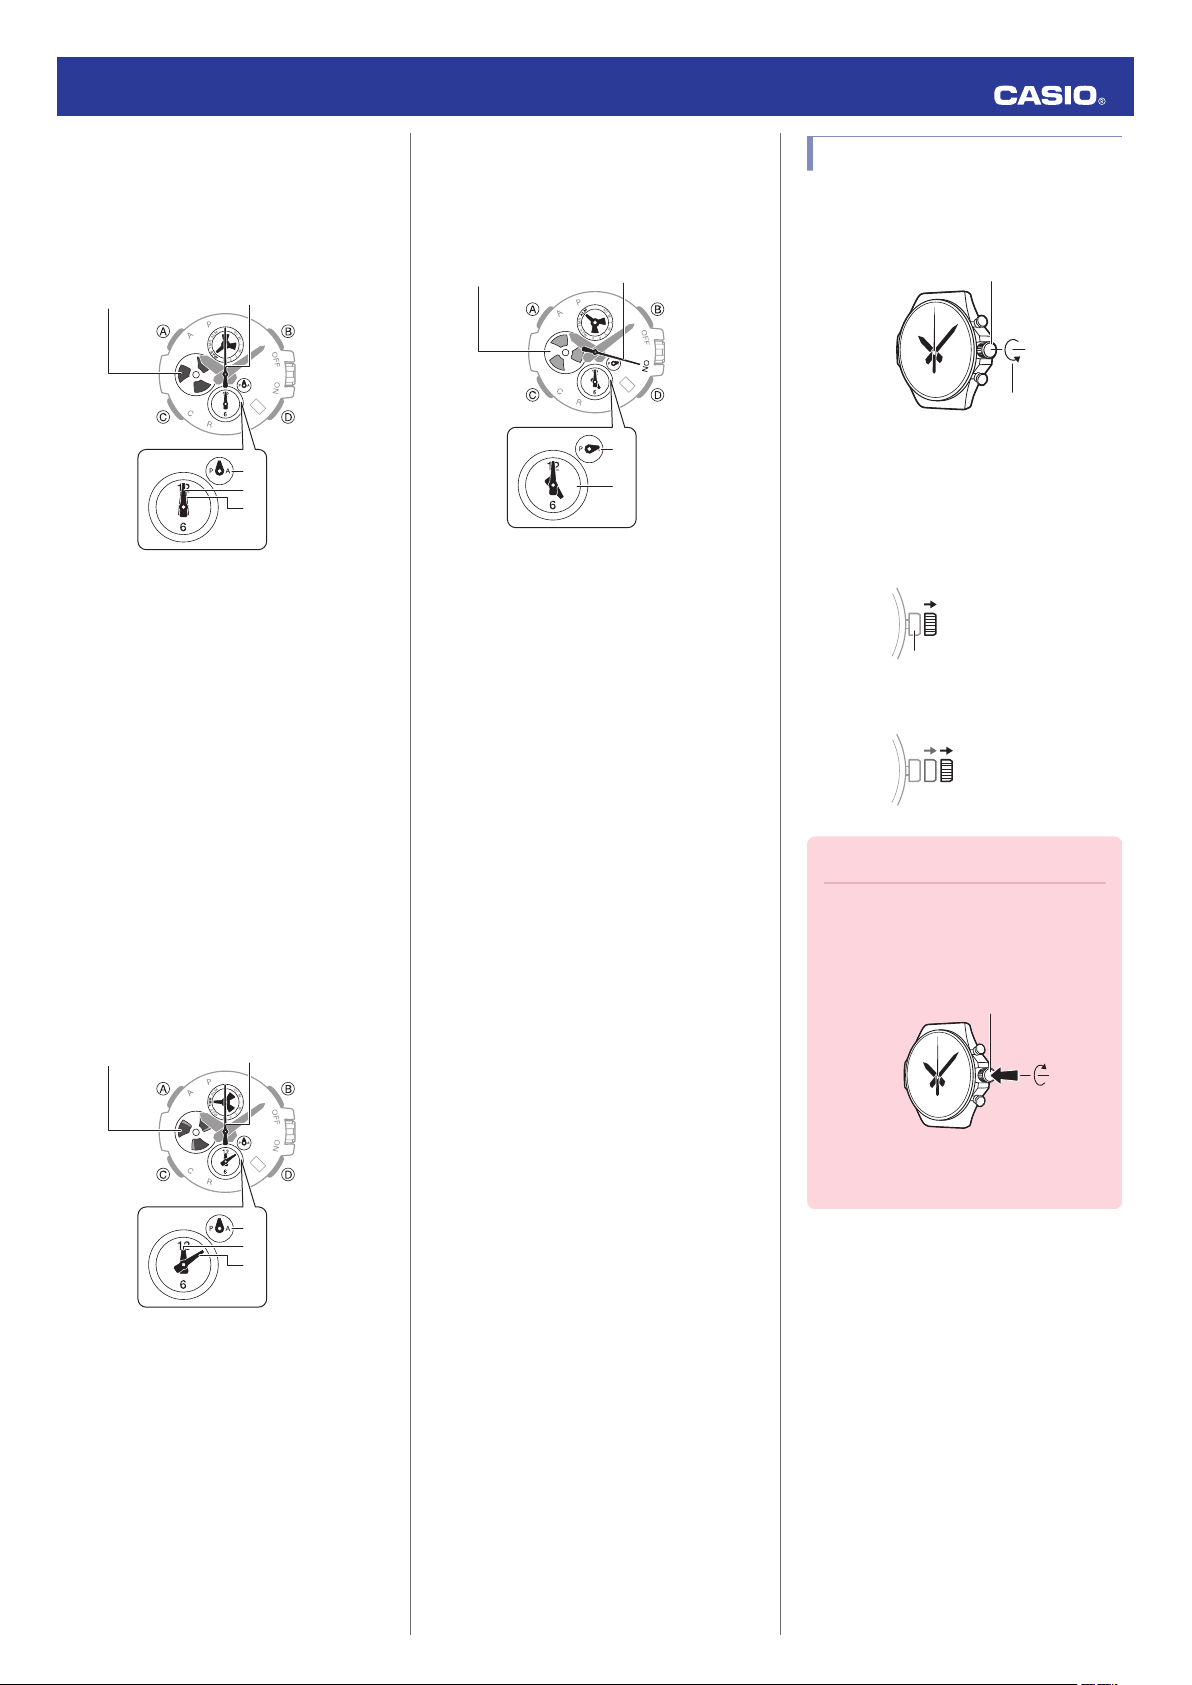
Using the Crown
The watch’s crown is a screw-in (screw lock)
type. To use the crown, you first need to rotate
it towards you (leftwards) to loosen it.
Loosen
Crown
● Pulling Out and Pushing In the Crown
To perform a crown operation, pull it out to the
first or second click and then rotate it. Do not
pull the crown with too much force.
First click
Normal timekeeping
Second click
Important!
●
To prevent loss of water resistance
and/or damage due to impact, be sure
to screw the crown in by rotating it
away from you as you push it in.
Screw in
●
When pushing the crown back in, take
care not to apply too much force.
Operation Guide 5513
3
Loading ...
Loading ...
Loading ...