Loading ...
Loading ...
Loading ...

8
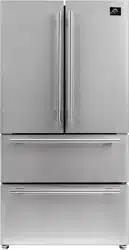
INSTALLATION INSTRUCTIONS
Before Using Your Appliance
•
Remove the exterior and interior packaging.
•
Check to be sure you have all the following parts:
1
(6)Six Refrigerator Door Bins
5
(2)Two Vegetable Crispers with Glass Cover
2
(2)Two Refrigerator Shelves
6
(2)Two Freezer Drawers
3
(1)Refrigerator Light
7
(1)Ice maker Assembly Inside the Freezer
Drawer
4
(1)Refrigerator LED Light
8
(1)Plastic Drawer Inside the Freezer Drawer
•
Before connecting the unit to the power source, let it stand upright for approximately 2 hours.
This will reduce the possibility of a malfunction in the cooling system due to handling during
transportation.
•
Clean the interior surface with lukewarm water using a soft cloth.
Installing Your Appliance
•
Place your refrigerator-freezer on a floor that is strong enough to support the refrigerator-
freezer when it is fully loaded. To level your refrigerator-freezer, adjust the leveling legs at the
bottom of unit.
•
ALLOW 3-5 INCHES OF SPACE BETWEEN THE BACK OF THE APPLIANCE AND THE
WALL AS WELL AS A MINIMUM OF ½” (HALF INCH) AT EACH SIDE OF THE UNIT AND
ONE (1) INCH AT THE TOP, WHICH ALLOWS PROPER AIR CIRCULATION TO COOL
THE COMPRESSOR AND CONDENSER.
Minimum Space Allowances
Top
One (1) inch
Sides
Half (½) inch on each side
Back
Three to Five (3 - 5) inches at the back
•
Locate the unit away from direct sunlight and heat sources (stove, heater, radiator, etc.).
Direct sunlight may affect the acrylic coating and heat sources may increase power
consumption. Extreme cold room temperatures may also cause the refrigerator- freezer to not
perform properly.
•
Avoid placing the unit in a moist area.
•
Plug the unit into an exclusive, properly-installed grounded wall outlet. Do not under any
circumstances cut or remove the third (ground) prong from the power cord. Any questions
concerning power and/or grounding should be directed to a certified electrician or an
authorized FORNO Products service centre.
Loading ...
Loading ...
Loading ...