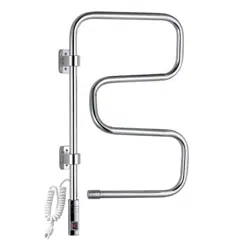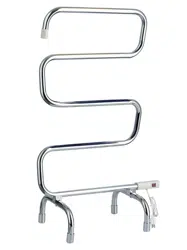
Comfort 5 Floor Curved oel rmer
Installation and Operations Manual
MA5
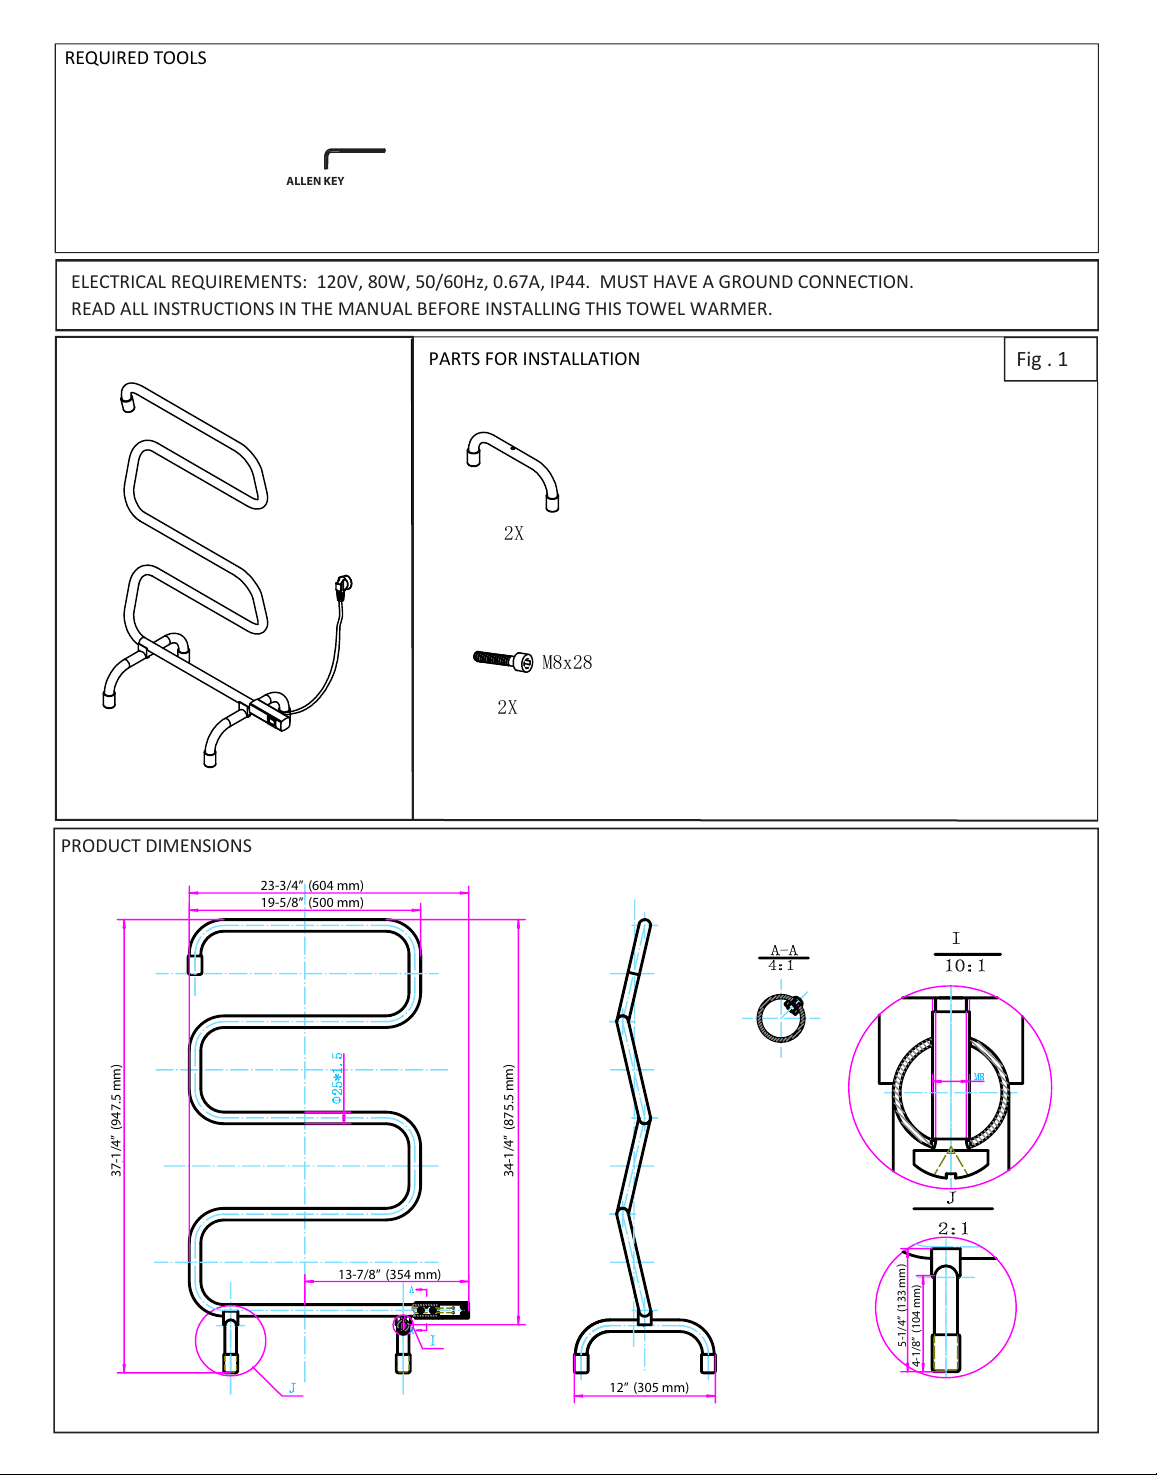
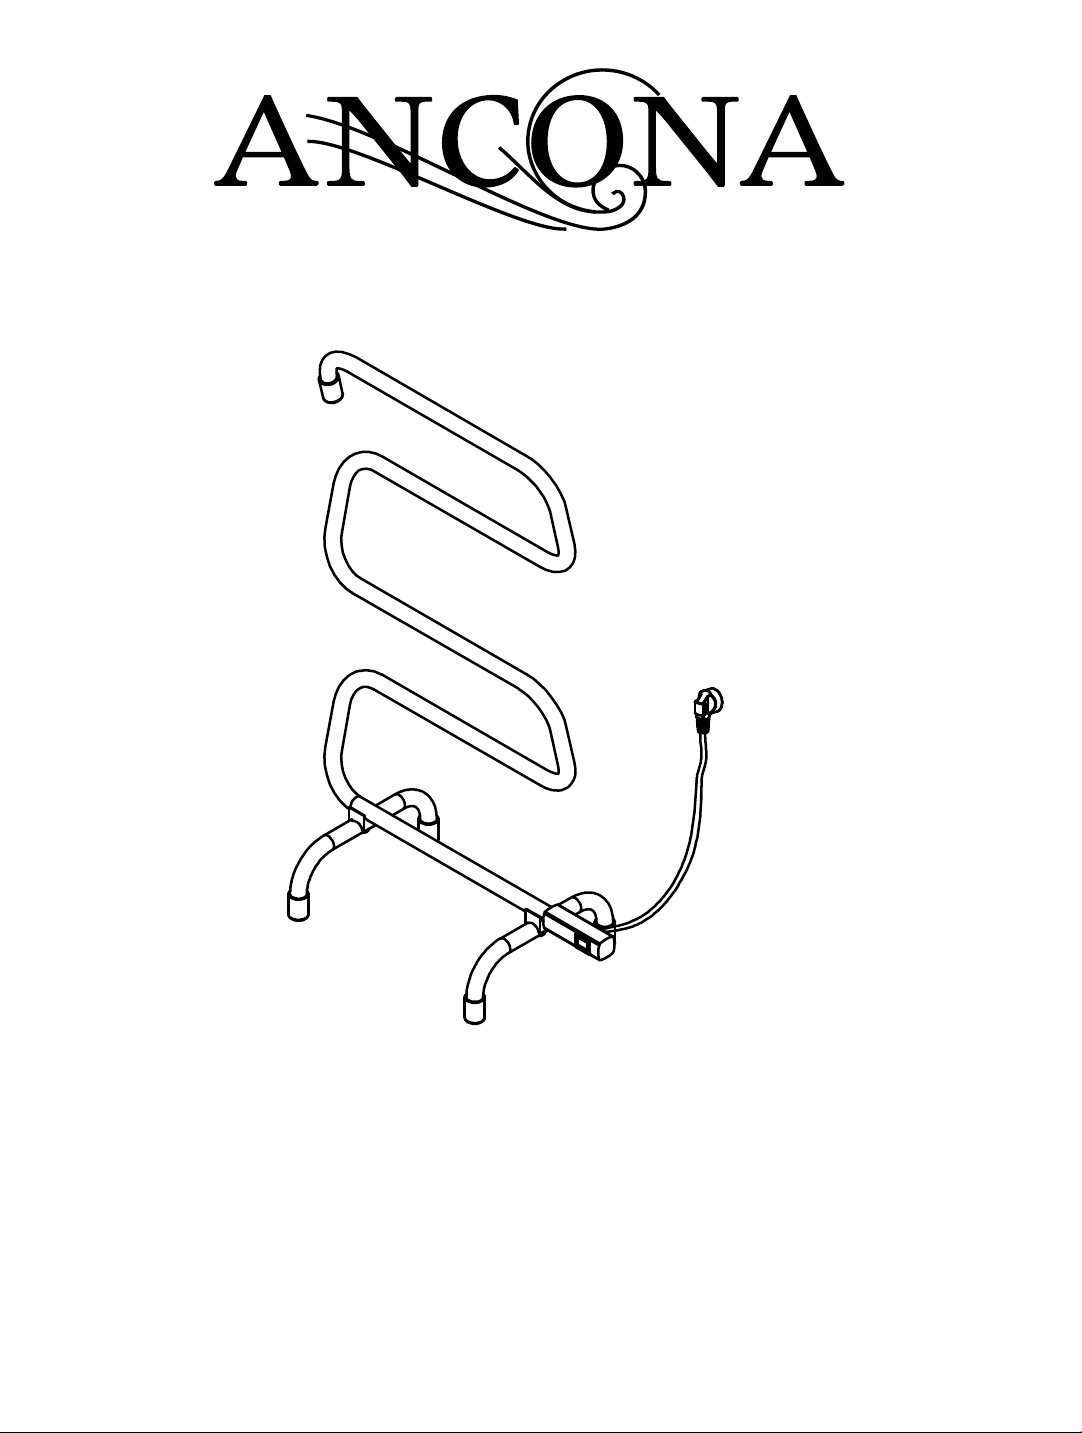
PRODUCT DIMENSIONS
REQUIRED TOOLS
Fig . 1
ELECTRICAL REQUIREMENTS: 120V, 80W, 060Hz0A
PARTS FOR INSTALLATION
2X
2X
M8x28
23-3/4” (604 mm)
19-5/8” (500 mm)
37-1/4” (947.5 mm)
34-1/4” (875.5 mm)
13-7/8” (354 mm)
” (35 mm)
5-1/4” (133 mm)
4-1/8” (104 mm)

1.
2.
Do not install in the shower, sauna or any wet
loons
3.
24”
.
Make sure towel warmer is properly secured
to the wall before use.
Install in accordance with n onal and local
codes
FLOOR PLUG-IN INSTALLATION
Step
1:
Verifying
installation
parts (Fig. 1)
Step
2:
Installing
floor
stand
posts
(Fig. 2 and 3)
Left and right f
fr tand t
nt
fr tand t
the nting raet hih are ated n the tt f the ain d nt the
fr tand t
ee ig
ee ig
fr tand t
Step 3: Test the towel warmer (Fig. )
-Turn the switch on to start towel warmer; the On-Off switch is located at the end of one of the posts.
-The towel warmer should reach its pre-set temperature in approximately 15 minutes.
-This towel warmer is designed to operate continuously and can be left on all the times.
To save electricity it an e trned ff hen nt in e
Fig.
L
R
L
R
OFF
ON
Fig.
Fig.
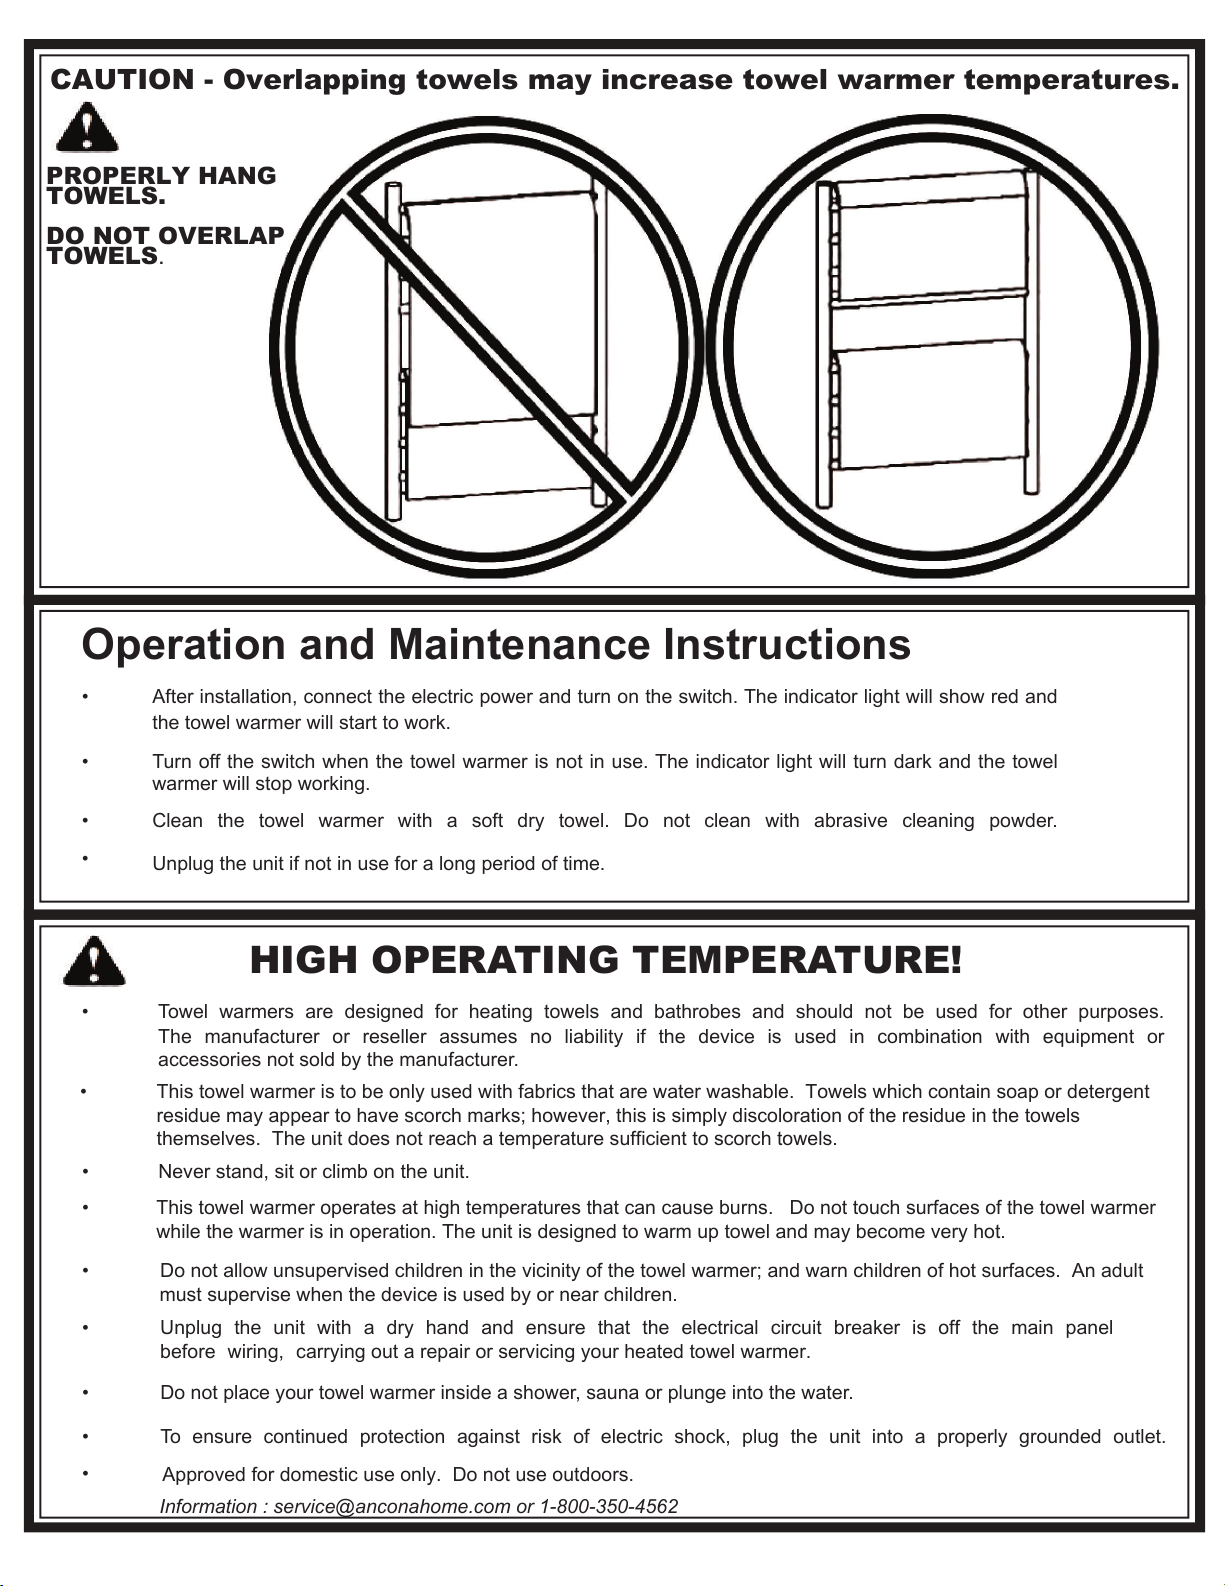
Operation and Maintenance Instructions
• After installation, connect the electric power and turn on the switch. The indicator light will show red and
the towel warmer will start to work.
• Turn off the switch when the towel warmer is not in use. The indicator light will turn dark and the towel
warmer will stop working.
• Clean the towel warmer with a soft dry towel. Do not clean with abrasive cleaning powder.
PROPERLY HANG
TOWELS.
DO NOT OVERLAP
TOWELS.
CAUTION - Overlapping towels may increase towel warmer temperatures.
• Towel warmers are designed for heating towels and bathrobes and should not be used for other purposes.
The manufacturer or reseller assumes no liability if the device is used in combination with equipment or
accessories not sold by the manufacturer.
• Never stand, sit or climb on the unit.
• This towel warmer operates at high temperatures that can cause burns. Do not touch surfaces of the towel warmer
while the warmer is in operation. The unit is designed to warm up towel and may become very hot.
• Do not allow unsupervised children in the vicinity of the towel warmer; and warn children of hot surfaces. An adult
must supervise when the device is used by or near children.
•
Unplug the unit and ensure that the electrical circuit breaker is off the main panel
before wiring, carrying out a repair or servicing your heated towel warmer.
• Do not place your towel warmer inside a shower, sauna or plunge into the water.
• To ensure continued protection against risk of electric shock, plug the unit into a properly grounded outlet.
•
Approved for domestic use only. Do not use outdoors.
HIGH OPERATING TEMPERATURE!
•
•
.
Information : @anconaho.com or 1-800-350-4562
Comfort 5 Floor Curved
Guide d’installation et de fonctionnement
MA5
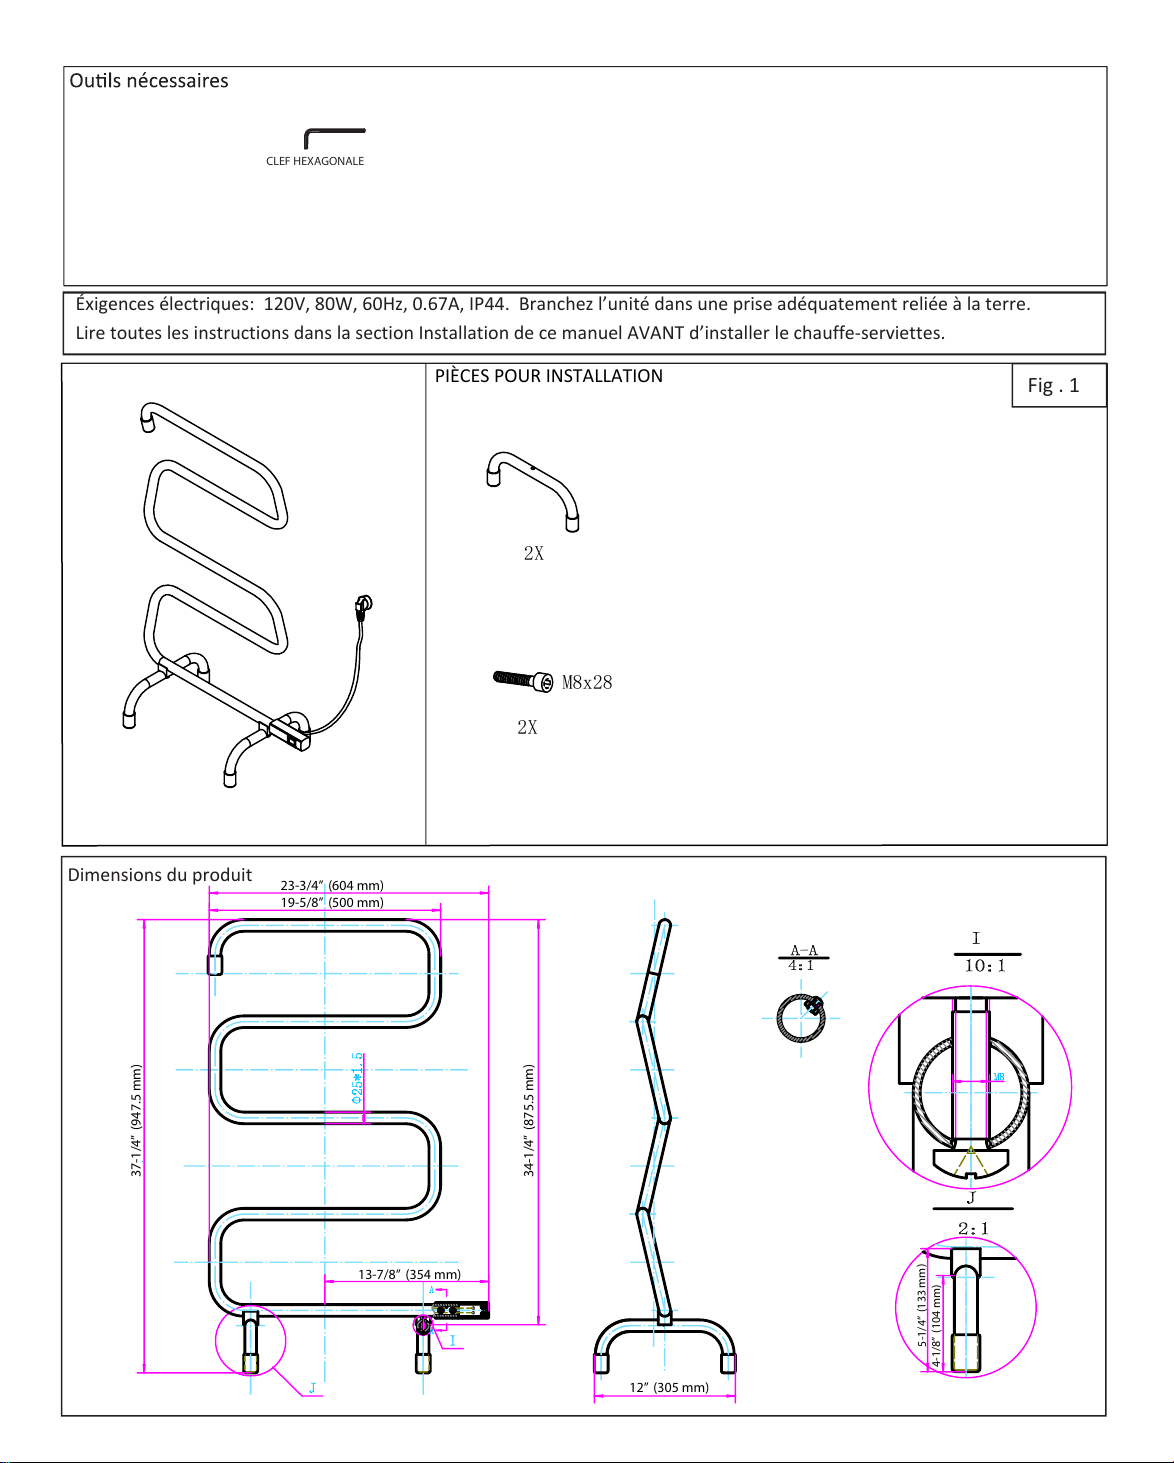
Dimensions du produit
CLEF HEXAGONALE
Fig . 1
P
Éxigences électriques: 120V, 80W, 60Hz, 0
2X
2X
M8x28
23-3/4” (604 mm)
19-5/8” (500 mm)
37-1/4” (947.5 mm)
34-1/4” (875.5 mm)
13-7/8” (354 mm)
1” (35 mm)
5-1/4” (133 mm)
4-1/8” (104 mm)

1.
2.
Ne pas installer dans une douche, un sauna ou tout
emplacement mouillé
3.
.
Assurez-vous que le chauffe-serviette est adéquatement
fixé au mur avant l’utilisation
Installer conformément les codes nationaux et locaux
Étape
1:
Vérification
des
pièces
d'installation
(Fig. 1)
Étape
2:
Installation
de
pieds (Fig. 2 et 3)
ahe et rite
e nneter
nit rinia r e ied ir e fig
ir e fig
Étape 3: Mettre le chauffe-serviette en marche (Fig. )
-Allumer le chauffe-serviette; l'interrupteur marche-arrêt se trouve sur le dessus de l'un des barreaux l’unité
devrait atteindre sa température préétablie dans environ 15 minutes
-Ce chauffe-serviettes est conçu pour fonctionner continuellement et peut être laissé en marche en tout temps.
Pour économiser de l'électricité, il est suggéré de l’éteindre lorsqu'il n'est pas utilisé
INSTALLATION ÉLECTRIQUE PLANCHER
Fig.
G
G
ON
OFF
Fig.
Fig.
Instructions de fonctionnement et d’entretien
•
L
• L
•
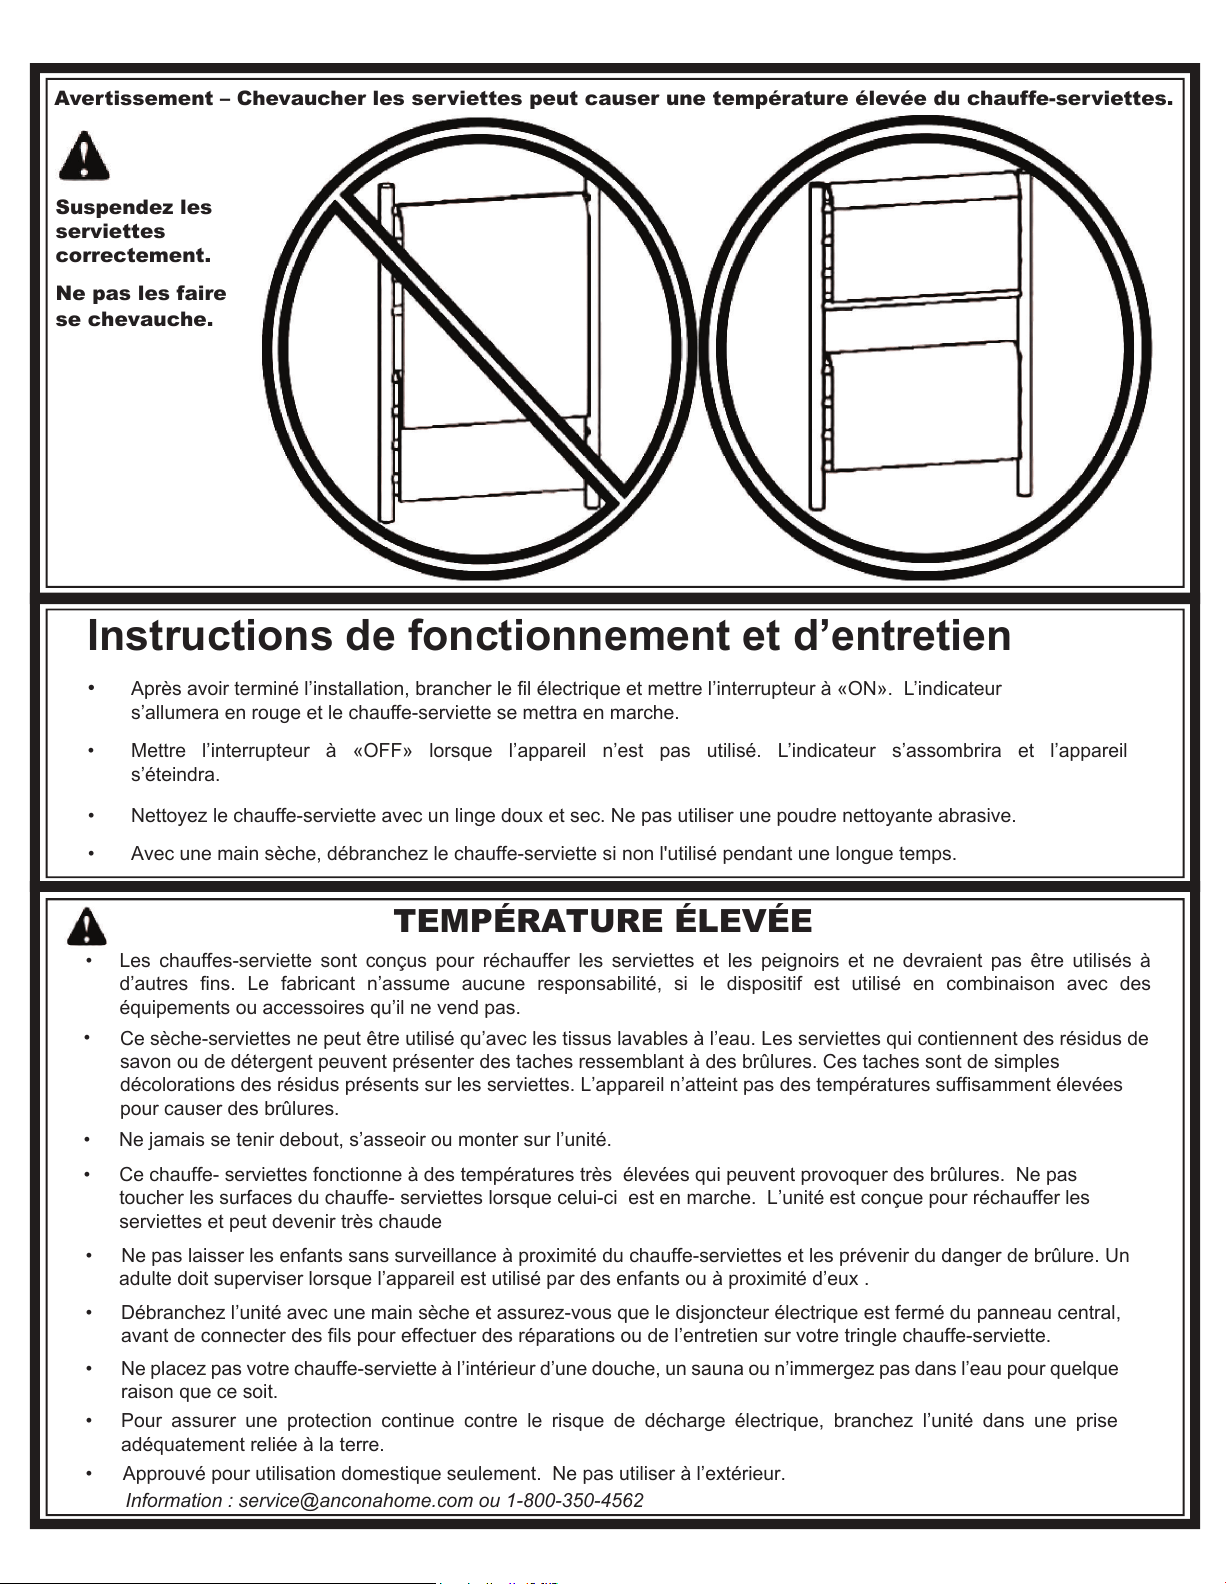
Suspendez les
serviettes
correctement.
Ne pas les faire
se chevauche.
•
•
•
•
•
•
•
•
r
Avertissement – Chevaucher les serviettes peut causer une température élevée du chauffe-serviettes.
TEMPÉRATURE ÉLEVÉE
•
•
Information : @anconacom ou 1-800-350-4562