
USER MANUAL
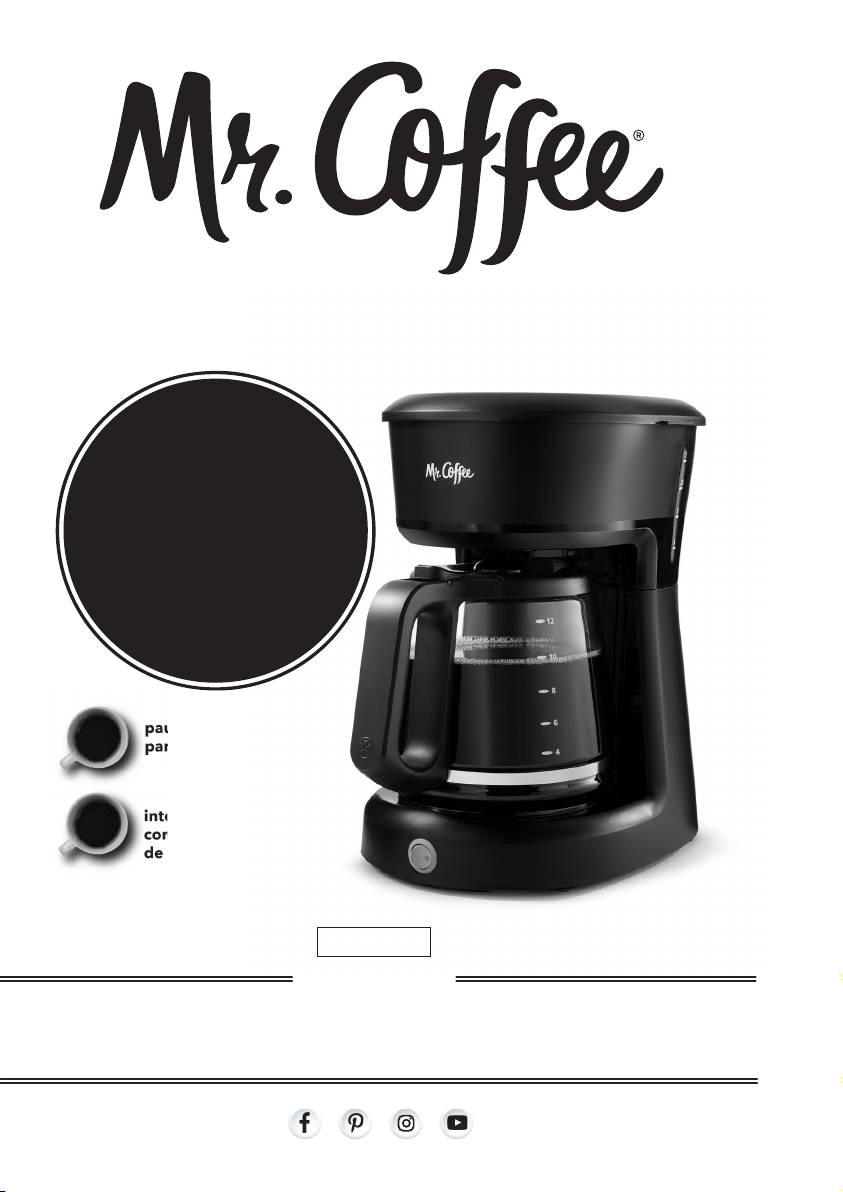
12 CUP COFFEEMAKER
P.N. NWL0001395325 www.mrcoffee.com
SC12 SERIES
© 2022 Sunbeam Products, Inc. All rights reserved. Distributed by Sunbeam Products, Inc.
Boca Raton, Florida 33431. Made in China.
BVMC-SC12 Series_22ESM1 (Walmart)_GCDS-JC
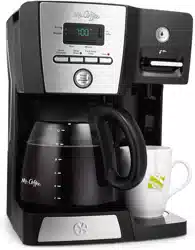
grab-a-cup
auto pause
+
easy switch with LED
power indicator
+
great
COFFEE
SIMPLY

USER MANUAL
12 CUP COFFEEMAKER
P.N. NWL0001395325 www.mrcoffee.com
SC12 SERIES
© 2022 Sunbeam Products, Inc. All rights reserved. Distributed by Sunbeam Products, Inc.
Boca Raton, Florida 33431. Made in China.
BVMC-SC12 Series_22ESM1 (Walmart)_GCDS-JC
grab-a-cup
auto pause
+
easy switch with LED
power indicator
+
great
COFFEE
SIMPLY
INTRODUCTION
Welcome and congratulations on the purchase of your new
MR. COFFEE® Coffeemaker. Your new SC12 Series Coffeemaker
will wake up with you in the morning and provide you tasty
breaks during your hectic daily activities. How you enjoy your MR.
COFFEE® Coffeemaker is up to you!
Our number one goal is to give you the best-tasting cup of
coffee every time, so if you have any questions about your new
coffeemaker, please contact us at 1-800-672-6333 or visit us
at www.mrcoffee.com.
1.
2.
IMPORTANT SAFEGUARDS
When using electrical appliances, basic safety precautions should always
befollowedtoreducetheriskoffire,electricshock,and/orinjuryto
persons including the following:
1. Read all instructions.
2. Do not touch hot surfaces. Use handles or knobs.
3. To protect against electric shock, do not place or immerse cord, plugs,
or appliance in water or other liquid.
4. This appliance is not intended for use by children or by persons with
reduced physical, sensory, or mental capabilities, or lack of experience
and knowledge. Close supervision is necessary when any appliance is
used near children. Children should be supervised to ensure that they
do not play with the appliance. Keep the appliance and its cord out of
reach of children.
5. Unplug from outlet when either the appliance or display clock (if
provided) is not in use, and before cleaning. Allow to cool before
putting on or taking off parts, and before cleaning the appliance.
6. Do not operate any appliance with a damaged cord or plug or after
the appliance malfunctions, or has been damaged in any manner.
Return appliance to an Authorized Service Center for examination,
repair or adjustment. Do not attempt to replace or splice a
damaged cord.
7. The use of an accessory not recommended by the appliance
manufacturerforusewiththisappliancemayresultinfire,electric
shock or injury to persons.
8. Do not use outdoors.
9. Do not let cord hang over edge of table or counter, or touch hot
surfaces.
10. Do not place on or near a hot gas or electric burner, or in a heated
oven.
11.Alwaysattachplugtoappliancefirst,thenplugcordintothewall
outlet (for appliances with detachable cords). To disconnect, turn any
control to the off position, then remove plug from wall outlet.
12. Do not use appliance for other than intended use.
13. All lids should be closed during use.
14. Scalding may occur if the lid is removed or brew basket door is
opened during or immediately after the brewing cycles. Contents may
be hot. Allow to cool before opening the lid.
For appliances with sealed capsules:
15. WARNING: To avoid the risk of injury, never open or disengage the
brew chamber during the brew cycle.
A short power supply cord (or detachable power-supply cord)
may be provided to reduce risks resulting from becoming
entangled in or tripping over a longer cord. Longer detachable
power-supply cords or extension cords are available and may be
used if care is exercised in their use. If a long detachable
power-supply cord or extension cord is used:
a. The marked electrical rating of the detachable power-supply
cord or extension cord should be at least as great as the
electrical rating of the appliance;
b. If the appliance is of the grounded type, the extension cord
should be a grounding type 3-wire cord; and
c. The longer cord should be arranged so that it will not drape
over the counter top or table where it can be pulled on by
children or tripped over unintentionally.
Do not pull, twist or otherwise abuse the power cord.
PRODUCT NOTICES
1.Placetheapplianceonahard,flat,levelsurfacetoavoid
interruptionofairflowunderneaththecoffeemaker.
2. Glass decanters only: Discard the decanter immediately if
it is ever boiled dry.
3. Glass decanters only: Protect the decanter from sharp blows,
scratches or rough handling.
4. Do not operate the appliance with an empty water tank.
5. Keep the area above the appliance clear during use, as hot
steam will escape the appliance.
4.3.
POWER CORD INSTRUCTIONS
SAVE THESE INSTRUCTIONS
HOUSEHOLD USE ONLY
IMPORTANT SAFEGUARDS CONT.
16. Only use capsules intended for this appliance. If the capsule does
notfit,donotforcethecapsuleintotheappliance.
For appliances with glass containers:
17. The container is designed for use with this appliance. It must never
be used on or near an external heat source such as a range top, hot
plate, heated oven or similar.
18. Do not set a hot container on a wet or cold surface.
19. Avoid sudden temperature changes, such as rinsing, washing,
filling,orimmersingahotcontainerwithcoldliquids.
20. Do not use a cracked or chipped container or a container having a
loose or weakened handle.
21. Do not clean container with cleansers, steel wool pads, or other
abrasive material.
For appliances with service panels:
22. WARNING: TO REDUCE THE RISK OF FIRE OR ELECTRIC SHOCK,
DO NOT REMOVE THIS COVER. NO USER–SERVICEABLE PARTS
INSIDE. REPAIR SHOULD BE DONE BY AUTHORIZED SERVICE
PERSONNEL ONLY.
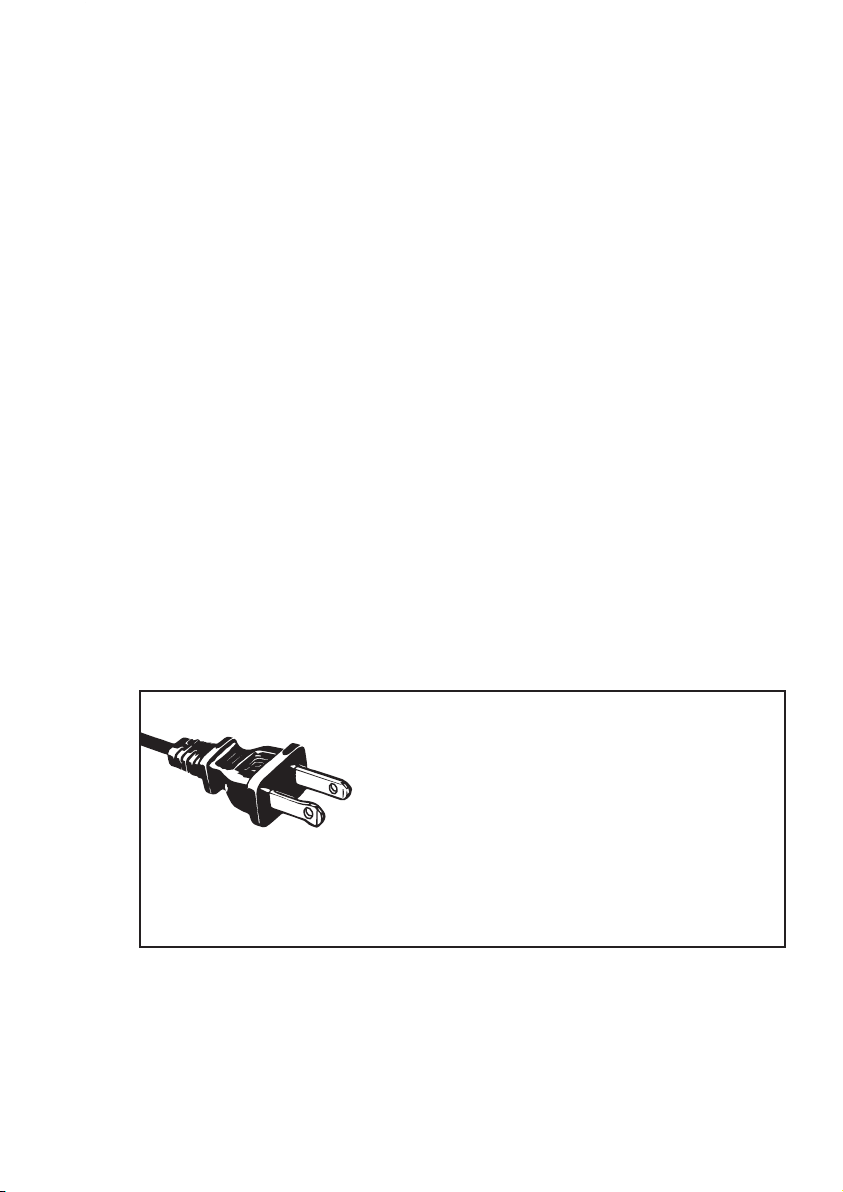
POLARIZED PLUG
This appliance has a polarized plug (one
blade is wider than the other). To reduce the
risk of electric shock, this plug is intended to
fitintoapolarizedoutletonlyoneway.Ifthe
plugdoesnotfitfullyintotheoutlet,reversetheplug.Ifitstilldoes
notfit,contactaqualifiedelectrician.Donotattempttomodifythe
pluginanyway.IftheplugfitslooselyintotheACoutletoriftheAC
outlet feels warm do not use that outlet.

A short power supply cord (or detachable power-supply cord)
may be provided to reduce risks resulting from becoming
entangled in or tripping over a longer cord. Longer detachable
power-supply cords or extension cords are available and may be
used if care is exercised in their use. If a long detachable
power-supply cord or extension cord is used:
a. The marked electrical rating of the detachable power-supply
cord or extension cord should be at least as great as the
electrical rating of the appliance;
b. If the appliance is of the grounded type, the extension cord
should be a grounding type 3-wire cord; and
c. The longer cord should be arranged so that it will not drape
over the counter top or table where it can be pulled on by
children or tripped over unintentionally.
Do not pull, twist or otherwise abuse the power cord.
PRODUCT NOTICES
1.Placetheapplianceonahard,flat,levelsurfacetoavoid
interruptionofairflowunderneaththecoffeemaker.
2. Glass decanters only: Discard the decanter immediately if
it is ever boiled dry.
3. Glass decanters only: Protect the decanter from sharp blows,
scratches or rough handling.
4. Do not operate the appliance with an empty water tank.
5. Keep the area above the appliance clear during use, as hot
steam will escape the appliance.
4.3.
POWER CORD INSTRUCTIONS
SAVE THESE INSTRUCTIONS
HOUSEHOLD USE ONLY
IMPORTANT SAFEGUARDS CONT.
16. Only use capsules intended for this appliance. If the capsule does
notfit,donotforcethecapsuleintotheappliance.
For appliances with glass containers:
17. The container is designed for use with this appliance. It must never
be used on or near an external heat source such as a range top, hot
plate, heated oven or similar.
18. Do not set a hot container on a wet or cold surface.
19. Avoid sudden temperature changes, such as rinsing, washing,
filling,orimmersingahotcontainerwithcoldliquids.
20. Do not use a cracked or chipped container or a container having a
loose or weakened handle.
21. Do not clean container with cleansers, steel wool pads, or other
abrasive material.
For appliances with service panels:
22. WARNING: TO REDUCE THE RISK OF FIRE OR ELECTRIC SHOCK,
DO NOT REMOVE THIS COVER. NO USER–SERVICEABLE PARTS
INSIDE. REPAIR SHOULD BE DONE BY AUTHORIZED SERVICE
PERSONNEL ONLY.
POLARIZED PLUG
This appliance has a polarized plug (one
blade is wider than the other). To reduce the
risk of electric shock, this plug is intended to
fitintoapolarizedoutletonlyoneway.Ifthe
plugdoesnotfitfullyintotheoutlet,reversetheplug.Ifitstilldoes
notfit,contactaqualifiedelectrician.Donotattempttomodifythe
pluginanyway.IftheplugfitslooselyintotheACoutletoriftheAC
outlet feels warm do not use that outlet.
GETTING STARTED
Unpack your Coffeemaker
1. Unpack your coffeemaker and remove plastic bags, cartons
and any tape on the unit.
WARNING: KEEP PLASTIC BAGS AWAY FROM CHILDREN.
Clean Coffeemaker Before Use
Just follow these simple steps:
1. Wash the carafe lid and the brew basket in a mixture of mild detergent
and water. Rinse each thoroughly.
2. Replace all the parts and close the lid. Then, run a brew cycle by adding
only water to the coffeemaker. After adding water, switch the
coffeemaker on.
3. When brewing is complete, turn your coffeemaker off.
Turnyourcoffeemakeroffbyflippingtheswitchtotheoffposition.
4. Discard the water in the carafe and rinse the carafe, carafe lid,
and brew basket.
NOTE: Carafe, brew basket is top rack dishwasher safe. Water Filtration
System is NOT!
6.
5.
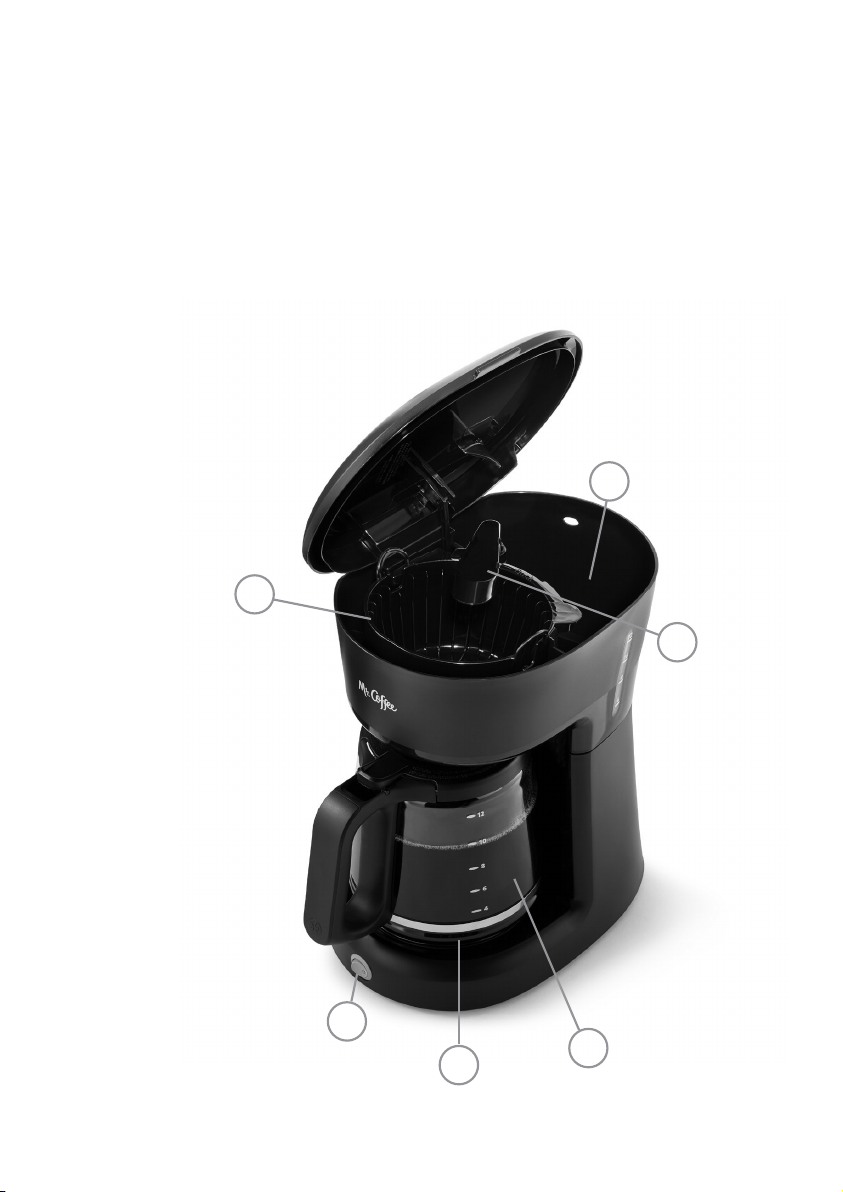
GET TO KNOW YOUR COFFEEMAKER
1. Brew Basket
2. Water Reservoir
3. On/Off Switch
4. Warming Plate
5. Carafe
6. Shower Head
2
3
4
5
1
6

GETTING STARTED
Unpack your Coffeemaker
1. Unpack your coffeemaker and remove plastic bags, cartons
and any tape on the unit.
WARNING: KEEP PLASTIC BAGS AWAY FROM CHILDREN.
Clean Coffeemaker Before Use
Just follow these simple steps:
1. Wash the carafe lid and the brew basket in a mixture of mild detergent
and water. Rinse each thoroughly.
2. Replace all the parts and close the lid. Then, run a brew cycle by adding
only water to the coffeemaker. After adding water, switch the
coffeemaker on.
3. When brewing is complete, turn your coffeemaker off.
Turnyourcoffeemakeroffbyflippingtheswitchtotheoffposition.
4. Discard the water in the carafe and rinse the carafe, carafe lid,
and brew basket.
NOTE: Carafe, brew basket is top rack dishwasher safe. Water Filtration
System is NOT!
6.
5.
GET TO KNOW YOUR COFFEEMAKER
1. Brew Basket
2. Water Reservoir
3. On/Off Switch
4. Warming Plate
5. Carafe
6. Shower Head
2
3
4
5
1
6
HOW TO MAKE YOUR FIRST
POT OF COFFEE
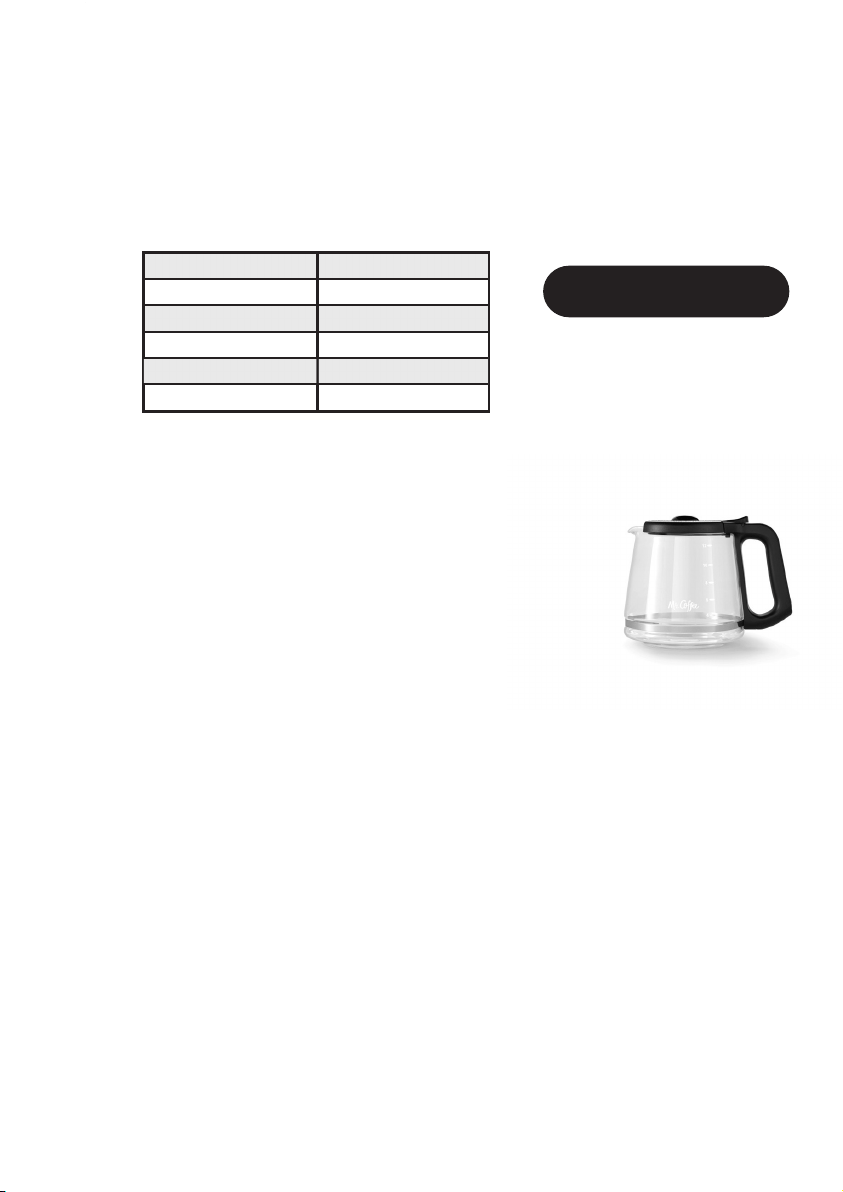
*Usingfinecoffeeordecafmaycauseoverflow.
1. Fill the carafe with fresh cold
water to the desired level. (Figure 1)
1Mr.Coffee“cup”isequivalentto5fluid
ounces. Pour into Water Reservoir.
NOTE: Some water will be absorbed into
thecoffeegroundsandwaterfilter
during the brewing process.
2. Insert and line the brew basket
withastandardbasket-stylepaperfilter(sold
separately)orreusablefilter(ifincluded).
3. Referencing the chart above, scoop the
equivalent amount of coffee grounds into the
filterusingatablespoon.
4. You are ready to switch your coffeemaker on.
5. Oncefinishedusingthecoffeemakerpleaseflip
switch to off.
6. Enjoy consistently fresh coffee every time!
8.
7.
Figure 1
Water To Brew Ground Coffee
12 cups = 60 oz. 12 tbs.
10 cups = 50 oz. 10 tbs.
8 cups = 40 oz. 8 tbs.
6 cups = 30 oz. 6 tbs.
4 cups = 20 oz. 4 tbs.
Bonus: For a BOLDER CUP,
use heaping TBS
Suggested Coffee Measurement Chart:
For best results, brew 4 or more cups of coffee.
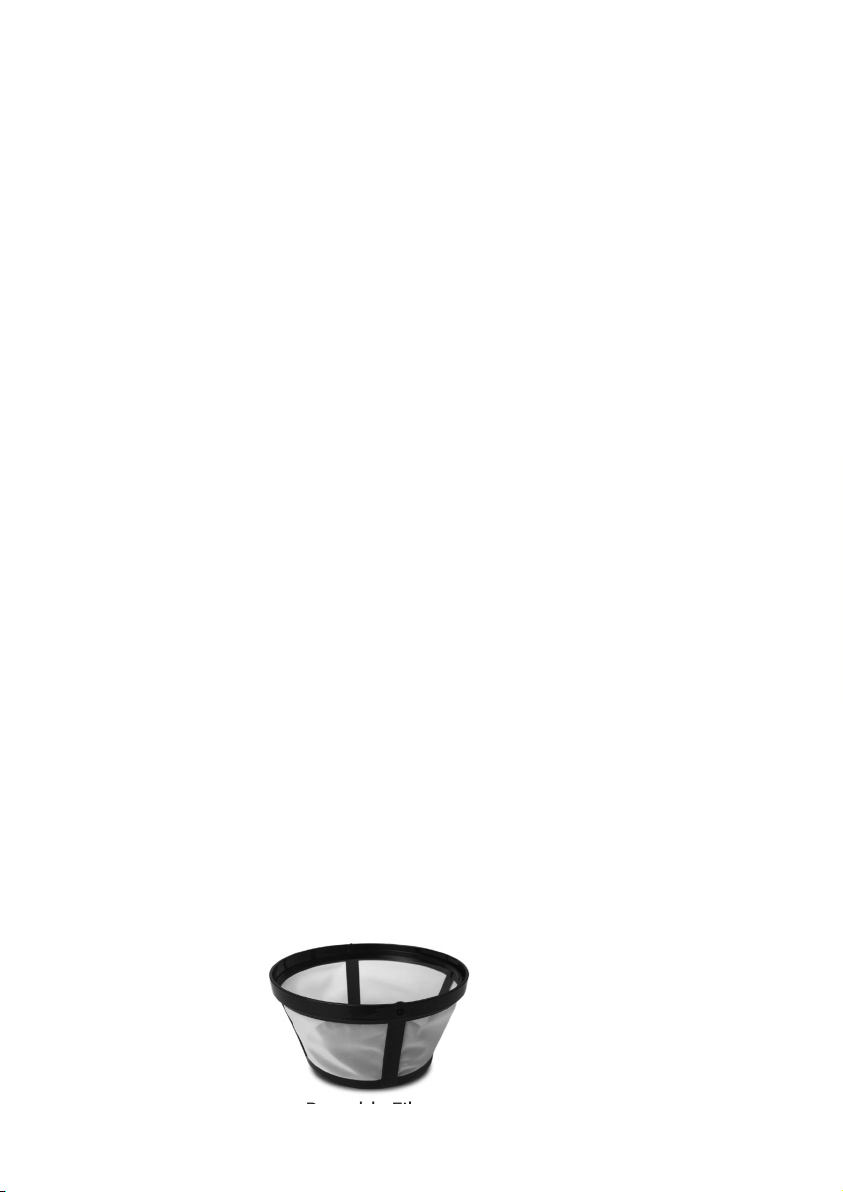
Reusable Filter
WATER FILTRATION SYSTEM
Congratulations! You are the owner of a MR. COFFEE®waterfiltration
system. Using the Mr. Coffee®carbon-basedwaterfilterintheMr.Coffee®
coffeemaker during the brewing process helps remove up to 97% of the
chlorine from the water and improves the taste of your coffee. To use the
waterfiltrationsysteminyourMR.COFFEE® Coffeemaker, please follow
these steps:
1. Align the red indicator on the frame to the letter that corresponds with
themonththatyouareusingthediskforthefirsttime.Thisservesto
remind you to change the disk every month (approx. 30 brewing cycles).
To change the disk, remove the used disk, insert new disk into the frame.
NOTE:Foroptimumresults,usethewaterfiltrationsystemwitha
permanentfilter.
2. Rinsethewaterfilterinfreshwaterbeforeuse.
3. Follow Adding Water and Coffee Instructions.
4.Positionthefilterontopofthebrewbasket,andbrewaccordingto
your particular model's brewing instructions.
5. Whenyouaredonebrewingyourcoffee,rinsethewaterfilterwithfresh
water.Donotputyourwaterfilterinthedishwasher.
This machine is compatible with Mr. Coffee Water Filtration Disk & Frame.
Filter sold separately.
HOW TO BREW THE PERFECT CUP
Paper Filters vs. Reusable Filters
PAPER FILTERS: To achieve a smoother, less bitter cup of coffee, use a
paperfilter.Itwillbemosteffectiveintrappingbittersediments.
REUSABLE FILTERS:Foramorerobustandfulltaste,useareusablefilter.
Itwillallowthecoffee’sfullflavortofillyourcup.Reusablefiltershavetiny
holes that allow rich coffee oils to brew through.
COFFEEMAKER EXTRAS
(not included with all models)
HOW TO MAKE YOUR FIRST
POT OF COFFEE
*Usingfinecoffeeordecafmaycauseoverflow.
1. Fill the carafe with fresh cold
water to the desired level. (Figure 1)
1Mr.Coffee“cup”isequivalentto5fluid
ounces. Pour into Water Reservoir.
NOTE: Some water will be absorbed into
thecoffeegroundsandwaterfilter
during the brewing process.
2. Insert and line the brew basket
withastandardbasket-stylepaperfilter(sold
separately)orreusablefilter(ifincluded).
3. Referencing the chart above, scoop the
equivalent amount of coffee grounds into the
filterusingatablespoon.
4. You are ready to switch your coffeemaker on.
5. Oncefinishedusingthecoffeemakerpleaseflip
switch to off.
6. Enjoy consistently fresh coffee every time!
8.
7.
Figure 1
Water To Brew Ground Coffee
12 cups = 60 oz. 12 tbs.
10 cups = 50 oz. 10 tbs.
8 cups = 40 oz. 8 tbs.
6 cups = 30 oz. 6 tbs.
4 cups = 20 oz. 4 tbs.
Bonus: For a BOLDER CUP,
use heaping TBS
Suggested Coffee Measurement Chart:
For best results, brew 4 or more cups of coffee.
Reusable Filter
WATER FILTRATION SYSTEM
Congratulations! You are the owner of a MR. COFFEE®waterfiltration
system. Using the Mr. Coffee®carbon-basedwaterfilterintheMr.Coffee®
coffeemaker during the brewing process helps remove up to 97% of the
chlorine from the water and improves the taste of your coffee. To use the
waterfiltrationsysteminyourMR.COFFEE® Coffeemaker, please follow
these steps:
1. Align the red indicator on the frame to the letter that corresponds with
themonththatyouareusingthediskforthefirsttime.Thisservesto
remind you to change the disk every month (approx. 30 brewing cycles).
To change the disk, remove the used disk, insert new disk into the frame.
NOTE:Foroptimumresults,usethewaterfiltrationsystemwitha
permanentfilter.
2. Rinsethewaterfilterinfreshwaterbeforeuse.
3. Follow Adding Water and Coffee Instructions.
4.Positionthefilterontopofthebrewbasket,andbrewaccordingto
your particular model's brewing instructions.
5. Whenyouaredonebrewingyourcoffee,rinsethewaterfilterwithfresh
water.Donotputyourwaterfilterinthedishwasher.
This machine is compatible with Mr. Coffee Water Filtration Disk & Frame.
Filter sold separately.
HOW TO BREW THE PERFECT CUP
Paper Filters vs. Reusable Filters
PAPER FILTERS: To achieve a smoother, less bitter cup of coffee, use a
paperfilter.Itwillbemosteffectiveintrappingbittersediments.
REUSABLE FILTERS:Foramorerobustandfulltaste,useareusablefilter.
Itwillallowthecoffee’sfullflavortofillyourcup.Reusablefiltershavetiny
holes that allow rich coffee oils to brew through.
COFFEEMAKER EXTRAS
(not included with all models)

10.9.
10. Turn the switch to ON and allow the full brew cycle to complete,
rinsing the coffeemaker with hot water.
11. Discard the water and rinse the carafe thoroughly with clean water.
12. Repeat steps 8 through 11 one more time, to ensure it is fully
rinsed.
Your coffeemaker is now clean and ready to brew the next pot of
delicious, hot coffee!
NOTE: It is recommended that you decalcify your coffeemaker every
30 days.
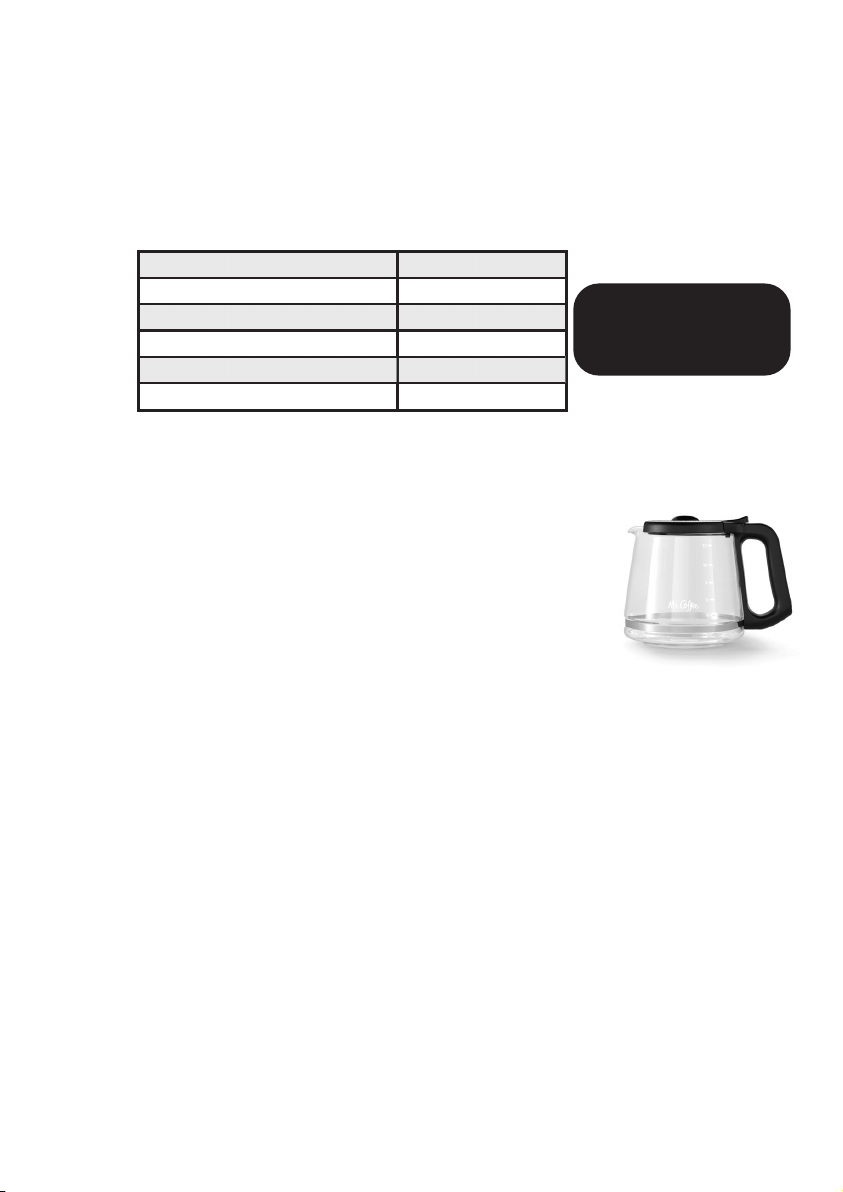
CARAFE USE AND CARE
Follow the instructions below to reduce or eliminate the chance of
breaking the glass carafe:
• Discard the carafe immediately if it is ever cracked.
• Protect the carafe from sharp blows, scratches or rough handling.
Do not use harsh abrasive cleaners that may scratch the carafe.
Scratches may cause the carafe to break.
USER MAINTENANCE
This appliance has no user serviceable parts. Any servicing beyond
that described in the Cleaning Section should be performed by an
Authorized Service Representative only. See warranty available online.
SERVICE MAINTENANCE AND WARRANTY
Service Maintenance and Warranty can be found online at
www.mrcoffee.com or call us toll-free at the Consumer Service
Department,
1-800-MR COFFEE (1-800-672-6333).
HOW TO BREW THE PERFECT CUP CONT.
Water
While it may not seem like an important ingredient, coffee is 98 percent
water.Thetypeofwaterthatyoubrewwithgreatlyaffectsthefinaltaste.
Alwaysuseclean,freshwaterthatisfilteredandfreeofimpurities–avoid
soft water or well water. Please refer to the “Water Filtration” section to
learn more about how your coffeemaker reduces impurities in water.
Cleanliness
A clean coffeemaker is essential to brewing great tasting coffee each and
every time. This coffeemaker is equipped with a cleaning cycle. Please
refer to the next page for steps on routine cleaning.
ROUTINE CLEANING
Daily Cleaning
• CAUTION: Make sure your coffeemaker is unplugged and has cooled
completely before cleaning.
•Removethebrewbasket,reusablefilter,carafe,carafelid,and
wash them in a solution of hot water and mild liquid soap, and dry
thoroughly. You can also place in the dishwasher; top-rack only.
Decalcifying your MR. COFFEE
®
SC12 Series Coffeemaker
Minerals(calcium/limestone)foundinwaterwillleavedepositsinyour
coffeemaker and affect its performance. It’s recommended that you
regularly remove these deposits using vinegar.
1. IMPORTANT:Removethewaterfiltrationsystemfrom
the coffeemaker.
2. Prepare4cupsor20fl.oz./592mlofundiluted,whitehousehold
vinegar. Pour the vinegar into the water reservoir.
3. Placeanempty10-12cupbasket-stylepaperfilterorMR.COFFEE®
reusablefilterintothebrewbasketandclosethecoffeemaker’slid.
4. Place the empty carafe back in the unit, centered on the warming
plate.
5. Brew prepared cleaning solution through the coffeemaker.
6. Discard the cleaning solution and rinse the carafe thoroughly
with clean water.
7. Fill the water reservoir with 12 cups of clean, fresh water.
8. Place the empty carafe back on the coffeemaker, centered on the
warming plate.
9. Removeanddiscardthepaperfilterusedduringthecleaningcycle.
IfaMR.COFFEE®reusablefilterwasusedduringcleaning,removeit
and rinse it thoroughly before replacing it in the brew basket.
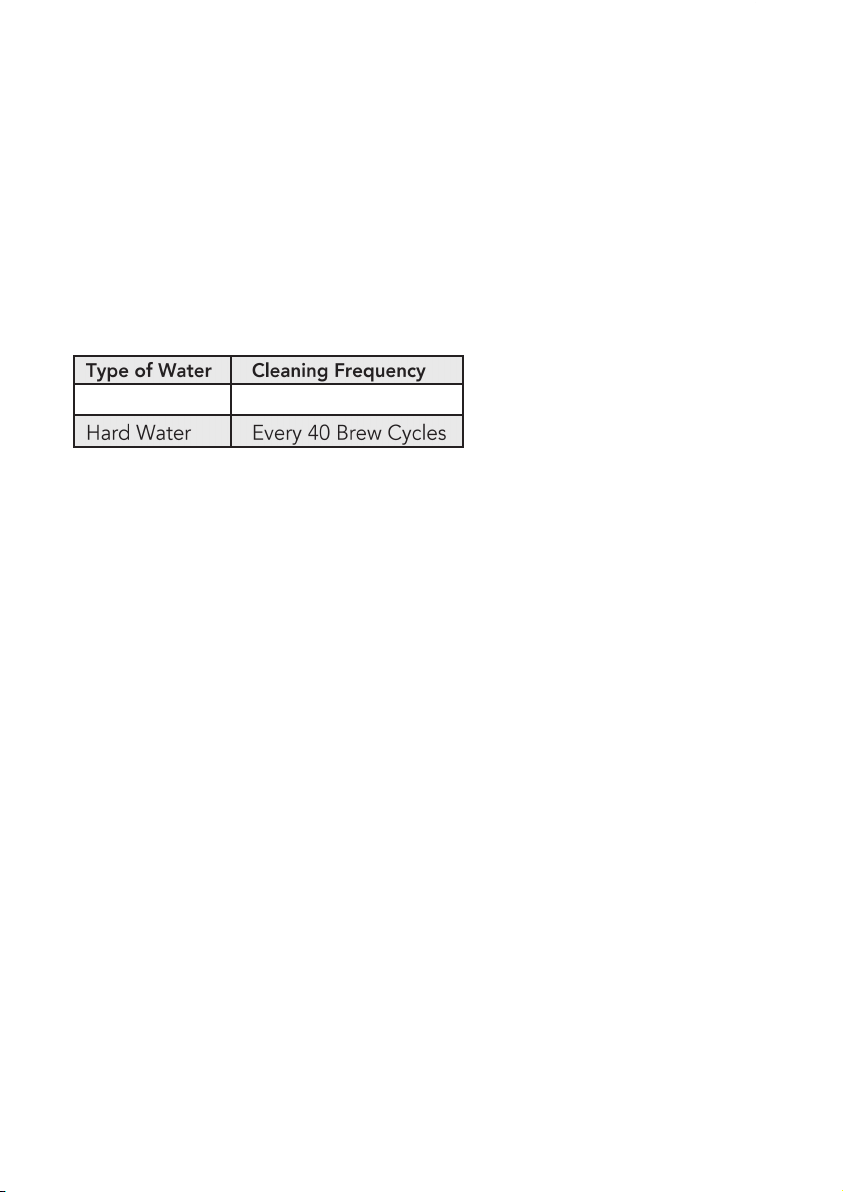
Cleaning Frequency
Type of Water Cleaning Frequency
Soft Water Every 80 Brew Cycles
Hard Water Every 40 Brew Cycles
10.9.
10. Turn the switch to ON and allow the full brew cycle to complete,
rinsing the coffeemaker with hot water.
11. Discard the water and rinse the carafe thoroughly with clean water.
12. Repeat steps 8 through 11 one more time, to ensure it is fully
rinsed.
Your coffeemaker is now clean and ready to brew the next pot of
delicious, hot coffee!
NOTE: It is recommended that you decalcify your coffeemaker every
30 days.
CARAFE USE AND CARE
Follow the instructions below to reduce or eliminate the chance of
breaking the glass carafe:
• Discard the carafe immediately if it is ever cracked.
• Protect the carafe from sharp blows, scratches or rough handling.
Do not use harsh abrasive cleaners that may scratch the carafe.
Scratches may cause the carafe to break.
USER MAINTENANCE
This appliance has no user serviceable parts. Any servicing beyond
that described in the Cleaning Section should be performed by an
Authorized Service Representative only. See warranty available online.
SERVICE MAINTENANCE AND WARRANTY
Service Maintenance and Warranty can be found online at
www.mrcoffee.com or call us toll-free at the Consumer Service
Department,
1-800-MR COFFEE (1-800-672-6333).
HOW TO BREW THE PERFECT CUP CONT.
Water
While it may not seem like an important ingredient, coffee is 98 percent
water.Thetypeofwaterthatyoubrewwithgreatlyaffectsthefinaltaste.
Alwaysuseclean,freshwaterthatisfilteredandfreeofimpurities–avoid
soft water or well water. Please refer to the “Water Filtration” section to
learn more about how your coffeemaker reduces impurities in water.
Cleanliness
A clean coffeemaker is essential to brewing great tasting coffee each and
every time. This coffeemaker is equipped with a cleaning cycle. Please
refer to the next page for steps on routine cleaning.
ROUTINE CLEANING
Daily Cleaning
• CAUTION: Make sure your coffeemaker is unplugged and has cooled
completely before cleaning.
•Removethebrewbasket,reusablefilter,carafe,carafelid,and
wash them in a solution of hot water and mild liquid soap, and dry
thoroughly. You can also place in the dishwasher; top-rack only.
Decalcifying your MR. COFFEE
®
SC12 Series Coffeemaker
Minerals(calcium/limestone)foundinwaterwillleavedepositsinyour
coffeemaker and affect its performance. It’s recommended that you
regularly remove these deposits using vinegar.
1. IMPORTANT:Removethewaterfiltrationsystemfrom
the coffeemaker.
2. Prepare4cupsor20fl.oz./592mlofundiluted,whitehousehold
vinegar. Pour the vinegar into the water reservoir.
3. Placeanempty10-12cupbasket-stylepaperfilterorMR.COFFEE®
reusablefilterintothebrewbasketandclosethecoffeemaker’slid.
4. Place the empty carafe back in the unit, centered on the warming
plate.
5. Brew prepared cleaning solution through the coffeemaker.
6. Discard the cleaning solution and rinse the carafe thoroughly
with clean water.
7. Fill the water reservoir with 12 cups of clean, fresh water.
8. Place the empty carafe back on the coffeemaker, centered on the
warming plate.
9. Removeanddiscardthepaperfilterusedduringthecleaningcycle.
IfaMR.COFFEE®reusablefilterwasusedduringcleaning,removeit
and rinse it thoroughly before replacing it in the brew basket.
Cleaning Frequency
Type of Water Cleaning Frequency
Soft Water Every 80 Brew Cycles
Hard Water Every 40 Brew Cycles

MANUAL DEL USUARIO
CAFETERA PARA 12 TAZAS
P.N. NWL0001395325 www.mrcoffee.com
SERIE SC12
© 2022 Sunbeam Products, Inc. Todos los derechos reservados. Distribuido por Sunbeam
Products, Inc. Boca Ratón, Florida, 33431. Fabricado en China.
BVMC-SC12 Series_22ESM1 (Walmart)_GCDS-JC
pausa automática
para tomar una taza
+
interruptor fácil
con indicador LED
de encendido
+
UN EXCELENTE
CAFÉ
SENCILLAMENTE,

INTRODUCCIÓN
Bienvenido y felicitaciones por la compra de su nueva cafetera
MR. COFFEE®. La nueva cafetera serie SC12 se despertará con
usted por la mañana y le ofrecerá descansos deliciosos durante
sus ajetreadas actividades diarias. Cómo disfruta de su cafetera
MR. COFFEE® depende de usted.
Nuestro objetivo principal es ofrecerle siempre la taza de café
más deliciosa, por lo tanto, si tiene alguna pregunta sobre su
cafetera nueva, comuníquese con nosotros al 1-800-672-6333 o
visítenos en www.mrcoffee.com.
1.
2.
MEDIDAS DE SEGURIDAD IMPORTANTES
Cuando se utilizan aparatos eléctricos, siempre se deben seguir medidas
básicas de seguridad para reducir el riesgo de incendio, descarga
eléctrica o lesiones personales, incluyendo las siguientes:
1. Lea todas las instrucciones.
2. Notoquelassuperficiescalientes.Utiliceasasoperillas.
3. Afindeprotegersecontraunadescargaeléctrica,nocoloqueni
sumerja el cable, los enchufes o el aparato en agua ni ningún otro
líquido.
4. Este aparato no está diseñado para ser utilizado por los niños ni por
personas con su capacidad física, sensorial o mental reducida, o falta
de experiencia o conocimiento. Todo aparato utilizado cerca de los
niños, requiere la supervisión cercana de un adulto. Los niños deben
estar bajo supervisión para asegurar que no jueguen con el aparato.
Mantenga el aparato y su cable fuera del alcance de los niños.
5. Desenchufe el aparato del tomacorriente cuando éste o el reloj de la
pantalla (si es proporcionado) no esté en uso y antes de limpiarlo.
Permita que el aparato se enfríe antes instalarle o retirarle piezas y
antes de limpiarlo.
6. No opere ningún aparato con un cable o enchufe dañado o después
de presentar un fallo en su funcionamiento, o si se ha dañado de
manera alguna. Devuelva el aparato a un centro de servicio autorizado
para su revisión, reparación o ajuste. No intente reemplazar o cortar un
cable dañado.
7. El uso de accesorios no recomendados por el fabricante del producto
podría ocasionar incendio, descarga eléctrica o lesión personal.
8. No utilice el aparato al aire libre.
9. No permita que el cable cuelgue del borde de la mesa o del
mostradorniqueentreencontactoconsuperficiescalientes.
10. No coloque el aparato sobre o cerca de una hornilla caliente de gas o
eléctrica ni dentro de un horno caliente.
11. Siempre conecte el enchufe al aparato primero y luego enchufe el
cable al tomacorriente (para aparatos con cables separables). Para
desconectar, gire todo control a la posición de apagado y luego retire
el enchufe del tomacorriente.
12.Noutiliceelaparatoparaotrofinquenoseaparaelquehasido
diseñado.
13. Todas las tapas deben estar cerradas durante el uso.
14. Si la tapa se retira o la puerta de la cesta de preparación se abre
durante o inmediatamente después de terminar el ciclo de
preparación, esto podría ocasionar quemaduras. El contenido puede
estar caliente. Permita que el aparato se enfríe antes de abrir la tapa.
4.3.
Se puede proporcionar un cable de alimentación corto (o cable
de alimentación desmontable) para reducir los riesgos
ocasionados por el enredo o tropiezo con un cable más largo.
Hay cables de alimentación desmontables más largos o cables de
extensión que se pueden utilizar con precaución. Si se utiliza un
cable de alimentación desmontable largo o de extensión:
a. La potencia eléctrica nominal marcada en el cable de
alimentación desmontable o del cable de extensión debe ser
al menos tan alta como la potencia eléctrica del aparato;
b. Si el aparato es del tipo con conexión a tierra, el cable de
extensión debe ser un cable de 3 hilos con conexión a tierra; y
c. El cable más largo debe estar dispuesto de modo que no
cuelgue de la encimera o la mesa donde los niños puedan
tirar de él o tropezarse accidentalmente.
No hale, tuerza ni maltrate de manera alguna el cable de
alimentación.
AVISOS SOBRE EL PRODUCTO
1.Coloqueelaparatosobreunasuperficiedura,planay
niveladaparaevitarinterrupcionesenelflujodeairepor
debajo de la cafetera.
2. Solo para jarras de vidrio: Descarte la jarra de inmediato si
en alguna ocasión hierve hasta evaporarse su contenido.
3. Solo para jarras de vidrio: Proteja la jarra de golpes secos,
rasguños o maltrato.
4. No opere el aparato con un tanque de agua vacío.
5. Mantenga el área encima del aparato despejada durante el
uso, ya que vapor caliente saldrá del aparato.
INSTRUCCIONES SOBRE EL
CABLE DE ALIMENTACIÓN
ENCHUFE POLARIZADO
Este aparato tiene un enchufe polarizado (un
contactoesmásanchoqueelotro).Afinde
reducir el riesgo de descarga eléctrica, este
enchufe está diseñado para entrar en un
tomacorriente polarizado sólo de una
manera. Si el enchufe no entra completamente en el tomacorriente,
invierta el enchufe. Si aún no entra, consulte a un electricista
calificado.Nointentemodificarelenchufedemaneraalguna.Siel
enchufe entra holgadamente en el tomacorriente de corriente alterna
o si el tomacorriente de corriente alterna se siente caliente, no utilice
ese tomacorriente.
CONSERVE ESTAS INSTRUCCIONES
SOLO PARA USO DOMÉSTICO
MEDIDAS DE SEGURIDAD IMPORTANTES
(CONTINUACIÓN)
Para aparatos con cápsulas selladas:
15.ADVERTENCIA:Afindeevitarelriesgodeunalesión,nuncaabrani
desconecte la cámara de preparación durante el ciclo de
preparación.
16. Solo utilice cápsulas diseñadas para este aparato. Si la cápsula no
encaja, no la fuerce dentro del aparato.
Para aparatos con recipientes de vidrio:
17. El recipiente está diseñado para utilizarse con este aparato. Nunca
debe ser utilizado sobre una estufa.
18.Nocoloqueunrecipientecalientesobreunasuperficiemojadaofría.
19. Evite los cambios bruscos de temperatura, tales como enjuagar, lavar,
llenar o sumergir un recipiente caliente con líquidos fríos.
20.Noutiliceunrecipienterajadooastillado,oquetengaelasaflojao
debilitada.
21. No limpie el recipiente con limpiadores, estropajos de lana de acero
ni ningún otro material abrasivo.
Para aparatos con paneles de servicio:
22. ADVERTENCIA: PARA REDUCIR EL RIESGO DE INCENDIO O
DESCARGA ELÉCTRICA, NO RETIRE ESTA CUBIERTA. NO TIENE
PIEZAS EN EL INTERIOR QUE DEBAN SER REPARADAS POR EL
USUARIO. CUALQUIER REPARACIÓN SOLO SE DEBE REALIZAR POR
PERSONAL DE SERVICIO AUTORIZADO.

6.
5.
GUÍA DE INICIO
Desembale la cafetera
1. Desembale la cafetera y retire de la unidad las bolsas de plástico, los
cartones y cualquier cinta.
ADVERTENCIA: MANTENGA LAS BOLSAS DE PLÁSTICO LEJOS DE
LOS NIÑOS.
Limpie la cafetera antes de usarla
Solo siga estos pasos sencillos:
1. Lave la tapa de la jarra y la canasta de preparación en una mezcla de
detergente suave y agua. Enjuáguelos bien.
2. Reemplace todas las partes y cierre la tapa. Luego, ejecute un ciclo de
preparación agregando únicamente agua a la cafetera. Después de
agregar el agua, encienda la cafetera.
3. Cuando se complete la preparación, apague la cafetera. Apague la
cafetera colocando el interruptor en la posición OFF.
4. Deseche el agua de la jarra y enjuague la jarra, la tapa de la jarra y la
cesta de preparación.
NOTA: Lajarraylacestadelfiltrodesmontablesonaptasparaelestante
superiordellavavajillas.¡ElsistemadefiltracióndeaguaNOloes!
CONOZCA SU CAFETERA
1. Cesta de preparación
2. Depósito de agua
3.Interruptordeencendido/apagado
4. Placa de calentamiento
5. Jarra
6. Cabezal de regadera
2
3
4
5
1
6
8.
7.
CÓMO HACER SU PRIMERA
JARRA DE CAFÉ
*Elusodecafémolidofinoodescafeinadopuede
causar derrames.
1. Llene la jarra con agua fría hasta el nivel deseado.
(Figura 1) 1 “taza” de Mr. Coffee equivale a 5
onzas líquidas. Viértala en el depósito de agua.
NOTA: Parte del agua se absorberá en los granos
delcaféyenelfiltrodeaguaduranteelproceso
de preparación.
2. Inserteyforrelacestadelfiltrodesmontablecon
unfiltrodepapelparacestaestándar(sevende
porseparado)ounfiltroreutilizable(siviene
incluido).
3. Tomando como referencia la tabla anterior, sirva
enelfiltrounacantidadequivalentedegranosde
café con una cuchara. (Figura 2)
4. Ya está listo para encender la cafetera.
5. Una vez que termine de usarla, coloque el
interruptor en la posición OFF.
6. ¡Disfrute siempre de un café recién hecho!
Agua para la preparación Ground Coffee
12 tazas = 60 onzas 12 cucharadas
10 tazas = 50 onzas 10 cucharadas
8 tazas = 40 onzas 8 cucharadas
6 tazas = 30 onzas 6 cucharadas
4 tazas = 20 onzas 4 cucharadas
Extra: Para una TAZA DE
CAFÉ MÁS INTENSO,
utilice cucharadas
colmadas
Tabla de medició n de café sugerida:
Para obtener los mejores resultados, prepare cuatro o más tazas de café.
Filtro reutilizable
Figura 1
SISTEMA DE FILTRACIÓN DE AGUA
¡Felicidades!UstedtieneelsistemadefiltracióndeaguaMR.COFFEE®.El
usodelfiltrodeaguaabasedecarbonoMr.Coffee®enlacafeteraMr.
Coffee® durante el proceso de preparación ayuda a eliminar hasta el 97%
del cloro del agua y mejora el sabor del café. Para utilizar el sistema de
filtracióndeaguaensucafeteraMR.COFFEE®,sigaestospasos:
1. Alinee el indicador rojo del marco con la letra que corresponde al mes
en que está usando el disco por primera vez. Esto sirve para recordarle
que cambie el disco todos los meses (aproximadamente 30 ciclos de
preparación). Para cambiarlo, quite el disco usado e inserte un disco
nuevo en el marco.
NOTA: Para obtener los mejores resultados, utilice el sistema de
filtracióndeaguaconunfiltropermanente.
2. Enjuagueelfiltrodeaguaconaguapotableantesdeusarlo.
3. Siga las instrucciones para agregar agua y café.
4. Coloqueelfiltroenlapartesuperiordelacestadepreparacióny
comience la preparación de acuerdo con las instrucciones de
preparacióndesumodeloespecífico.
5. Cuandohayaterminadodeprepararelcafé,enjuagueelfiltrodeagua
conaguapotable.Nocoloqueelfiltrodeaguaenellavavajillas.
EstamáquinaescompatibleconelDiscodefiltracióndeaguade
Mr.Coffee.Elfiltrosevendeporseparado.
CÓMO PREPARAR LA TAZA DE CAFÉ PERFECTA
Filtros de papel vs. filtros reutilizables
FILTROS DE PAPEL: Para lograr una taza de café más suave y menos
amarga,utiliceunfiltrodepapel.Esmásefectivoparacapturar
sedimentos amargos.
FILTROS REUTILIZABLES: Para lograr un sabor más robusto y completo,
utiliceunfiltroreutilizable.Permitiráqueelsaborplenodelcaféllenesu
taza.Losfiltrosreutilizablestienenpequeñosorificiosquepermitenel
filtradodericosaceitesdecafé.
PARTES ADICIONALES DE LA CAFETERA
(no incluidas en todos los modelos)

10.9.
9. Retireydesecheelfiltrodepapelutilizadoduranteelciclodelimpieza.
SiseutilizóunfiltroreutilizableMR.COFFEE®durantelalimpieza,
quítelo y enjuáguelo bien antes de volver a colocarlo en la cesta
delfiltro.
10. Presione Preparar ahora y deje que se complete el ciclo de preparación
para que enjuague la cafetera con agua caliente.
11. Deseche el agua y enjuague bien la jarra con agua limpia.
12. Repita los pasos del 8 al 11 una vez más para asegurarse de que esté
completamente enjuagada.
La cafetera ya está limpia y lista para preparar la próxima jarra de
delicioso café caliente.
NOTA:Serecomiendaquedescalcifiquelacafeteracada30días.
USO Y CUIDADO DE LA JARRA
Siga las instrucciones que se detallan a continuación para reducir o
eliminar la posibilidad de que se rompa la jarra de vidrio:
• Deseche la jarra inmediatamente si está rajada.
• Proteja la jarra de golpes fuertes, rayones o manipulación brusca.
No use productos de limpieza abrasivos fuertes que puedan rayar la
jarra. Los rayones pueden hacer que la jarra se rompa.
MANTENIMIENTO DEL USUARIO
Este aparato no contiene partes que el usuario pueda reparar. Cualquier
servicio de mantenimiento que no esté descrito en la sección Limpieza
deberá ser realizado únicamente por un representante autorizado del
servicio de mantenimiento. Consulte la garantía disponible en línea.
SERVICIO DE MANTENIMIENTO Y GARANTÍA
El servicio de mantenimiento y garantía se puede consultar en línea
en www.mrcoffee.com. También puede llamarnos sin cargo al
Departamento de servicio al consumidor al 1-800-MR COFFEE
(1-800-672-6333).
CÓMO PREPARAR LA TAZA DE CAFÉ PERFECTA
Agua
Si bien puede parecer que no es un ingrediente importante, el café
contiene 98 % de agua. El tipo de agua con la que prepara el café afecta
enormementeelsaborfinal.Siempreutiliceagualimpiaypotableque
estéfiltradaylibredeimpurezas;eviteelaguablandaoelaguadepozo.
Consulte la sección “Filtración de agua” para obtener más información
sobre cómo la cafetera reduce las impurezas del agua.
Limpieza
Una cafetera limpia es esencial para preparar siempre un café de
excelente sabor. Esta cafetera viene con un ciclo de limpieza. Consulte la
página siguiente para conocer los pasos para la limpieza de rutina.
LIMPIEZA DE RUTINA
Limpieza diaria
• PRECAUCIÓN: Asegúrese de que la cafetera esté desenchufada y que se
haya enfriado completamente antes de la limpieza.
•Retirelacestadepreparación,elfiltroreutilizable,lajarra,latapadela
jarra y lávelos en una solución de agua caliente y jabón líquido suave;
luego séquelos bien. Estas piezas también son aptas para lavavajillas;
únicamente en el estante superior.
Có mo descalcificar la cafetera MR. COFFEE
®
serie SC12
Losminerales(calcio/piedracaliza)queseencuentranenelaguadejarán
depósitos en la cafetera y afectarán su rendimiento. Se recomienda
eliminar regularmente estos depósitos con vinagre.
1. IMPORTANTE:Retireelsistemadefiltracióndeaguadelacafetera.
2. Prepare 4 tazas o 20 onzas líquidas (592 ml) de vinagre blanco de
cocina sin diluir. Vierta el vinagre en el depósito de agua.
3. Coloqueunfiltrodepapeltipocestapara10a12tazasvacíooun
filtroreutilizableMR.COFFEE®enlacestadelfiltroycierrelatapade
la cafetera.
4. Coloque la jarra vacía nuevamente en la unidad, centrada en la placa
de calentamiento.
5. Filtre la solución de limpieza preparada en la cafetera.
6. Deseche la solución de limpieza y enjuague bien la jarra con agua
limpia.
7. Llene el depósito de agua con 12 tazas de agua limpia y potable.
8. Coloque la jarra vacía nuevamente en la cafetera, centrada en la placa
de calentamiento.
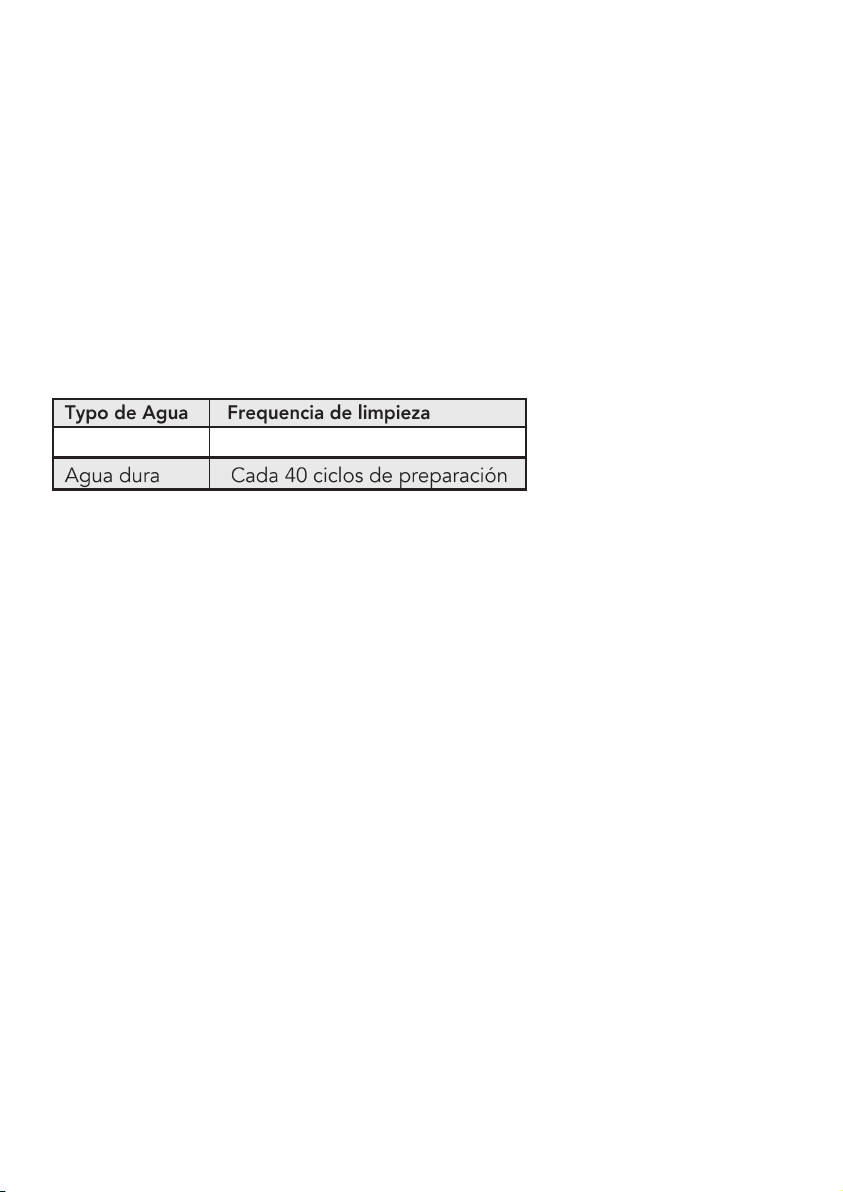
Frecuencia de limpieza
Typo de Agua Frequencia de limpieza
Agua blanda Cada 80 ciclos de preparación
Agua dura Cada 40 ciclos de preparación
10.9.
9. Retireydesecheelfiltrodepapelutilizadoduranteelciclodelimpieza.
SiseutilizóunfiltroreutilizableMR.COFFEE®durantelalimpieza,
quítelo y enjuáguelo bien antes de volver a colocarlo en la cesta
delfiltro.
10. Presione Preparar ahora y deje que se complete el ciclo de preparación
para que enjuague la cafetera con agua caliente.
11. Deseche el agua y enjuague bien la jarra con agua limpia.
12. Repita los pasos del 8 al 11 una vez más para asegurarse de que esté
completamente enjuagada.
La cafetera ya está limpia y lista para preparar la próxima jarra de
delicioso café caliente.
NOTA:Serecomiendaquedescalcifiquelacafeteracada30días.
USO Y CUIDADO DE LA JARRA
Siga las instrucciones que se detallan a continuación para reducir o
eliminar la posibilidad de que se rompa la jarra de vidrio:
• Deseche la jarra inmediatamente si está rajada.
• Proteja la jarra de golpes fuertes, rayones o manipulación brusca.
No use productos de limpieza abrasivos fuertes que puedan rayar la
jarra. Los rayones pueden hacer que la jarra se rompa.
MANTENIMIENTO DEL USUARIO
Este aparato no contiene partes que el usuario pueda reparar. Cualquier
servicio de mantenimiento que no esté descrito en la sección Limpieza
deberá ser realizado únicamente por un representante autorizado del
servicio de mantenimiento. Consulte la garantía disponible en línea.
SERVICIO DE MANTENIMIENTO Y GARANTÍA
El servicio de mantenimiento y garantía se puede consultar en línea
en www.mrcoffee.com. También puede llamarnos sin cargo al
Departamento de servicio al consumidor al 1-800-MR COFFEE
(1-800-672-6333).
CÓMO PREPARAR LA TAZA DE CAFÉ PERFECTA
Agua
Si bien puede parecer que no es un ingrediente importante, el café
contiene 98 % de agua. El tipo de agua con la que prepara el café afecta
enormementeelsaborfinal.Siempreutiliceagualimpiaypotableque
estéfiltradaylibredeimpurezas;eviteelaguablandaoelaguadepozo.
Consulte la sección “Filtración de agua” para obtener más información
sobre cómo la cafetera reduce las impurezas del agua.
Limpieza
Una cafetera limpia es esencial para preparar siempre un café de
excelente sabor. Esta cafetera viene con un ciclo de limpieza. Consulte la
página siguiente para conocer los pasos para la limpieza de rutina.
LIMPIEZA DE RUTINA
Limpieza diaria
• PRECAUCIÓN: Asegúrese de que la cafetera esté desenchufada y que se
haya enfriado completamente antes de la limpieza.
•Retirelacestadepreparación,elfiltroreutilizable,lajarra,latapadela
jarra y lávelos en una solución de agua caliente y jabón líquido suave;
luego séquelos bien. Estas piezas también son aptas para lavavajillas;
únicamente en el estante superior.
Có mo descalcificar la cafetera MR. COFFEE
®
serie SC12
Losminerales(calcio/piedracaliza)queseencuentranenelaguadejarán
depósitos en la cafetera y afectarán su rendimiento. Se recomienda
eliminar regularmente estos depósitos con vinagre.
1. IMPORTANTE:Retireelsistemadefiltracióndeaguadelacafetera.
2. Prepare 4 tazas o 20 onzas líquidas (592 ml) de vinagre blanco de
cocina sin diluir. Vierta el vinagre en el depósito de agua.
3. Coloqueunfiltrodepapeltipocestapara10a12tazasvacíooun
filtroreutilizableMR.COFFEE®enlacestadelfiltroycierrelatapade
la cafetera.
4. Coloque la jarra vacía nuevamente en la unidad, centrada en la placa
de calentamiento.
5. Filtre la solución de limpieza preparada en la cafetera.
6. Deseche la solución de limpieza y enjuague bien la jarra con agua
limpia.
7. Llene el depósito de agua con 12 tazas de agua limpia y potable.
8. Coloque la jarra vacía nuevamente en la cafetera, centrada en la placa
de calentamiento.
Frecuencia de limpieza
Typo de Agua Frequencia de limpieza
Agua blanda Cada 80 ciclos de preparación
Agua dura Cada 40 ciclos de preparación