Loading ...
Loading ...
Loading ...

37
Figure
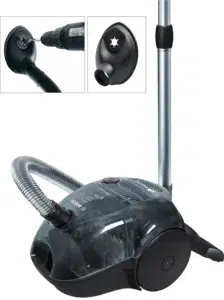
䡲 Secure the drill dust nozzle to the handle and then place
against the wall, so that the nozzle drill hole opening sits
directly over the hole to be drilled.
䡲 Select the lowest power setting and then switch on the
vacuum cleaner.
䡲 Suction holds the drill dust nozzle in the required
position. Depending on the surface of the wall to be
drilled it may be necessary to readjust the power to a
higher setting to ensure the drill dust nozzle is firmly
attached.
Any fine particles are automatically vacuumed up.
!
Caution: The drill dust nozzle should only be used in
conjunction with the dust collector since fine drill
dust can impair the function of the dust bag.
Figure
You can use the parking aid on the back of the vacuum
cleaner if you wish to stop vacuuming for a short time.
Slide the catch on the floor tool into the groove at the
rear of the appliance.
Figure
The appliance can also be carried using the two handles
when vacuuming steps, for example.
When the work is done
Figure
Unplug the vacuum cleaner.
Tug the power cord briefly and let go. The cable then
rewinds automatically.
Figure
To store or transport the vacuum cleaner, use the storage
aid on the underside of the vacuum cleaner.
Stand the vacuum cleaner up on its end. Slide the catch
on the floor tool into the groove on the underside of the
appliance.
You have purchased a floor vacuum cleaner which can
vacuum up any type of dry dirt using the dust collector or
dust bag.
We recommend that you use:
- the dust collector, in particular for your hobbies, e.g. to
remove wood shavings, etc.
- the dust bag principally for everyday household cleaning.
Using the dust collector
Figure
Set the power setting to maximum for the best results
when vacuuming.
We recommend that you reduce the setting only when
vacuuming very delicate materials.
!
Attention: The dust bag change indicator only
functions correctly in conjunction with a dust bag.
17
16
15
14
13
12*
Emptying the dust collector
To achieve an optimal result when vacuuming, the dust
collector should be emptied each time the vacuum cleaner
is used.
Figure
Turn the dust compartment locking lever in the direction
of the arrow to open the dust compartment cover.
Figure
Remove the dust container from the appliance.
Figure
䡲 Release the two snap locks on the bottom flap in the
direction of the arrow, open the flap until it clicks into the
stop position and the container will then empty the dirt in
a downwards direction.
䡲 If the bottom flap is very dirty, (thick dirt) clean it before
closing, by vacuuming it with the crevice nozzle, for
example.
(You must fit the dust bag in the vacuum cleaner
when you do this - see Figure 25)
䡲 Close the bottom flap so that it can be heard snapping
into position.
Figure
Put the dust bag back into the vacuum cleaner and close
the dust bag compartment lid.
!
Caution: The inside of the dust container may
become scratched with use and start to look opaque.
This does not, however, affect the performance of the
vacuum cleaner in any way, i.e. it will continue to
function as normal.
Cleaning the permanent filters and
micro filters in the dust container
The filters must be cleaned:
䡲 After any operating malfunctions, i.e. after a blockage is
cleared.
䡲 At least every six months.
Figure
䡲 Press the fastener on the rear side of the container and
remove the micro filter from the bottom of the container.
䡲 Remove the permanent filter from the bottom plate of the
container.
Figure
䡲
Wash the micro- and permanent filters.
The filter must then be left to dry for at least 24 hours.
䡲
After cleaning, place the permanent filter on the bottom
plate of the container.
Put the micro filter onto the container and fix it in place
by pushing in the direction of the arrow. You will hear the
flap snap shut.
23
22
21
20
19
18
*
Depending on equipment
Loading ...
Loading ...
Loading ...