
318203686 rev. E (01/16)
EN GAS COOKTOP USE AND CARE GUIDE
electrolux.com/shop

2
©2016 Electrolux Home Products, Inc. All rights reserved. Printed in China.
Finding Information
Thank you for choosing Electrolux, the new
premium brand in home appliances. This Use &
Care Guide is part of our commitment to customer
satisfaction and product quality throughout the
service life of your new appliance.
We view your purchase as the beginning of a
relationship. To ensure our ability to continue
serving you, please use this page to record
important product information.
Keep a record for quick
reference
Please read & save this guide
Questions?
For toll-free telephone support in the U.S. and
Canada:
1-877-4ELECTROLUX (1-877-435-3287)
For online support and Internet production information
visit http://www.electroluxappliances.com
Purchase date
Electrolux model number
Electrolux serial number
Table of contents
NOTE
Registering your product with Electrolux enhances
our ability to serve you. You can register online at
www.electroluxappliances.com or by dropping
your Product Registration Card in the mail.
Finding information .................................................... 2
Important Safety Instructions ................................3-5
Getting Started ............................................................6
• GroundingInstructions ..........................................6
• LiqueedPetroleum(Propane)GasConversion ... 6
Surface Cooking ....................................................7-12
• SurfaceCookingUtensils ......................................7
• UsingtheGriddle ................................................... 7
• UsingtheWokStand(accessorynotincluded) .....8
• UsingtheSimmerPlate(accessorynotincluded) . 9
• LocationsoftheBurners ........................................9
• PlacementofBurnerGrates ..................................9
• PlacementofBurnerCaps ..................................10
• FlameSize ........................................................... 11
• ProperBurnerAdjustments ................................. 11
• SettingSurfaceControls ......................................12
General Care and cleaning .................................13-14
• CareandCleaningTable .....................................13
• CareandCleaningofStainlessSteel .................. 13
• CleaningburnerGrates,Caps,
heads and glass cooktop ................................13-15
Solutions to common problems ..............................16
• SurfaceBurnersDoNotLight ..............................16
• BurnerFlameOnlyLightsHalf
WayAroundBurner ............................................16
• BurnerFlameisOrange ......................................16
• ScratchesorAbrasiononCeramic
GlassCooktopSurface ........................................16
• MetalMarkonCeramicGlass .............................16
• BrownStreaksandSpecksonCeramicGlass .... 16
• AreasofDiscolorationonCeramicGlass ............ 16
Warranty information ...............................................17

3
• Removealltapeandpackagingwrap
before using the appliance. Destroy the
carton and plastic bags after unpacking
the appliance.Neverallowchildrentoplay
withpackagingmaterial.Donotremovethe
model/serial plate attached to the cooktop.
• ProperInstallation-Besureyourappliance
is properly installed and grounded by a
qualiedtechnicianinaccordancewiththe
National Fuel Gas Code ANSI Z223.1—latest
edition in the United States, or in Canada
CAN/CGA B149.1, and CAN/CGA B149.2,
and the National Electrical Code ANSI/
NFPA No. 70—latest edition in United
States, or in Canada CSA Standard C22.1,
Canadian Electrical Code, Part 1, and local
code requirements. Installand/oradjustonly
per installation instructions provided in the
literature package for this cooktop.
What you need to know about safety instructions
Warning and Important Instructions appearing in this guide are not meant to cover all possible conditions
and situations that may occur. Common sense, caution and care must be exercised when installing,
maintaining or operating a microwave.
ALWAYS contact your dealer, distributor, service agent or manufacturer about problems or conditions
you do not understand.
Recognize Safety Symbols, Words, Labels
WARNING—Hazardsorunsafepracticeswhich
COULDresultinseverepersonalinjuryordeath.
Iftheinformationinthismanualisnotfollowedexactly,areorexplosionmayresultcausing
property damage, personal injury or death.
FOR YOUR SAFETY:
— Donotstoreorusegasolineorotherammablevaporsandliquidsinthevicinityofthisorany
other appliance.
— WHAT TO DO IF YOU SMELL GAS:
• Donottrytolightanyappliance.
• Donottouchanyelectricalswitch;donotuseanyphoneinyourbuilding.
• Immediately call your gas supplier from a neighbor’s phone. Follow the gas supplier’s
instructions.
• Ifyoucannotreachyourgassupplier,calltheredepartment.
— Installation and service must be performed by a qualied installer, servicer or the gas
supplier.
CAUTION—Hazardsorunsafepracticeswhich
COULDresultinminorpersonalinjury.
Important Safety Instructions
Ask your dealer to recommend a qualied
technician and an authorized repair service.
Know how to shut off gas supply at the meter and
disconnect the electrical power to the cooktop
at the circuit breaker or fuse box in case of an
emergency.
•User servicing—Do not repair or replace
anypartoftheapplianceunlessspecically
recommended in the manuals. All other
servicing should be done only by a qualied
technician, This may reduce the risk of personal
injuryanddamagetothecooktop.
•Nevermodifyoraltertheconstructionofa
cooktop by removing panels, wire covers
or any other part of the product.
• Aircurtainorotheroverheadhoods,which
operatebyblowingadownwardairowon
to a range, shall not be used in conjunction
with gas ranges other than when the hood
4
and range have been designed, tested and
listed by an independent test laboratory for
use in combination with each other.
• Stepping,leaningorsittingonthiscooktop
can result in serious injuries and also cause
damage to the cooktop. Do not allow children
to climb or play around the cooktop.
• NEVER use this appliance as a space heater
to heat or warm the room. Doingsomayresult
in carbon monoxide poisoning and overheating
of the oven.
•Use Proper Flame Size—Adjust ame size so it does
not extend beyond the edge of the utensil. The use of
undersized utensils will expose a portion of the burner ame
to direct contact and may result in ignition of clothing. Proper
relationship of utensil to ame will also improve efciency.
•Do Not Use Stove Top Grills on Your Sealed Gas Burners—
If you use a stove top grill on a sealed gas burner, it will cause
incomplete combustion and can result in exposure to carbon
monoxide levels above allowable current standards. This can
be hazardous to your health.
•Use proper pan size. This cooktop can be equipped with
one or more surface units of different sizes. Select utensils
having at bottoms large enough to cover the surface unit.
The use of undersized utensils will expose a portion of the
surface heating unit to direct contact and may result in ignition
of clothing. Proper relationship of utensil to the surface unit
will also improve efciency
•StorageonAppliance—Flammablematerials
should not be stored on the cooktop or near
surface units. This includes paper, plastic and
cloth items, such as cookbooks, plasticware
andtowels,aswellasammableliquids.Do
not store explosives, such as aerosol cans, on
or near the cooktop. Flammable materials may
explodeandresultinreorpropertydamage.
•Do Not Leave Children Alone—Children
should not be left alone or unattended in the
area where appliance is in use. They should
never be allowed to sit or stand on any part of
the appliance.
Do not store items of interest to children in the
cabinets above the cooktop. Children climbing
on the cooktop to reach items could be seriously
injured.
•DO NOT TOUCH SURFACE BURNERS/
UNIT, GRATES OR AREAS NEAR THESE
BURNERS/UNIT. Surface burners/unit may be
hoteventhoughamesarenotvisible/unitis
dark in color. Areas near surface burners/unit
maybecomehotenoughtocauseburns.During
and after use, do not touch, or let clothing or
otherammablematerialstouchtheseareas
untiltheyhavehadsufcienttimetocool.Among
these areas are the cooktop and surfaces facing
the cooktop.
•Wear Proper Apparel—Loose-fitting or
hanging garments should never be worn
while using the appliance. Donotletclothing
or other flammable materials contact hot
surfaces.
•Do Not Use Water or Flour on Grease
Fires—Smothertherewithapanlid,oruse
baking soda, a dry chemical or foam-type
extinguisher.
•Whenheatingfatorgrease,watchitclosely.
Fatorgreasemaycatchreifallowedtobecome
too hot.
•Use Only DryPotholders—Moistordamp
potholders on hot surfaces may result in
burns from steam.Donotletpotholderstouch
hotheatingelements,theameorburners.Do
not use a towel or other bulky cloth instead of
a potholder.
•DoNotHeatUnopenedFoodContainers—
Buildupofpressuremay cause container
to burst and result in injury.
•Know which knob controls each surface
burner. Place a pan of food on the burner
before turning it on, and turn the burner off
before removing the pan.
•Always turnthe knob to the LITE position
when igniting the burners. Visually check that
theburnerhaslit.Thenadjusttheamesoitdoes
not extend beyond the edge of the utensil.
•Clean the appliance regularly to keep all
parts free of grease that could catch re.
Exhaustfanventilationhoodsandgreaselters
shouldbekeptclean.Donotallowgreaseto
accumulateonhoodorlter.Greasydeposits
inthefancouldcatchre.Whenamingfood
Important Safety Instructions

5
under the hood, turn fan on. Refer to hood
manufacturer’s instructions for cleaning.
•UtensilHandlesShouldBeTurnedInward
and Not Extend Over Adjacent Surface
Burners/Unit —To reduce the risk of burns,
ignition of ammable materials, and spillage
due to unintentional contact with the utensil,
the handle of the utensil should be positioned
so that it is turned inward, and does not extend
overadjacentsurfaceburners.
•NeverLeaveSurfaceBurners/UnitUnattended
at High Heat Settings—Boilovers cause
smoking and greasy spillovers that may ignite,
or a pan that has boiled dry may melt.
•ProtectiveLiners—Donotusealuminumfoil
to line any part of the cooktop, use aluminum
foil only to cover food during cooking. Improper
installation of these liners may result in risk of
electricshock,orre.
•GlazedCookingUtensils—Onlycertaintypes
of glass, glass/ceramic, ceramic, earthenware,
or other glazed utensils are suitable for
cooktop service without breaking due to the
sudden change in temperature. Check the
manufacturer’s recommendations for cooktop
use.
DonotuseSearingGrillonthecooktop.The
Searing Grill is not designed for use on the
cooktop.Doingsomayresultinare.
•Do Not Use Decorative Surface Burner
Covers. If a burner/unit is accidentally turned
on, the decorative cover will become hot and
possibly melt. You will not be able to see that the
burnerison.Burnswilloccurifthehotcovers
aretouched.Damagemayalsobedonetothe
cooktop or burners because the covers may
cause overheating. Air will blocked from the
burner/unit and cause combustion problems.
IMPORTANT INSTRUCTIONS FOR USING
YOUR GLASS COOKTOP
•DoNotOperateorCleanaBrokenCooktop
Glass— If glass top should break, cleaning
solutions and spillovers may penetrate
the broken cooktop and create a risk of
electricshock.Contact aqualiedtechnician
immediately.
•CleanCooktopGlasswithCaution— If a wet
sponge or cloth is used to wipe spills on a hot
cooking area, be careful to avoid a steam burn.
Some cleaners can produce harmful fumes if
applied to a hot surface.
•Avoid scratching the Cooktop Glass with
Sharp Objects.
NOTE
Save these important safety instructions for future
reference.
Important safety notice
The California Safe Drinking Water and Toxic
EnforcementActrequirestheGovernorofCalifornia
to publish a list of substances known to the state to
cause cancer, birth defects or other reproductive
harm, and requires businesses to warn customers
of potential exposure to such substances.
Important Safety Instructions
6
Getting Started
LiqueedPetroleum
(Propane) Gas Conversion
ThisappliancecanbeusedwithNaturalGasand
PropaneGas.Itisshippedfromthefactoryforuse
with natural gas.
AkitforconvertingtoLPgasissuppliedwithyour
cooktop. The kit is marked "FORLP/PROPANE
GASCONVERSION". Follow the installation
instructions which are inside the envelope.
Theconversionmustbeperformedbyaqualied
service technician in accordance with the kit
instructions and all local codes and requirements.
Failure to follow instructions could result in serious
injuryorpropertydamage.Thequaliedagency
performing this work assumes responsibility for the
conversion.
Severe shock, or damage to the cooktop may occur if the
cooktop is not installed by a qualied installer or electrician.
Any additions, changes or conversions required in order for this
appliance to satisfactorily meet the application needs must be
made by a qualied service technician in accordance with the
manufacturer’s instructions and all codes and requirements of
the authority having jurisdiction. Failure to follow the instructions
could result in serious injury or property damage. The qualied
agency performing this work assumes responsibility for the
conversion.
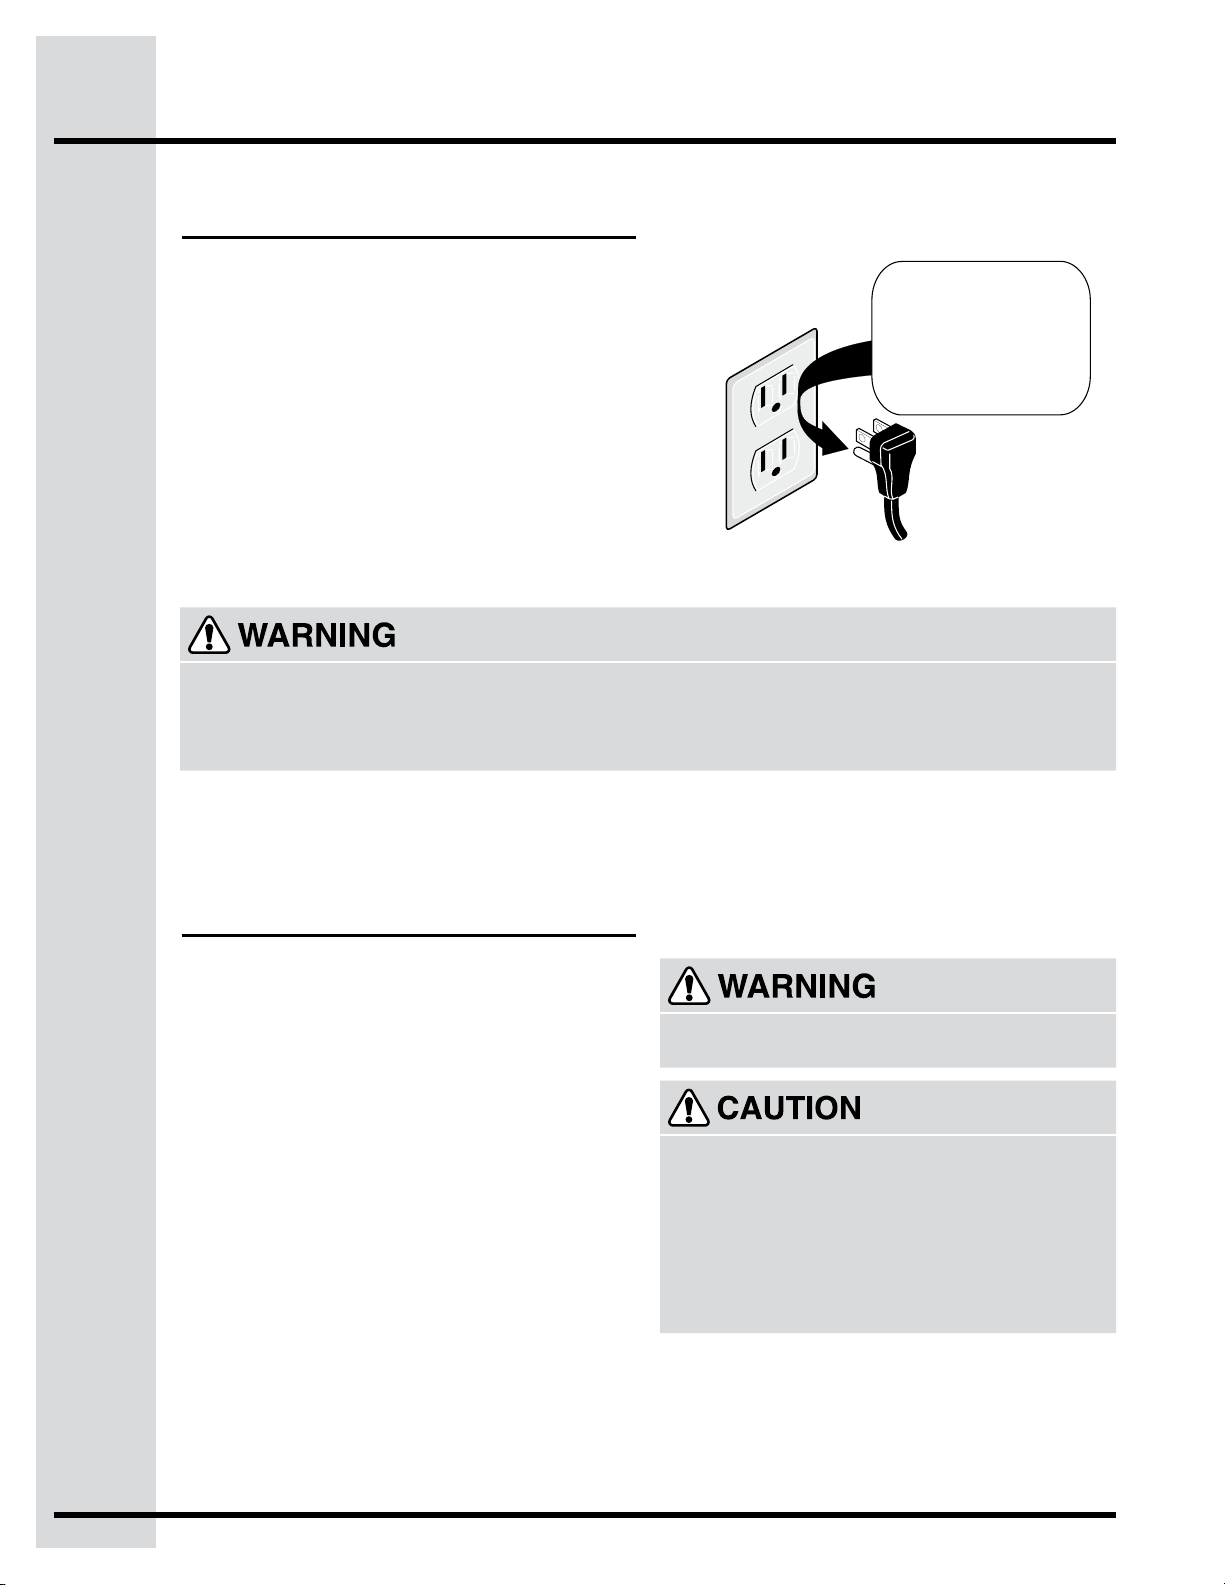
This appliance is equipped with a 3-prong grounding plug for your protection against shock hazard and should be plugged
directly into a properly grounded receptacle. DO NOT cut or remove the grounding prong from this plug.
Avoid re hazard or electrical shock. DO NOT use an adapter plug, an extension cord, or remove grounding prong from
electrical power cord. Failure to follow this warning can cause serious injury, re or death.
Do not, under any
circumstances, cut,
remove, or bypass
the grounding
prong.
Power supply
cord with 3-prong
grounding plug
Grounding
type wall
receptacle
Grounding Instructions
For personal safety, the cooktop must be properly
grounded. For maximum safety, the power cord
must be plugged into an electrical outlet that is
correctlypolarizedandproperlygrounded.
DO NOT operate the cooktop using a 2-prong
adapter or an extension cord. If a 2-prong wall
receptacle is the only available outlet, it is the
personal responsibility of the consumer to have
it replaced with a properly grounded 3-prong wall
receptacleinstalledbyaqualiedelectrician.
See the INSTALLATION INSTRUCTIONS
packaged with this cooktop for complete installation
and grounding instructions.
7
Surface Cooking
Surface cooking utensils
Note: Always use a utensil for its intended purpose. Follow manufacturer’s instructions. Some utensils
were not made to be used in the oven or on the cooktop.
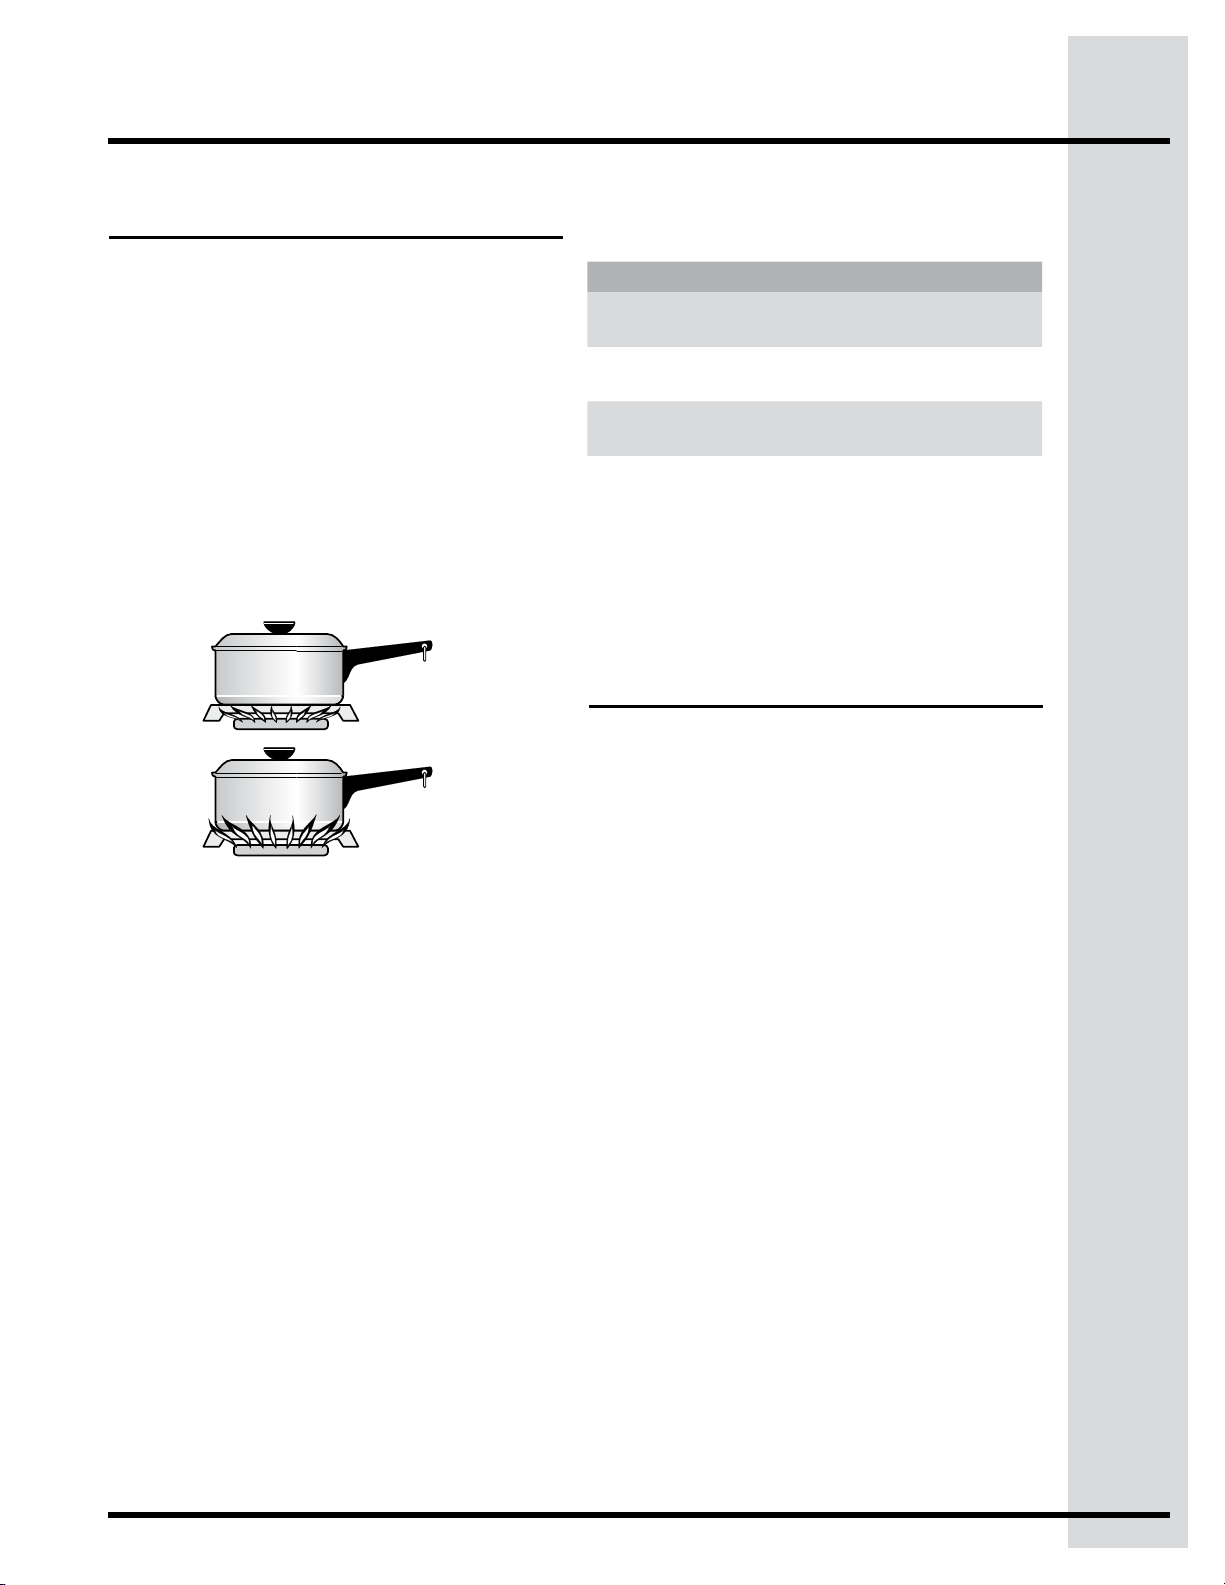
*GOOD
• Flatbottom and
straight sides.
• Tightttinglids.
• Weightofhandle
does not tilt pan. Pan
is well balanced.
• Pansizesmatchthe
amount of food to be
preparedandthesize
of burner.
• Madeofmaterialthat
conducts heat well.
• Easytoclean.
POOR
• Curvedandwarpedpan
bottoms.
• Panoverhangsunitbymore
than2.5cm(1”).
• Heavyhandletiltspan.
• Flameextendsbeyondunit.
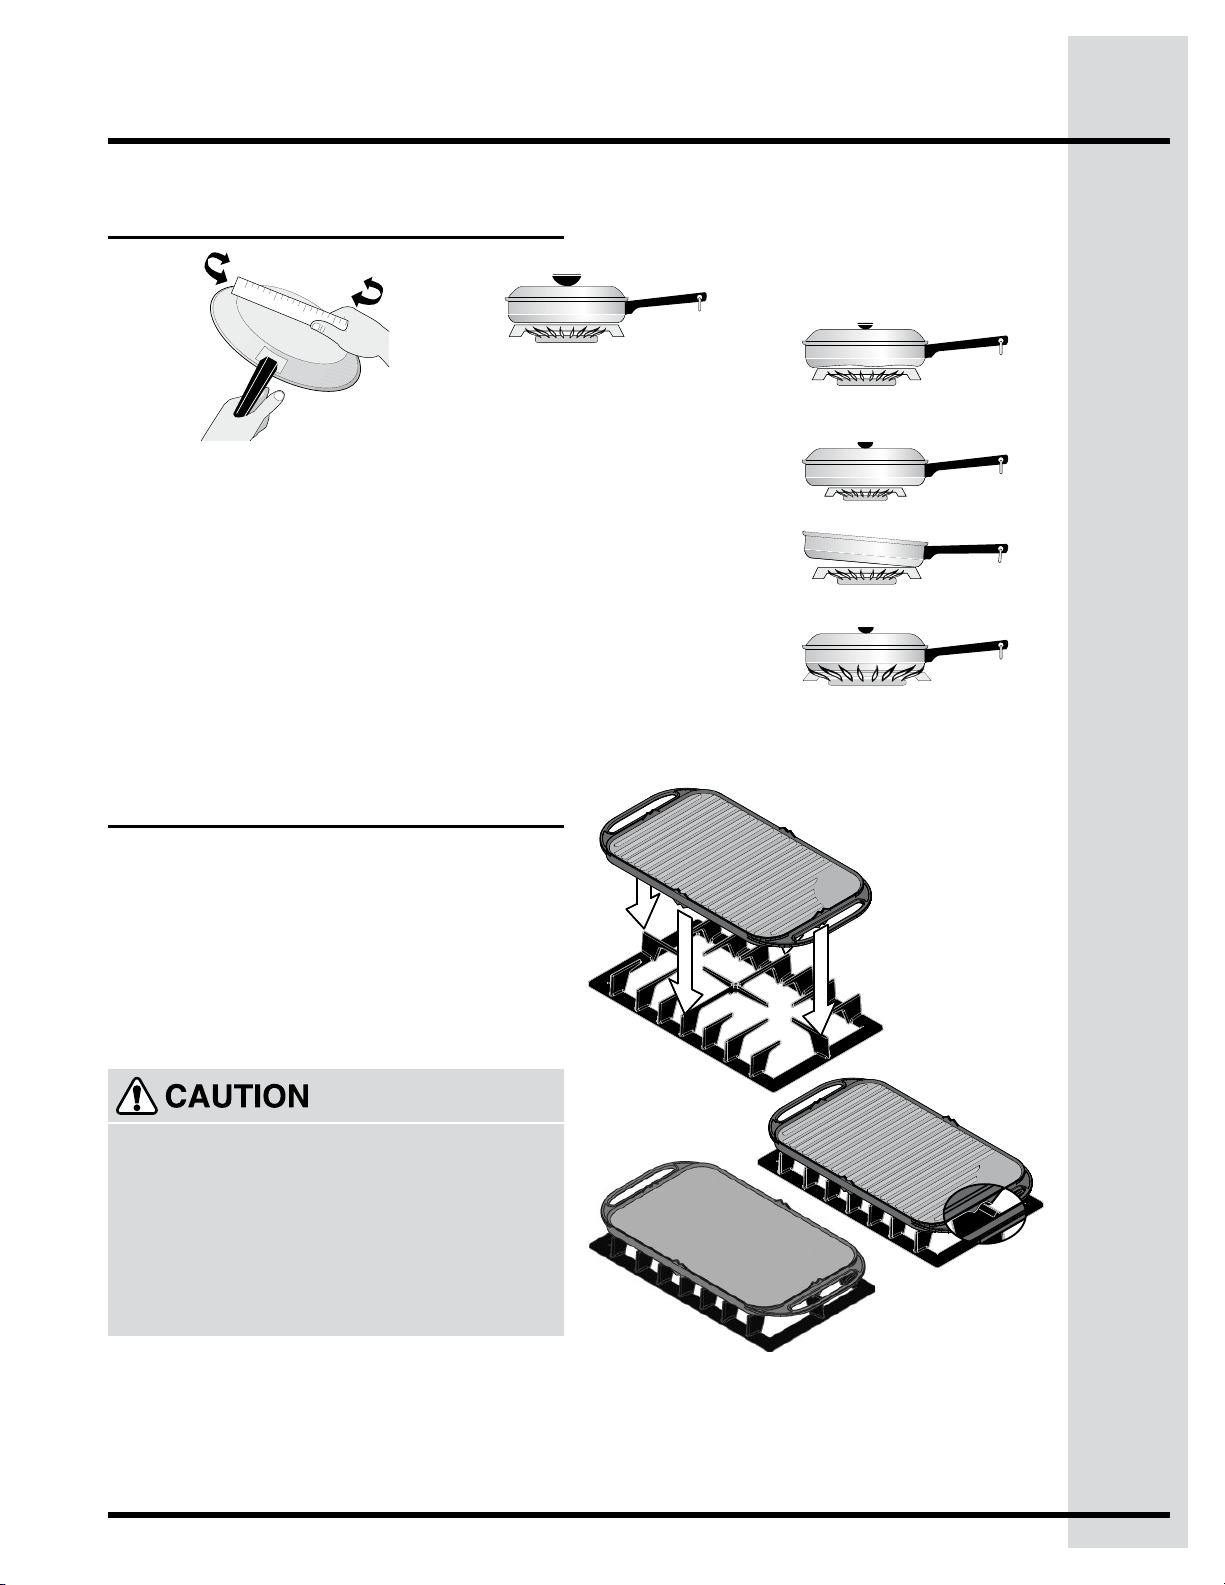
Pansshouldhaveatbottoms.Check
foratnessbyrotatingaruleracross
the bottom. There should be no gaps
between the pan and ruler.
* Specialty pans such as lobster pots,
griddles and pressure cookers may be
used but must conform to the above
recommended cookware requirements.
Using the griddle
Always place the griddle on the grate before to turn on
the burner.
Always use potholders to remove the griddle from the
grate. Allow the griddle to cool before removing. Do not
set hot griddle on surfaces that cannot withstand high
heat; such as countertops.
Be sure the griddle is positioned correctly and stable
before use to prevent hot spills and possible burns
The griddle is intended for direct food cooking and
canbeusedonbothsides(Figures2or3).Do
not use pans or other cookware on the griddle.
Doingsocoulddamagethenish.Withthegrate
in position over the burner, set the griddle on top
of the grate positioning the notches in the griddle
overthegratengers(refertogures1and2for
optimalpositioning).
Figure 1
Figure 2
Side with
grooves
Figure 3
Flat Side
8
Surface Cooking
Using the wok stand (accessory not included)
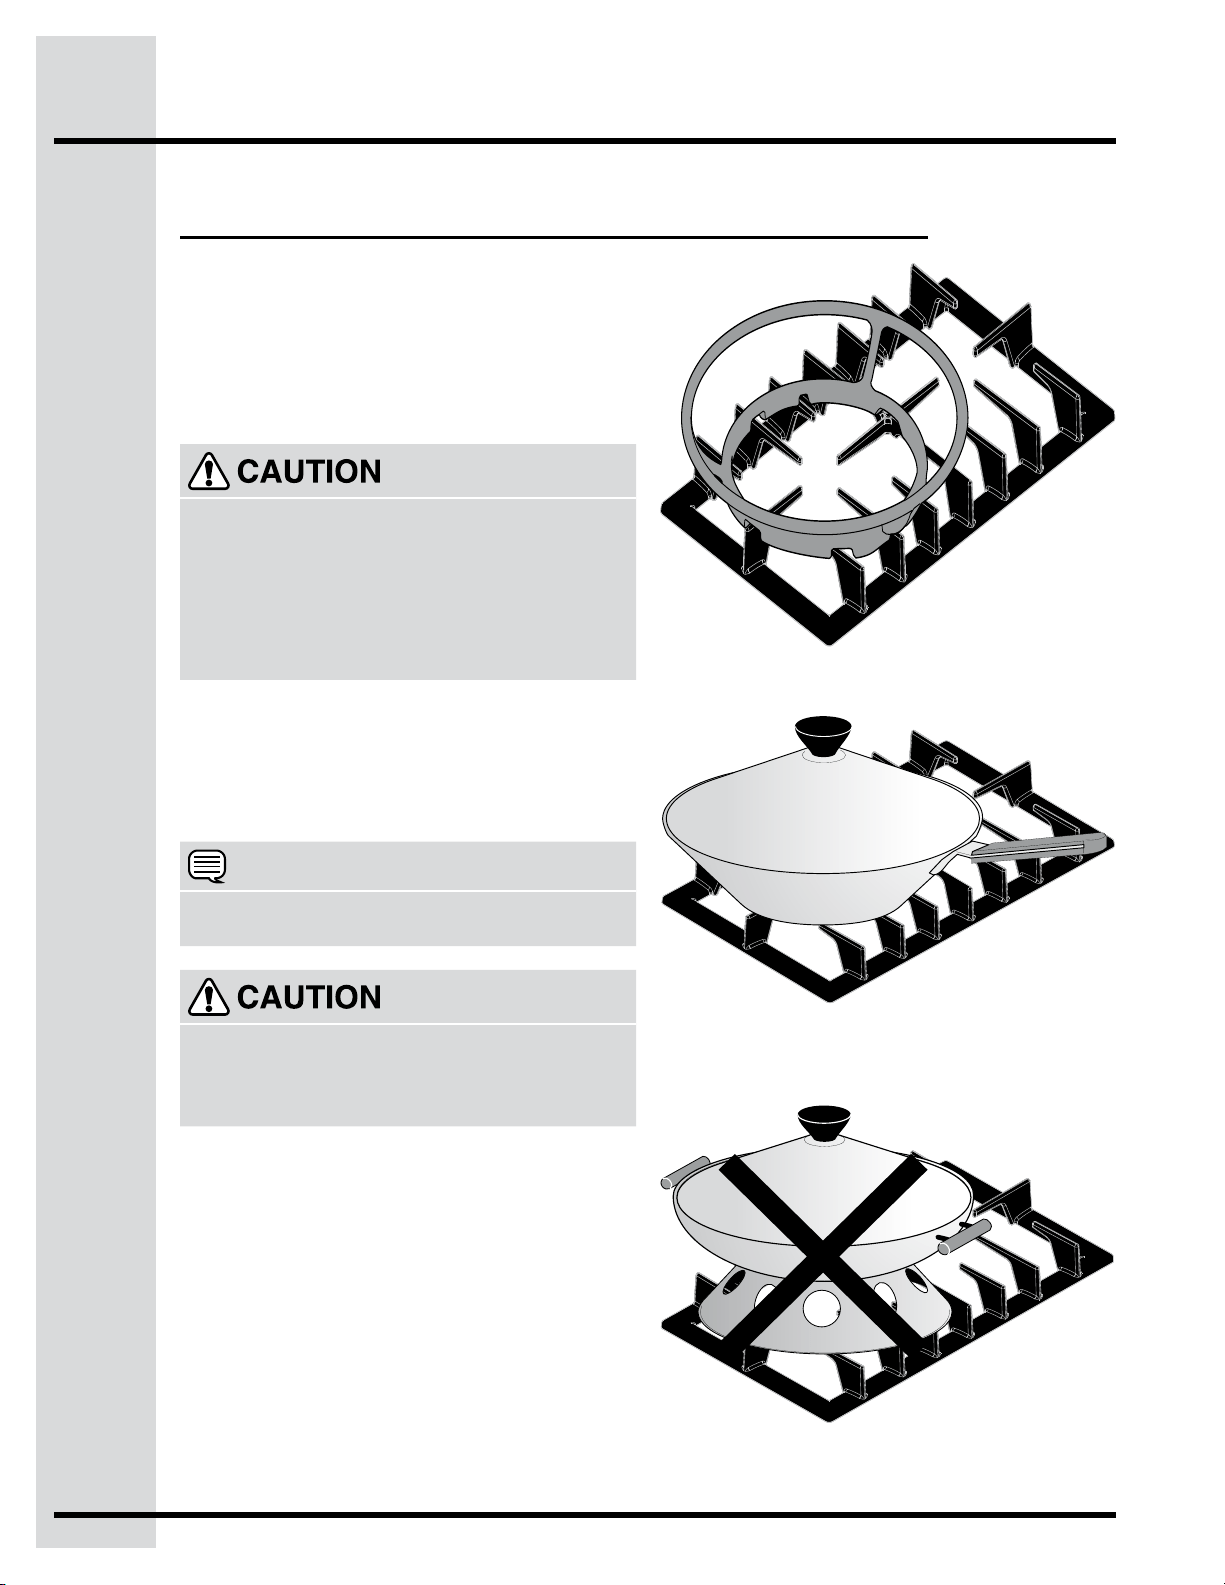
The Wok Stand is designed to allow round-
bottomed woks to be used. It is recommended
that you use a 14 inch diameter (35.5 cm)
or less Wok. It is recommended that you use
the POWER burner with the wok stand for best
performance. If properly positioned, the Wok Stand
will not slide off the grate.
Figure 1
Flat-bottom wokswithlargeatbottomsmayalso
beusedonyourcooktopSurfaceBurnerGrates
withouttheWokStand(SeeFigure2).Insurethe
stabilityoftheat-bottomwokbeforecooking
withouttheWokStand.Ifunstable,DONOTuse
theat-bottomwokwithouttheWokStand.
Round-bottom woks(with a support ring)
shouldNOTbeused(SeeFigure3).The
supporting ring was not designed for proper or
stableuseontheSurfaceBurnerGrates.
Properuseofat-bottomwok
onSurfaceBurnerGrate
Figure 2
Improper use of round-bottom wok
onSurfaceBurnerGrate
Figure 3
Always use potholders to remove the wok stand from
the grate. Allow the wok stand to cool before removing.
Do not set hot wok stand on surfaces that cannot
withstand high heat; such as countertops.
Be sure the Wok Stand is positioned correctly and
stable before use to prevent hot spills and possible
burns.
Be sure to ALWAYS use the Wok Stand if the stability of
the wok is uncertain. If cooking large amounts of liquid
food without the Wok Stand, the wok may tip and spill
over causing burns.
To Properly Position the Wok Stand:
With the grate in position over the burner, set the
Wok Stand on top of the grate positioning the
notches in the Wok Stand over the cooktop grate
ngers(SeeFigure1).
NOTE
The Wok cooking performance is best on the POWER
burner.

9
Surface Cooking
Using the simmer plate (accessory not included)
Always place the simmer plate on the grate before to turn on the burner.
Always use potholders to remove the simmer plate from the grate. Allow the simmer plate to cool before removing.
Do not set hot simmer plate on surfaces that cannot withstand high heat; such as countertops.
Be sure the simmer plate is positioned correctly and stable before use to prevent hot spills and possible burns.
Figure 1
Figure 2
Thesimmerplate(Figure1)isintendedto
diffuse lower temperature of the burner to help
cooking delicate aliment such as chocolate, milk,
bechamel, etc. It can also be use for cooking
sauce during long period. With the grate in
position over the burner, set the simmer plate
on top of the grate positioning the notches in the
simmerplateoverthegratengers(SeeFigure
2)andthenplacetheutensilonthesimmerplate.
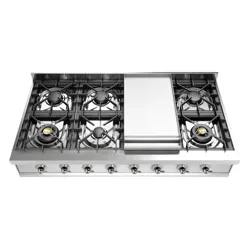
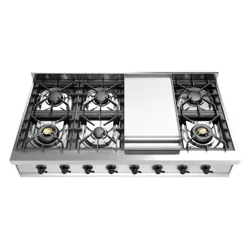
Thecooktopisequippedwithdifferentsizedburners.
The surface burners are located on the cooktop as follows:
- a 5000BTU(naturalgas)burnerlocatedatthecenter
rear position;
- a 9500BTU(naturalgas)burnerlocatedattherightrear
position;
- two 14000BTU(naturalgas)burnerslocatedattheleft
rear and center front position;
- and two 20000BTU(naturalgas)burnerslocatedatthe
left front and right front position.
LocationoftheBurners
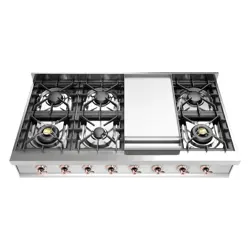
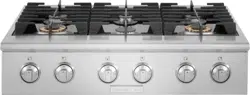
PlacegratesontheCeramicGlassCooktop.Besuretheyareright
located inside the stainless steel frame.
ATTENTION:Donotslidethegratesonthestainlesssteelframe,
doing so can damage the surface.
Placement of burner grates
10
Surface Cooking
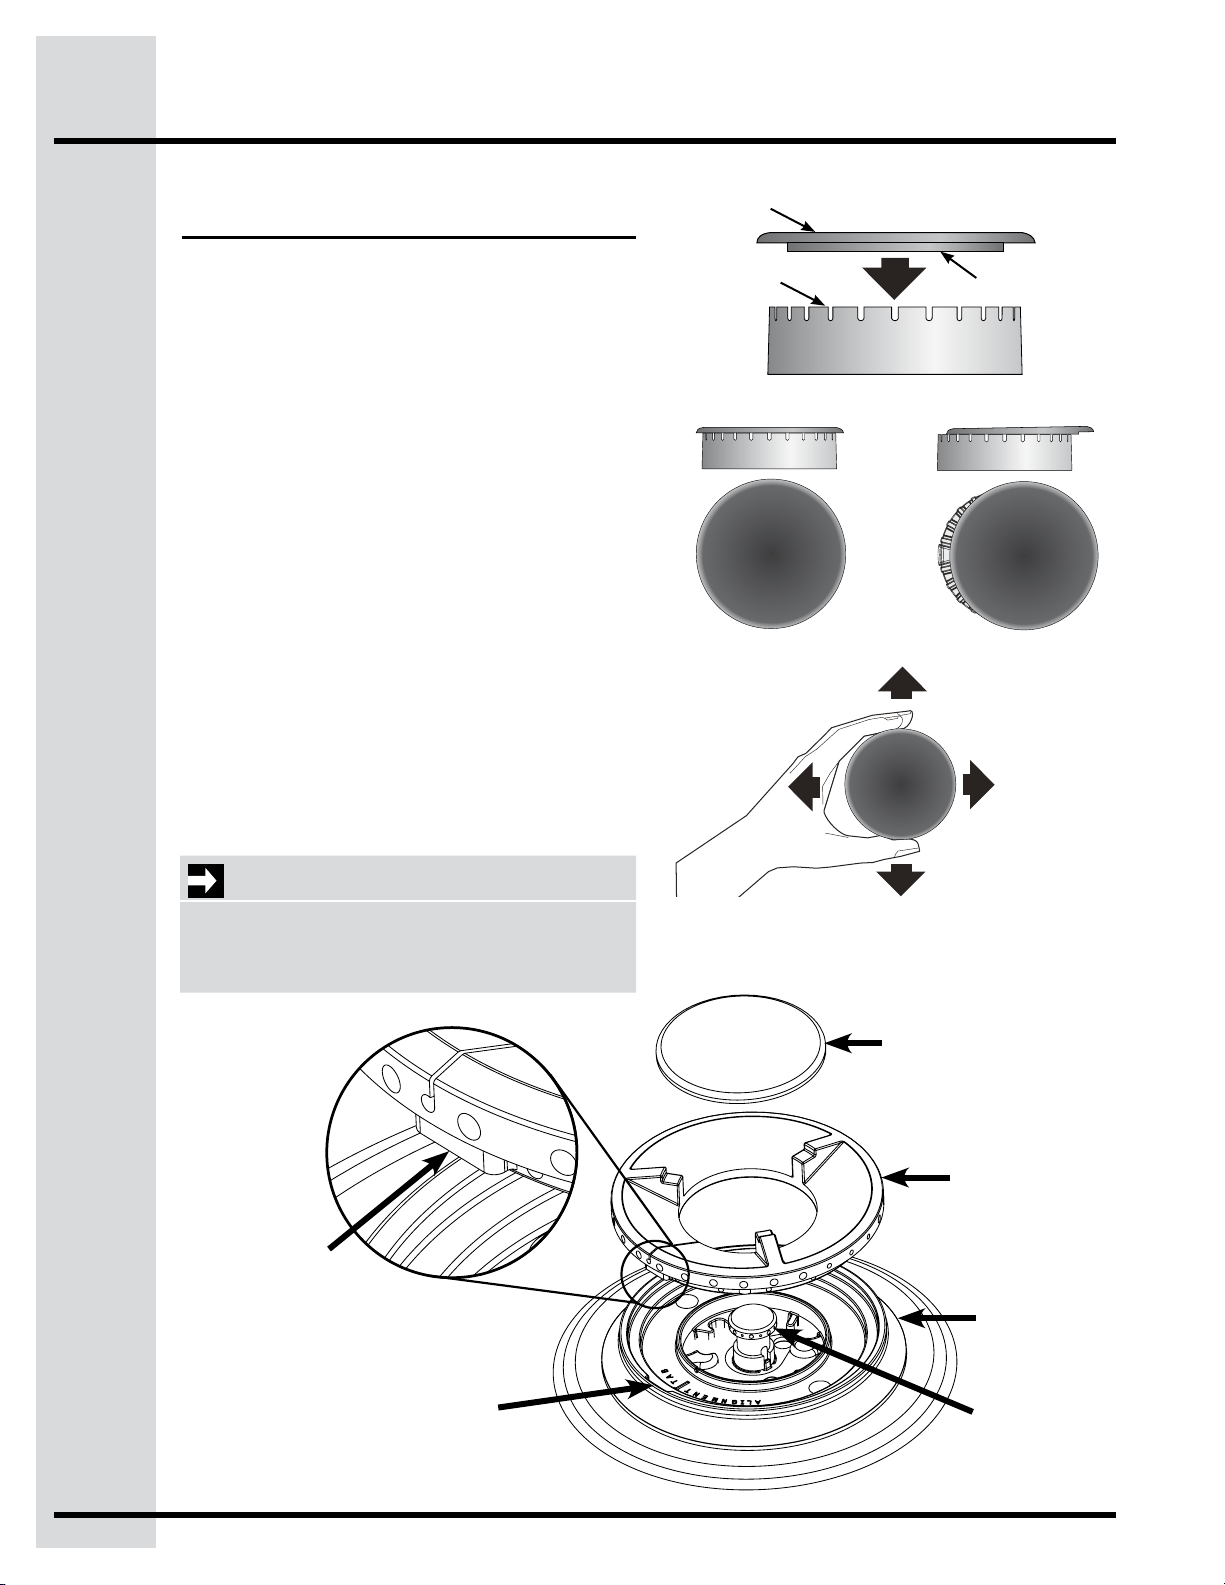
Place a burner cap on each burner head, matching
thecapsizetotheheadsize.Thecapforeach
burner has an inner locating ring which centers
thecapcorrectlyontheburnerhead.Besurethat
all the burner caps and burner heads are correctly
placedBEFOREusingyourappliance.
Makesureeachburnercapisproperlyalignedand
level.
Turn the burner on to determine if it will light. If the
burnerdoesnotlight,contactaServiceCenter.Do
not service the sealed burner yourself.
ATTENTION:Donotslidetheburnercapsonthe
cooktop, doing so can damage the surface.
Placement of burner caps
BurnerRing
Alignment Tab
BurnerCap
BurnerRing
BurnerBase
Simmer Head
BurnerBase
Alignment Tab Slot
BurnerCap
BurnerHead
CorrectBurnerCap
Placement
IncorrectBurnerCap
Placement
BurnerCapLip
IMPORTANT
For Proper Ignition: Burner Ring
AlignmentTabMustAlignwithBurner
BaseAlignmentTabSlot
11
Surface Cooking
For most cooking, start on the highest control
setting and then turn to a lower one to complete
the process. Use the chart below as a guide for
determiningproperamesizeforvarioustypes
ofcooking.Thesizeandtypeofutensilusedand
theamountoffoodbeingcookedwillinuencethe
setting needed for cooking.
For deep fat frying, useathermometerandadjust
the surface control knob accordingly. If the fat is too
cool, the food will absorb the fat and be greasy. If
the fat is too hot, the food will brown so quickly that
thecenterwillbeundercooked.Donotattemptto
deep fat fry too much food at once as the food will
neither brown nor cook properly.
The coloroftheameis the key to proper burner
adjustment.Agoodameisclear,blue andhardly
visible in a well-lighted room. Each cone of ame
shouldbesteadyandsharplydened.Adjustorclean
burnerifameisyellow-orange.Tocleanburner,see
instructions under General Care & Cleaning.
RIGHT
WRON
G
Flame Size
ProperBurnerAdjustments
*These settings are based on using medium-
weight aluminum pans with lids. Settings may
vary when using other types of pans.
Neverextendtheamebeyondtheouteredgeof
theutensil.Ahigheramesimplywastesheatand
energy, and increases your risk of being burned by
theame.
*Flame Size Type of Cooking
High Flame
Start most foods; bring water
to a boil; pan broiling
MediumFlame
Maintainaslowboil;thicken
sauces, gravies; steam
LowFlame
Keep foods cooking; poach;
stew
12
Setting surface controls
Your cooktop may be equipped with any
combination of the following burners:
SimmerBurner:bestusedforsimmeringdelicate
sauces, etc.
StandardBurner:usedformostallsurfacecooking
needs.
LargeBurner:bestusedwhenbringinglarge
quantities of liquid to temperature and when
preparing larger quantities of food.
Regardlessofsize,alwaysselectautensil
that is suitable for the amount and type of food
beingprepared.Selectaburnerandamesize
appropriatetothepan.Neverallowamesto
extend beyond the outer edge of the pan.
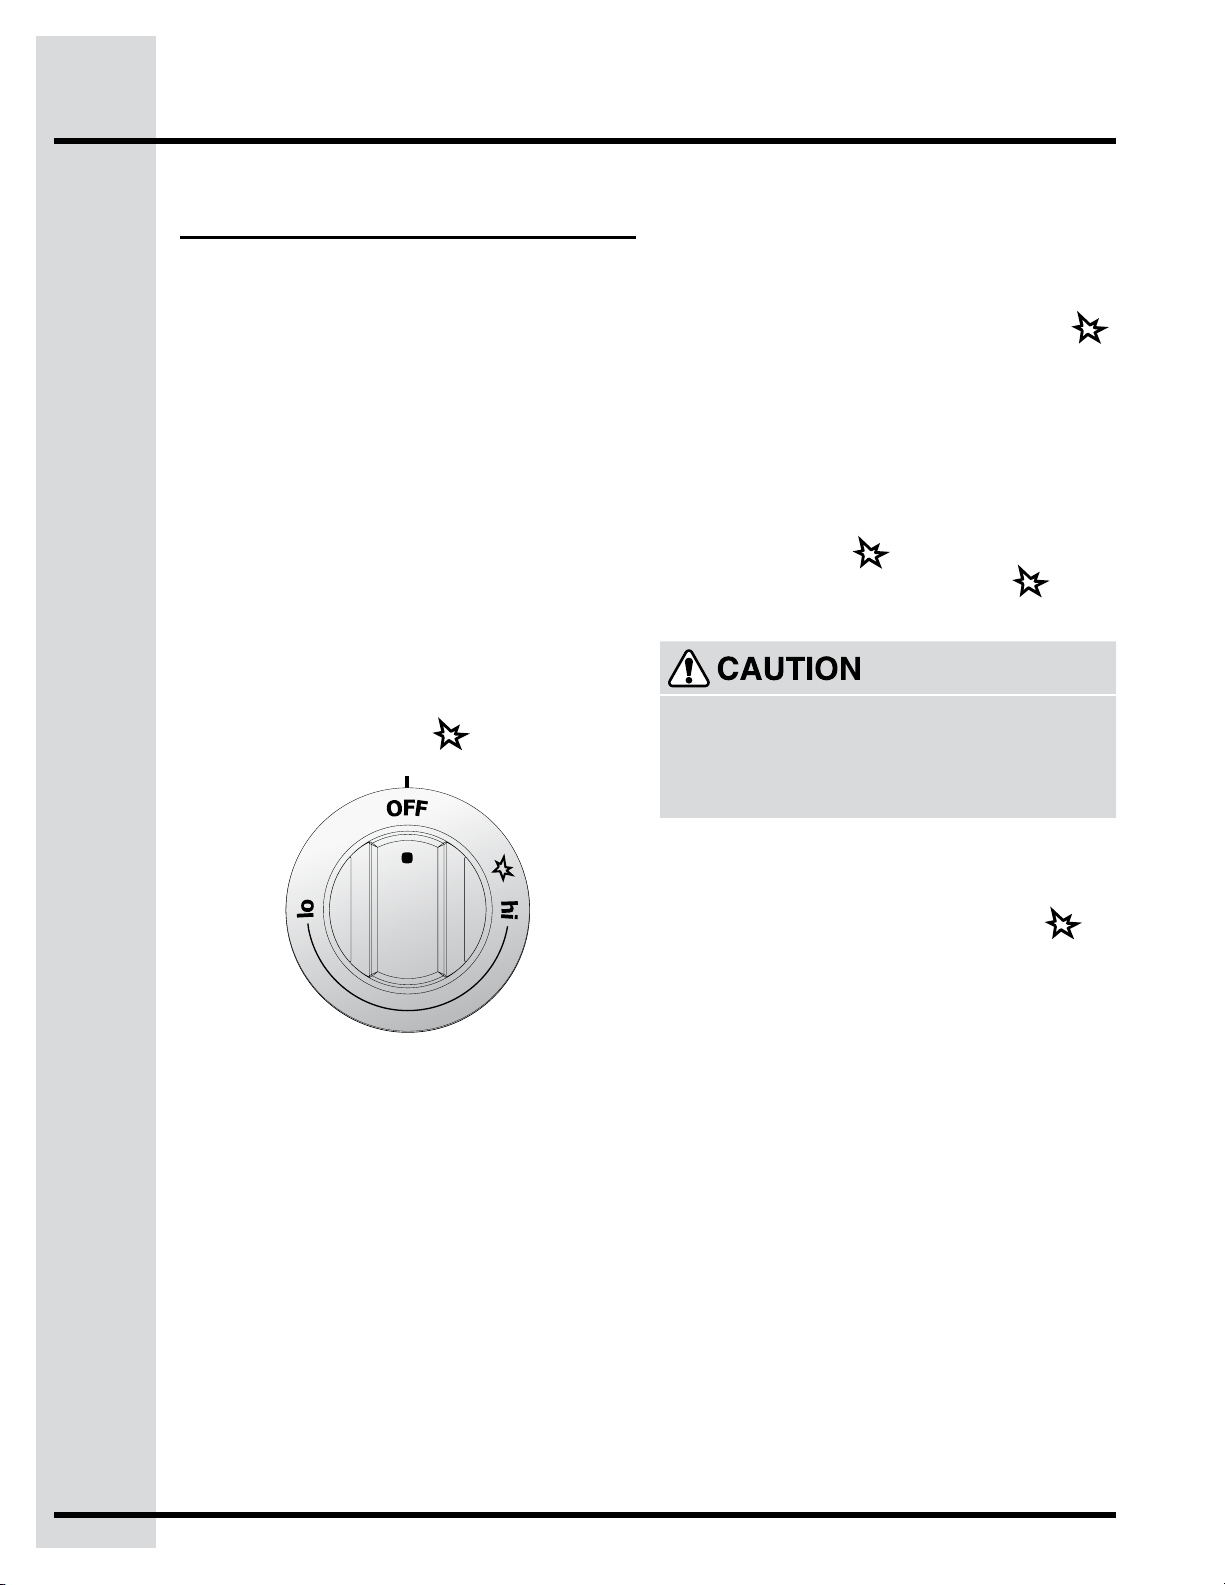
Yourcooktopisequippedwith270°rotationame
control valves. These valves provide enhanced
controloftheburnerame.Eachburnerlights
automatically from an electric ignitor when its
control knob is turned to the position.
Do not place plastic items such as salt and pepper
shakers, spoon holders or plastic wrappings on
top of the cooktop when it is in use. These items
could melt or ignite. Potholders, towels or wood spoons
couldcatchreifplacedtooclosetoaame.
To operate the surface burner:
1. Place cooking utensil on burner.
2. Push in and turn the Surface Control knob to
.
Note: All electronic ignitors will click at the same time
when the knob is pushed in. However, only the burner
you are turning on will ignite.
3. Visually check that the burner has lit.
4. Turnthecontrolknobtothedesiredamesize.
The control knobs do not have to be set at a
particularmark.Usetheguidesandadjustthe
ameasneeded. DO NOT cook with the Surface
Control knob in the
position.(Theelectronic
ignitor will continue to click if left in the
position,causingprematurewear.)
In the event of an electrical power outage, the
surface burners can be lit manually. To light a
surface burner, hold a lit match to the burner head,
then slowly turn the Surface Control knob to
.
Use caution when lighting surface burners manually.
Surface Cooking
13
Care and Cleaning
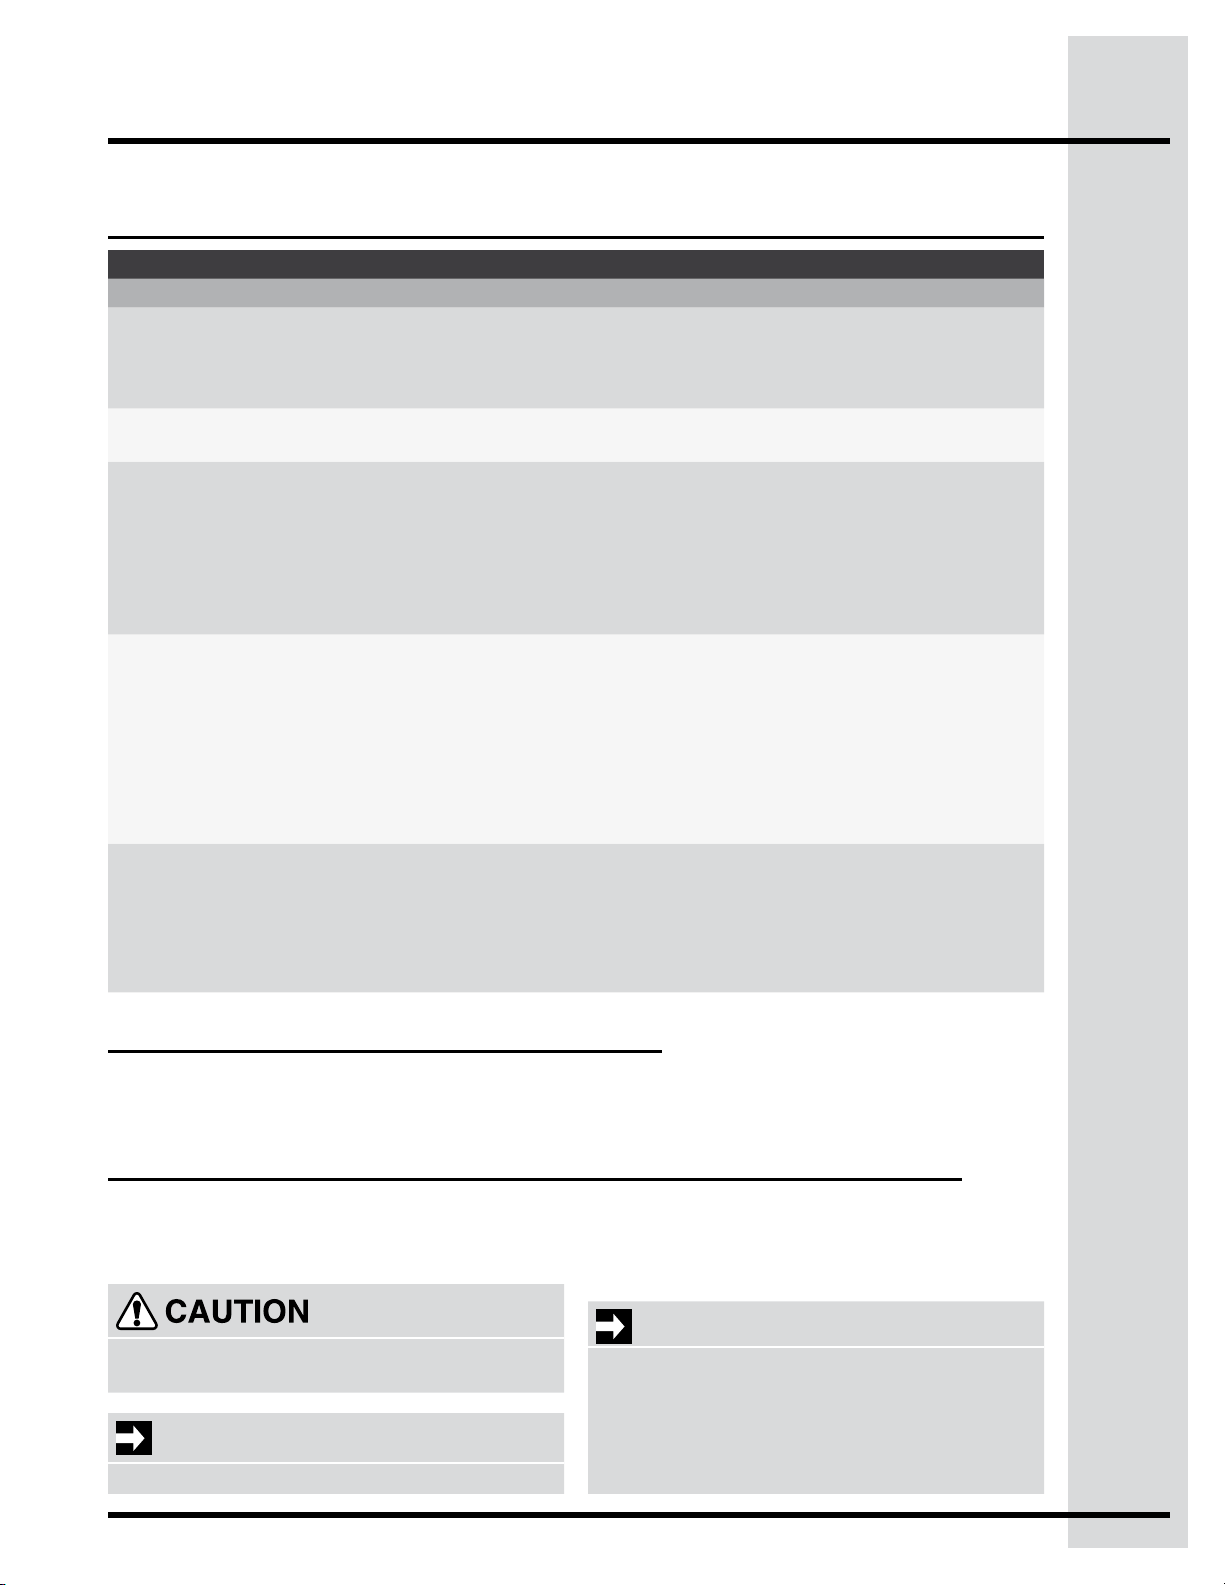
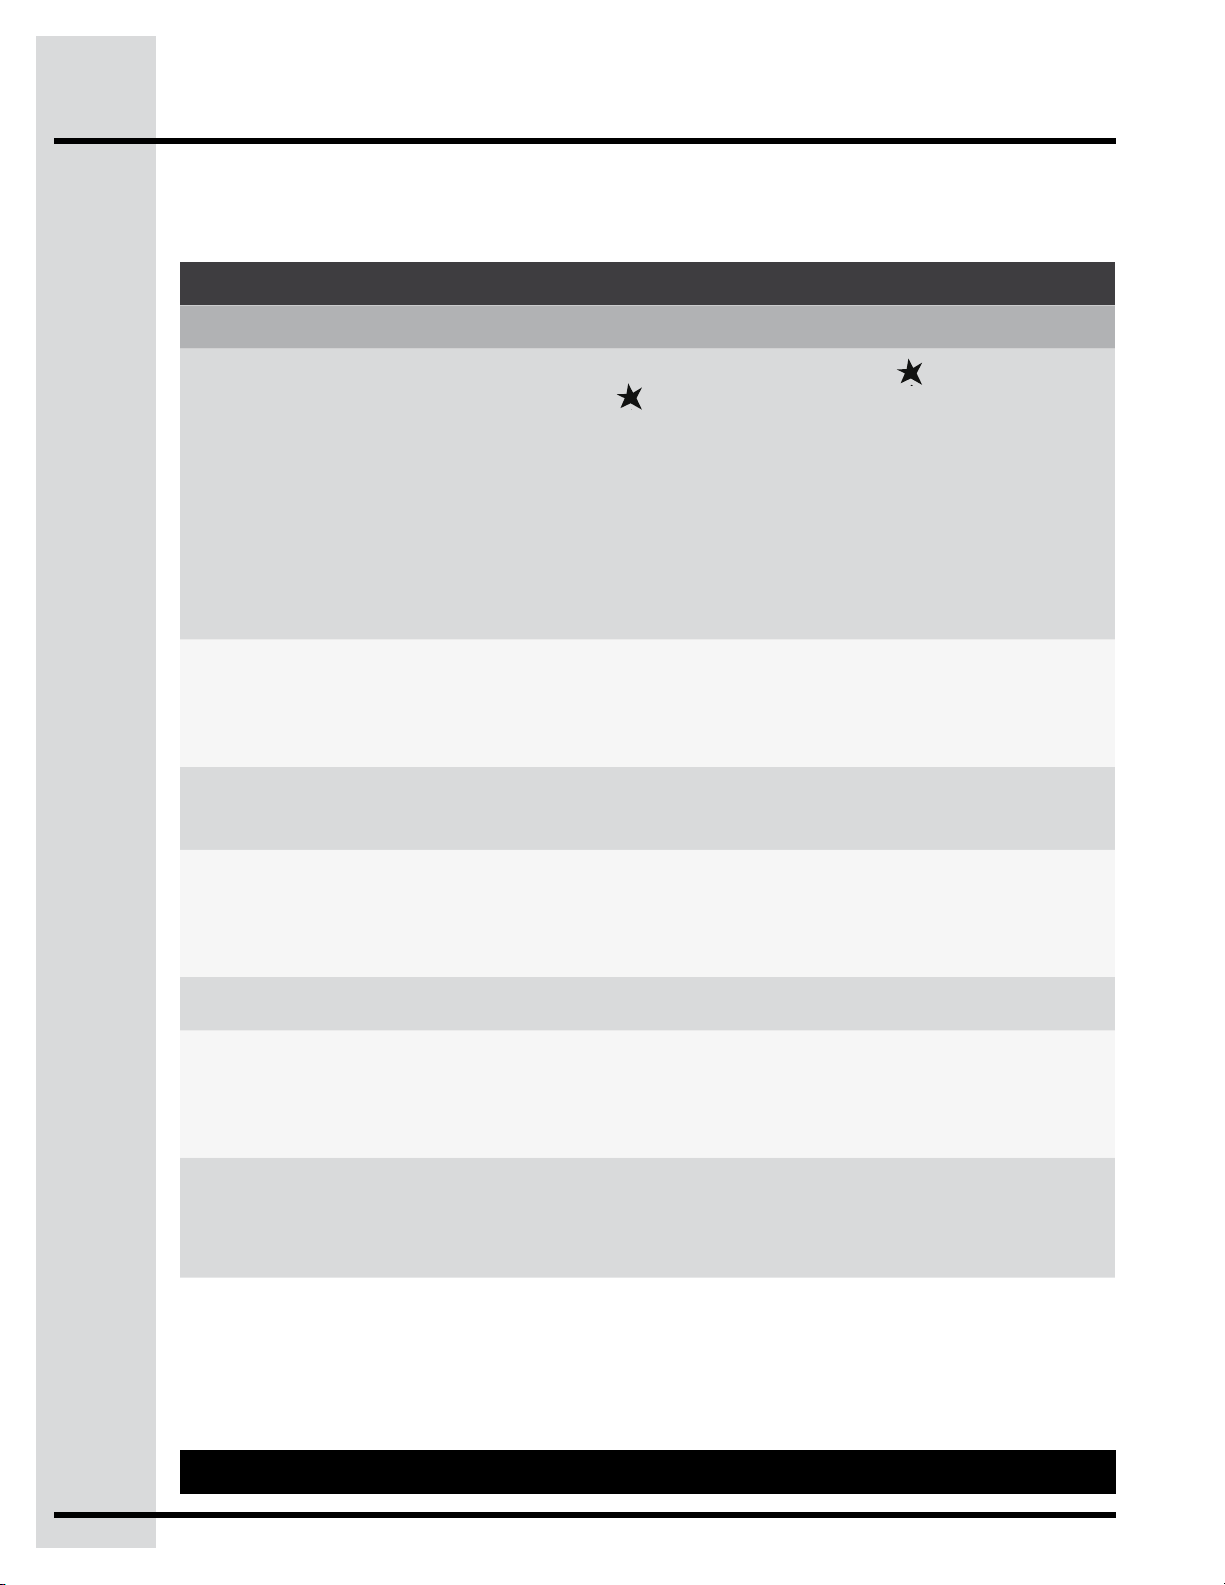
Cleaning Recommendations
Surface Type Cleaning Recommendation
• Painted and
Plastic Control
Knobs
For general cleaning, use hot, soapy water and a cloth. For more difcult soils and
built-up grease,applyaliquiddetergentdirectlyontothesoil.Leaveonsoilfor30
to 60 minutes. Rinse with a damp cloth and dry. DO NOT use abrasive cleaners
on any of these materials; they can scratch.
• Glass surface Before cleaning,turnallcontrolstoOFF.CleantheglassasinstructionsinGeneral
Care & Cleaning section under Cooktop Cleaning Maintenance.
• Porcelain Enamel
• BurnerGrates,
BurnerCaps
Clean burner grates in the dishwasher and dry upon removal.
Gentlescouringwithasoapyscouringpadwillremovemostspots.Rinsewitha
1:1 solution of clean water and ammonia. If necessary,coverdifcultspotswith
an ammonia-soaked paper towel for 30 to 40 minutes. Rinse with clean water and
adampcloth,thenscrubwithasoap-lledscouringpad.Rinseandwipedrywith
a clean cloth. Remove all cleaners or the porcelain may become damaged during
future heating. DO NOT use spray oven cleaners on the cooktop.
• SurfaceBurners The holes in the burners of your cooktop must be kept clean at all times for proper
ignitionandacomplete,evename. Clean the burner holes routinely with a small gauge
wire or needle and especially after bad spillovers which could clog these holes.
Toremove,cleanandreplacesealedburnerunits;followtheinstructionsinGeneral
Care & Cleaning section under CleaningBurners,GratesandTrivets. For stubborn
stains,scrubwithsoapandwateroramildabrasivecleanseranddampcloth.Dry
the burners thoroughly in a warm oven for 30 minutes. Then replace them, making
sure they are seated and level. DO NOT put burner units in the dishwasher.
• Stainless Steel Clean stainless steel with hot, soapy water and a dishcloth. Rinse with clean
water and a cloth. Do not use cleaners with high concentrations of chlorides
or chlorines.Donotuseharshscrubbingcleaners.Onlyusekitchencleaners
that are especially made for cleaning stainless steel. Always be sure to rinse the
cleaners from the surface as bluish stains may occur during heating that cannot
be removed.
Care and cleaning table
Care and cleaning of stainless steel
Special care and cleaning are required for maintaining the appearance of stainless parts. Please refer to
the table provided at the beginning of the General Care & CleaningsectioninthisUse&CareManual.
Do not remove any parts from the cooktop until they
have completely cooled and are safe to handle.
IMPORTANT
Do not use spray oven cleaners on the cooktop.
The cooktop is designed to make cleaning easier.
Becausethegasburneraresealed,cleanupsare
easy when spillovers are cleaned up immediately.
Cleaning burner grates, caps, heads and glass cooktop
Cleaning the burner grates
The burner grates are dishwasher safe and may be
cleaned in the dishwasher. Remove any excessive
soils before placing in the dishwasher.
IMPORTANT
●Forpropergasowandignitionoftheburners
— DO NOT allow spills, food, cleaning
agents or any other material to enter the gas
oriceopening.
●Thecooktopisnotremovable.Donotattempt
to remove or lift the cooktop.
14
Care and Cleaning
Cleaning burner grates, caps, heads and glass cooktop
Cleaning the cooktop glass
Your appliance is shipped with the burner heads
andburnercapsinthecorrectlocations.Before
using your gas appliance be sure to:
●Followinstallationinstructionsbeforeoperating.
●Removeallpackingtapefromcooktoparea.
●To avoid possible burns use care when
cleaning the cooktop. DO NOT attempt to clean
the cooktop whenever the cooktop or burner
heads are still hot.
●To avoid possible burns DO NOT attempt any
of the following cleaning instructions provided
beforeturningOFFallofthesurfaceburners
and allow them to cool.
●To avoid possible burns DO NOT attempt to
operate the surface burners without the burner
caps.
Consistent and proper cleaning is essential to
maintaining your ceramic glass cooktop
Cleaning the burner Caps
Should you ever need to remove the burner caps
for cleaning lift the burner cap off the burner
head. Clean heavy soils with an absorbent cloth.
Rinse with a clean, damp cloth and immediately
thoroughly dry including the bottom and inside
ofthecap.Donotuseharshabrasivecleaners.
Theycanscratchtheporcelainonthecap.Donot
clean burner caps in dishwasher. When placing the
burner caps, see Important note below.
IMPORTANT
When placing the burner caps on the cooktop, be
sure the burner caps are seated firmly on top of
burnerheads.Improperflamesizeanduneven
heating may result when any surface burners are
turnedONandtheburnercapsarenotseated
correctly.
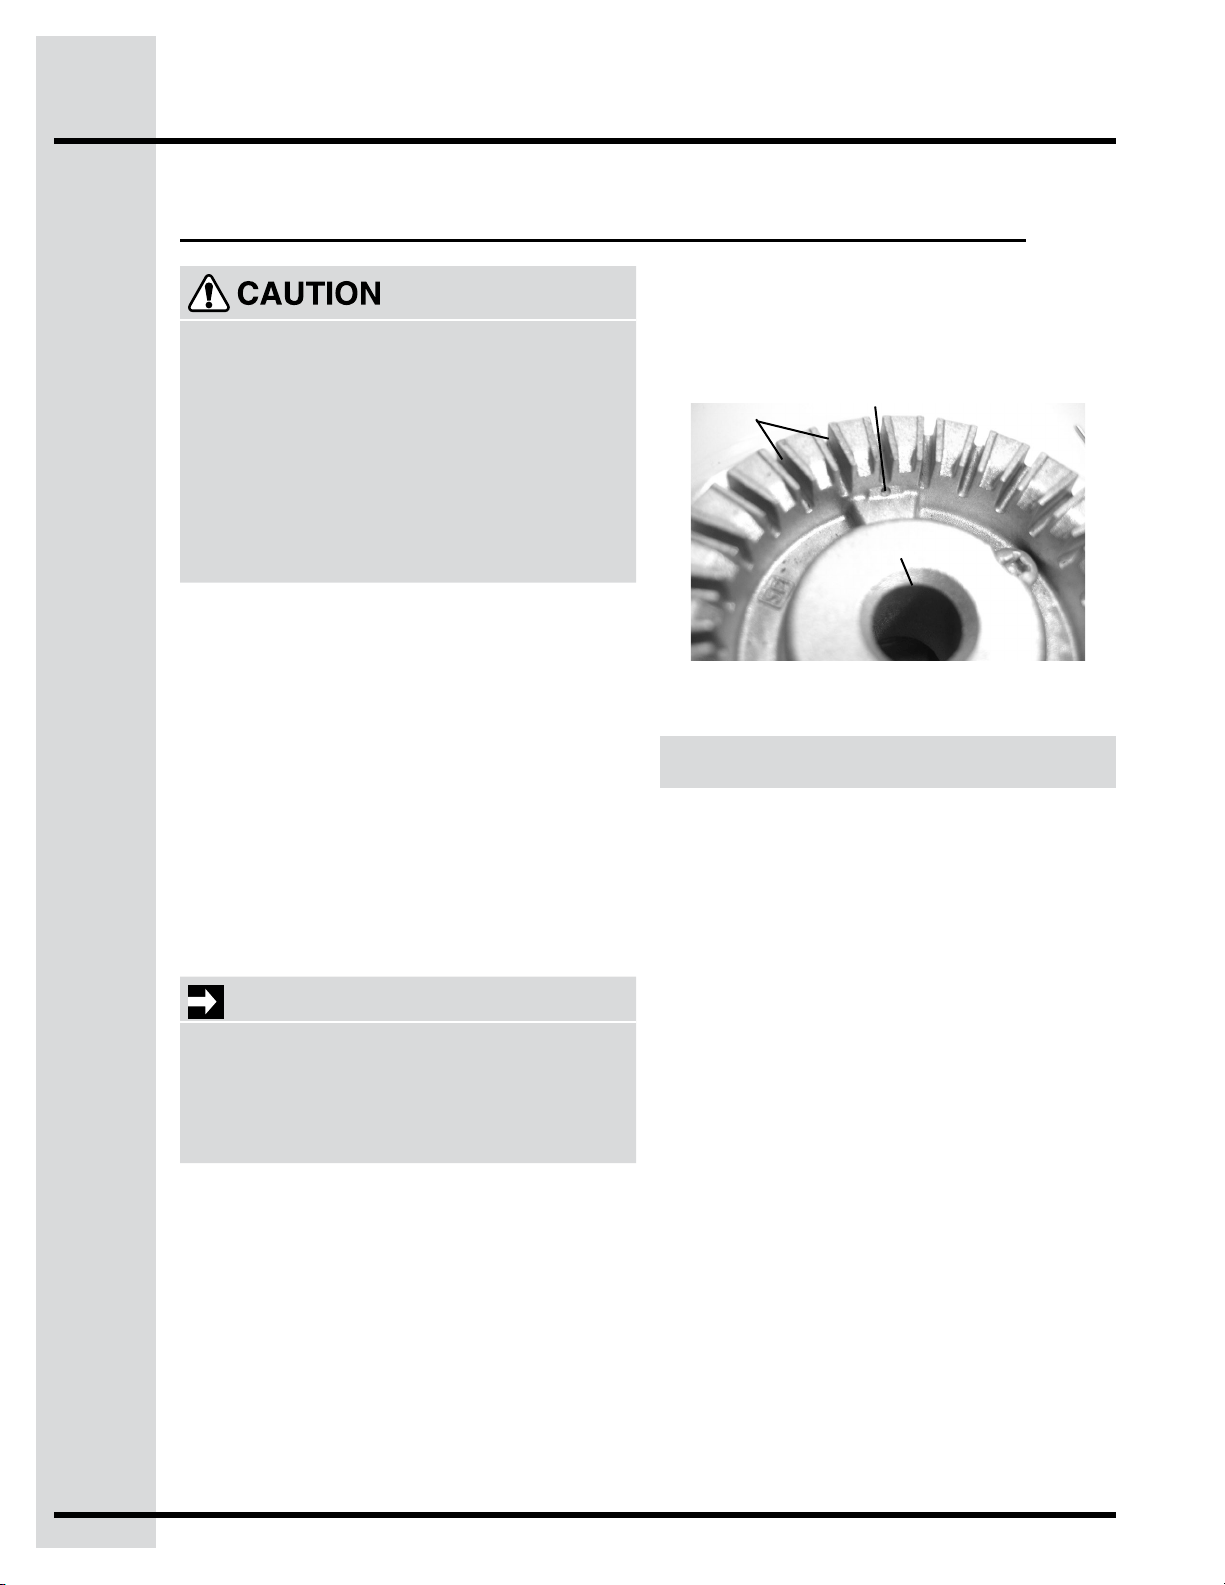
Cleaning the burner heads
Lifttheburnercapfromtheburnerhead.The
surface burner heads are secured to the cooktop
and must be cleaned in place.
Forpropergasowitmaybenecessarytoclean
theburnerheadsandslots.Toclean,rstusea
cleanDAMPclothtosoakupanyspills.Remove
any food from between the burner slots using a
small nonabrasive brush like a toothbrush and
afterwards wipe using a damp cloth. For stubborn
soils located in the slots, use a small-gauge wire or
needle to clean.
Slots
Ignition port
Oriceport
Should you experience ignition problems it may be
that an ignition port hole is partially blocked with
soil(seegurebelow).Withtheburnerheadin
place, use a small wire gauge needle or the end of
a paper clip to clear the ignition port or ports.
Priortousingyourcooktopforthersttime,apply
aceramiccooktopcleaningcream(availablein
mosthardware,groceryanddepartmentstores)to
the ceramic surface. Clean and buff with a clean
paper towel. This will make cleaning easier when
soiled from cooking. Cooktop cleaning creams
leaveaprotectivenishontheglasstohelp
prevent scratches and abrasions.
Sliding aluminum or copper clad bottom pans on
the cooktop glass can cause metal markings on the
cooktop surface. These marks should be removed
immediately after the cooktop has cooled using the
cooktopcleaningcream.Metalmarkscanbecome
permanent if not removed prior to future use.
Cookware(castiron,metal,ceramic orglass)with
rough bottoms can mark or scratch the cooktop
surface. Do not slide anything metal or glass
across the cooktop. Do not use your cooktop as a
cutting board or work surface in the kitchen. Do not
cook foods directly on the cooktop surface without a
pan. Do notdropheavyorhardobjectsontheglass
cooktop, they may cause it to crack.
15
Care and Cleaning
Cleaning burner grates, caps, heads and glass cooktop
Cleaning recommendations for the
ceramic glass cooktop
30°
Before cleaning the cooktop, be sure the controls are
turned to OFF and the cooktop is COOL.
Damage to the ceramic glass cooktop may occur if you
use scrub pad.
DO NOT use a cooktop cleaner on a hot cooktop.
The fumes can be hazardous to your health, and can
chemically damage the ceramic-glass surface.
For light to moderate soil:
Apply a few drops of cooktop cleaning cream
directly to the cooktop. Use a clean paper towel
tocleantheentirecooktopsurface.Makesurethe
cooktop is cleaned thoroughly, leaving no residue.
Donotusethetowelyouusetocleanthecooktop
for any other purpose.
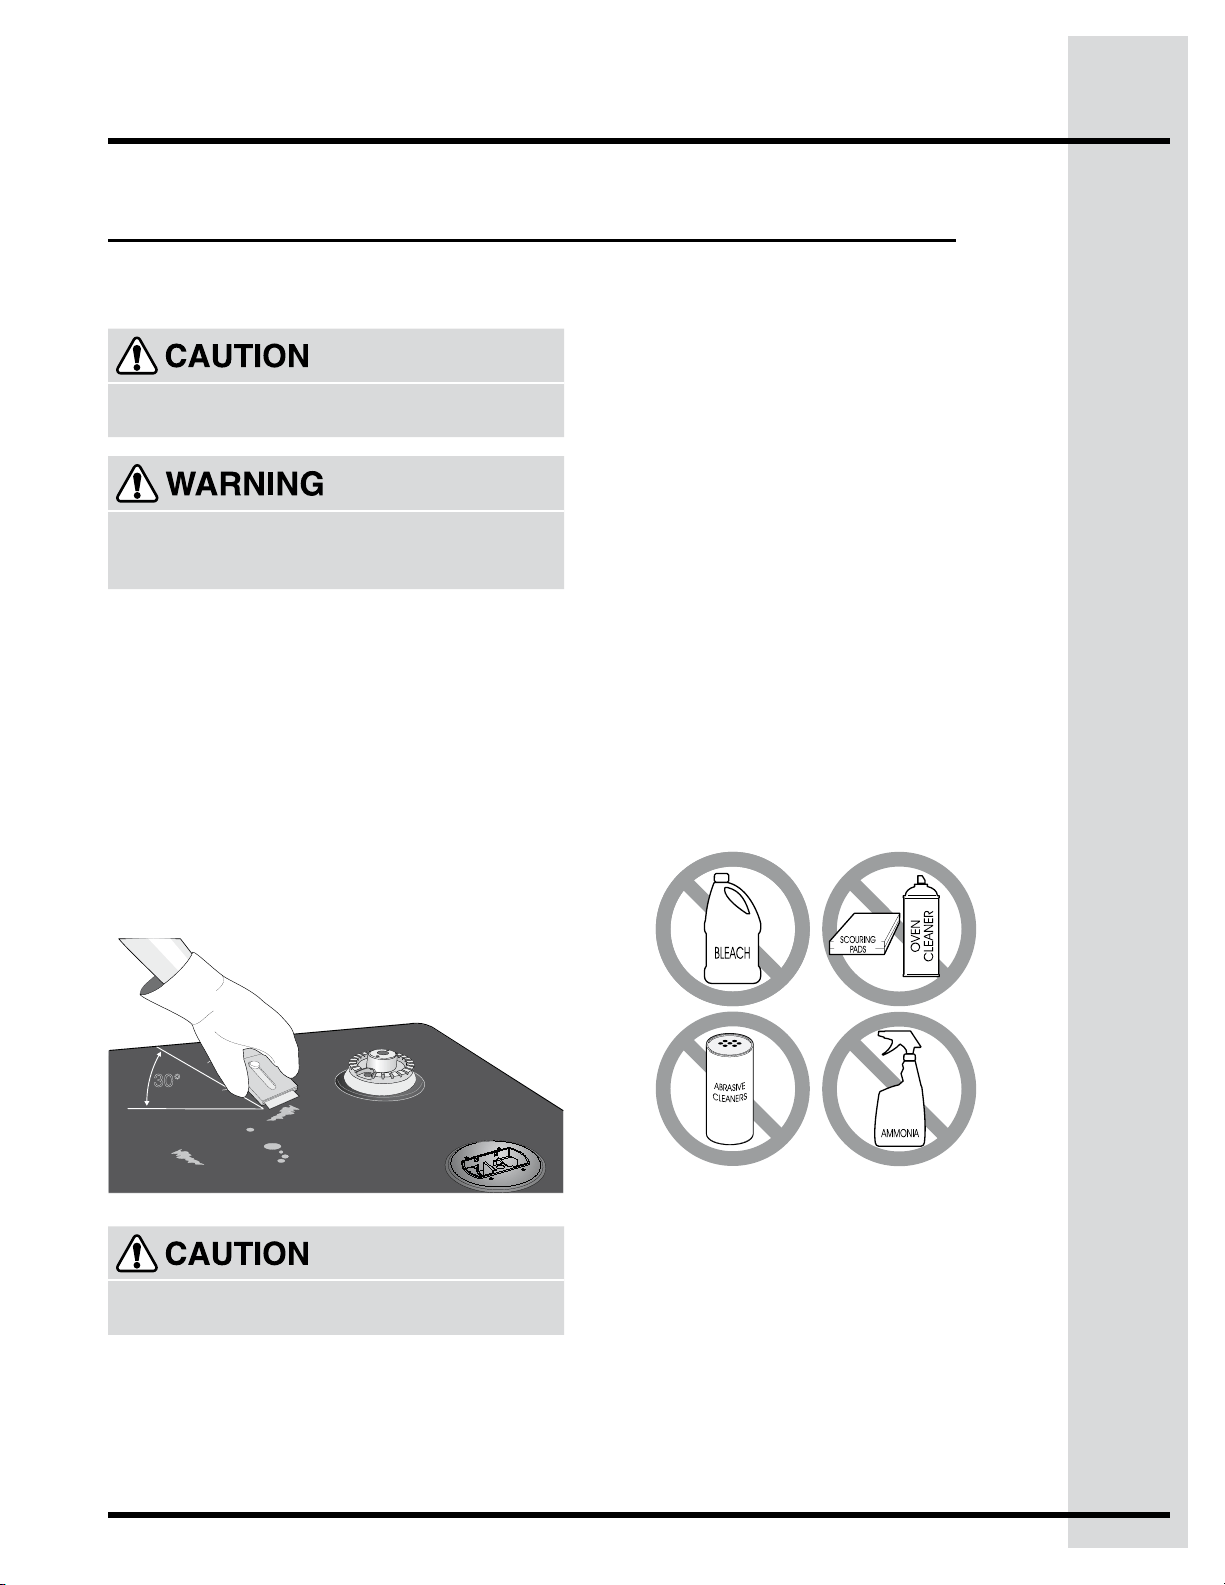
For heavy, burned on soil:
First, clean the surface as described above. Then,
if soils remain, protect your hand with a potholder
andcarefullyscrapesoilswithametalrazorblade
scraper, holding scraper at a 30 degree angle to
the surface. Remove loosened soils with cooktop
cleaning cream and buff surface clean.
Plastic or foods with a high sugar content:
These types of soils need be removed immediately if
spilled or melted onto the ceramic cooktop surface.
Permanentdamage(suchaspittingofthecooktop
surface) may occur if not removed immediately.
AfterturningthesurfaceelementsOFF,usearazor
blade scraper or a metal spatula with a mitt and
scrape the soilfromthehotsurface(asillustrated
on previous page).Allow the cooktop to cool, and
use the same method for heavy or burned on soils.
Do not use the following on the ceramic glass
cooktop:
• Donotuseabrasivecleanersandscouring
pads, such as metal and some nylon pads.
They may scratch the cooktop, making it
moredifculttoclean.
• Donotuseharshcleaners,suchaschlorine
bleach, ammonia or oven cleaners, as they
may etch or discolor the cooktop.
• Donotusedirtysponges,clothsorpaper
towels, as they can leave soil or lint on
the cooktop which can burn and cause
discoloration.
Special Caution for Aluminum Foil and Aluminum
Cooking Utensils
• Aluminum foil - Use of aluminum foil will damage
the cooktop. Do not use thin aluminum cooking
utensils or allow foil to touch the ceramic cooktop
underANYcircumstances.
• Aluminum utensils - The melting point of
aluminum is much lower than that of other metals.
Care must be taken when aluminum pots or pans
are used on the cooktop. If allowed to boil dry,
not only will the utensil be destroyed, but it may
fuse to, break or mark the ceramic glass surface,
permanently damaging the cooktop surface.
16
Solutions to common problems
Before you call for service, review the following list. It may save you time & expense. The list includes
common occurrences that are not the result of defective workmanship or materials in this appliance.
Questions or for service call: 1-877-4ELECTROLUX (1-877-435-3287)
Beforeyoucall
Problem Solution
Surface burners
do not light.
• Surfacecontrolknobhasnotbeencompletelyturnedto
position. Turn the
Surface Control knob to and push in and until burner ignites and then turn
controlknobtodesiredamesize.
• Besuregassupplyvalveisopen.
• Burnerportsareclogged.Cleanburner.SeeCleaningtheburnergrates,burner
caps, burner heads in general care & Cleaning section. With the burner off,
clean ports with a small-gauge wire or needle.
• Powercordisdisconnectedfromoutlet(Electricignitionmodelsonly).Besure
cord is securely plugged into the outlet.
• Electricalpoweroutage(electricignitionmodelsonly).Burnerscanbelit
manually.SeeSettingSurfaceControlsinthisUseandCareGuide.
Burnerameonly
lights half way
around burner
• Burnerportsareclogged.Withtheburneroff,cleanportsbyusingasmall-
gauge wire and needle.
• Moistureispresentaftercleaning.Lightlyfantheameandallowburnertooperate
untilameisfull.DrytheburnersthoroughlyfollowinginstructionsintheGeneral
Cleaning section.
Burnerameis
orange
• Dustparticlesinmainline.Allowtheburnertooperateafewminutesuntilame
turns blue.
• Incoastalareas,aslightlyorangeameisunavoidableduetosaltair.
Scratches or
abrasion on
ceramic glass
cooktop surface
• Coarseparticles(suchassaltorsand)arebetweencooktopandutensil.
Besurecooktopsurfaceandbottomofutensilsarecleanbeforeuse.Small
scratches do not affect cooking and will become less visible with use.
• Cleaningmaterialsnotrecommendedforglassceramiccooktophavebeen
used. See Ceramic-Glass CooktopsectioninthisUseandCareGuide.
Metal marks on
ceramic glass
• Slidingorscrapingofmetalutensilsoncooktopsurface.Donotslidemetal
utensils on cooktop surface. Use a mildly abrasive cleanser to remove marks.
Brownstreaks
and specks on
ceramic glass
• Boilovershavecookedontosurface.Userazorbladescrapertoremovesoil.
See instructions under General Care & Cleaning.
• Cleaningmaterialsnotrecommendedforceramic-glasscooktophavebeen
used.Userecommendedcleanersandcleaningmethod.SeeCeramicGlass
CooktopsectioninthisUseandCareGuide.
Areas of
discoloration on
ceramic glass
• Mineraldepositsfromwaterandfood.Wetsurfacewithwaterandsprinkleon
a cooktop cleaning creme, Scrub with a clean damp paper towel until the stain
disappears. Wipe remaining paste away, then apply a small amount of cooktop
cleaning creme and polish with a clean paper towel. Use cookware with clean,
dry bottoms. See Ceramic Glass CooktopsectioninthisUseandCareGuide.
17
Warranty
Your appliance is covered by a one year limited warranty. For one year from your original date of purchase, Electrolux will
repair or replace any parts of this appliance that prove to be defective in materials or workmanship when such appliance is
installed, used, and maintained in accordance with the provided instructions. In addition, the glass cooktop or radiant surface
elementofyourappliance(excludingbuilt-inandfree-standingrangeappliances)iscoveredbyatwothroughveyear
limitedwarranty.Duringthe2ndthrough5thyearsfromyouroriginaldateofpurchase,Electroluxwillprovideareplacement
glass cooktop or radiant surface element for your appliance which has proven to be defective in materials or workmanship
when such appliance is installed, used, and maintained in accordance with the provided instructions.
Exclusions
This warranty does not cover the following:
1. Products with original serial numbers that have been removed, altered or cannot be readily determined.
2. Product that has been transferred from its original owner to another party or removed outside the USA or Canada.
3. Rust on the interior or exterior of the unit.
4. Productspurchased“as-is”arenotcoveredbythiswarranty.
5. Products used in a commercial setting.
6. Service calls which do not involve malfunction or defects in materials or workmanship, or for appliances not in
ordinary household use or used other than in accordance with the provided instructions.
7. Service calls to correct the installation of your appliance or to instruct you how to use your appliance.
8. Expenses for making the appliance accessible for servicing, such as removal of trim, cupboards, shelves, etc.,
which are not a part of the appliance when it is shipped from the factory.
9. Servicecallstorepairorreplaceappliancelightbulbs,airlters,waterlters,otherconsumables,orknobs,
handles, or other cosmetic parts.
10. Labororin-homeservicecostsduringtheadditionallimitedwarrantyperiodsbeyondtherstyearfromyour
original date of purchase.
11. Pickup and delivery costs; your appliance is designed to be repaired in the home.
12. Surcharges including, but not limited to, any after hour, weekend, or holiday service calls, tolls, ferry trip charges,
or mileage expense for service calls to remote areas, including the state of Alaska.
13. Damagestothenishofapplianceorhomeincurredduringtransportationorinstallation,includingbutnotlimited
tooors,cabinets,walls,etc.
14. Damagescausedby:servicesperformedbyunauthorizedservicecompanies;useofpartsotherthangenuine
Electroluxpartsorpartsobtainedfrompersonsotherthanauthorizedservicecompanies;orexternalcausessuch
asabuse,misuse,inadequatepowersupply,accidents,res,oractsofGod.
DISCLAIMEROFIMPLIEDWARRANTIES;LIMITATIONOFREMEDIES
CUSTOMER’SSOLEANDEXCLUSIVEREMEDYUNDERTHISLIMITEDWARRANTYSHALLBEREPAIRORREPLACEMENT
ASPROVIDEDHEREIN.CLAIMSBASEDONIMPLIEDWARRANTIES,INCLUDINGWARRANTIESOFMERCHANTABILITY
ORFITNESSFORAPARTICULARPURPOSE,ARELIMITEDTOONEYEARORTHESHORTESTPERIODALLOWEDBY
LAW,BUTNOTLESSTHANONEYEAR.ELECTROLUXSHALLNOTBELIABLEFORCONSEQUENTIALORINCIDENTAL
DAMAGESSUCHASPROPERTYDAMAGEANDINCIDENTALEXPENSESRESULTINGFROMANYBREACHOFTHIS
WRITTENLIMITEDWARRANTYORANYIMPLIEDWARRANTY.SOMESTATESANDPROVINCESDONOTALLOWTHE
EXCLUSIONORLIMITATIONOFINCIDENTALORCONSEQUENTIALDAMAGES,ORLIMITATIONSONTHEDURATIONOF
IMPLIEDWARRANTIES,SOTHESELIMITATIONSOREXCLUSIONSMAYNOTAPPLYTOYOU.THISWRITTENWARRANTY
GIVESYOUSPECIFICLEGALRIGHTS.YOUMAYALSOHAVEOTHERRIGHTSTHATVARYFROMSTATETOSTATE.
IfYouNeedService
Keep your receipt, delivery slip, or some other appropriate payment record to establish the warranty period should service be
required. If service is performed, it is in your best interest to obtain and keep all receipts. Service under this warranty must be
obtained by contacting Electrolux at the addresses or phone numbers below.
This warranty only applies in the USA, Puerto Rico and Canada. In the USA and Puerto Rico, your appliance is warranted by
ElectroluxMajorAppliancesNorthAmerica,adivisionofElectroluxHomeProducts,Inc.InCanada,yourapplianceiswarranted
byElectroluxCanadaCorp.Electroluxauthorizesnopersontochangeoraddtoanyobligationsunderthiswarranty.Obligations
forserviceandpartsunderthiswarrantymustbeperformedbyElectroluxoranauthorizedservicecompany.Productfeatures
orspecicationsasdescribedorillustratedaresubjecttochangewithoutnotice.
Canada
1-800-265-8352
Electrolux Canada Corp.
5855 Terry Fox Way
Mississauga,Ontario,CanadaL5V3E4
USA
1.800.944.9044
Electrolux Home Products, Inc.,
10200DavidTaylorDrive
Charlotte,NC28262

electrolux.com/shop