
Loading ...
Loading ...
Loading ...
12 Cyclone Insert Installation - English
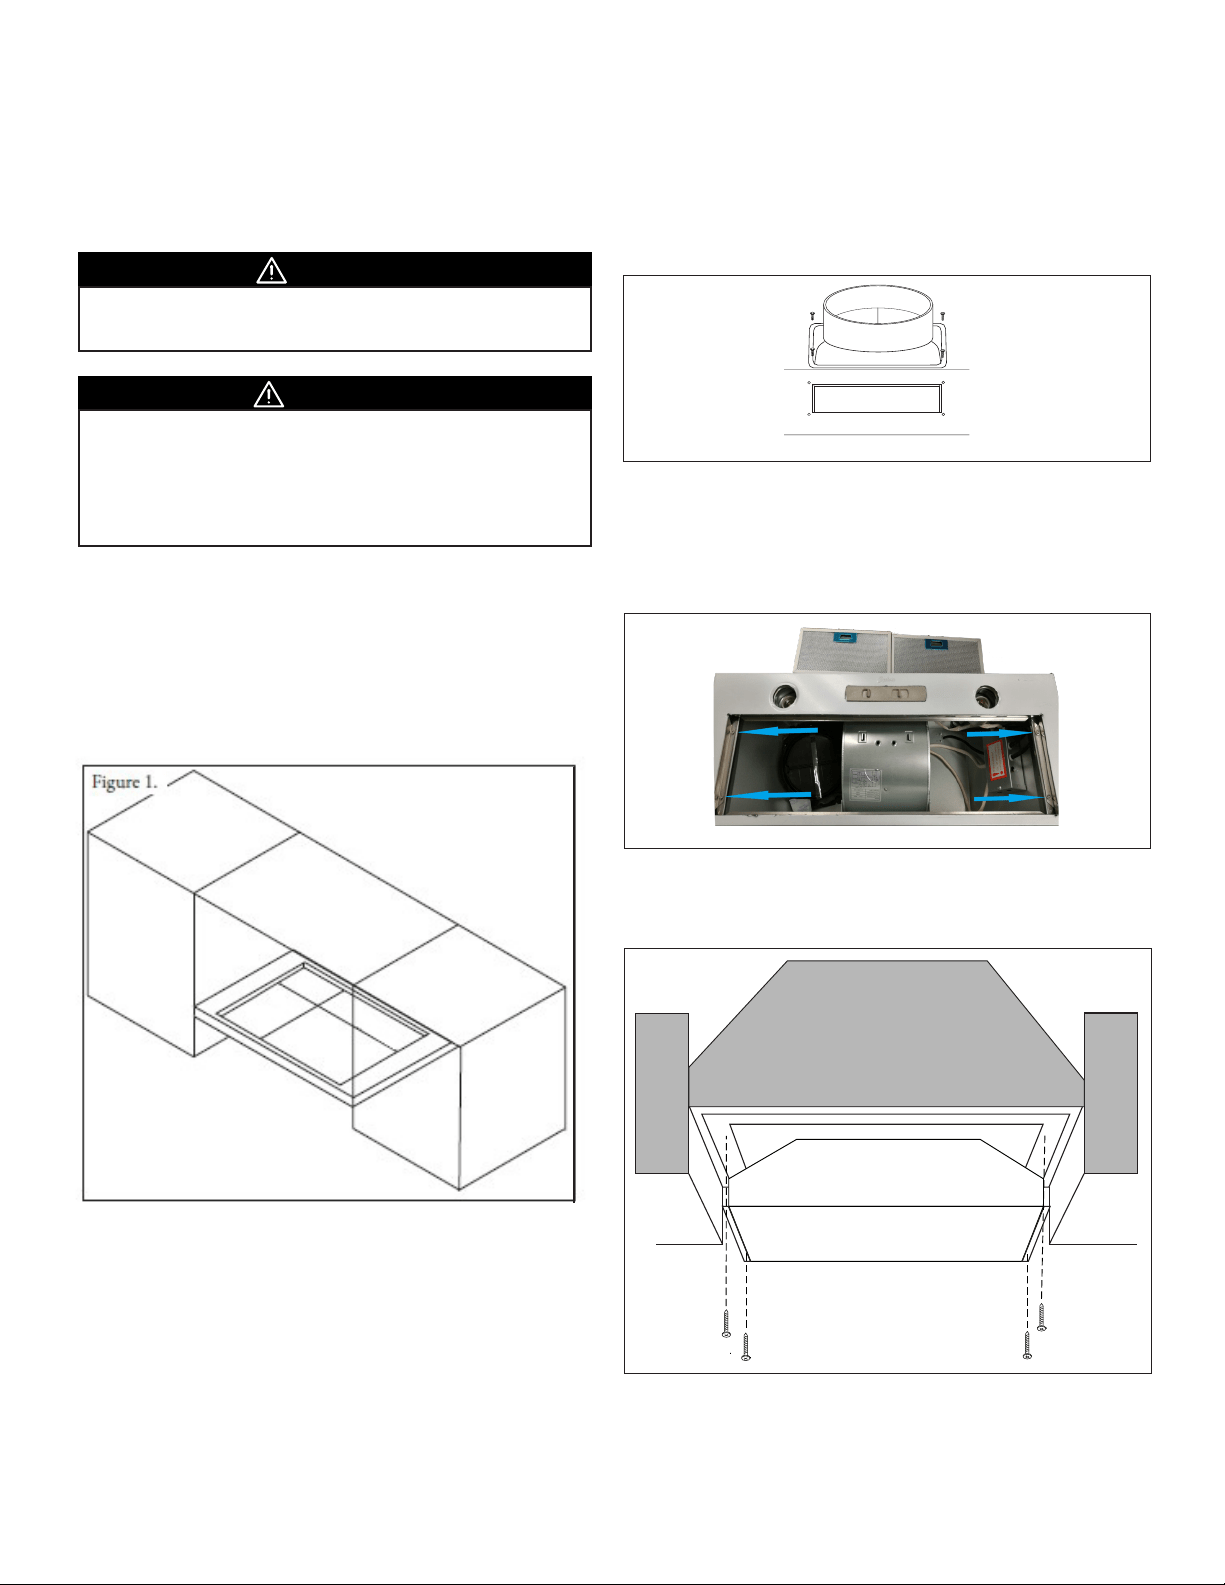
1. Remove outer mesh lters of range hood.
2. Attach rubber seal and damper to rectangular cutout on top
of the range hood using the screws provided (Figure 2).
3. Remove the mesh lters, locate the four Phillips screws.
ere are 2 on the right side and 2 on the le side. Remove
the 4 screws using your screwdriver or power drill and place
them aside as you will need them later on to reattach the
face. Remove the face and set it aside (Figure3) .
4. Hold range hood upright, and insert range hood upward
into cabinet cutout. Secure the range hood to the cabinet
using the four screws provided. Two for each side (Figure 4).
5. Reattach and screw top panel onto range hood.
6. Make sure that the adapter is connected to ductwork.
7. Place mesh lters back into place.
8. Connect the power plug to the junction box.
BX212/BX215 INSERT HOOD INSTALLATION
is appliance requires 120V 60Hz electrical supply and
connection to an individual properly grounded branch circuit
protected by a circuit breaker or time delay fuse.
• Turn o power circuit at the service panel before wiring
this unit.
• All electrical work must be done by a qualied electrician
in accordance with all applicable codes and standards.
is range hood must be properly grounded.
WARNING
• At least two installers are required due to the weight and
size of the hood.
CAUTION
Prepare for Installation
1. Unpack range hood and check contents. Note: Be cautious of
sharp edges within the unit.
2. Cut the insert cutout at the bottom of the cabinet using the
given cutout measurements on page 15 (Figure 1).
3. Locate the cutout at the center of the bottom of the cabinet.
Installing the BX212/BX215 Range Hood
Figure 3.
Figure 2.
Figure 4.
Loading ...
Loading ...
Loading ...