Loading ...
Loading ...
Loading ...

GENERAL SAFETY RULES
TO WORK IN SAFE CONDITIONS WITH THIS TOOLING, IT IS IMPERATIVE TO
READ CAREFULLY THE DIRECTIONS FOR USE AND TO FOLLOW THE
INSTRUCTIONS IT CONTAINS. IF YOU DO NOT RESPECT THE INFORMATION
WRITTEN IN THAT INSTRUCTION MANUAL THE WARRANTY WILL BE
CANCELLED.
1. Work area safety
a. Keep work area clean and well-lit. Cluttered or dark areas invite accidents.
b. Keep children and bystanders away while operating the mechanical
crimping tool. Distractions can cause you to lose control.
c. Do not leave the tool in acidity, alkaline or other corrosive gas or liquid and do
not operate or stock the tool in high temperature to avoid damage.
2. Personal safety
a. Stay alert, watch what you are doing and use common sense when operating the
tool. Do not use the tool while you are tired or under the influence of drugs,
alcohol or medication.. A moment of inattention while operating hydraulic tools
may result in serious personal injury.
b. Use safety equipment. Always wear eye protection. Safety equipment such as
dust mask, non-skid shoes, hard hat, or hearing protection used for appropriate
conditions will reduced personal injuries.
c. Dress properly. Do not wear loose clothing or jewelry. Keep your hair,clothing
and gloves away from moving parts. Loose clothes jewelry or long hair can be
caught in moving parts.
d. Do not force the tool. Use the correct power tool for your application .The
correct power tool will do the job better and safer at the rate for which it was
OPERATING INSTRUCTIONS
Read the entire SAFETY INFORMATION section at the beginning of this manual
including all text under subheadings therein before using this product.
Any parts of the tool cannot be knocked; the tool is dangerous
when the parts is broken.
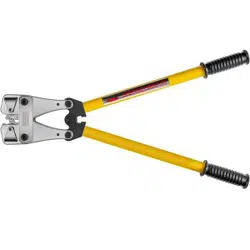
1. To choose die size, open the handle completely, dies can be rotated by activating the
spring loaded buttons.
2. Press the buttons until the die can be rotated. Adjust the die to the required lug or link
size.
the angle locks snap must be back into position and the dies are
locked securely.
3. A lug or link is crimped when the dies come together.
4. The crimp is completed when the handles are completely closed and the dies touch one
another
Do not crimp lugs to electrical cables that are live or in close
proximity to live circuits. Please note this tool is not insulated.
5. Open the handles to take out the connector for next cycle.
Loading ...
Loading ...
