GEAppliances
JES1851
Part NO, 164D3370P091 Pub No 49-40094 4-99JR 3828WSA1198
IMPORTANTSAFETYINFORMATION.
READALLINSTRUCTIONSBEFOREUSING.
PRECAUTIONSTOAVOID
POSSIBLEEXPOSURETO
EXCESSIVEMICROWAVEENERGY
• DONotAttemptm operate
dais oven with the door open
since ope_vdoor operation
(m] result in hannlhl
exposure to microwave
energy. It is important not
lo deti:at or tamper with the
_ely imerlo( ks.
• Do Not Place any object
between the oven front lace
and the door or allow soil
or cleaner residue to
accumulate on sealing
surfaces.
• Do Not Operate the oven if it
is damaged. It is particularly
important that the oven
door close properly and that
there is no damage to the:
[] door (benO,
[] hinges and latvhes
(broken or loosened),
[] door se_dsmad sealing
sur_ax;es.
• The OvenShouldNotbe
adjusted or repaired by
anyone except properly
qualified smMce personnel.
2
A WARNING!
Toreduce therisk ofbums,fire, electric shock,injury to
persons,or exposure toexcessive microwave energy,
follow basic precautions, including thefollowing.
SAFETYPRECAUTIONS
This microwave oven is not approved or tested for
marine use.
• Read and tallow dae specific
precautions in dae
PrecautionstoAvoid Possible
ExposuretoExcessive
Microwave Energysecdon
alx)ve.
• This appliance must be
gxounded. Connect only
m a properly grounded
oudet, gee the Groundin9
Instructions_cdon on page 8.
• Inslall or locate dais
appliance only in accordance
with the proxdded Installation
lnsO-ucdons.
• Be certain u) place tim front
surface of the door daree
inches or more back li-om
the coumertop edge to aw)id
accident_d tipping of din
appliam e in n(nanal usage.
Use this appliance only for its intended purpose as
described in this Owner's Manual.
• Do not mount this applimace
over a sink.
• Do not mount the mi( rowave
oven over or near any portion
of a heating or (ooking
appliance.
• Do not store anydfing directly
on top of the microwave oven
surface when the microwave
ovenis in operation.
• Do not operate dais appliance
if it has a damaged power
cord or plug, ifit is not
working properly, or if it has
been damaged or dropped.
• Do not cover or block any
openings on the appliance.
• Use this appliance only tier its
intended u_ as described in
this manual. Do not u_
con-osive chemicals or vapors
in lhis appliance. This
microwave oven is specifically
designed u) heal, d_y or cook
load, and is not inlended for
lal_)vatory or indusuial u_.
• Do not store this appliance
outdoors. Do not use dais
product near water-for
example, in a wet
basement, near a swimming
pool or near a sink.
• Keep power cord away from
heated sin-faces.
• Do not immerse power cord
or plug in water.
• Do not let power cord hang
over edge oftahle or (-_mnler.
• To reduce the risk of fire in
the oven cavity:
--Do not overcook ti_od.
Carefully atmnd appliance
if paper, plastic or odaer
combustible malerials are
placed inside the oven while
cooking.
-- Remove wire twist-des and
metal handles fi-Oln paper
or plastic ( onlainers beii)re
placing them in the oven.
-- Do not use the oven ti)r
st oFage puq_x)ses. Do not
leave paper products,
( ooking utensils or tbod in
dae oven when not in u_.
-- If materials inside the oven
should igafite, keep the oven
door cloud, mm the oven off
and di_'onnect the power
cord, or shut off power at dae
tla_ or circuit breaker panel.
Ifdae door is opened, the fire
may spread.
• See door surface cleaning
instructions in the Care and
cleaning of the microwave
oven section of dais naanual.
• This appliance should be
sendced only by qualified
sen,ice personnel. Contact
nearest authorized service
facility fi)r examination,
repair or adjustment.
• As with any appliance, close
supervision is necessm-y
when used by children.
IMPORTANTSAFETYINFORMATION.
READALLINSTRUCTIONSBEFOREUSING.
fi WARNING!
ARCING
If you see arcing, press the CLEAR/OFFpad and correct
the problem.
Arcing is Itle mi( 1-owavelenn
tbr sparks in the oven. Arcing
is caumd hy:
• Metal, such as twisl-ties,
poulny pins, or gold-rimmed
dishes, in lhe microwave.
• Metal or tbil touching the
side of the oven.
• Foil not molded to food
(upturned edges act like
an|ellnas).
• Recycled paper towels
containing small metal pieces
being u_d in the microwave.
FOODS
• Do not pop popcorn in your
microwave oven uilless in a
special microwave popcorn
accessory or unless you use
popcorn labeled for um in
microwave ovens.
• N)me products such as
whole eggs and ,sealed
containers-for exmnple,
closed jars--will explode and
should not be heated in lhis
microwave oven. Such use of
1he microwave oven could
result in irljmy.
• Do not l_)il eggs in a
microwave oven. Pressure will
huild up inside egg yolk and
will cause it u) hm ,-st,possibly
resulting in ir_jmy.
• Operating Itae microwave
with no fbod inside for more
than aminute or two may
cause d_unage |o the oven
and could start afire. It
increases flae heat around the
magnetron and can shorten
the litb of the oven.
• Foods wifla unbroken outer
"skin" such as potatoes, hot
dogs, sausages, tomatoes,
apples, (hicken livel_ and
oflmr giblets, and egg yolks
should be pierced to allow
steam u) es(_tpe during
cooking.
4
• SUPERHEATEDWATER
Microwaved water and other
liquidsdonot alwaysbubble
when theyreach theboiling
point Theycan actuallyget
superheatedandnot bubble
atall
Superheatedliquidwill bubble
upout of the cupwhen it is
movedor when somethinglike
aspoonor teabagisput intoit
Topreventthisfrom happening
andcausinginjury,do not heat
anyliquidfor more than2
minutesper cup.After heating,
letthe cupstandin the
microwave for30seconds
beforemovingit or putting
anythingintoiL
• Avoid heating baby tood in
gla.ss.jal_, even with tim lid
otI. Make sm-e all intant lbod
is thoroughly cooked. Stir
lbod to disuibut e Ihe heal
evenly. Be ( m-eful to prevent
s( aiding when _ranning
lbnnula. The container may
{eel cooler than fl]e tbnnula
really is. Ahvays lest the
_bnnula be_bre tbeding
the baby.
• Don't defrost frozen
beverages in nanx)wmecked
bottles (especially
carhonamd beverages). Even
ifthe container isopened,
pressure can build up. This
can cause daecontainer lo
bm_t, possiblyresuhing in
injmy.
• Spontaneous boiling--Under
( ertain special circumstances,
liquids may start to boil
during or shortly after
removal from the inicrowave
oven. To prevent hums fi-om
splashing liquid, we
recommend tim fi)llowing:
l)efore removing Ihe
( ontainer hx)m the oven,
allow the ( ontainer to stand
in the oven tor 30 u) 40
_(-onds after Ihe oven has
shut off. Do not l_)il liquids
in narrow-necked containers
such as soil drink hotfles,
wine flasks and especially
narrowme( ked coffee cups.
Even if the container is
opened, excessive steam cma
huild up and (_tu.se it to burst
or overflow.
• Hot toods and steam (an
(ause bums. Be careful when
opening any containel,'s of
hot lood, including popcorn
[yags, cooking pouches and
Ix)xes.'ro prevent possible
injmT, direct steam away
from hands and lace.
• Do not overtook potatoes.
They could dehydrate mad
(arch fire, causing damage
to your oven.
• Cook meat mad pouluy
timroughly--meat u) at
least an INTERNAL
mmpevature of 160 °F.
and pouluy m at least an
INTERNAL tempeFature
(ff 180°F. Cooking m these
tempeFatures usually protects
ag_alnsttbodhome illness.
IMPORTANTSAFETYINFORMATION.
READALLINSTRUCTIONSBEFOREUSING.
©
WARNING!
MICROWAVE-SAFECOOKWARE
Make sure all cookware used in
your microwave oven is suilable
tbr microwaving. Most glass
(asseroles, cooking dishes,
measuring cups, cuslard cups,
poue_y or china dinnerware
which does not have metallic
u-im or glaze with a metallic
sheen can be used. Some
(x)okware is laheled "suitable
tbr microwaving."
• If you are not sure ifa dish is
microwav_safe, use this lest:
Place in lhe oven Ix)da the
dish you m-e testing mad a
glass measuring cup filled
widl 1 cup ofwater-set the
measuring cup eidaer in or
next to the dish. Microwave
1 minme at high. If the dish
heats, it should not be used
tbr microwaving.
If the dish remains cool and
only the waler in the cup
heats, Ihen the dish is
microwave_safe.
• If you use a meal
lhen_ometer while cooking,
make sure it is safe tbr use
in nlicl-owave ovens.
• Do not use recycled paper
products. Recycled paper
towels, napkins and waxed
paper cma (xmtain metal
flecks which may cause arcing
or ignite. Paper products
containing nykm or nylon
filaments should be avoided,
as racy may also igafite.
• Some styroloam ways (like
those daat meal is packaged
on) have a thin strip of metal
embedded in dae l_)ttom.
When microwaved, dm metal
can bum dae floor of dae
oven or igaaite a paper towel.
• Do not use the microwave m
dPi newspapers.
• Not all plastic w_ap is suitable
lbr use in microwave ovens.
Check die package lbr
proper use.
• Paper towels, waxed paper
and plastic wrap can be used
to cover dishes in order m
retain moisture and prevent
spattering. Be sure to vent
plastic wrap so steam cma
escape.
• Cook_rare may become hot
because of heat wansfi:rred
from die heated tood. Pot
holders may be needed m
hmldle the cx)okware.
• "Boilable" cooking pouches
and tightly (losed plastic bags
should be slit, pierced or
vetoed as directed by
package. Ifflaey are not,
plasti( could bm'st during or
immediamly ai_er cooking,
posgtl}ly resulting in iqjmy.
Also, plastic storage
containers should be at least
partially uncovered becattse
they lblan a fight seal. When
cookingwith containers
tightly covered with plastic
wlTa p, ren]ove covering
careiially and direct steam
away li-om hands and Pace.
• Uselbil only asdirected in
thisguide. TV dinnePsmay
be microwaved in tbil ways
lessthan 3/4" high; remove
the mp tbil cover and remm
the wayto the box. When
using Rill in the microwave
oven, keep Ihe tbil atleast
1inch awayfi-omthe sides
of the oven.
• Plastic cookwarc_Plasfic
cookware designed lbr
microwave cooking is vePi
useful, but should be used
carefully. Even microwave_
safe plastic may not be a.s
loleFant of overcooking
conditions as are glass or
ceFamic materials and may
soften or char if suhjected
to short periods of
overcooking. In longer
exposures to overcooking,
lhe toed and cookwm-e
could igllit e.
Followtheseguidelines:
[_U_ microwave-sa[_
plastics only mad use
1hem in strict {ompliance
with the cookware
manufacturer's
recomtnendafions.
[_Do not microwave empty
containers.
_Do not permit children
to use plastic cookware
will]out complete
supelMsion.
IMPORTANTSAFETYINFORMATION.
READALLINSTRUCTIONSBEFOREUSING.
A WARNING!
Improper use of the grounding plug can result in a risk of
electric shock.
GROUNDINGINSTRUCTIONS
This appliance must be grounded. In lhe event ()fan electrical short
circuit, grounding reduces the risk of electric shock by providing an
e_ape wire ti)r the electric current.
This applimlce is equipped wida a power cord having a grounding
wire with a grounding plug. The plug nmst be plugged into an
outlet that is properly installed mid gTounded.
Consult a qualified elecuician or service technician ifdae
grounding inswactions are not completely understood, or if
douht exists as t() whether the appliance is properly gTounded.
If the outlet is a slandard 2-prong wall outlet, it is your perv)nal
responsibility and obligation to have it repla( ed with a properly
grounded 3-prongwall outlet.
Do not under any circumslances cut or remove the third (ground)
prong li-om the power (ord.
We do not recommend using an extension cord wida dais appliance.
If the power cord is too short, have a qualified elecu-ician or sel_ice
mchnician install an outlet near the applimace. (See WARNING--
EXTENSIONCORDSsection.)
For best operation, plug dais applian(e into its ova] electrical outlet
to prevent flickering ()flights, blowing of liase or Uipping of circuit
hreaker.
3
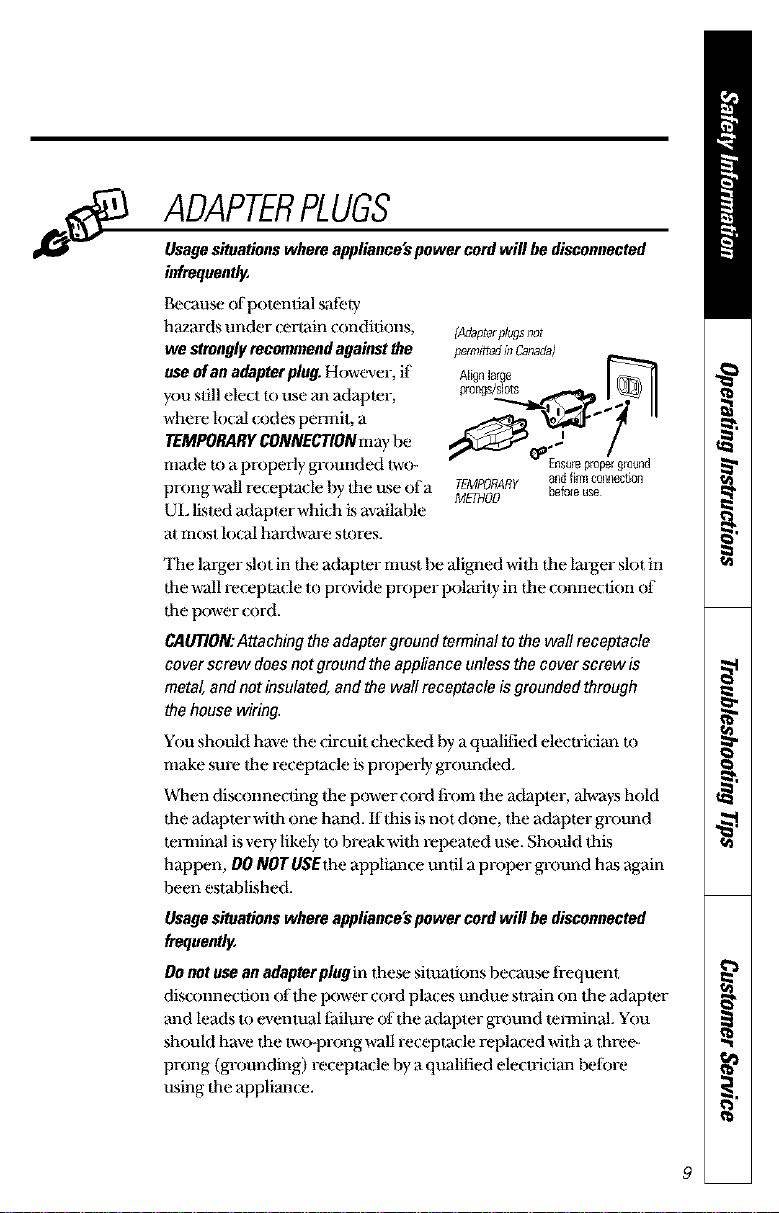
ADAPTERPLUGS
Usagesffuationswhereappliance'spowercordwill be disconnected
infrequently.
l_cause of potential salbty
hazards under certain conditions,
westrenglyrecommendagainstthe
useofan adapterplug.However, if
you still elect k) use an adapter,
where lo(al (odes permit, a
TEMPORARYCONNECTIONmW be
made m a properly grounded lwo-
prongwall re( eptacle by file use of a
UL listed adaptor which is available
al most lo(_1 hardware stores.
{Adaptorplugsnot
permittedkl Canada_
Alignlarge
N°Ns/sl°ts .-
_Ensule properground
TEMPOP,ARY andtirol connection
METHOD beforeuse
'111elarger slot in the adapter must be aligned wit1 tile larger slot in
the wall receptacle to provide proper polarily in ltae conne( tion of
the power (ord.
CAUTION:Attaching the adapterground terminalto the wall receptacle
coverscrew doesnot groundtheappliance unlessthe coverscrew is
metal,and not insulated,and the wallreceptacle isgroundedthrough
the housewiring.
You should have the circuit checked by a qualified electrician to
make sure tim receplade is properly gxounded.
_kmn disconnecting tim power cord fi-om the adapter, always hold
lhe adapter with one hand. If Ibis is not done, lhe adapter ground
ten, final is vmT likely to break wilh repeated use. Should this
happen, DO NOTUSEIhe applimace until a proper ground has ag_ain
been established.
Usagesituationswhereappliance'spowercordwill bedisconnected
frequently.
Donot use an adaptur plugin flmse situations be(ause fl-equem
disconnection (fffl]e power cord plax;esundue swain on file adapter
and leads Io eventual tailure of the adapter ground lenninal. You
should have lhe twol)rong wall receptacle replaced with a lhrec-
prong (grounding) receptax;le by a qualified elecu-icima Imtbre
using lhe applimace.
IMPORTANTSAFETYINFORMATION.
READALLINSTRUCTIONSBEFOREUSING.
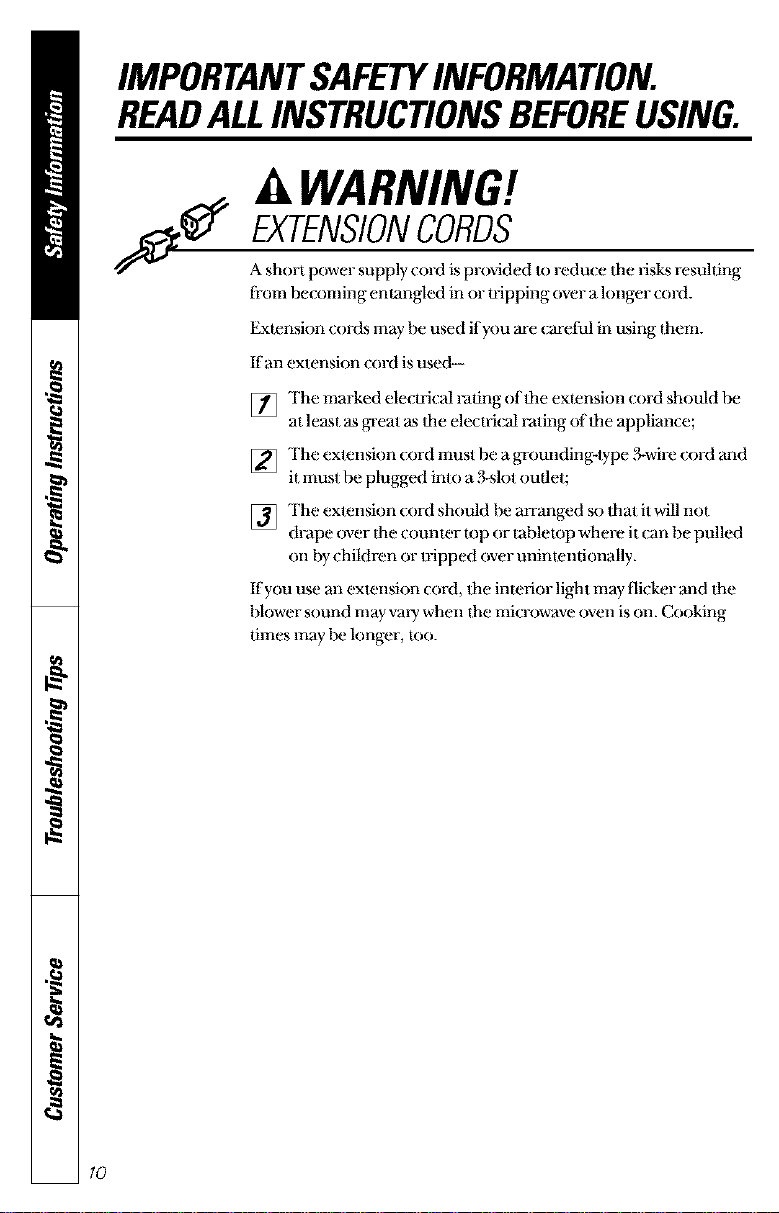
WARNING!
EXTENSIONCORDS
A short power supply cord is prox_ded to reduce Ihe risks resulting
ti-om becoming entangled in or U-ipping over a longer cord.
Extension cords may he used if you are careful in using _hem.
If an extension cord is used--
] The marked elecuical ruling of dm extension cord should be
al leasl as great as lhe eleclrk al rating oflhe appliance;
] The extension {ord must be a grounding-type ,_wire cord and
il must be plugged into a Nslot outlet;
] The extension (ord should [m arranged so lhat it will not
dFape over the counter top or lahletop where il can be pulled
on hy children or uipped over unimentionally.
If you use an exlension {ord, Ihe interior light may flicker and the
hlower sound may vmy when lhe microwave oven is on. Cooking
limes may Ix longer, too.
10

,2,4r
Readandfollow thisSafety
Informationcarefully.
SAVETHESEINSTRUCTIONS
11
Congratulations!
YouAre Now Part ofthe GEFamily.
Welcome to the GE t_tmfly. We re proud ()four quahty producls and we are comnntted
o provadmg dependable sePace. You'll see it m this easy-to-u_ Owner's Manual and
• , , . , ....
you 11hea t n the tiiendly \ (1 es ( f ( ur usto ne selwace deparlment.
l_st ()fall, you'll experience these values ea(-h time you use your microwave oven.
'l]]at's imporlant, because your new mi( 1-owave oven will be part of your lamily tbr
many yem ,-s.And we hope you will Im part of om's lbr a long time t() (ome.
We thank you lbr buying GE. We appreciate your purchase, and hope you will
continue to rely on us whenever you need quality appliances tbr your home.
"_F_" Important!
_l_r_ Fill out and return the Consumer Produ( t Registration (_rd
that is pax ked with this product.
Write the Model & Serial NumbersHere.
#
#
Youcan find them on a labelinside the oven,
Staple sales slip or cancelled check here.
Proofof the original purchase date is needed to obtainservice
under the warran_
12
GE& You,
A ServicePartnership.
Ask any GEappliance owner and they will
tell you we stand behind our products with
unmatched quality service. However, did
you know that most questions result from
simple problems that you can easily fix
yourself in just a few minutes? This
Owner's Manual can tell you how.
( Read thisManual
Inside you will find many help[ul
hinl_s on how to me and mainlain
your microwave oven properly.
,lust a litde preventive care on your
part (an saveyoua great deal of
dine and money over dm liii:of
your microwave oven.
ReviewtheSectionon
Troubleshootingtips
You'll find many answers m
common problems here. ff
you review our chart (ff
Troubleshooting Tips fipst,
you may not need to call R)r
smwice at all.
If YouNeedService
Ifyou do need se_wice,you (:an
relax knowing help is only a
phone call away. A list of tolbfree
customer service numbers is
included in the back section.
Or you can always call Itae
GE Answer Cemer ®at
800.626.2000, 24 hours a day,
7 days aweek.
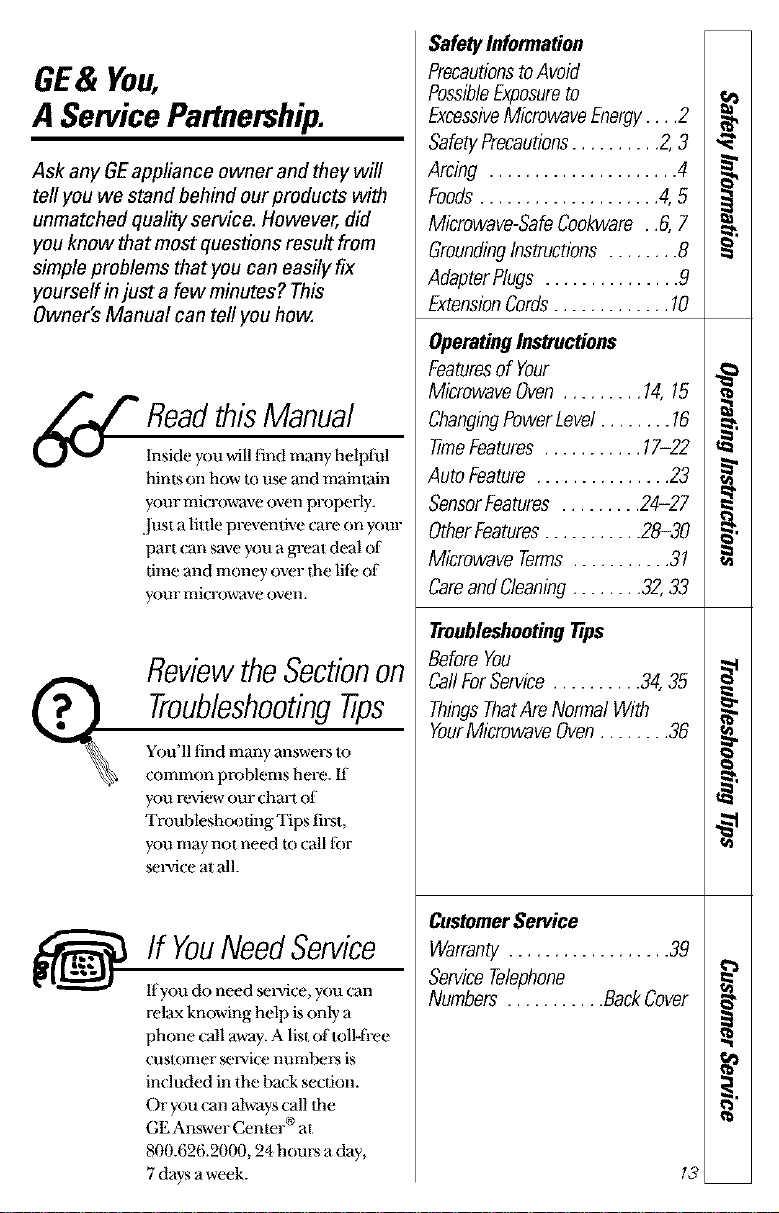
SafetyInformation
PrecautionstoAvoid
PossibleExposureto
ExcessiveMicrowaveEnergy.... 2
SafetyPrecautions.......... 2,3
Arcing ..................... 4
Foods.................... 4,5
Microwave-SafeCookware . .6,7
GroundingInstructions ........ 8
AdapterPlugs ............... 9
ExtenslbnCords............. 10
OperatingInstructions
Featuresof Your
MicrowaveOven ......... 14,15
Chang/hgPowerLevel........ 16
time Features ........... 17-22
Auto Feature ............... 23
SensorFeatures ......... 24-27
OtherFeatures........... 28-30
Microwave Terms........... 31
CareandCleaning........ 32,33
TroubleshootingTnps
BeforeYou
CallForService .......... 34,35
ThingsThatAre Normal With
YourMicrowave Oven........ 36
CustomerService
Warranty .................. 39
ServiceTelephone
Numbers ........... BackCover
13
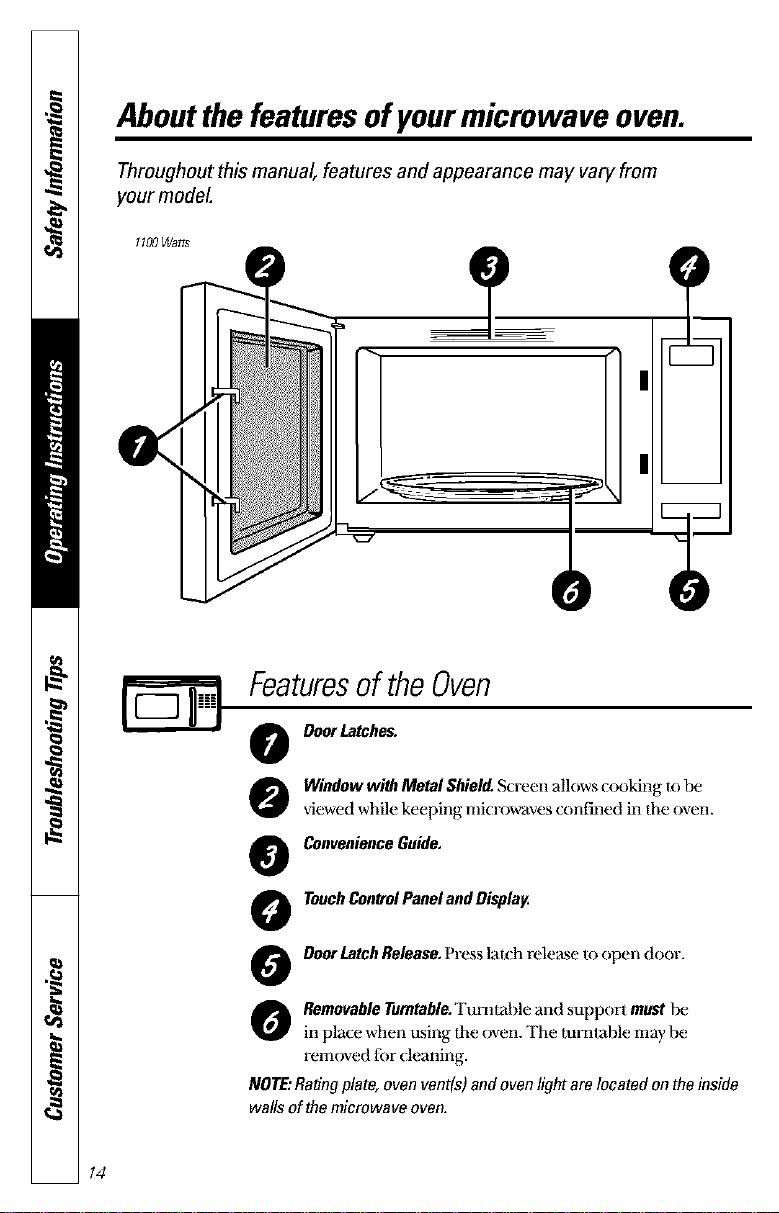
Aboutthe features ofyourmicrowave oven.
Throughout this manual, features and appearance may vary from
your model
1100Watts
Featuresof theOven
0
@
O
0
0
O
DoorLatches.
Window with Metal Shield. Screen allows cooking to be
\fiewed while keeping microwaves confined in lhe oven.
Convenience Guide,
Touch ControlPanel and Display,
Door Latch Release, Press latch release u) open door.
Removable Turntable. Tumtahle and support must be
in place when using the oven. The mn]lable may be
removed tor (;leaning.
NOTE:Ratingplate,ovenvent(s)andoven lightare locatedonthe inside
walls ofthe microwave oven.
14
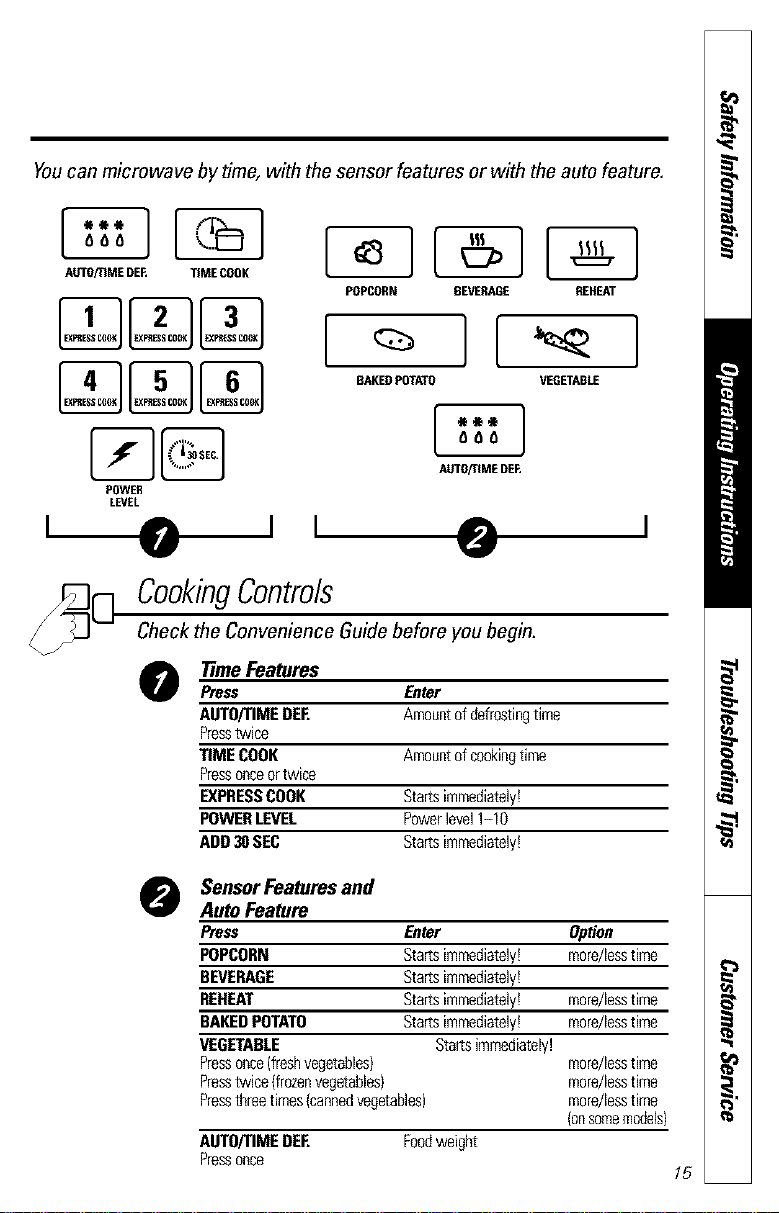
Youcan microwave by time, with the sensor features or with the auto feature.
(_.._]
AUTO/TIME DEE TIME COOK
POWER
LEVEL
O '
['_](_'] ("="]
POPCORN OEVERAGE REHEAT
BAKED POTATO VEGETABLE
AUTO/TIMEDEE
CookingControls
Check the Convenience Guide before you begin.
TimeFeatures
Press Enter
AUTO/TIMEDEE Amountofdefrostingtime
Presstwice
TIMECOOK Amountofcookingtime
Pressonceortwice
EXPRESSCOOK Startsimmediately!
POWERLEVEL Powerlevel1-10
ADD30SEC Startsimmediately!
SensorFeaturesand
Auto Feature
Press Enter Option
POPCORN Startsimmediately! more/Jesstime
BEVERAGE Startsimmediately!
REHEAT Startsimmediately! more/Jesstime
BAKEDPOTATO Startsimmediately! mere/Jesstime
VEGETABLE Startsimmediately!
Pressonce(freshvegetables) more/lesstime
Presstwice{frozenvegetables) more/lesstime
Pressthroetimes{canoedvegetables) more/lesstime
(onsomemodels}
AUTO/TIMEDEE Foodweight
Pressonce
15
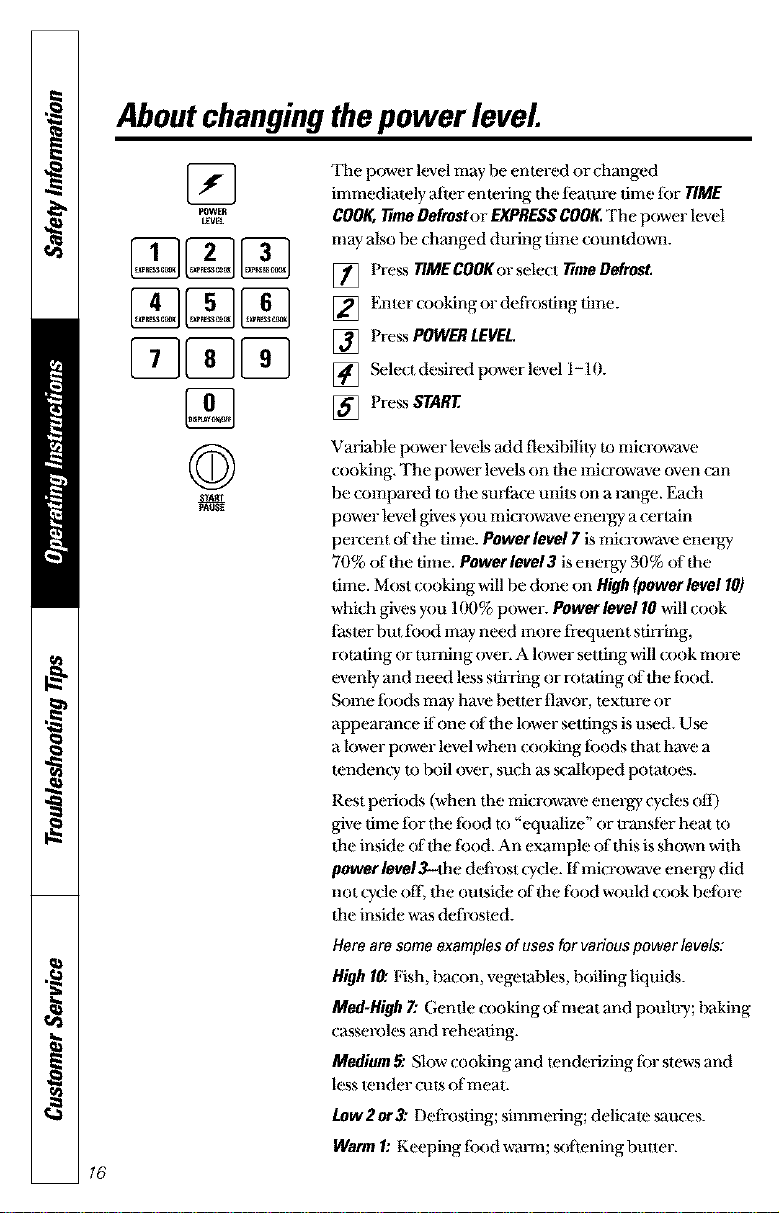
About changingthepower level
16
[]
POWER
LEVEL
©
A,Srm_
PAOSE
'111epower level may be entered or chmlged
immediately after enmring the teamre dine tor TIME
CO01_TtmeDefroster EXPRESSCOOK,The power level
tnay also be (hanged during dine countdown.
[] PressTIMECOOKerselect TtmeDefrost,
[] Enler c_)oking or deii-osfing time.
[] Press POWERLEVEL
[] Selectdesiredpowerlevel 1-10.
[] Press START
Variable power levels add flexibility m microwave
cooking. The power levels on lhe microwave oven can
be compared to the surface milts on a Fange. Each
power level gwes you microwave energy a certain
percent of the time. Power level 7 is tni( rowave en elw/
70% of the time. Powerlevel3 is energy 30% of the
dine. Most cooking will be done on High(power level 10)
which gives you 100% power. Powerleve110will cook
{kster but fbod may need more frequent sdn-ing,
rotating or mining over. A lower setting will c_)ok more
evenly and need less stirring or rotadng of dee fi)od.
Some fi)ods may have better flavor, texture or
appearance if one of din lower settings is used. Use
a lower power level when cooking fi)ods that have a
tendem T to boil over, such as scalloped potatoes.
Rest periods (when the microwave energy cycles off)
give dine fi)r tim {bod to "equalize" or mansibr heal to
the inside of dee fbod. An example of this is shown with
power level3-dae deii-ost cycle. If microwave enmgy did
not cycle ofI_dee outside of din fbod would _ook beibre
the inside was defrosted.
Herearesomeexamplesof usesfor variouspower levels:
High 10:Fish, bacon, vegelables, boiling liquids.
Med-High 7: Gentle c_)oking ofnmat and poulmi; lyaking
casseroles and reheating.
Medium 5: Slow cooking and tenderizing tbr stews and
less lender cut_ of meat.
Low2or3: Deffosdng; simmering; delicate sauces.
Warm 1: Keeping ibod w',uCn;sollening butter.
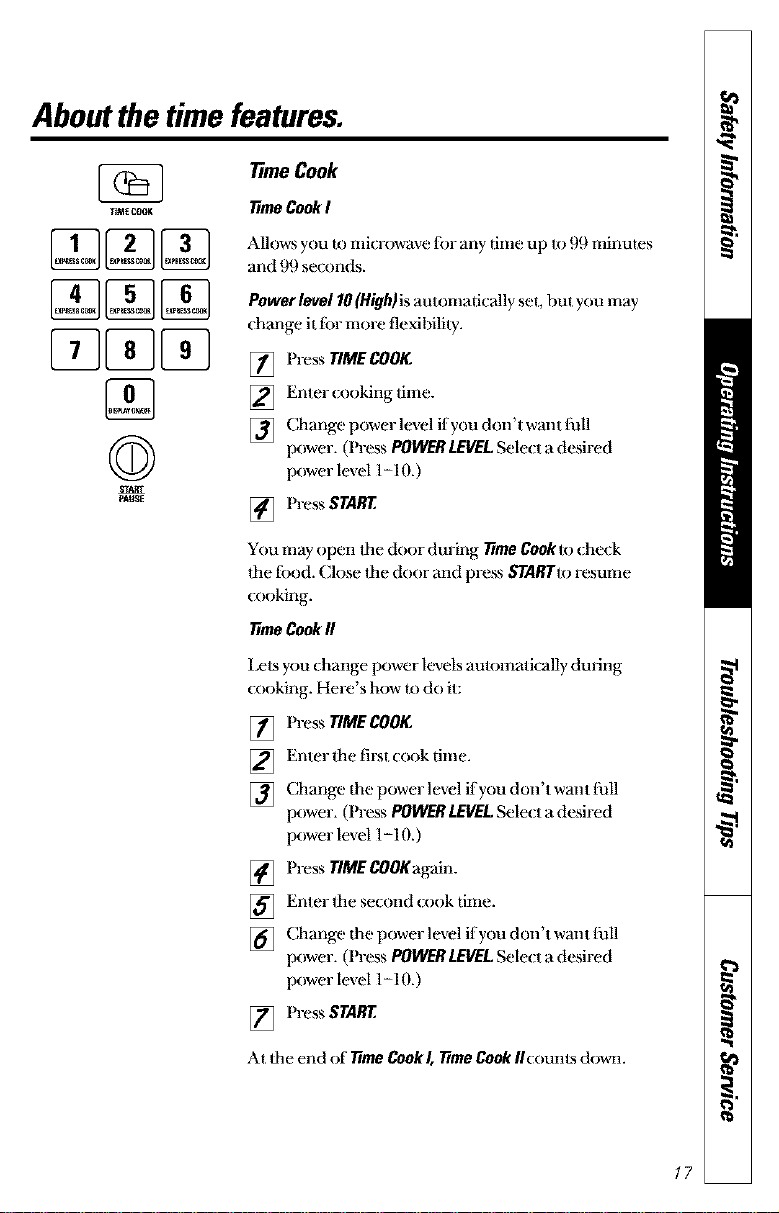
Aboutthe time features.
TtMECOOK
[][][]
[][][]
©
gTgRT
PAUgE
time Cook
fimecookl
Allowsyoutomicrowave ibr any time up to 99 minutes
and 99 seconds.
Power level 10(High)is automatically set, but you may
(hange i_ibr more flexibility.
[] Press TIMECOOK
] Enter (ooking lime.
[] Change power level ifyou don't want liall
power. (Press POWERLEVELSele( t a desired
power level 1-10.)
[] Press START.
You may open flae door during time Cookto (beck
lhe tbod. Close _he door and press ,._ARTto resume
(()()king.
timeCookfl
I.ts you (;hange power levels automatically during
( okmg. He e s how ( d( it.
[] Press TIMECOOK.
] Enter lhe fil_t cook time.
[] Change tim power level ifyou don't wmlt lull
power. (Press POWERLEVELSelect a desired
power level 1-10.)
[] Press TIMECOOKagain.
] Enter the second c*)ok time.
[] Change tim power level ifyou don't wmlt lhll
power. (Press POWERLEVELSele( t a desired
power level 1-10.)
[] Press START.
A_the end of time CookI, timeCookflcounlsdovm.
17
Aboutthe time features.
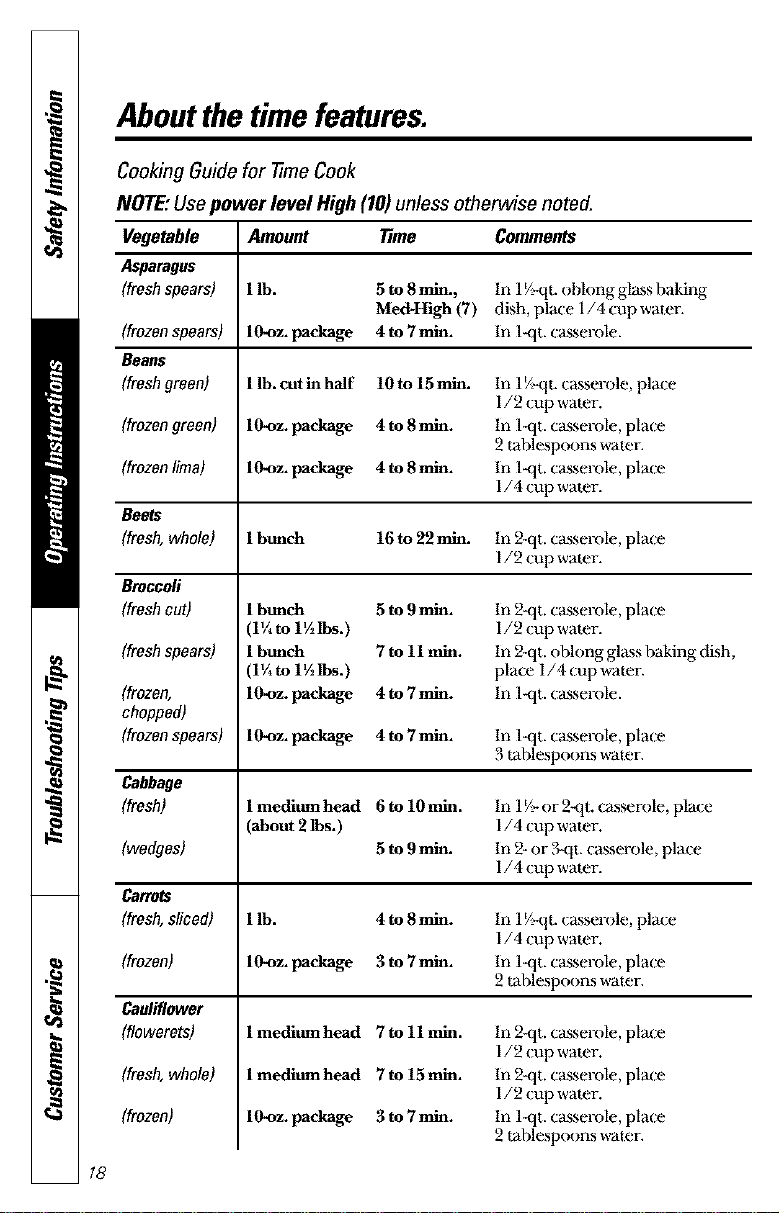
CookingGuidofor TimeCook
NOTE: Use power level High (10) unless otherwise noted,
Amount Teme Comments
lib. 5 to 8mhl., In l V,-qt.oblong glass baking
Meal-High (7) dish, place 1/4 cup water.
10*oz.package 4 to 7 mila. In l-qt. c_sserole.
1lb. cut in half 10 to 15 mill. In 1V,-qt.casserole, place
1/2 cup water.
10-oz. package 4 to 8 mha. In l_t. casserole, place
2 tablespoons water.
10-oz. package 4 to 8 mha. In l_t. casserole, place
1/4 cup water.
1bunch 16 to 22 mila. In 2_qt. casserole, place
1/2 cup water.
78
Vegetable
Asparagus
(freshspears)
(frozenspears)
Beaus
(freshgreen)
(frozengreen)
(frozenlima)
Beets
(fresh,whole)
Broccoli
(freshcut)
(freshspears)
(frozen,
chopped)
(frozenspears)
Cabbage
(fresh)
(wedges)
Carrots
(fresh,sliced)
(frozen)
Cauliflower
(flowerets)
(fresh,whole)
(frozen)
1 bunch
(1V, to llA lb_.)
1 bunch
(1V, to llA Ibm.)
lO-oz, package
5 to 9rain.
7 to 11 rain.
4to 7rain.
10*oz.package 4 to 7 mila. in l_t. casserole, place
3 tablespoons water.
1medium head 6 to 10 rain. In ] %or 2_t. cas_role, place
(about 2lbs.) 1/4 cup water.
5 to 9 mha. In 2-or ?-qt. casserole, place
1/4 cup water.
1lb. 4 to 8 mha. In 1V_qt.casserole, place
1/4 cup water.
10-oz. package 3 to 7 mha. In lNt. casserole, place
2 tablespoons water.
In 2-qt. c_sserole, place
1/2 cup wamr.
In 2-qt. oblong glass baking dish,
place 1/4 cup water.
In l-qt. c_sserole.
1 medium head 7 to 11 rain.
1 medium head 7 to 15 rain.
lO.oz, package 3 to 7 rain.
In 2-qt. c_sserole, place
1/2 cup water.
In 2-qt. c_sserole, place
1/2 cup water.
In l_t. casserole, place
2 tablespoons water.
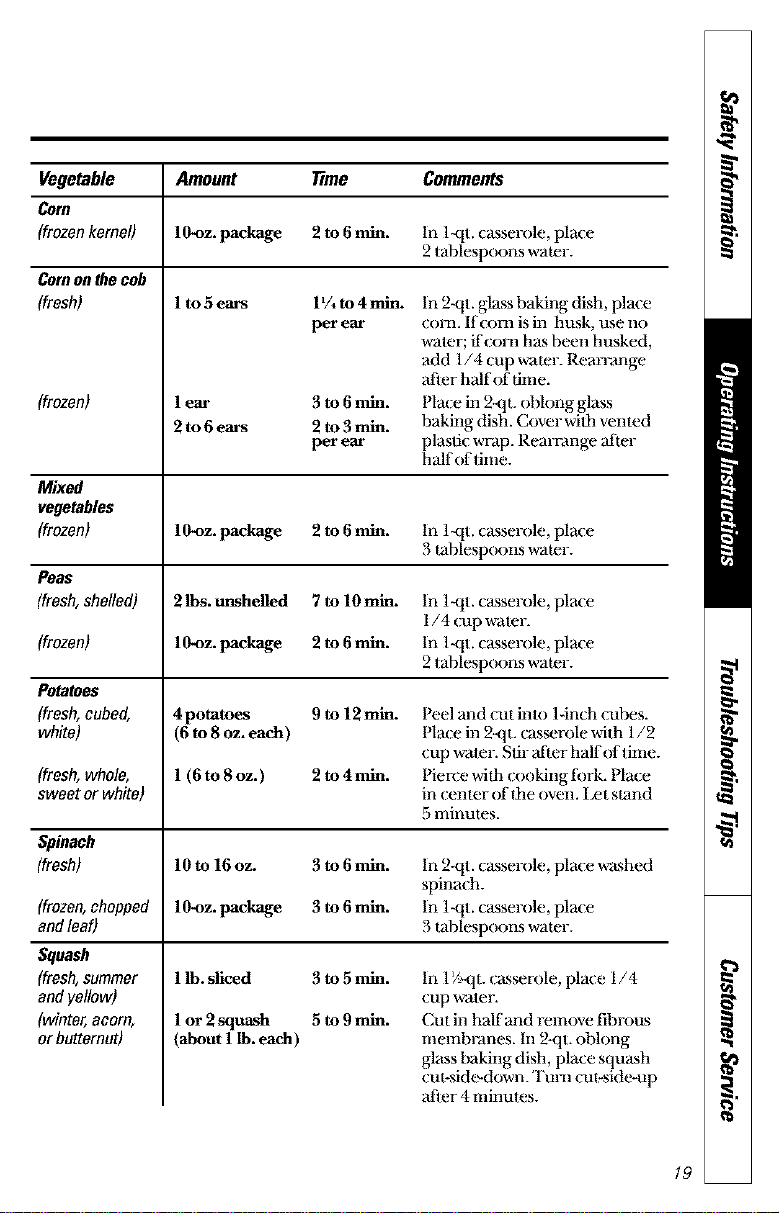
Vegetable Amount lime Comments
Corn
(frozenkernel) 10-oz. package 2 to 6mha. In 1-<It.casserole, pla_e
2 tablespoons water.
Cornonthecob
(fresh)
(frozen)
Mixed
vegetables
(frozen)
Peas
(fresh,shelled)
(frozen)
Potatoes
(fresh,cubed,
white)
(fresh,whole,
sweet or white)
Spinach
(froze_chopped
andleaO
Squash
(fresh,summer
andyellow)
(winter,acorn,
orbutternut)
1to5ears IlA to 4 rain.
per ear
lear 3 to 6 min.
2to6ears 2 to3 mh_.
per ear
In 2-qt. glass baking dish, place
con]. If corn is in husk, use no
water; ifcorn has been husked,
add 1/4 cup water. Rean-ange
after half of time.
Pla_e in 2Nt. obkmg glass
baking dish. Cover wilta vetoed
plastic wrap. Rearrange after
half of time.
10.oz. package 2 to 6 mha. In l-qt. casserole, place
3 tablespoons water.
2 lbs. unshelled 7 to 10 min.
1O-oz.package 2 to 6 mhl.
In 1_tt. c_sserole, pla(e
1/4 cup w'ater.
In 1-qt. casserole, place
2 tablespoons water.
4 potatoes 9 to 12 min.
6 to 8 oz.each)
1 (6 to 8oz.) 2 to 4 mhl.
Peel and cut imo 1-inch cubes.
Place in 2_]t. casserole with 1/2
cup water. Stir after half of time.
I'ierce with cooking tbrk. Place
in cemer of the oven. I_t stand
5 minutes.
lOto 16oz. 3 to 6 mha.
1O-oz.package 3 to 6 mhl.
In 2Nt. casserole, place washed
spinach.
In lqt. casserole, place
3 tablespoons water.
1lb.sliced 3 to 5 rain.
1or 2squash 5 to9 mha.
about 1 lb. each )
In 17_tt. cas_role, place 1/4
cup water.
Cut in half and remove fibrous
membranes. In 2-qt. oblong
glass baking dish, place squash
cm-sid_-down. Turn cut-side-up
after 4 minutes.
/9
Aboutthe time features.
2O
AUTO/r,M£ DE_
©
STARt
pAUSE
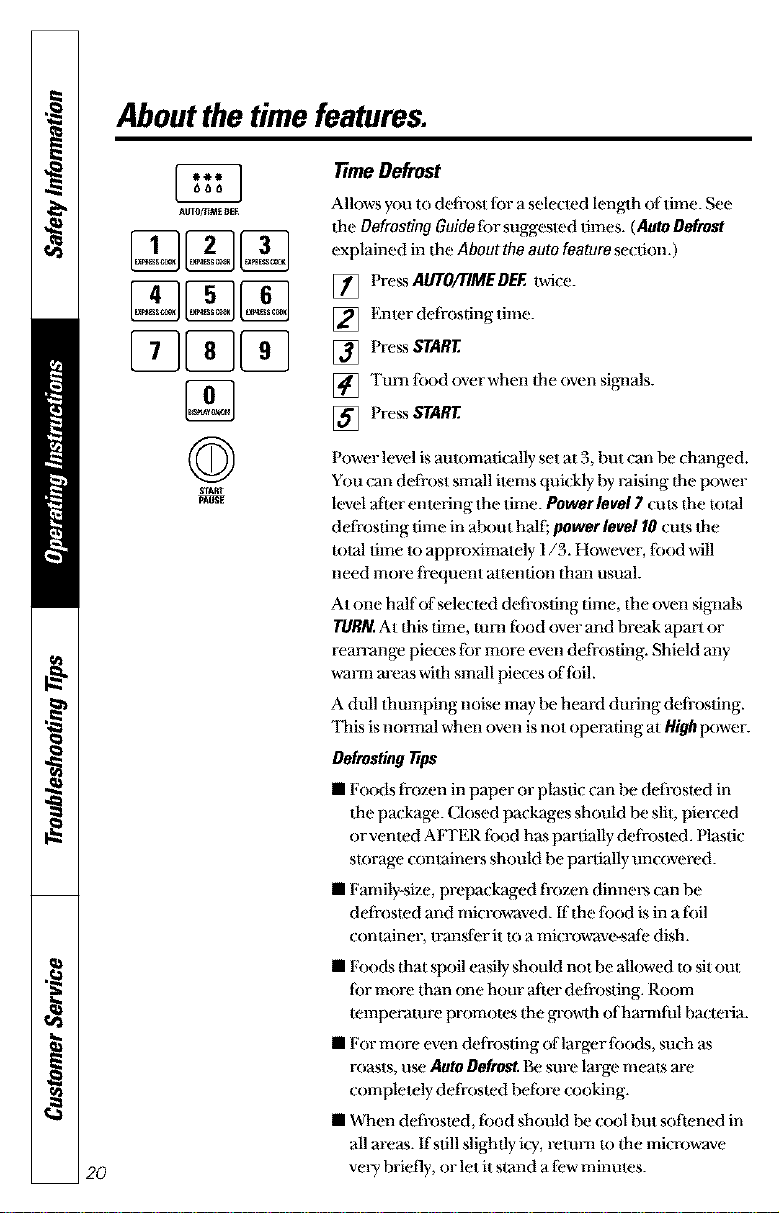
TnmeDefrost
Allows you to deti-ost lor a selecmd lenglh of time. See
flae Defrosting Guide tbr suggesled times. (Auto Defrost
explained in ltae About the auto feature section.)
[] Press ALFI'O/TIMEDEF.twice.
] Enler defrosting time.
[] Press START
] Turn lbod over when dae oven siga_als.
[] Press START
Power level is aulomatically set at 3, but can be changed.
You can deli-ost small ilems quickly by raising the power
level after emering the time. Power level 7 cuts lhe t()l:al
defrosting lime in alx)ut half; power level 10 cuts the
total lime u) approximalely 1/3. However, lbod will
need more li-equent al_ention dama usual.
At one half of selected deti-osting time, dae oven signals
TURN.At this time, mm tbod over and break apart or
rean-ange pieces lor more even defrosting. Shield any
wma_lm-ea.swith small pieces of lbil.
A dull dmmping noise may be heard during defrosting.
'llais is no,anal when oven is not operating at Higb power.
DefrostingT_ps
• Foods fl-ozen in paper or plastic can be defrosted in
ltae package. Closed packages should be slit, pierced
or vented AFI'ER tbod has partially deti-osled. Plastic
storage conlainel_ should be partially uncovered.
• Family-size, prepackaged tiozen dinnel_ can be
defrosled and microwaved, ffdae fbod is in afoil
container, u-masler it m a microw'avc_safe dish.
• l"oockstllat spoil easily should not be allowed m sit out
lbr more lhan one hour af1_r defrosting. Room
temperature promotes the growlh ofh_mntial bacteria.
• For more even defrosting of larger tbods, such as
roasts, use AutoDefrost.Be sure lm-ge meats are
completely defrosted before cooking.
• When defrosted, tbod should he cool but soi_ened in
all areas. If still slightly icy, remm to dae microwave
very brietly, or let it sland a few minules.
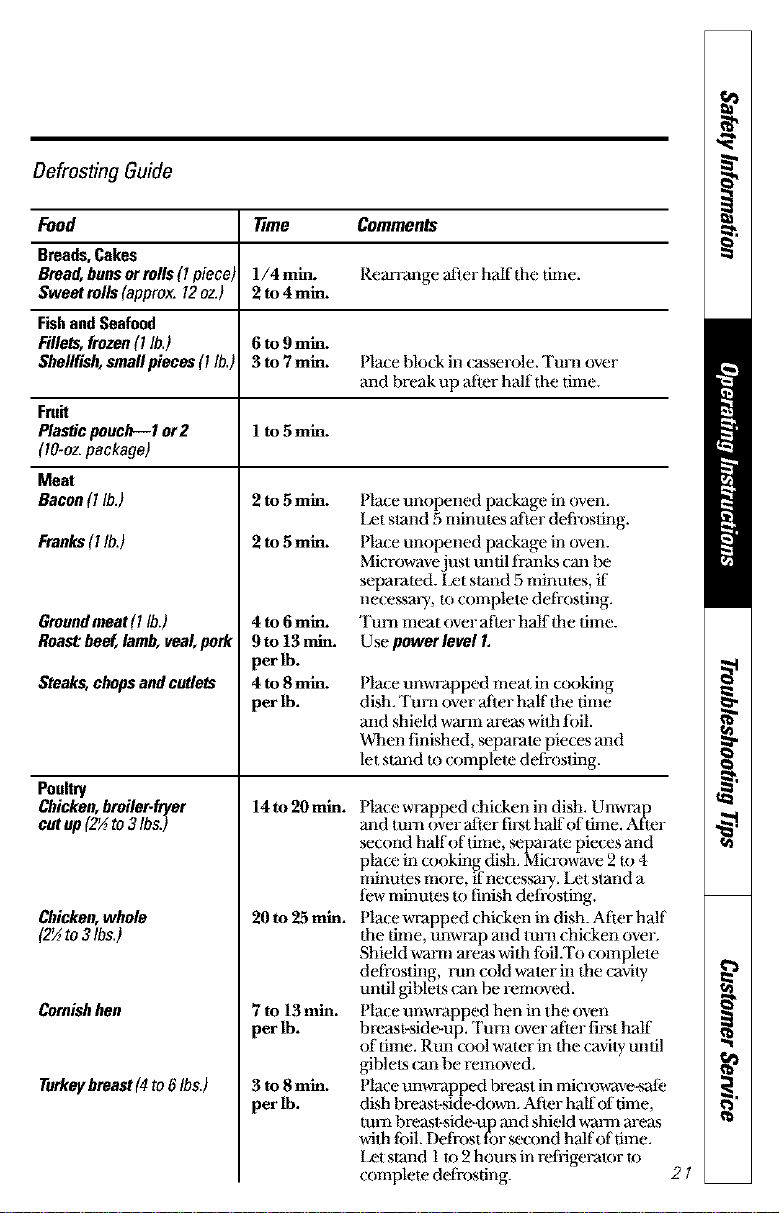
Defrosting Guide
Food time Comments
Breads, Cakes
Braad, bunsormlls(lpiece) 1/4 rain. I_emTange adier half the tinm.
Sweet mlls (approx. 12oz.) 2 to 4min.
Fishand Seafood
Fillets, frozen ( l lb.) 6 to 9mm.
Shellfish, small pieces (l lb.) 3 to 7 mln. Place block in ( asserole. Tm_l over
and break up after half the time.
Fruit
Plastic pouch---1 or2 I to 5 min.
(tO-oz. package)
Meat
Bacon (I lb.)
Franks(I lb.)
Groundmeat(l lb.)
Roast:beef,lamb,veal,pork
Steaks,chopsandcutlets
Po_
Chicken, brailer-fryer
cutup(2½to3/ks.)
Chicken,whole
(2_to31bs.)
Cornishhen
Turkeybreast(4to6 Ibs.)
4 to 6min.
9to 13 min.
per lb.
4 to 8min.
per lb.
14m2Omm.
20 to 25 min.
7ml3mm.
per_.
3m8mm.
per_.
Place unopened package in (wen.
Let sland 5 minutes after defix)sfing.
Pla(e unopened package in oven.
Microwave just until franks (m] be
separated. Let sland 5 minutes, if
necessmy, to complete defrosting.
Turn meat over afier halflhe time.
Use power level I.
Plaa;eunwrapped meat in cooking
dish. Tun] over adler haft the time
and shield warm areas wifl] lbil.
When finished, mparate pieces and
let stand m complete defrosting.
Place wrapped chicken in dish. Unwrap
and turn over adler filet hadf of time. Atier
second half of time, mparate pieces and
place in cooking dish. Microwave 2 m 4
minutes more, if neces_Pi. Let stand a
fi:w minutes to finish defi-osting.
Plaa;e wrapped chicken in dish. After half
the time, unwrap and tun] chicken over.
Shield waml areas with tbil.To complete
defrosting, run cold water in the cavity
until giblets can be removed.
Plaa;e unwlapped hen in the oven
breast_sidc-up. Turn over atier first hall
of time. Run cool water in the cavily unfil
giblets (an be removed.
Place unwrapped breast in microwav_e
dish brffa,st-sidc-down. After half of time,
mm breast-sidc,_up mid shield warm areas
wilt] fi)il. Defrost fi)r second half of time.
Let stand 1 t_)2 horn's in refi-igerator t_)
complete defrosting. 2 1
Aboutthe time features.
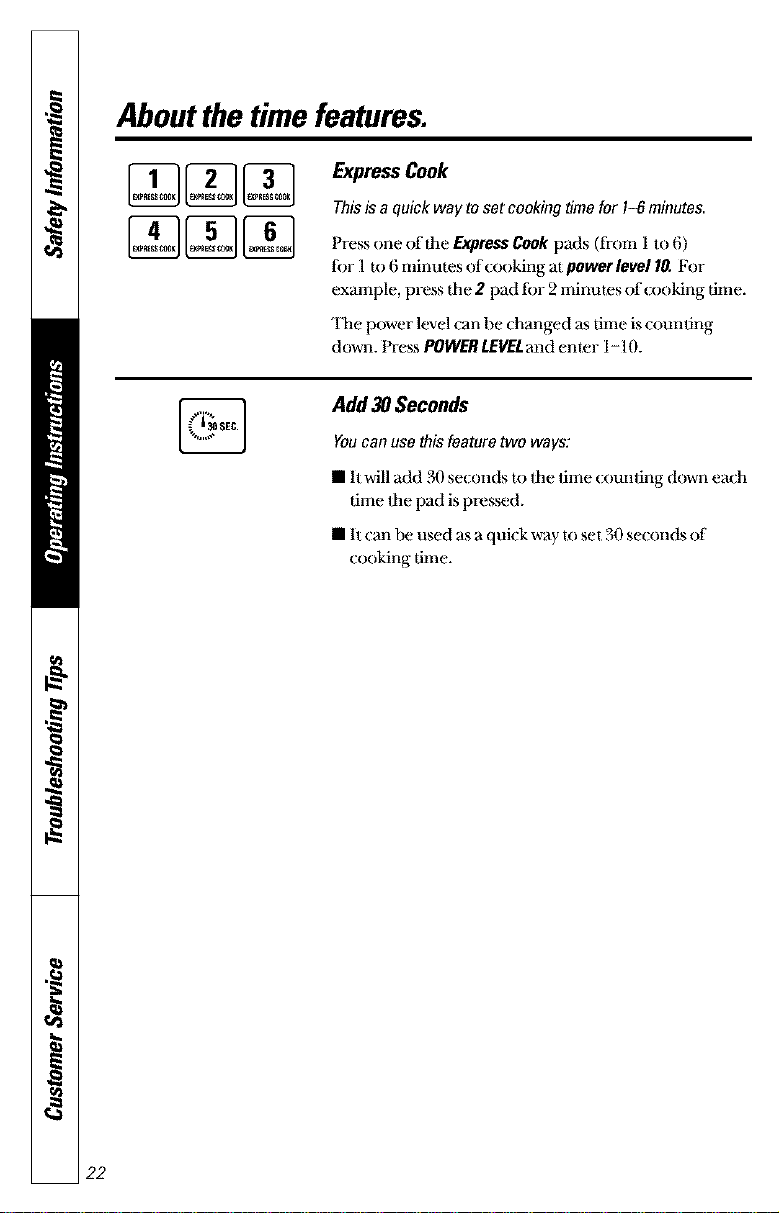
Express Cook
Thisisa quickway to setcookingtime for I-6 minutes.
Press one of the ExpressCook pads (tixlm 1to 6)
lbr i to 6 minutes of cooking at power level 10.For
example, press the 2 pad fbr 2 minutes of cooking time.
'ltae power level can be changed as time is counting
down. Press POWERLEVELand enter 1-10.
Add 30 Seconds
Youcan usethisfeaturetwo ways:
• It will add 30 seconds t,,)the lime counting down each
time ltae pad is pressed.
• It can be used as a quick way to set 30 se( onds of
cooking time.
22
Aboutthe auto feature.
AtffO/TIME OEE
[][][]
[][][]
[]
©
STAI_T
pAUSE
Guide
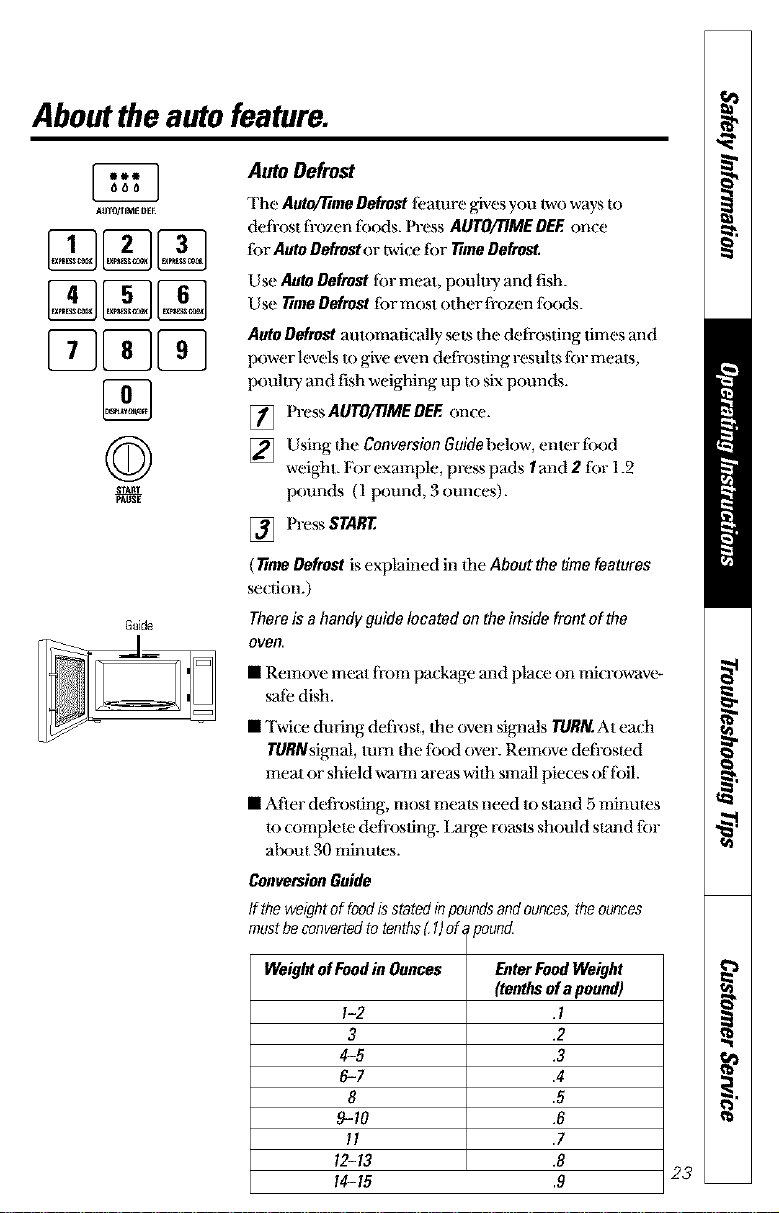
Auto Defrost
The Auto/TtmeDefrostli:ature gives you lwo ways to
deiiost fiozen foods. Press AUTO/TIMEDEEonce
for AutoDefrostor t_vi(e R)r TtmeDefrost.
Use Auto Defrost for meat, pouluy and fish.
Use TtmeDefrost tar most other ti-ozen ii)ods.
AutoDefrostautomati( ally sets the defrosting fimes and
power levels to give even defrosting results _br meats,
poultly and fish weighing up to six pounds.
[] Press AUTO/TIMEDEE on( e.
] Using the gonvorslon Guidebelow, enterfbod
weight. For exmnple, press pads I and 2 for 1.2
pounds (1 pound, 3 ounces).
[] Press START,
(Tune Defrost is explained in die About the time features
_ction.)
Thereis ahandyguidolocated onthe insidefront oftho
oven.
• Remove meat li-om package mad place on microwav¢,_
_e dish.
• Twice during defrost, lhe oven sigaaals TURN.Ateach
TURNsigaaal,turn the tbod over. Remove defrosted
meal or shield w'am_ areas with small pieces of li)il.
• Afief defrosting, most meats need u) stand 5 minutes
lo (omplete deti-osfing. Lm-ge roasts should stand tar
al_mt 30 minutes.
ConversionGuide
Iftheweightof foodisstatedinpoundsandounces,theounces
mustbeconvertedto tenths(.1)of _ound.
Weightef Foodin Ounces
I-2
3
4-5
6-7
8
9-70
II
12-13
I4-I5
EnterFoodWeight
(tenthsof apound)
.1
.2
.3
.4
5
.6
.7
.8
9
23
Aboutthe sensorfeatures.
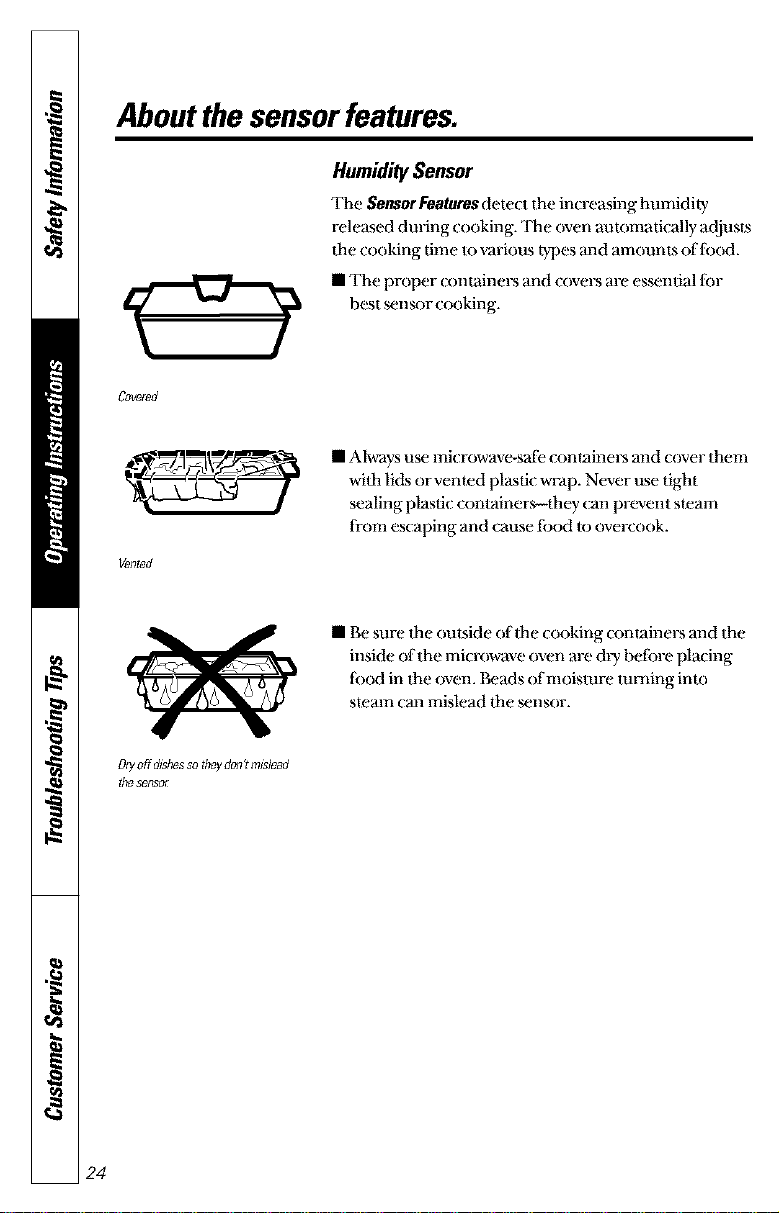
HumiditySensor
The SensorFeaturesdete_tthe increasing humidity
released during cooking+'l]ae oven automatically adjusts
tbe cooking time It _arious types madamounts oflbod.
• The proper c_mminez_and covez_are es_nfial lot
best _nsor cooking+
Covoged
• Always use mi{ rowavc-safe {onlainers and cover them
with lids orvenmd plastic wrap. Never use tight
sealing plastic container,v-they can prevent steam
li-om escaping and cause tbod +oovertook.
Ozyoff dishes so they don't m_slead
the sensol"
• Be sure flae outside <Yflae cooking containm_ m_d the
inside of the microwave oven arc dly beiore placing
lood in tim oven. Beads of moisture mlaaing into
steam _mamislead dm _nsor.
24
POPCOXN
(lesstime) {m0retime)
UseonlywJ#_prepackagedm&owave
ppacomweJ)hJng175 to_5 ounce_
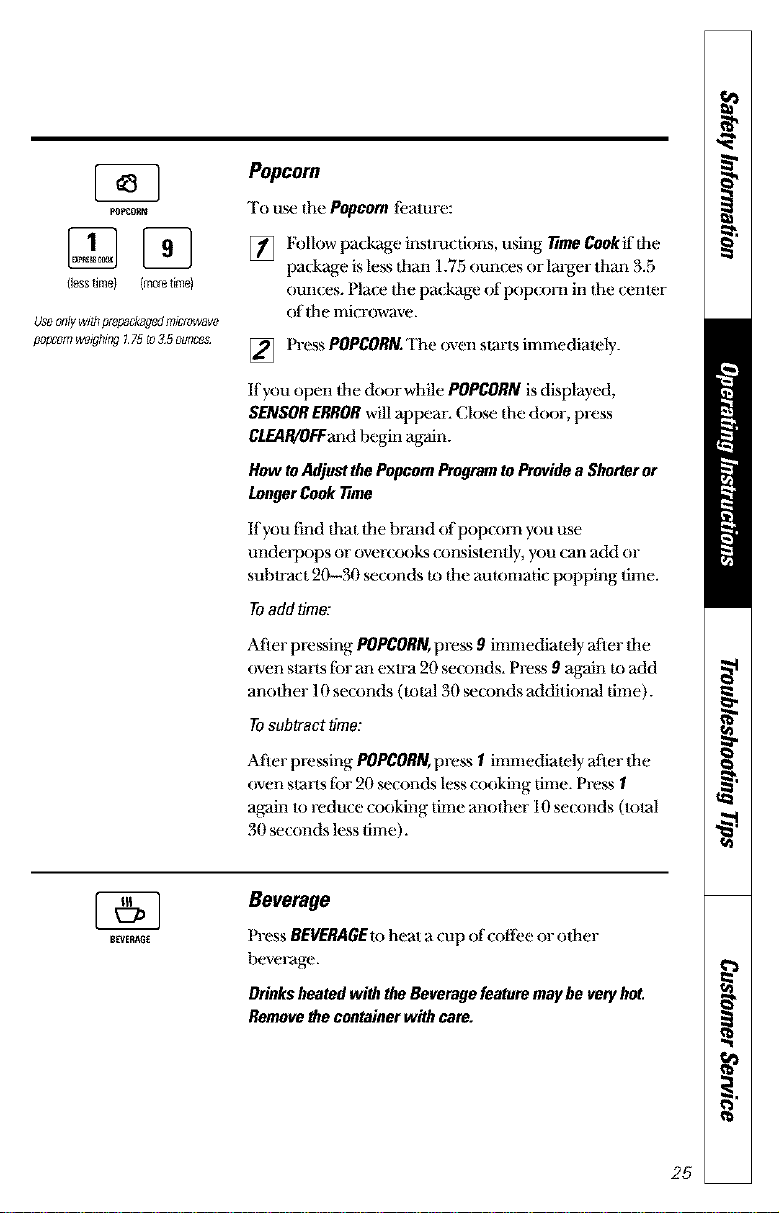
Popcorn
To u_ dm Popcornli:ature:
[] Followpaclcageinsn-actions, using fimeCeakifdle
package is less than 1.75 ounces or larger than 3.5
ounces. Place Ihe pax;kage of popcorn in the center
ofdae microwave.
[] PressPOPCORN.Theovenstm-ksimmediately.
If you open dm door while POPCORNis displayed,
SENSORERRORwill appear. Clo_ the door, press
CLEAR/OEFandbegin again.
HowtoAdjustthePopcornProgramtoProvidea Shorteror
LongerCooktime
If you find that _he bFand of popcorn you use
unde_ pops or overcooks consistently, you can add or
sul)u-act 20-30 _conds tothe automatic popping time.
Toadd #me:
After pressing POPCORN,press 9 immediately after Ihe
oven slarts tot an exu-a 90 seconds. Press 9 again to add
anolher 10 seconds (total 30 mconds additional time).
Tosubtract time:
Alier pressing POPCORN,press I immediately after Ihe
oven slans tbr 20 _conds less cooking dme. Press 1
again to reduce cooking time another 10 seconds (total
30 seconds less time).
BEVERAGE
Beverage
Press BEVERAGEmheal a cup of coffee or olher
beveFage.
Drinksheatedwith theBeveragefeaturemaybe veryhot,
Removethe containerwith care,
25
Aboutthe sensorfeatures.
REH_T
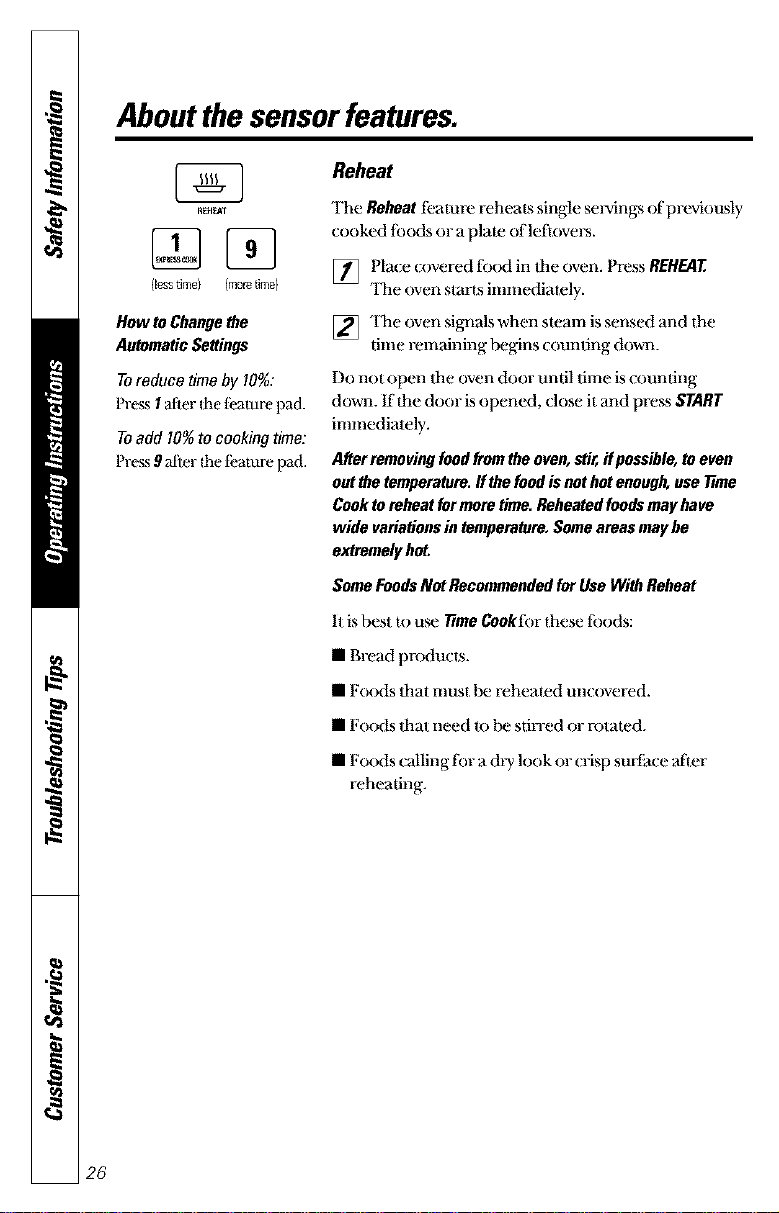
How toChangethe
AutomaticSettings
Toreduce timeby I0%:
Press 1after Ihe ti_ature pad.
Toadd I0% tocookingtime:
Press 9 after die ligature pad.
Reheat
The Reheatfieamre reheat.s single se_ings of previously
cooked toods or a plate (ffleflove_.
] Place covered tbod in flm oven. Press REHE.AT
'ltm oven starts immediately.
] 'ltm oven signals when steam is sensed and the
time remaining begins counting down.
Do not open tim oven door until time is counting
down. If the door is opened, close itand press START
immedialely.
Afterremovingfoodfromtheoven,stir,ifpossible,to even
outthe temperature.If thefoodisnothotenough,user_me
Cooktoreheatformoretime.Reheatedfoodsmayhave
wide variationsin temperature,Someareasmaybe
extremelyhot
SomeFoodsNot RecommendedforUseWithReheat
It is best Io u_ rtmo Cooktbr these loods:
• Bread product.s.
• Foods flaat mttst I_ reheated uncovered.
• Foods fl]at need to Ix' stined or rotated.
• Foods calling for a &y look or crisp surface afmr
reheating.
26
6A_IEDpOTATO
[][]
(lesstime) (m0r_me}
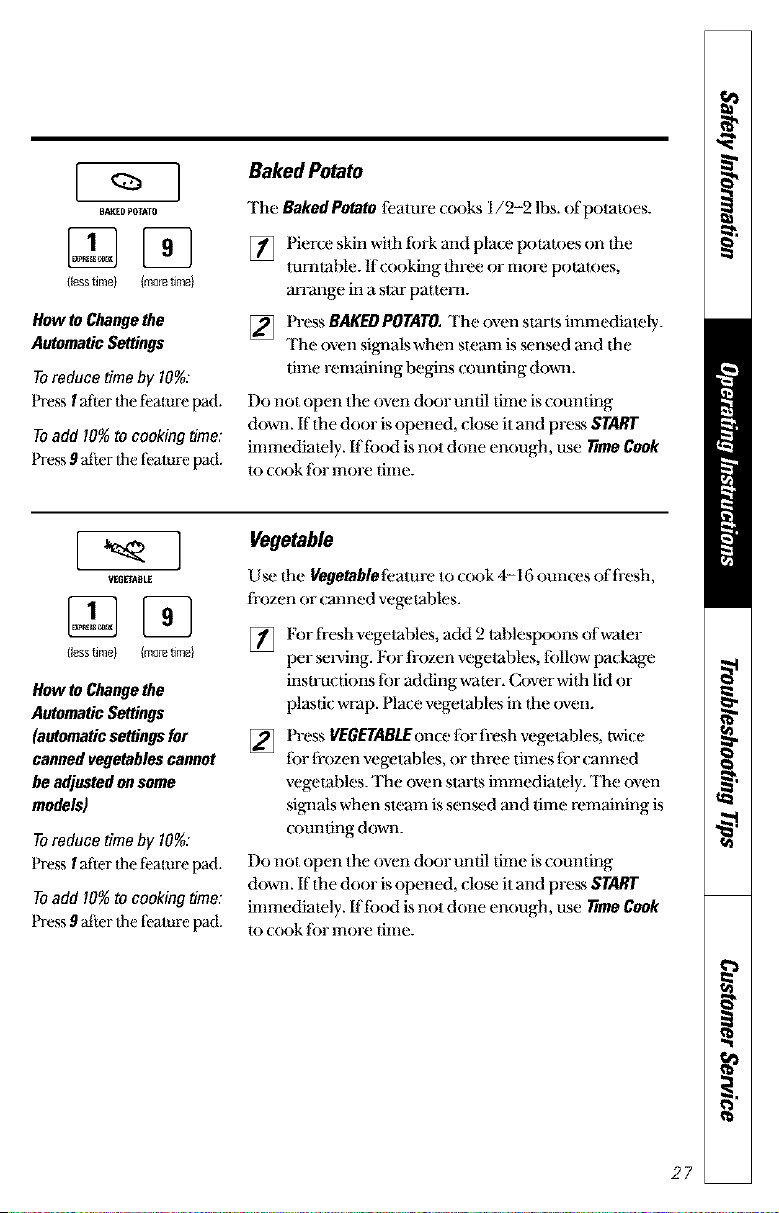
HowtoChangethe
AutomaticSettings
Toreduce timeby 10%:
15-essI after thet_alure pad.
Toadd I0% tocookingtime."
lh-ess9 after the feature pad.
Baked Potato
The Baked Potato li:amre cooks 1/2-2 lbs. of potatoes.
] Pierce skin wifla tbrk and place potatoes on flae
lummble. If cooking fln-ee or more potatoes,
mTange in a star pa[tem.
[] Press BAKEDPOTATO, The oven stm-ks immediately.
The oven signals when slemn is sensed and lt_e
time remaining begins counting dovm.
Do nol open the oven door until time is counting
dovm. If the door is opened, clom it and press START
immedimely. Iftbod is not done enough, use Time Cook
to cook lot more time.
VEG_A!ILE
(lesstime) (m0r_me}
HowtoChangethe
AutomaticSettings
(automaticset_ngsfor
cannedvegetablescannot
be adjustedonsome
models)
Toreduce timeby 10%:
PressI after flaet;_amrepad.
Toadd I0% tocookingtime:
Press 9 after/he feature pati.
Vegetable
U_ the Vegetableti:atureto cook 4-16 ounces of fi-esh,
frozen or cmmed vegetables.
] l:br fresh vegelables, add 2 tablespoons (ffwater
per sepAng. For li-oyen vegelables, lollow package
inswuctions lor addingwater. Cover wifla lid or
plastic wrap. Place vegetahles in file oven.
[] Press VEGETAB/.£once lbr fi-esh vegetables, twice
tbr tix)zen vegetables, or three times tot canned
vegemhles.'ll]e oven slm-ts immediately. The oven
signals when sleam is senmd mad time remaining is
(-_mnfing down.
Do not ()pen the oven door until time is counting
dovm. If flaedoor is opened, clom it and press START
immedimely. Iftbod is not done enough, use FtmeCook
lo cook lbr more time.
27
Aboutthe otherfeatures.
L
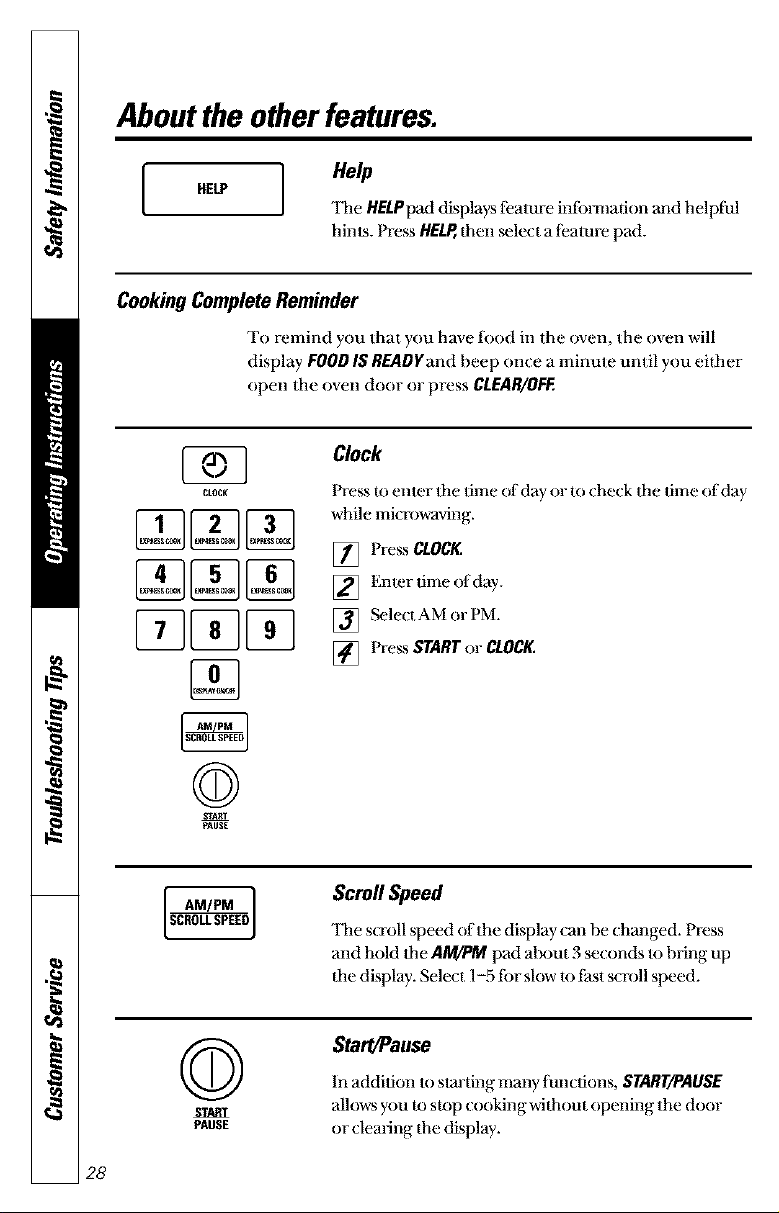
Hap
'llae HELPpad displays li:ature inii)m_ation and helpfial
hints. Press HELP,then _lect a li:alure pad.
CookingCompleteReminder
To remind you thai you have fi)od in the oven, the oven will
display FOOD IS READYand heep once a minute until you either
open the oven door or press CLEAR/OFF,
CLOCK
[][][]
[][][]
©
A,Srm_
PAUSE
Clock
Press to enter dae lime of day or to check dae dme of day
while microwaving.
[] Press CLOCK,
] Enler lime ofday.
] Select AM or PM.
[] Press STARTor CLOCK,
AM/PM ]
SCROLLSPEEDJ
Scroll Speed
'ltae scroll speed of the display Call be changed. Press
and hold Ihe AMADMpad alx)ut 3 seconds to hring up
the display. Select 1-5 ti)r slow to fast scron speed.
©
STAR'r
PAUSE
Start/Pause
In addition to slatting many tuncfions, START/PAUSE
allows you to stop (()()king without opening the door
or clearing the display.
28
I REMINDER 1
[][][]
[][][]
[][][]
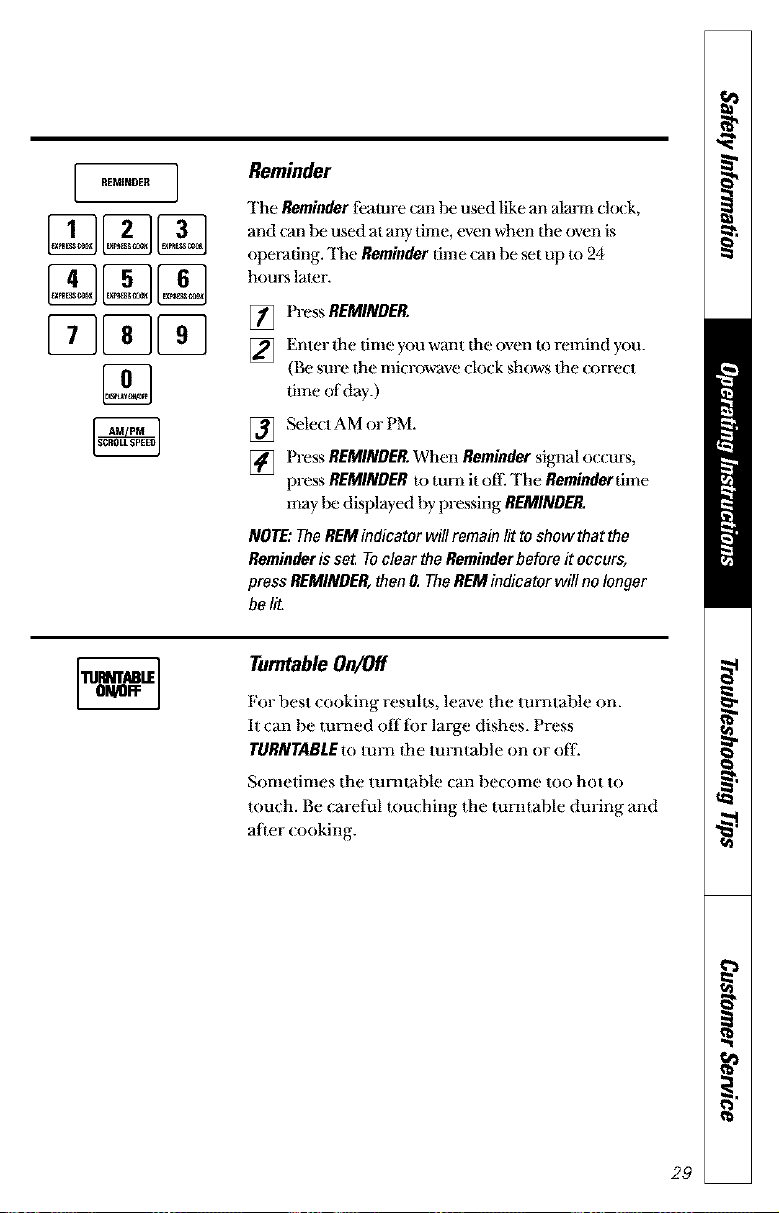
Reminder
The Reminderf_ature can be used like an alarm cl(u:k,
and (an be used at any time, even when the oven is
operating. 'ttm Reminder time can be set up m 94
hom_ later.
] Press REMINDER.
] Enter tim time you want the oven to remind you.
(Be sm-e the microwave clock shows the correct
time of day.)
] _lect AM or PM.
[] Press REMINDER.When Remindersigaaal occurs,
press REMINDERm turn it off The Remindertime
may Im displayed by pressing REMINDER.
NOTE:TheREMindicator will remainlit toshow that the
Reminderisset Toclear theReminderbeforeit occurs,
press REMINDER,thenO.TheREMindicator will nolonger
belit.
TurntableOn/Off
For best cooking results, leave the turntable on.
It can be mined offibr large dishes. Press
TURNTABLEto tm-n the tm-ntable on or off.
Sometimes the tun]table can become too hot to
touch. Be carelial touching the tun]table dm-ing and
after {ooking.
29
Aboutthe otherfeatures.
©
CLEAR
OFF
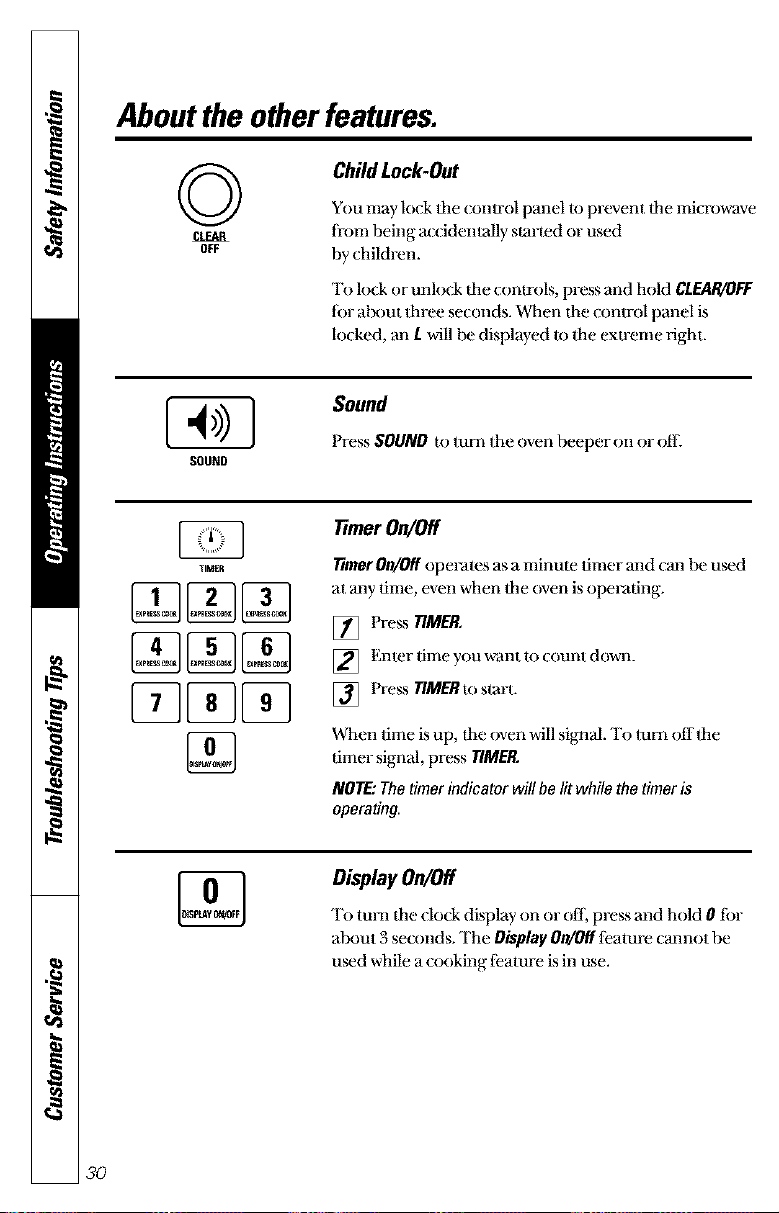
ChildLock-Out
You may lock file ( onu-ol panel to prevem the microwave
li-om being ax ( idenlally started or used
by children.
To lock or unlo(_ the controls, press and hold CLEAR/0FF
lbr alx)ut Ihree seconds. When the conu-ol panel is
locked, an f will Im displayed to die extreme right.
SOUND
Sound
Press SOUND to turn the oven heeper on or oiE
TIMER
timer On/Off
rimer On/OffopeFates as a minute timer and cma lmumd
at maylime, even when dm oven is opeFating.
[] Press TIMER.
] Enter dllle you want to ( ou_lt dOWeL
] Press TIMER to start.
When time is up, tim oven will sigllal. To mm offthe
timer signal, press TIMER,
NOTE: The timer indicator will be lit while the timer is
operating.
Display On/Off
To turn the ('lock display on or olI_ press and hold 0 tbr
about 3 seconds. The Display On/Off li:amre emmet be
umd while a cooking li:amre is in use.
3O
Microwave terms.
Term
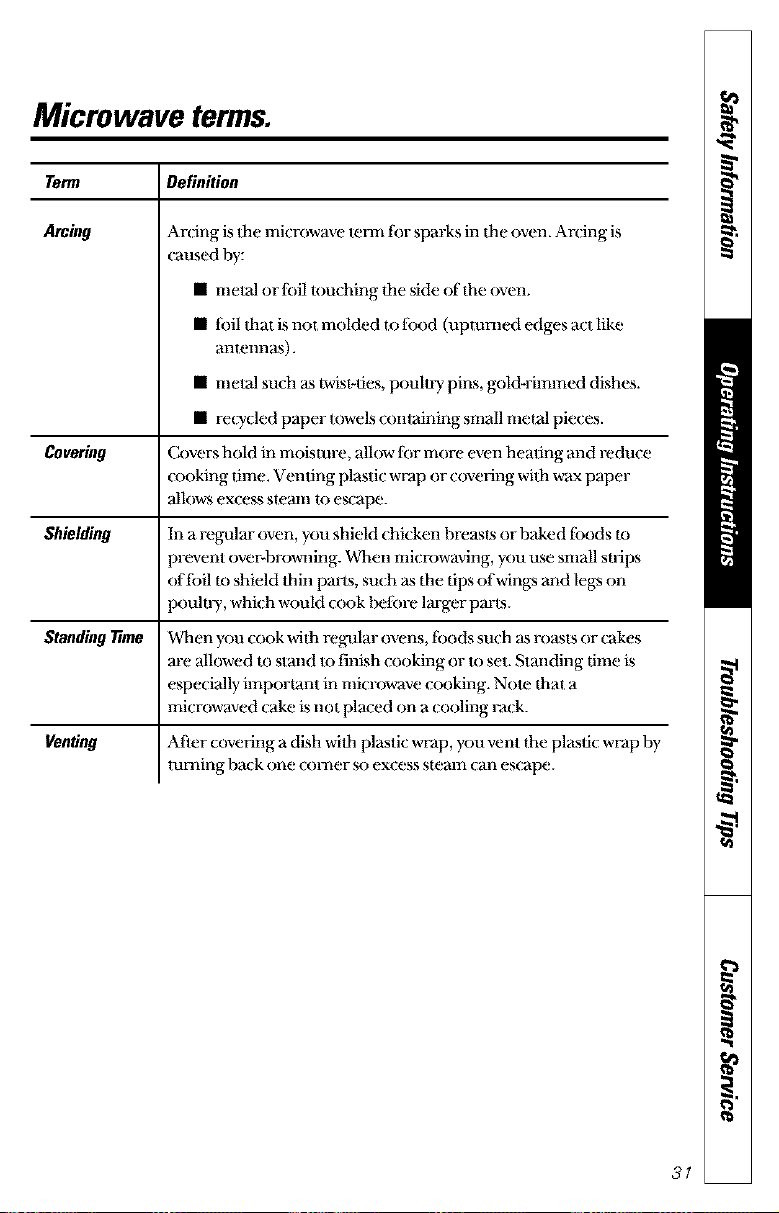
Arcing
Definition
Arcing is Ihe microwave lenn ff_rsparks in the oven. Arcing is
a+used by:
• metal or fflil touching the side <>film oven.
• lbil Ihat is not molded m lbod (upturned edges act like
amennas).
• metal such as twisl*ties, poulw/pins, gold-rimmed dishes.
• recycled paper rowels conlaining small metal pieces.
Covering Covers hold in moisture, allow lbr more even heating and reduce
_x)oking time. Venting plastic wrap or covering widl wax paper
allows excess steam lo e_ape.
Shielding In a regular oven, you shield chicken breas_.s or baked ibods m
)revent over-browning. When microwaving, you u_ small s_dps
(ffibil m shield Ihin parts, such as die tips of wings and legs on
poulnT, which would cook l_tbre lm-ger paris.
Standing T_me When you cook with regular ovens, tbods such as roasts or cakes
are allowed m stand m finish cooking or Io set. Standing time is
especially important in microwave cooking. Nole fllat a
microwaved cake is not placed on a cooling rax;k.
Venting After covering a dish wilh plastic wrap, you vent the plastic wrap by
mining ba+k one comer so excess stemn _an es<_+pe.
31
Careand cleaning of the microwave oven.
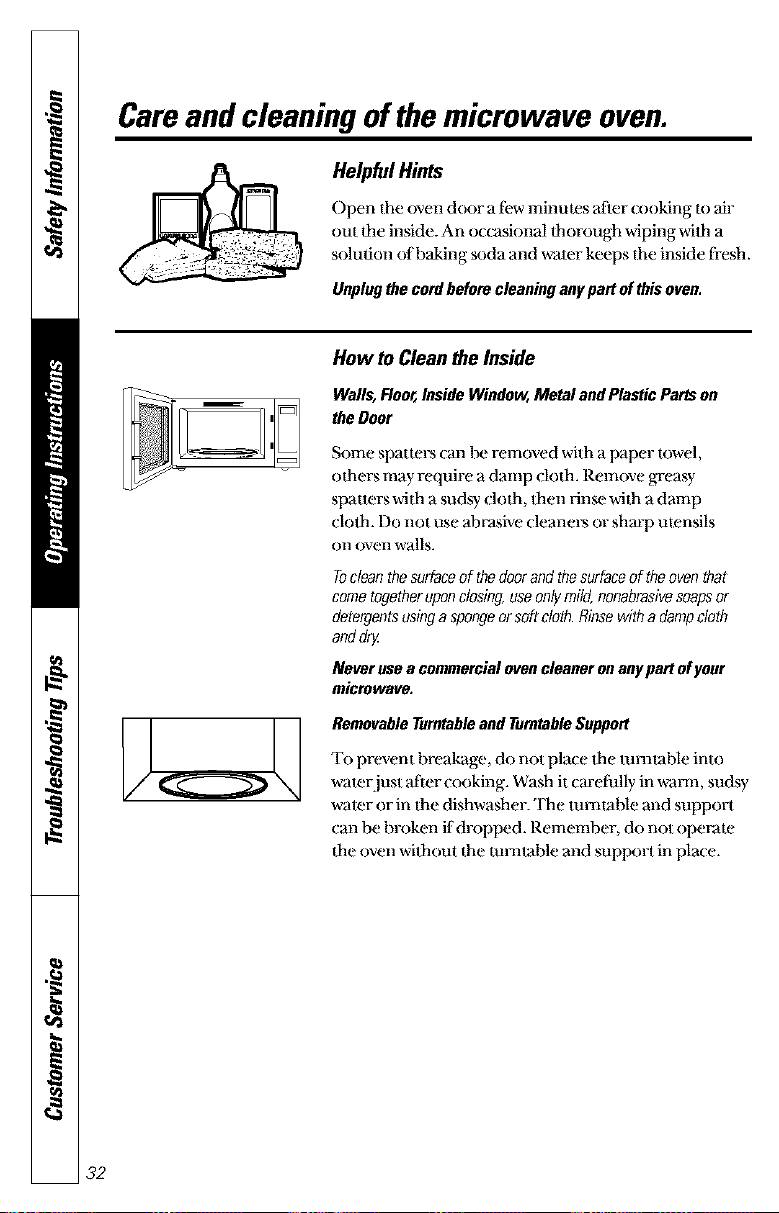
Helpful Hints
()pen the oven door a few minutes after (x)oking to air
out the inside. An oc(:asional flmrough wiping wifla a
solution ofl)aking soda and water keeps the inside fresh.
Unplugthecordbeforecleaninganypartofthisoven.
How to Cleanthe Inside
Walls,Floor,InsideWindow,Metal andPlasticPartson
the Door
Some spatters (malm removed with a paper towel,
others may require a damp cloda. Remove greasy
spauers widl a sudsy cloth, fllen rin_ with a damp
clofl_. Do not use ab Fasive (;leane_ or sharp utensils
Oil oven walls.
Tocleanthesurfaceofthedooraridthesurfaceoftheoventhat
cometogetheruponclosing,useonlymild,nonabrasivesoapsor
detergentsusinga spongeorsoftcloth.Rinsewithadampcloth
anddry
Neverusea commercialovencleaneronanypartofyour
microwave.
RemovableTurntableandTurntableSupport
To prevent breakage, do not place Ihe mmtal)le into
walerjust after cooking. Wash it cm-efully in waml, sudsy
water or in the dishwasher.'llle mmlable and support
can be broken if dropped. Remember, do not operate
the oven widlout the mnflal)le and support in plax e.
32
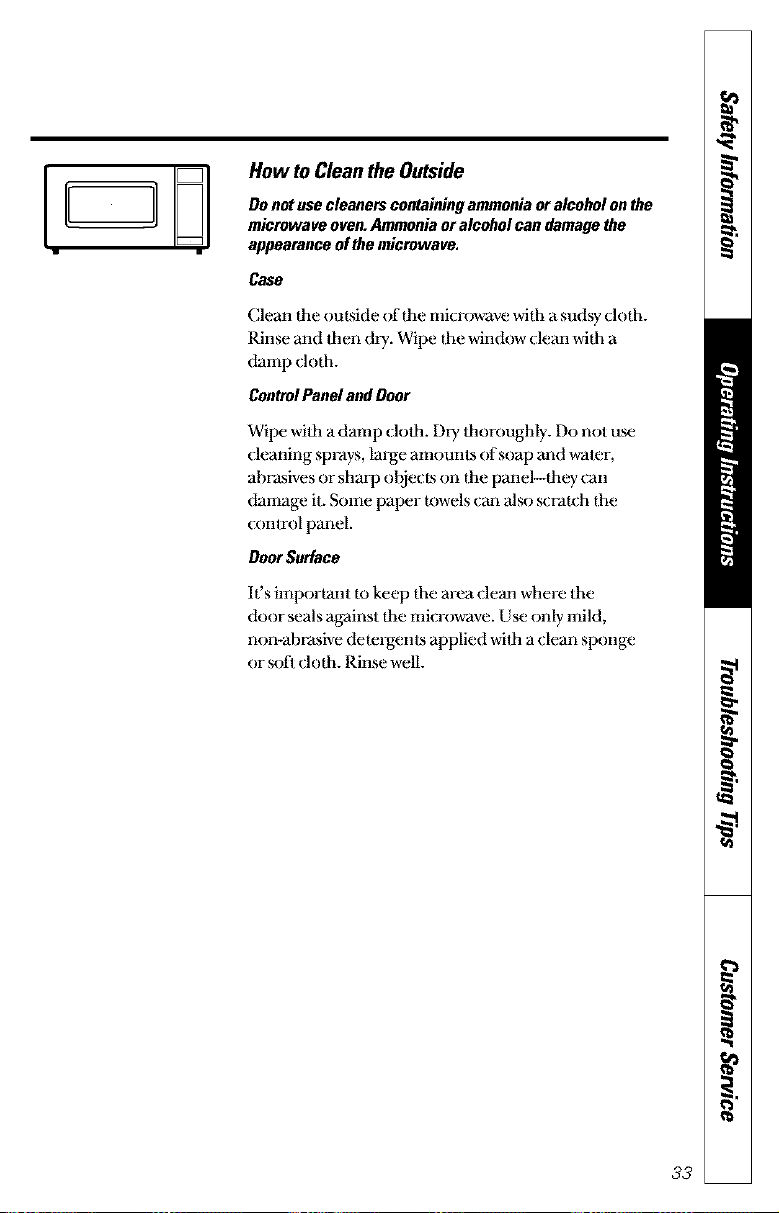
How to Cleanthe Outside
Donotusecleanerscontainingammoniaoralcoholonthe
microwaveoven,Ammoniaoralcoholcandamagethe
appearanceofthemicrowave.
Case
(;lean the omside (ffthe microwave with a sudsy cloth.
Rinse and then thy. Wipe the window dean with a
damp doth.
CentralPanelandDoor
Wipe with a damp cloth. DU thoroughly. Do not u_
cleaning sprays, large amounts (ffsoap and waler,
abrasives or shaq'_ objects on the panel--they can
damage it. Some paper rowels can also _ralch the
_onu-ol panel.
DoorSurface
It's important m keep the area clem_ where the
door seals against the microwave. Use only mild,
nonCab ra.sive dmergents applied with a clean sponge
or soft cloth. Rinse well.
32
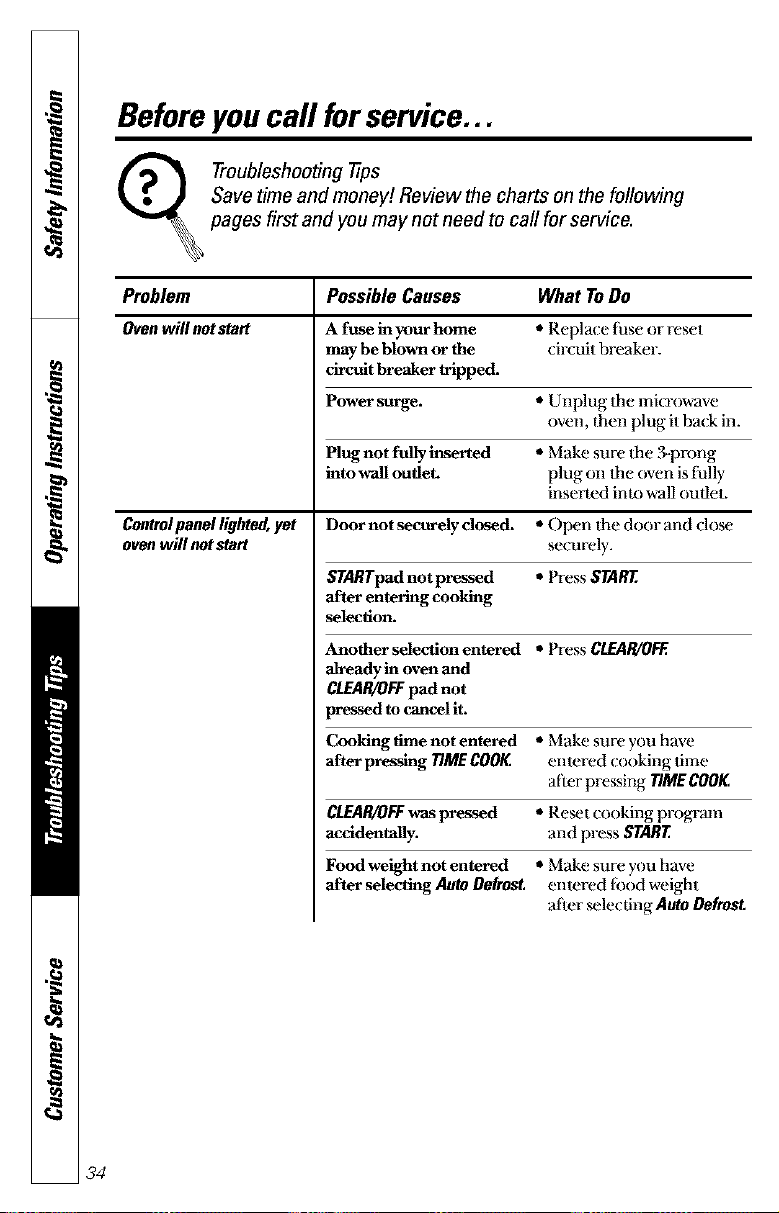
Beforeyou call forservice...
Troubleshooting tips
Save time and money! Review the charts on the following
pages first and you may not need to call for service.
Problem Possible Causes What ToDo
Oven will notstart * Replace tuse or reset
circuit breaker.
Controlpanellighted,yet
ovenwill notstart
A fuse in your home
may be blown or the
circuit breaker u'ipped.
Power surge. '*Unplug Itle mi(xowave
oven, then plug it back in.
Plug not fully inserted
into wall outleL
'*Make sure Ihe _prong
plug on Ihe oven isfully
inserted into walloudet.
Door not secretly dosed. '*()pen dm door and close
securely.
STARTpadnot pressed * PressSTART.
after entering cooking
selection.
Another sdection entered * Press CI._R/ORq.
already in oven and
CLEAR/OFFpad not
pressed to cancel it.
Cooking time not entered '*Make sure you have
after pressing TIMECOOK, entered (()()king time
after pressing TIMECOOK,
CLE.AR/OFFwas pressed '*Remt cooking progxam
accidentally, and press START
Food weight not entered '*Make sure you have
after selecthlg AutoDefrost. enlered tbod weight
after _lecfing AutoOefmst.
34
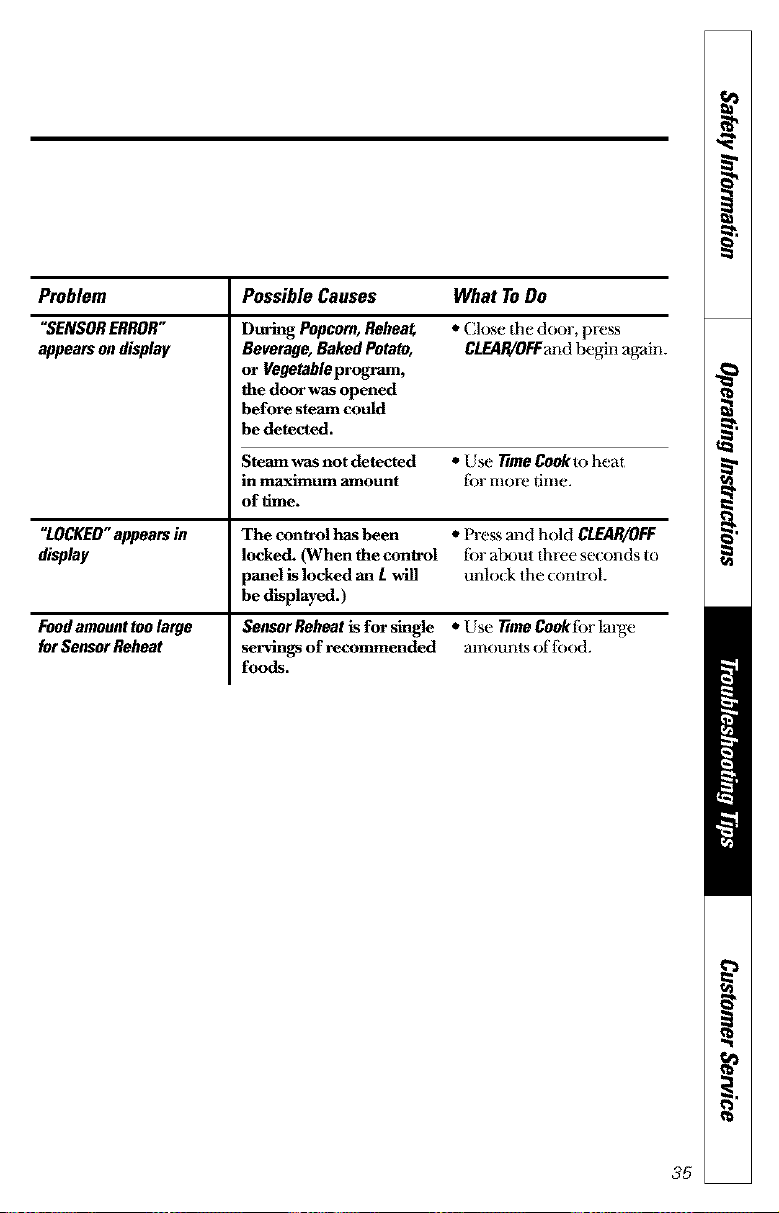
Problem PossibleCauses What ToDo
"SENSORERROR" • Close the door, press
appearsondisplay CLEAR/OFFandbegin again.
During Popcorn, Rehea{
Beverage, Baked Potato,
or Vegetable program,
the door was opened
before steam could
be detected.
Steam was not detected * Use rime Cook m heat
in maximum amount ibr more dine.
of time.
"LOCKED"appears in The control has been * Press mad hold CLEAR/OFF
display locke& (When the control ibr about three seconds to
panelis locked an L will unlock the _onu-ol.
be displayed.)
Fead amount too latge Seasor Reheat is for single , Use TIme Cookibr lmge
for Sensor Reheat servingsof recommended amounts of lbod.
foods.
35
Beforeyou call forservice...
ThingsThatAre Normal With YourMicrowave Oven
• Stemn or vapor es(_tping fl-om around lhe door.
• Light reflection around door or outer ca_.
• Dimming oven light and daange in the hlower sound at power
levels oflaer than high.
• Dull flmmping sound while oven is operating.
• TV/radio imerl;erence might [;e noticed while using flae
microwave. Similar to flae immtbrence cau_d by oflmr small
appliances, it does not indicale a problem wifll ltle microwave.
Plug the microwave inlo a di{Ii:rent electrical circuit, move Ihe
radio or TV as tar away from tim microwave as possihle, or check
file position and signal of file TV/radio antenna.
36
Notes.
zz_
_P
t'%
m.
27
L-
._ Notes.
L_
2,,,,t
38
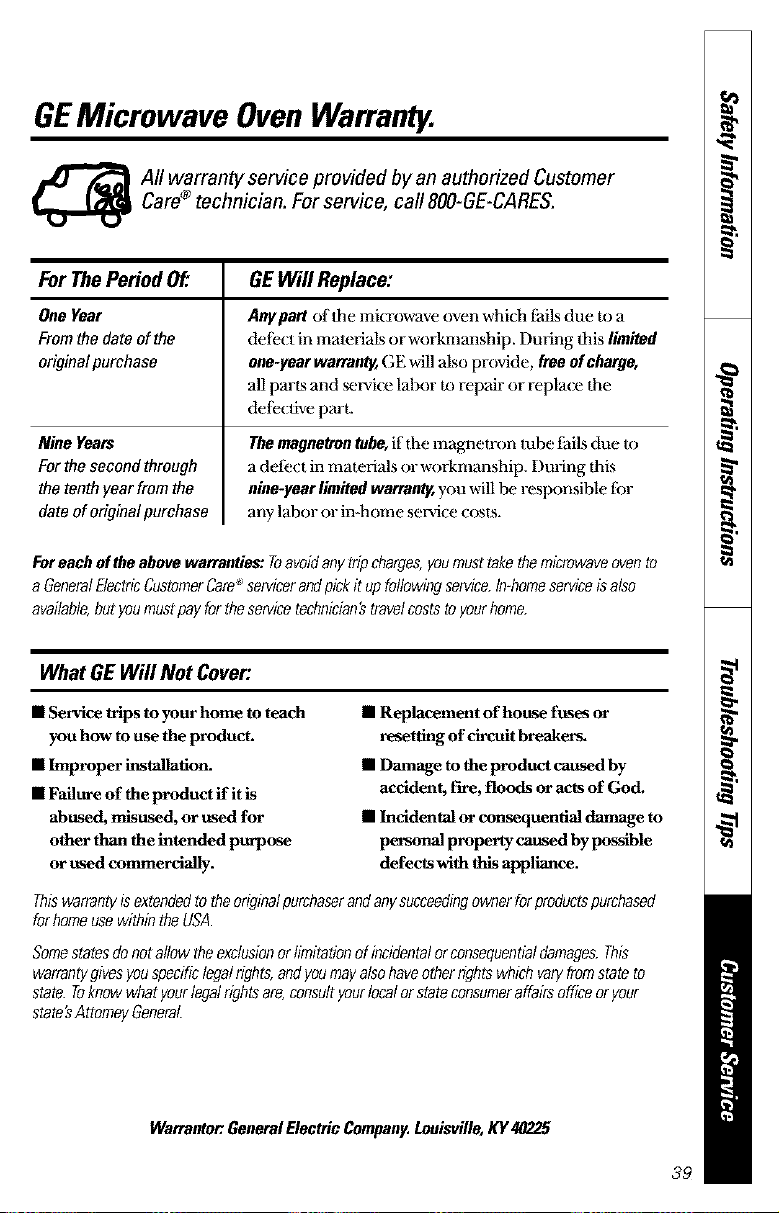
GEMicrowave OvenWarranty.
_ II warranty service provided by an authorized Customer
Care®technician. For service, calI 8OO-GE-CARES.
ForThePeriod OF. GEWill Replace:
One Year Anypart oflhe microwave oven which fails due to a
Fromthe date of the deli:( t in matelials or workmanship. During dais limitod
originalpurchase one-yecrwarranty,GE will also provide, freeof charge,
all parts and ran,ice labor to repair or replace the
deli:{ live part.
Nine Years
Forthesecond through
the tenthyearfrom the
dateof originalpurchase
Themagnetrentube,if the maglaetron tube fails due Io
a defect in mamrials or workmmlship. During dais
nine-year limited warren_l, you will be responsible tbr
any labor or in-borne ser_dce costs.
Foreachoftheabovewarranties:Toavoidanytripcharges,youmusttakethemicrowaveovento
aGeneralElectricCustomerCare_servicerandpickit upfollowingservice.In-homeserviceisalso
available,butyoumustpayfortheservicetechnician'stravelcoststoyourhome.
What GE Will Not Cover:
• Service lrlps to your home to teach
you how to use the product.
• Improper h_staUallon.
• Failure of the product ff it is
abused, misused, or used for
other than the ha_nded purpose
or used commerdaUy.
• Replacement of house fuses or
rese_ng of drofit breakerg
• Damage to the produ_ caused by
acddent, fire, floods or acts of God.
• _addenRfl or consequential _un_e to
pe_onM proper Wcaused by possible
defeOs Mth d_ applhnce.
Thiswarrantyisextendedtotheoriginalpurchaserandanysucceedingownerforproductspurchased
forhomeusewithintheUSA.
Somestatesdonotallowtheexclusionorlimitationofincidentalorconsequentialdamages.This
warrantygivesyouspecificlegalrights,andyoumayalsohaveotherrightswhichvaryfromstateto
state.Toknowwhatyourlegalrightsare,consultyourlocalorstateconsumeraffairsofficeoryour
state'sA#omeyGeneral.
Warrantor.GeneralElectricCompany.Louisville,KY40225
39
Service TelephoneNumbers.
GEAnswer Center® s00.6262000
'1tle GE Ans_ver Cemer ®is open 24 hom_ a day, 7 (lays a week.
In-HomeRepairService800-GE-CARES(800-4324737)
Expert GE repair sm, dce is only a phone call a_ray.
SpecialNeedsService800.6_.2000
TDD800-TDD-GEAC(800-833-4322)
GE oiIi:rs, flee of (harge, a hrodmre to assist in plarming a han-ie_
flee kit*hen li)r persons with limited mobility.
ServiceContractssoo-626-2z24
Purchase a GE sendce contract while your warranty is still in eflhct
aM you 11 e eve a subslanual dl_ tram (,IcAxmsumer _r_ace _,nll
still be there alier your wan-anW expires.
PartsandAccessoriess00-626-2002
lndi_dduals qualified to smwice their own applimaces can have parts or
a*cessories sent directly to their homes (VISA, MasterCm-d and
Di_over cards are accepted).
Instructionscontainedinthismanualcoverprecedurestobe performed
byanyuser.Otherservicinggenerallyshouldbe referredtoqualified
servicepersonnel.Cautionmustbe exercised,sinceimproperservicing
maycauseunsafeoperation,
©
ServiceSatisfaction
Ifyou are not satisliedwidl the mr_ficeyoureceiveti-omGE,
lollow diem daree stops.Ftrel;contact the people who m_wked your
applimme. Next;ifyouare stillnot plea,rod,wrlmall the delails-
including your phone numlmr--t_):Manager, Cust_mmrRelations,
GE Appliances, Appliance Park, lx)uisville,KY40225.
40 Pm_zed&Korea

