Loading ...
Loading ...
Loading ...
11
2
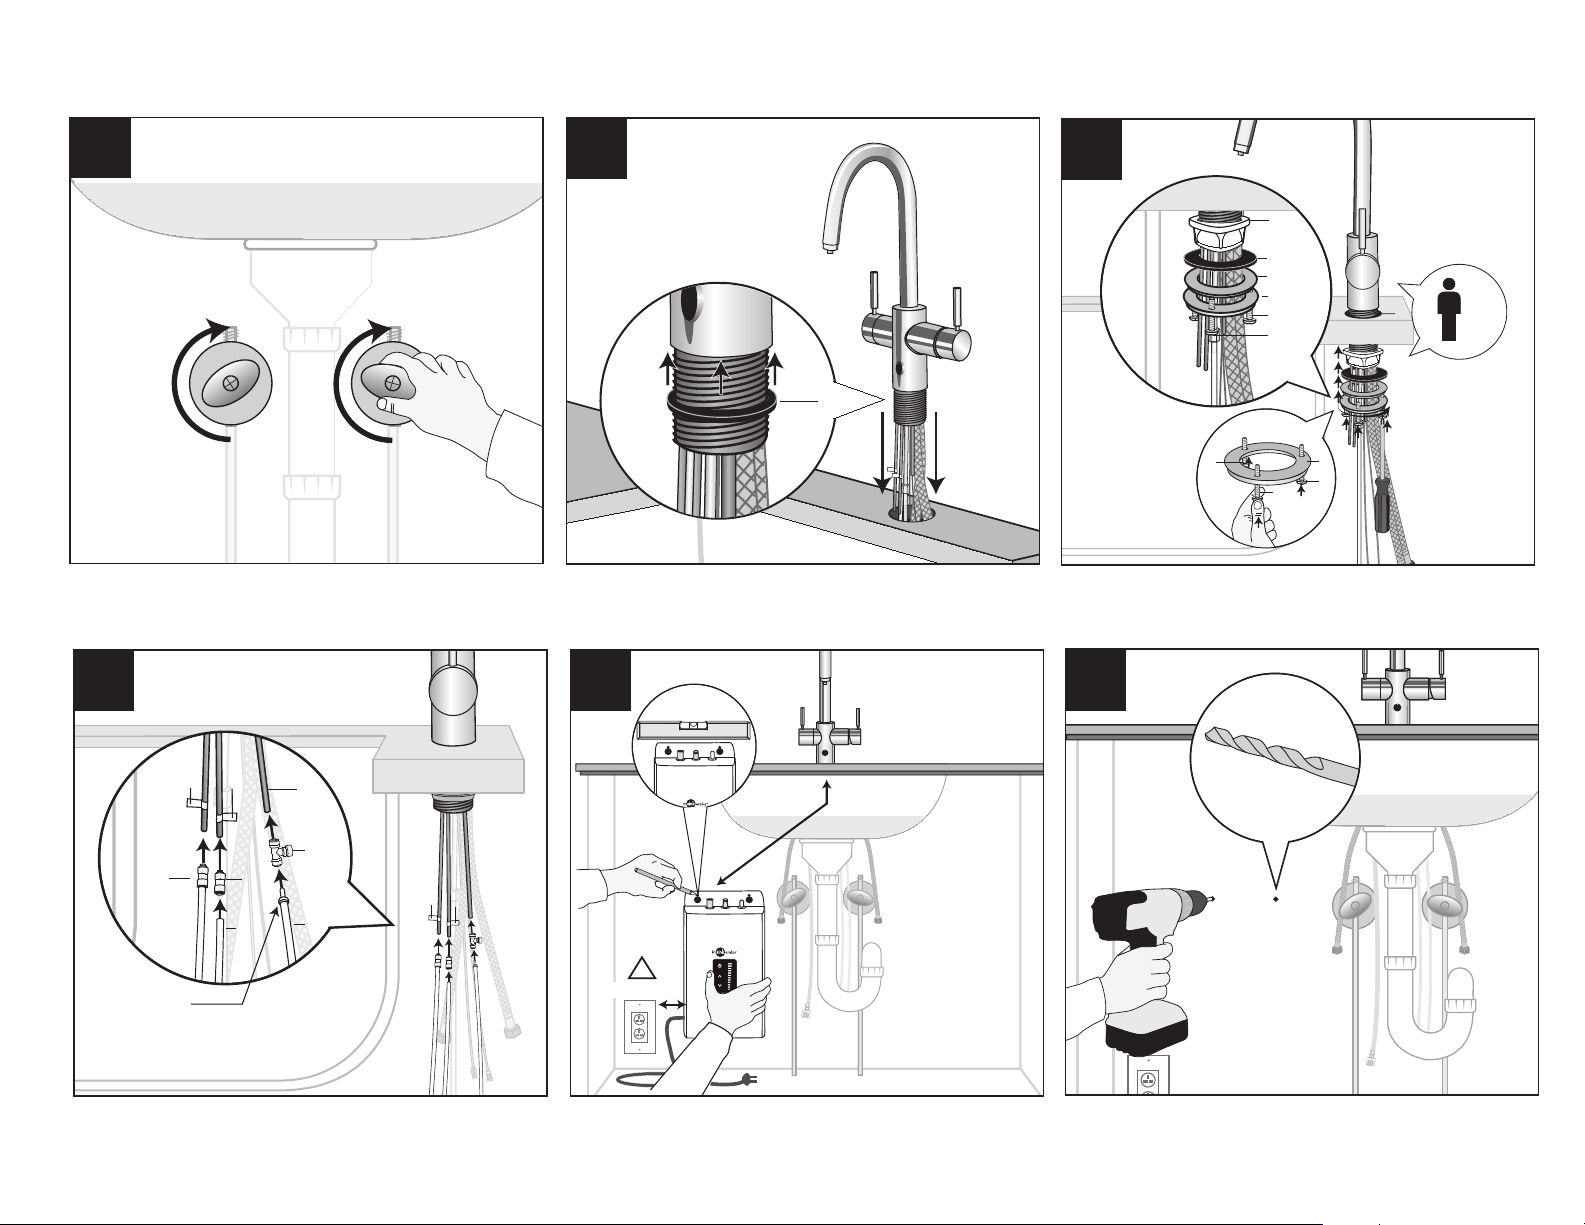
NOTICE:
Property Damage. Do not pinch or break copper tubing. Do not distort
the last 35 mm (1") of tubing.
Note: Required 33.5 mm (1
3
/
8") hole size. For ease of installation, insert the
braided hoses through first
*
1
2
15
16
16
12
13
14
x2
11
16
16
15
16
3
6.4mm
(¼")
½
8
9
6
!
8
9
7
WARNING. (Personal Injury) Do not locate filter above an outlet or other
electrical device. Install head and bracket so that connections require no
stretching, kinking or pinching of tubing.
!
NOTICE:
Property Damage. Pinched or blocked water lines may cause damage
to the water tank. Check to make sure tubes are connected correctly and are
pushed down as far as possible.
*
8 9
Note: For best performance minimise the length of the silicon tubes. Cut tubes
must be straight and free of any defects that could cause a leak.
Note: For ease of installation, insert the braided hoses through each
mounting piece first, then the tube and wires.
Note: Turn screws into pre-drilled holes, leaving 1/4" exposed. Tighten the
screws with only 1/2 turn clockwise.
NOTICE:
Property Damage. Do not plug in hot water tank. Tank must be
located within 600 mm (23
1
/
2") of tap and within 76 0mm (30") or less of a
standard earth (grounded) outlet. DO NOT extend plumbing or electrical lines.
*
NOTICE: Property Damage. Item 9 is a brass check valve with attached
silicon tube. The check valve must always be installed to prevent damage to
the hot water tank
*
B
A
B
8
18
10
A
3
9
19
Check Valve
4
< 600 mm (23
1
/
2")
!
*
≤ 760 mm (30")
5
3mm
(¼")
8
6
INSTALLATION
3mm
(¼")
8
6.4mm
(¼")
10 11
12
Loading ...
Loading ...
Loading ...