Loading ...
Loading ...
Loading ...
Checkthelevelnessofthedryer.Checklevelnessfirst
side-to-side,thenfront-to-back.
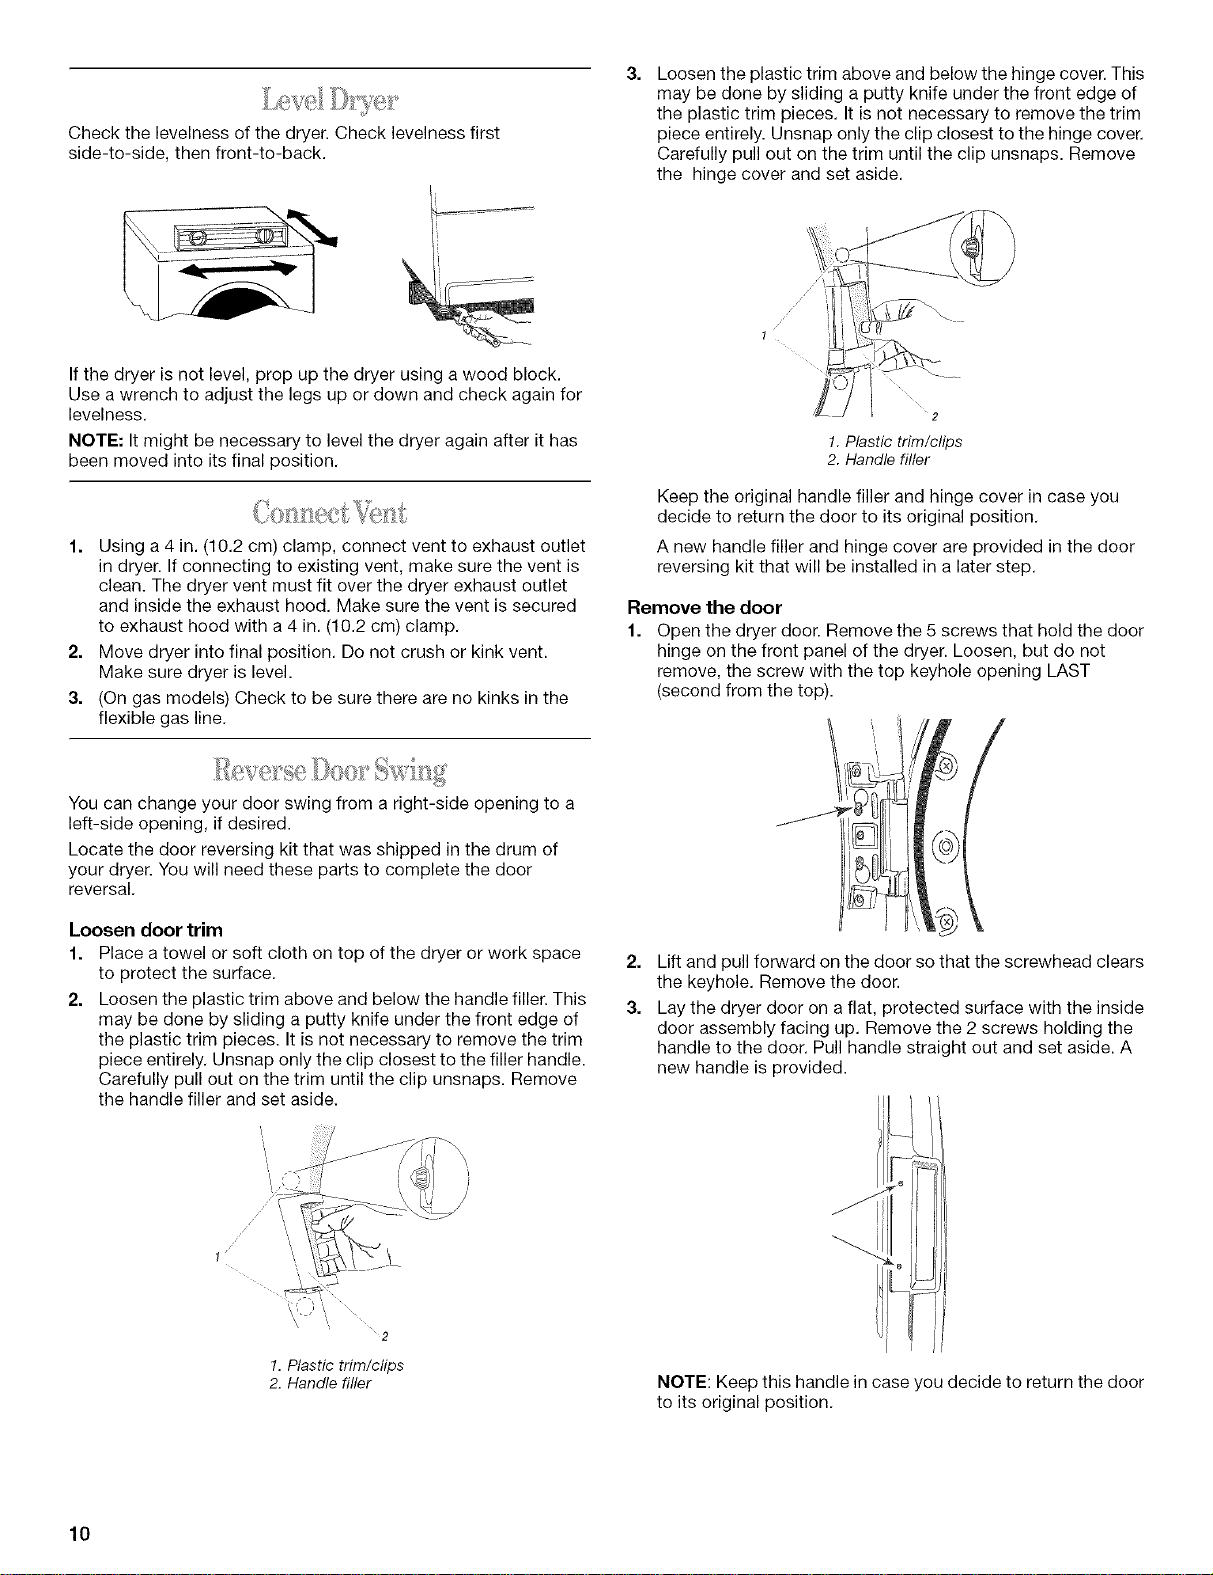
Loosentheplastictrimaboveandbelowthehingecover.This
maybedonebyslidingaputtyknifeunderthefrontedgeof
theplastictrimpieces.Itisnotnecessarytoremovethetrim
pieceentirely.Unsnaponlytheclipclosesttothehingecover.
Carefullypulloutonthetrimuntiltheclipunsnaps.Remove
thehingecoverandsetaside.
Ifthedryerisnotlevel,propupthedryerusingawoodblock.
Useawrenchtoadjustthelegsupordownandcheckagainfor
levelness.
NOTE:Itmightbenecessarytolevelthedryeragainafterithas
beenmovedintoitsfinalposition.
1. Usinga4in.(10.2cm)clamp,connectventtoexhaustoutlet
indryer.Ifconnectingtoexistingvent,makesuretheventis
clean.Thedryerventmustfitoverthedryerexhaustoutlet
andinsidetheexhausthood.Makesuretheventissecured
toexhausthoodwitha4in.(10.2cm)clamp.
2. Movedryerintofinalposition.Donotcrushorkinkvent.
Makesuredryerislevel.
3. (Ongasmodels)Checktobesuretherearenokinksinthe
flexiblegasline.
/
2
!. Plastic trim/clips
2. Handle filler
Keep the original handle filler and hinge cover in case you
decide to return the door to its original position.
A new handle filler and hinge cover are provided in the door
reversing kit that will be installed in a later step.
Remove the door
1. Open the dryer door. Remove the 5 screws that hold the door
hinge on the front panel of the dryer. Loosen, but do not
remove, the screw with the top keyhole opening LAST
(second from the top).
You can change your door swing from a right-side opening to a
left-side opening, if desired.
Locate the door reversing kit that was shipped in the drum of
your dryer. You will need these parts to complete the door
reversal.
Loosen door trim
1. Place a towel or soft cloth on top of the dryer or work space
to protect the surface.
2. Loosen the plastic trim above and below the handle filler. This
may be done by sliding a putty knife under the front edge of
the plastic trim pieces. It is not necessary to remove the trim
piece entirely. Unsnap only the clip closest to the filler handle.
Carefully pull out on the trim until the clip unsnaps. Remove
the handle filler and set aside.
2,
3.
Lift and pull forward on the door so that the screwhead clears
the keyhole. Remove the door.
Lay the dryer door on a flat, protected surface with the inside
door assembly facing up. Remove the 2 screws holding the
handle to the door. Pull handle straight out and set aside. A
new handle is provided.
1, Plastic trim/clips
2. Handle filler
NOTE: Keep this handle in case you decide to return the door
to its original position.
10
Loading ...
Loading ...
Loading ...