Loading ...
Loading ...
Loading ...
8
5.Removethecapcoveringtheholeontheoppositesideofthe
doorwheretherefrigeratordoorhandlewillbeinstalledand
discardthecap.
6.Removetheshoulderscrewanditswasherfromtheleft-hand
sideofthedoorandfastenitintotheholethatwasbehindthe
cap.
7.Placethehandleontheshoulderscrewandpushthehandle
towardthedooruntilthemountingbaseisflushagainstthe
door.
8.Fastenthetopoftherefrigeratorhandletothetopofthe
refrigeratordoor.
9.Covertheremainingholewiththecap(provided).
10.Removedoorhingeholeplugfromthe
refrigeratordoor.Move
tooppositeside.
11.Tightenallscrews.Setasiderefrigeratordooruntilbottom
hingeisinstalledontheoppositesideoftherefrigerator.
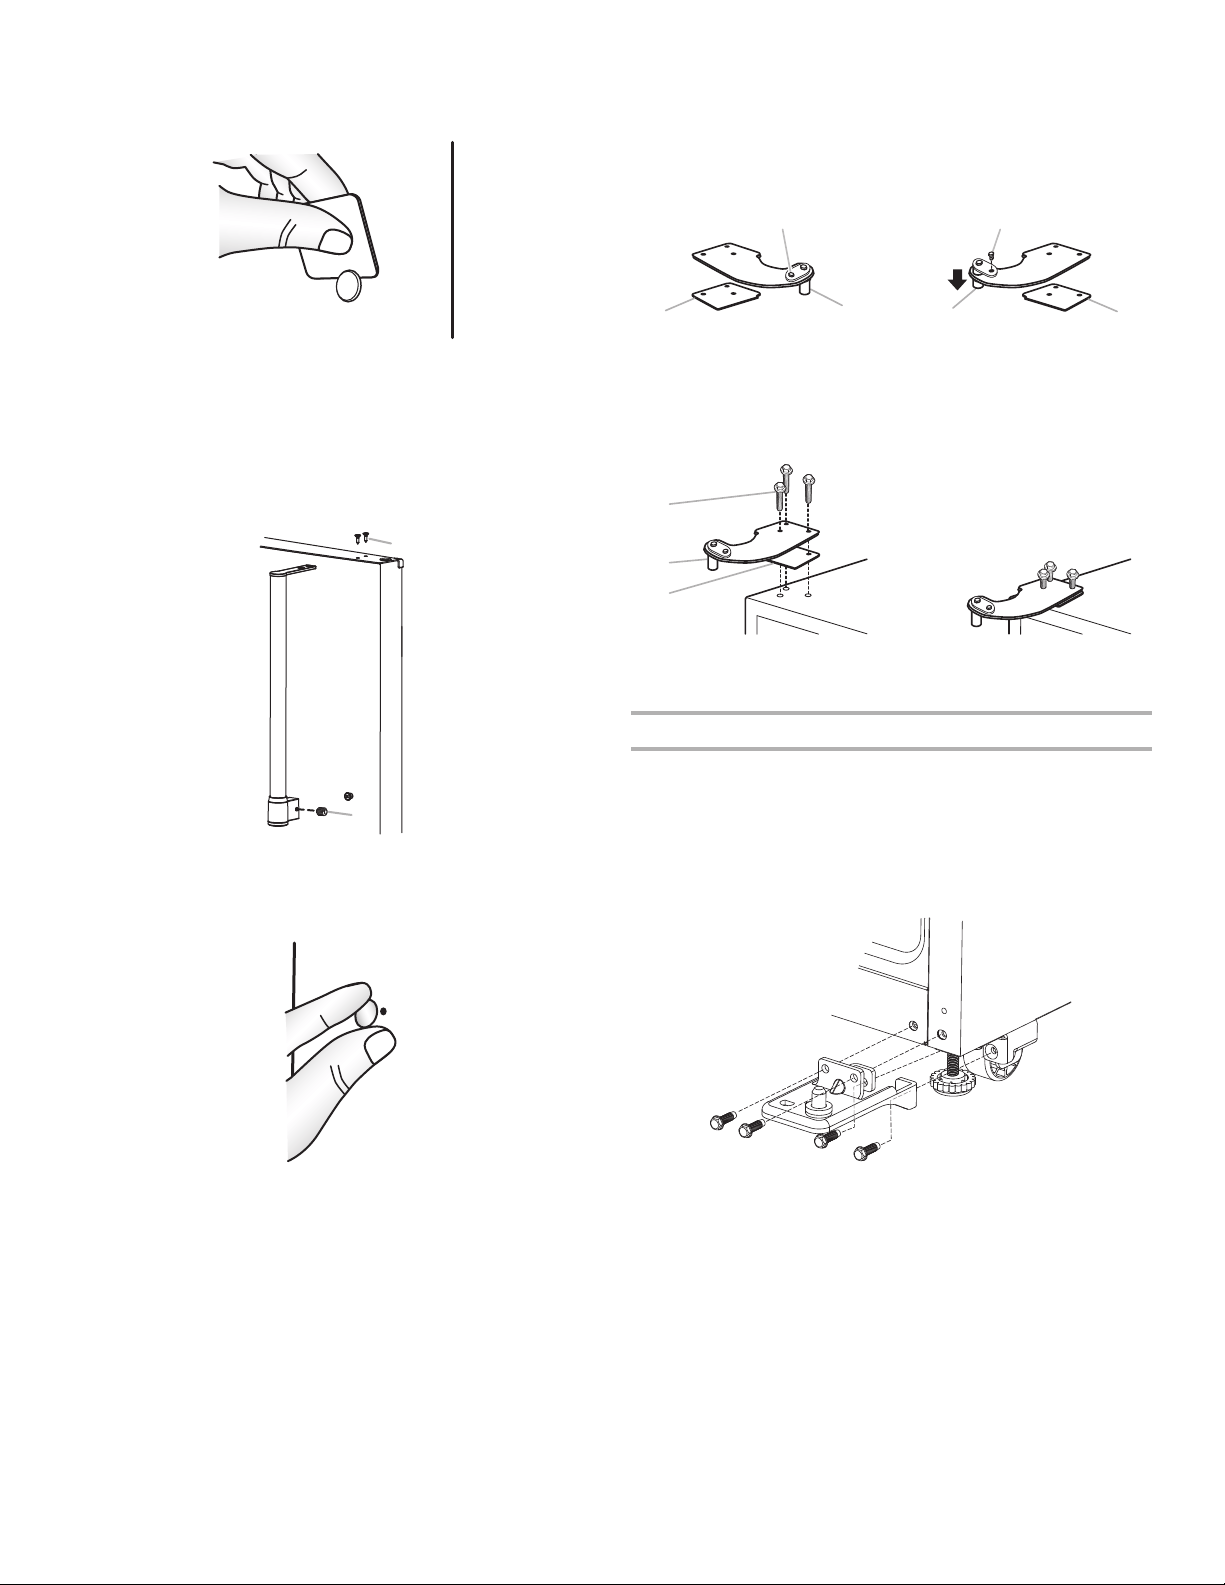
ReverseTopHinge-Contourdoormodelsonly
1.Removethescrewattachingthehingepintothehinge.Turn
thehingeoversothatitispointingintheoppositedirection.
2.Placetheplasticspacerbeneaththehingesothatitwillbe
betweenthehingeandthecabinet,makingsuretheholes
arealigned.
3.Fastenthetophingetotheoppositesideofthecabinet,
insertingthescrewsonlyhalfway,soyouwillbeableto
replacean
dalignthefreezerdoorlater.
ReplaceDoorsandHinges
IMPORTANT:Provideadditionalsupportforthedoorswhilethe
hingesarebeingmoved.Donotdependonthedoormagnetsto
holdthedoorsinplacewhileyouareworking.
InstallRefrigeratorDoor
1.Insertthehingepinintothebottomhingeoftherefrigerator
doorandfastenthehingetothecabinet.Donottighten
completely.
2.Placethewasherontopofthebottomhingepin.
3.Placetherefrigeratordoorontothebottomhingepin.
4.Measurethedistancefromthebottomoftherefrigeratordoor
tothefloor.Thedistanceshouldbeapproximately1⁴⁄₅"
(4.6cm).
NOTE:Ifnecessary,loosenthebottomhinge,without
removingthescrews,adjustthedoortothecorrectheightand
fullytightenthescrews.
A. Flat-head handle screws
B. Setscrew
A
B
A. Plastic spacer
B. Hinge pin screw
C. Hinge pin
A.
⁵⁄₁₆
" hex-head hinge screws
B. Top hinge pin
C. Plastic spacer
A. Bottom hinge
CCA
A
BB
C
B
A
Loading ...
Loading ...
Loading ...