User guide.
EVERYGRAIN
™
COOKER

PERSONAL SAFETY
DO NOT touch hot surfaces.
Use handles or knobs, and
use oven mitts when lifting the
steaming basket or cooking pot
from the base.
Extreme caution must be used
when moving an appliance
containing hot food or hot
liquids.
To reduce the risk of electrical
shock or injury, cook only in
removable cooking pot or
steaming pan. DO NOT pour
liquid into base.
Close supervision is necessary
when any appliance is used
by or near children. Keep cord
out of reach of children. This
appliance is not a toy. DO NOT
allow children to play with it.
To protect against fire, electrical
shock, and injury to persons, DO
NOT immerse the appliance,
cord, or plug in water or any
other liquid.
Unplug appliance from outlet
when not in use and detach
power cord from the appliance
before putting on or taking
o parts, and before cleaning
or attempting to move the
appliance. Allow to cool before
putting on or taking o parts.
The use of attachments not
recommended or sold by
nutribullet is a safety risk, and
may cause fire, electric shock, or
injury.
To eliminate a choking hazard
for young children, remove and
safely discard the protective
cover fitted to the power plug of
this appliance.
The appliance is not intended
for use by persons (including
children) with reduced physical,
sensory, or mental capabilities,
or lack of experience and
knowledge, unless they have
been given supervision or
instruction concerning use
of the appliance by a person
responsible for their safety.
During operation, check the
appliance regularly. DO NOT
leave the unit unattended for
long periods of time when in use.
Keep hands, fingers, hair,
clothing, and utensils away from
the appliance during operation.
!
Save these instructions!
FOR HOUSEHOLD USE ONLY
Important safeguards.
Warning! To avoid the risk of serious injury, carefully read all
instructions before operating your nutribullet
®
. When using
any electrical appliance, basic safety precautions must always
be observed, including the following important information.
2

This product is not intended for
use outside of Australia and
New Zealand. DO NOT use
this product in locations with
dierent electrical specifications
or plug types. DO NOT operate
with any type of plug adapter
or voltage converter device,
as these may cause electrical
shorting, fire, electric shock,
personal injury or product
damage.
PRODUCT SAFETY
Regularly inspect the power
cord, plug, and actual appliance
for any damage. DO NOT
operate any appliance with a
damaged cord or plug or after
the appliance malfunctions, or
is dropped or damaged in any
manner. Contact nutribullet
Customer Service for assistance
at: 1300 285 538 (AUS) / 0800
232 633 (NZ).
This appliance is for household
use only. DO NOT use this
appliance for anything other
than its intended use. DO NOT
USE OUTDOORS. Misuse may
cause injury.
Ensure that the surface where
the appliance operates is stable,
level, clean, and dry.
Always attach the plug to the
appliance first, and then plug
the cord into the wall outlet. To
disconnect, press the power
button to power “OFF”, then
remove the plug from the wall
outlet. Make sure the unit is
UNPLUGGED after each use.
Always make sure the unit
is properly and completely
assembled before connecting to
power outlet and operating.
DO NOT let the power cord
hang over the edge of a table or
countertop.
DO NOT let the power cord touch
hot surfaces or become knotted
or tangled.
3

Any significant spillage onto the
surface under or around the
appliance, or onto the appliance
itself, should be cleaned and
dried before continuing to use
the appliance.
When using this appliance,
provide adequate air space (at
least 200mm) above, below, and
on all sides for circulation.
DO NOT place the cooker on or
near a hot gas or electric burner,
or in a heated oven.
Remove and safely discard
any packaging material or
promotional labels before using
this appliance for the first time.
DO NOT overfill the cooking
pot. Ensure recommended
water levels indicated within
the cooking pot are followed.
Overfilling may result in leakage
through the vent located on the
lid of the cooker base.
A standard rice cup is not the
same as a standard measuring
cup. To prevent overfilling the
cooking pot during the cooking
process, refer to page 14 & 15 for
the recommended water level
to the number of rice scoops.
Recommended water levels are
also repeated under “Inner pot
markings” on page 17.
Keep the appliance clean. Refer
to the Care and Maintenance
section for tips and best
practices.
Any maintenance other than
cleaning should be performed
by a qualified electrician. DO
NOT attempt to repair or service
this appliance yourself. Contact
nutribullet Customer Service
for assistance at 1300 285 538
(AUS) / 0800 232 633 (NZ).
If any of the contained
instructions or warnings are
not understood, please contact
nutribullet
®
Customer Service
for assistance at 1300 285 538
(AUS) / 0800 232 633 (NZ).
Save these
instructions!
!
4

5
6

Contents.
Thank you for purchasing the nutribullet
®
EveryGrain
™
Cooker.
08 What’s included
09 Assembly guide
10 Control panel: cooking programs
14 Measuring & cook time guide
16 Steam time guide
17 Inner pot markings
18 Assembly & use
18 Before first use
18 Assembly
19 Usage instructions
22 Tips & tricks
26 Troubleshooting
27 Care & maintenance
28 How to store
28 Replacement parts
30 nutribullet
®
EveryGrain
™
Cooker
one-year limited warranty
7
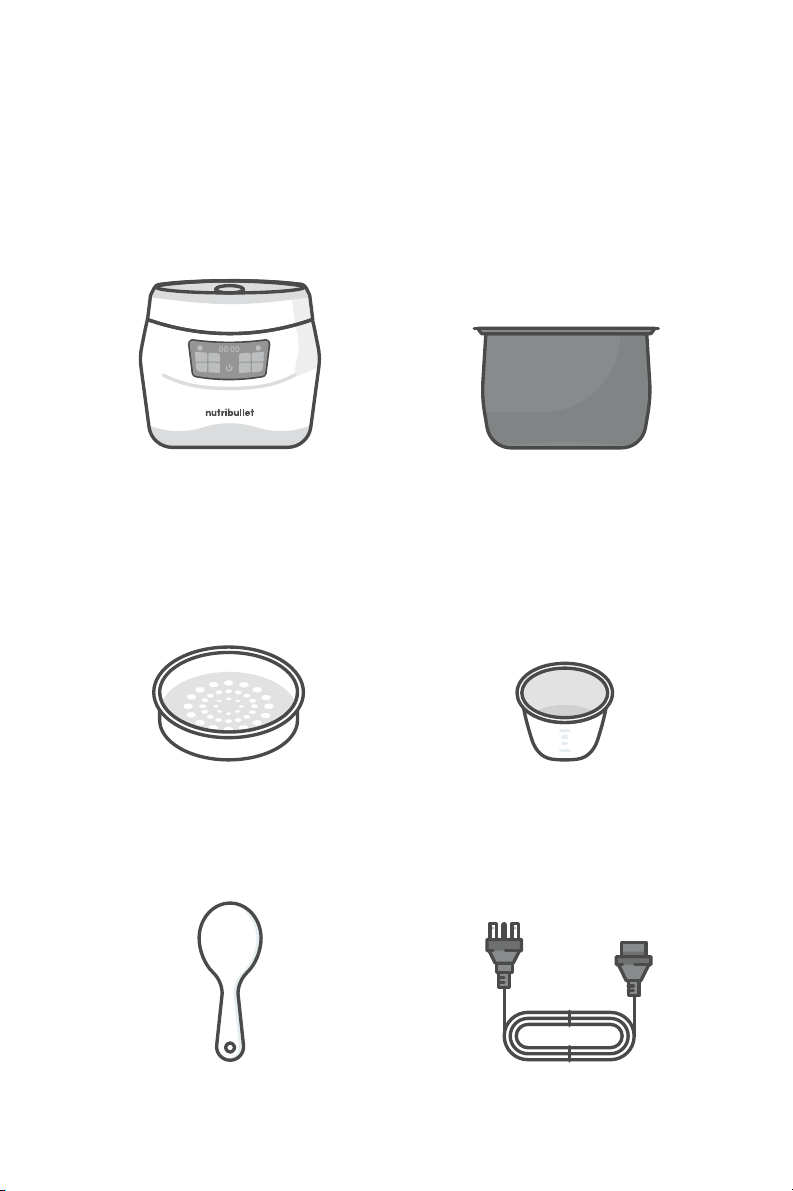
What’s included.
cooker base
rice/grain
measuring scoop
steaming basket
rice spatula power cord
cooking pot
5 rice cup capacity (raw grains)
10 rice cup capacity (cooked grains)
Cooker Base
WHITE
RICE
OATS
BROWN
RICE
GRAIN
STOP
START
STEAM
DELAY
START
KEEP
WARM
QUINOA
Steaming Basket
Spatula/Rice Spoon
10-Cup Cooking Pot
1-Cup Rice/Grain Measuring Cup Power Cord
Cooker Base
WHITE
RICE
OATS
BROWN
RICE
GRAIN
STOP
START
STEAM
DELAY
START
KEEP
WARM
QUINOA
Steaming Basket
Spatula/Rice Spoon
10-Cup Cooking Pot
1-Cup Rice/Grain Measuring Cup Power Cord
Cooker Base
WHITE
RICE
OATS
BROWN
RICE
GRAIN
STOP
START
STEAM
DELAY
START
KEEP
WARM
QUINOA
Steaming Basket
Spatula/Rice Spoon
10-Cup Cooking Pot
1-Cup Rice/Grain Measuring Cup Power Cord
Cooker Base
WHITE
RICE
OATS
BROWN
RICE
GRAIN
STOP
START
STEAM
DELAY
START
KEEP
WARM
QUINOA
Steaming Basket
Spatula/Rice Spoon
10-Cup Cooking Pot
1-Cup Rice/Grain Measuring Cup Power Cord
Cooker Base
WHITE
RICE
OATS
BROWN
RICE
GRAIN
STOP
START
STEAM
DELAY
START
KEEP
WARM
QUINOA
Steaming Basket
Spatula/Rice Spoon
10-Cup Cooking Pot
1-Cup Rice/Grain Measuring Cup Power Cord
Cooker Base
WHITE
RICE
OATS
BROWN
RICE
GRAIN
STOP
START
STEAM
DELAY
START
KEEP
WARM
QUINOA
Steaming Basket
Spatula/Rice Spoon
10-Cup Cooking Pot
1-Cup Rice/Grain Measuring Cup Power Cord
8
WHITE
RICE
OATS
BROWN
RICE
GRAIN
STOP
START
STEAM
DELAY
START
KEEP
WARM
QUINOA
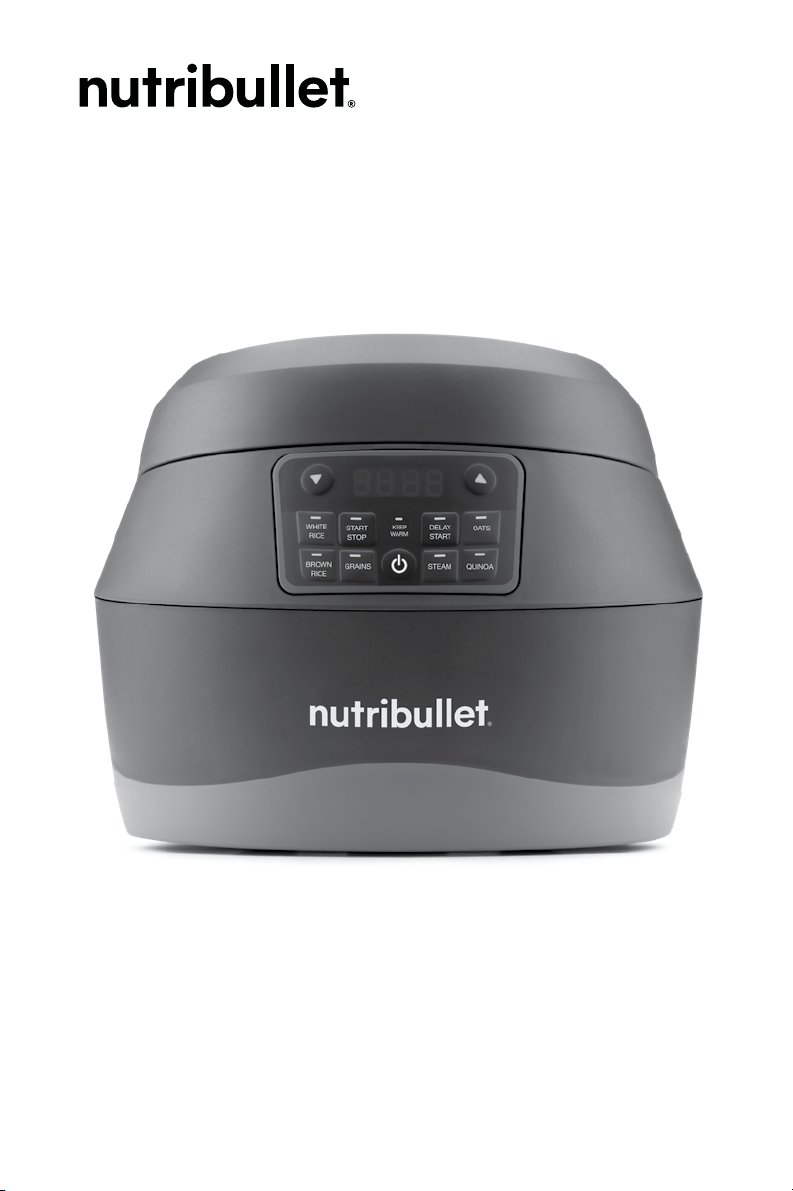
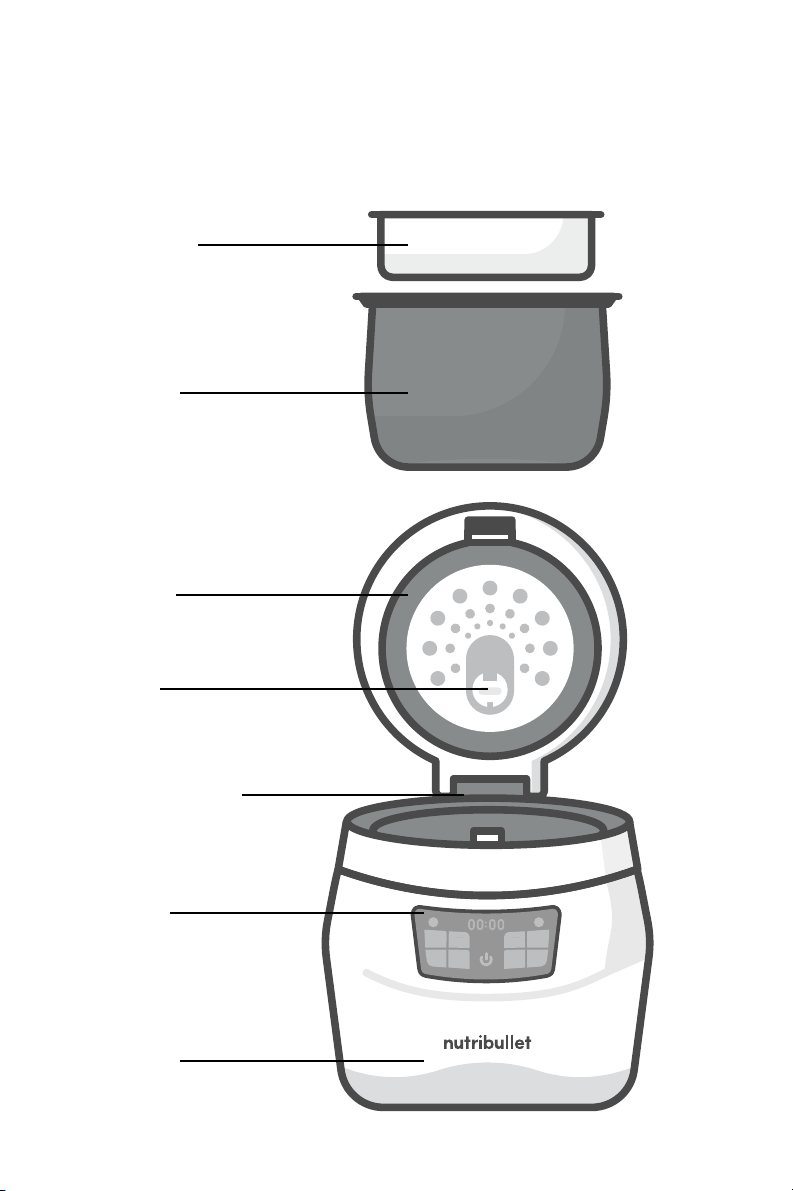
Assembly guide.
control
panel
steam
vent
cooking
base
sealing
panel
cooking
pot
steaming
basket
condensation
collector
9
WHITE RICE
This cooking program yields
light, fluy results, whether
you’re cooking jasmine,
basmati, or sushi rice. Measure
your scoops, add to the Cooking
Pot, and fill with water to the
White Rice Line in the Cooking
Pot. Select the White Rice
Program and press Start.
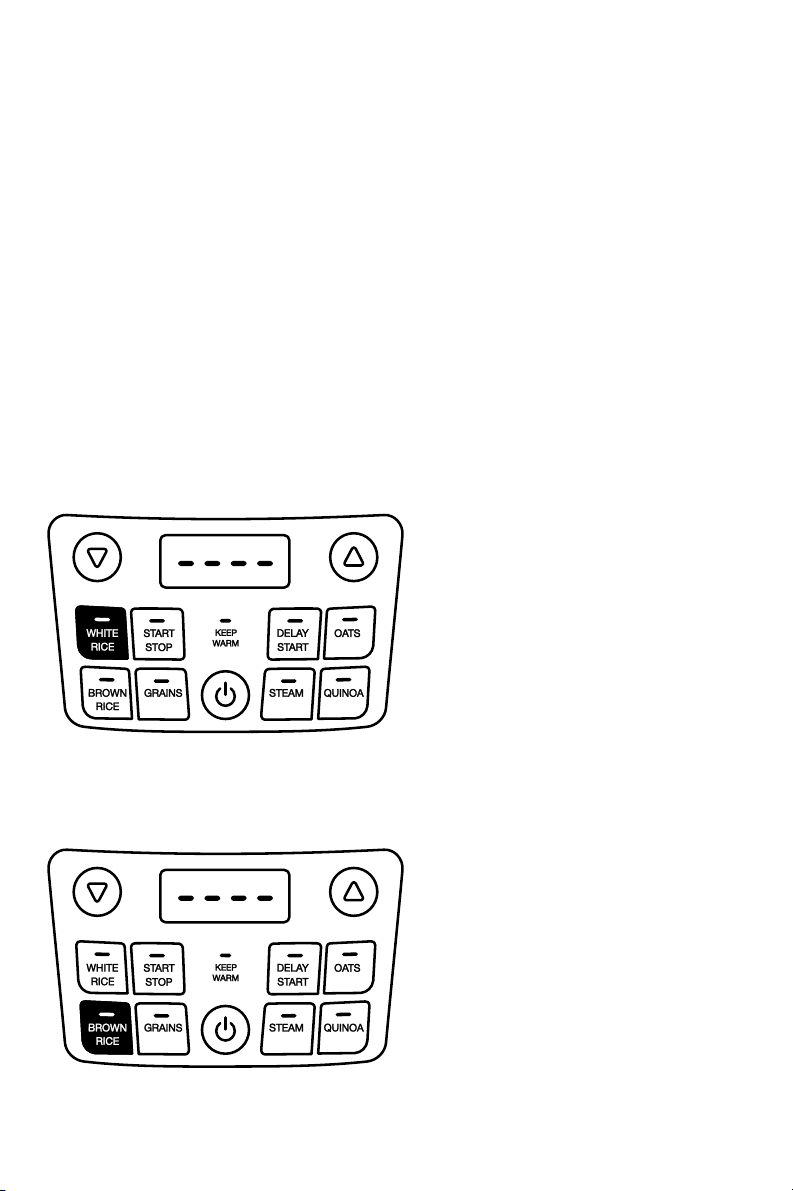
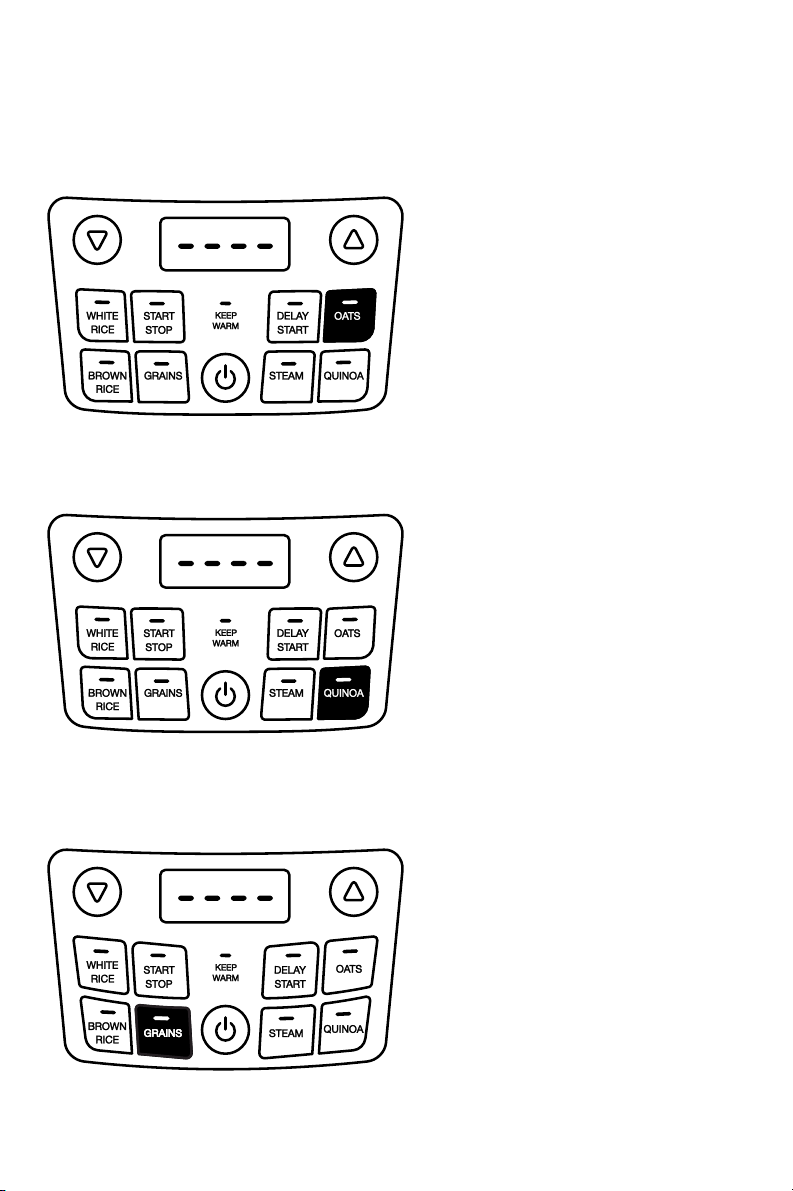
Control panel:
cooking programs.
The EveryGrain
™
Cooker features 5 Auto-Cook Programs, plus a Steam
program if you’re steaming food.
BROWN RICE
This setting delivers expertly
cooked brown rice, every time.
Fill the Cooking Pot to the
Brown Rice Line for Whole Grain
Brown Rice and for Indian and
Pakistani Brown Basmati Rice.
Select the Brown Rice Program
and press Start.
TO SELECT A COOKING PROGRAM:
Select one of the 5 auto-cook programs by pressing the button of the
cooking program you desire on the control panel, located on the front of
the unit, below the lid. To change programs, just press a dierent button.
Once pressed, the button lights up fully, indicating your chosen program.
10
OATS
Whether steel-cut or rolled, this
cooking program turns your oats
into creamy, comforting porridge.
Use a 1:2 ratio of oats to water for
rolled oats, or measure your oats
using the Measuring Scoop and
fill the Cooking Pot with water
to the Oats Line. Select the Oats
Program and press Start.
Note: Steel cut oats will require a 1:3 oats
to water ratio.
QUINOA
This superfood is actually a seed,
which makes it high in protein
and other nutrients. Quinoa
comes in white, black, brown,
or multicolored. For all quinoa
types, measure your quinoa
using the Measuring Scoop and
fill the Cooking Pot with water
to the Quinoa Line. Select the
Quinoa Program and press Start.
GRAINS
Many ancient grains such
as amaranth, farro, spelt,
buckwheat and millet oer many
health benefits as well as great
flavor and texture. Consult our
Measuring Guide on Page 8 for
water to grain ratios, or simply
measure the grain and water as
grain package directs. Select the
Grains Program and press Start.
11

TO USE STEAM PROGRAM:
Press Steam if you’re only steaming food. The timer will show 0:00.
Press (or press and hold) the up/down arrows to adjust steaming time
in 1-minute increments (each up/down press will add or subtract
1 minute). The maximum time you can set for steaming is 1 hour.
STEAM
The EveryGrain
™
cooker lets you
steam foods in one of two ways:
you can steam items and cook
grains simultaneously, or you
can steam items on their own. To
steam items on their own, simply
fill the Measuring Scoop with
water and add to the cooker,
select the Steam Program, and
set the timer for the length of
time your food requires to cook.
For tender green vegetables,
remove prompty and shock in
ice cold water to stop cooking.
12
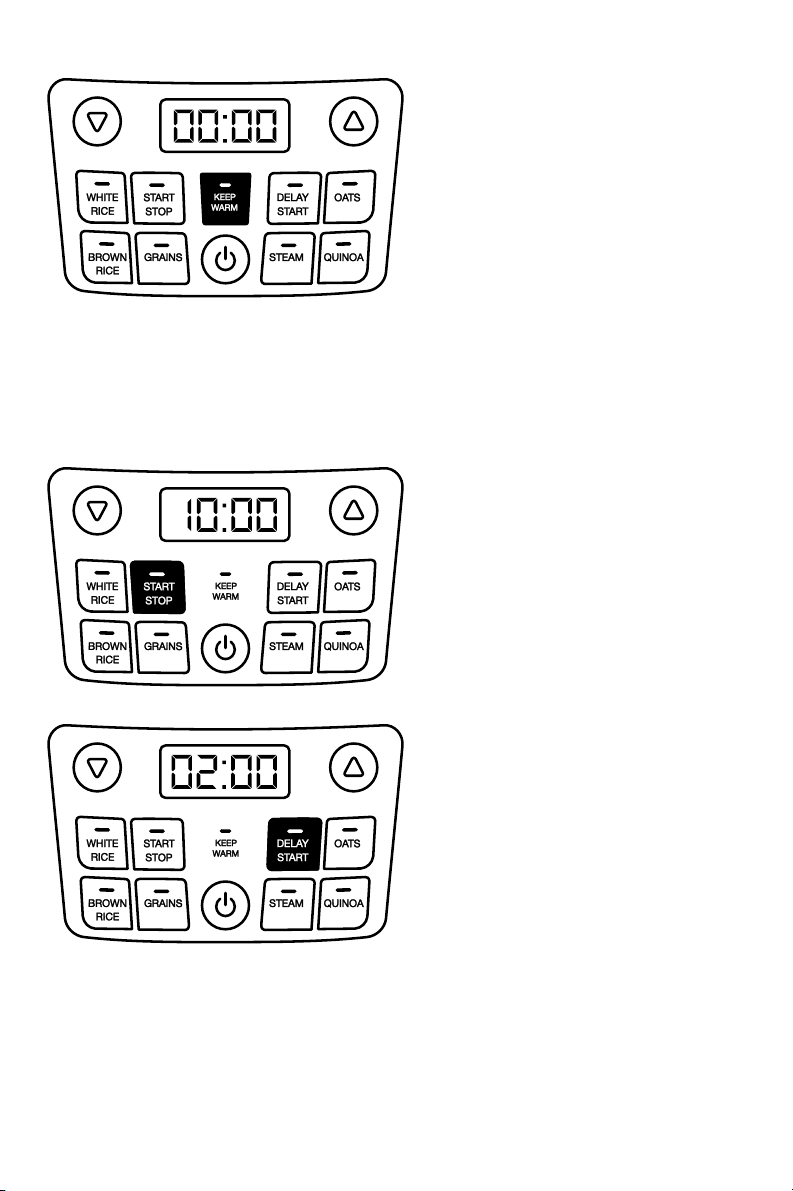
KEEP WARM
All programs, will automatically
switch to Keep Warm once
the cooking program has
completed, for up to 3 hours.
This will keep your grains at an
ideal temperature for when
you are ready to eat. The timer
will count up in the Keep Warm
stage to let you know how long
cooked foods have been resting.
Remove tender foods from heat
immediately after the end of the
cooking program to ensure they
will not overcook.
START STOP
Use the Start/Stop button
to start a cooking cycle after
choosing a program, cancel
a cooking program, or end
the Keep Warm stage.
DELAY START
After selecting your desired
cooking program, you can
choose to delay cooking for
up to 12 hours! This will ensure
grains or rice are ready on your
schedule. Select your desired
cooking program, then press
Delay Start, set your time
(the timer defaults to 2 hours,
but can be adjusted up to 12
hours. Use the arrows to move
up and down in increments
of 15 minutes.) After setting to
your desired delay time, select
Start, and the countdown to
commence cooking will begin.
13

1 scoop (150g) 2 scoops (300g) 3 scoops (450g)
Grain or
Rice Type
Cooking
Program
Grain to Liquid
Ratio
Serving Size
(uncooked)
Automatic
Cook Time
(minutes)
Cooked
Yield
(rice
cups
)
Automatic
Cook Time
(minutes)
Cooked
Yield
(rice
cups
)
Automatic
Cook Time
(minutes)
Cooked
Yield
(rice
cups
)
White Rice White Rice 1:2
⁄ Rice cup
28 2 31 3⁄ 34 5⁄
Brown Rice Brown Rice 1:2⁄
⁄ Rice cup
53 2 56 4 60 5⁄
Quinoa Quinoa 1:2
⁄ Rice cup
38 2⁄ 40 4 39 6
Oats Oats 1:1⁄
⁄ Rice cup
50 2⁄ 51 3⁄ 51 4⁄
Farro Grains 1:3⁄
⁄ Rice cup
39 1 53 2
Do not cook more than
2 scoops to avoid
overfilling the cooking pot
Barley Grains 1:2
⁄ Rice cup
53 2⁄ 57 5
Do not cook more than
2 scoops to avoid
overfilling the cooking pot
Millet Grains 1:2
⁄ Rice cup
50 2⁄ 54 3⁄ 58 7⁄
Amaranth Grains Pilaf – 1:1⁄
Cereal – 1:2⁄
⁄ Rice cup
50 1⁄ 53 2⁄ 54 4⁄
Jasmine Rice White Rice 1:1⁄
⁄ Rice cup
50 2 52 4 55 5⁄
Texmati Grains 1:2⁄
⁄ Rice cup
54 2⁄ 58 3 62 6
Spelt Grains 1:3
⁄ Rice cup
54 1⁄ 62 3⁄ 73 5⁄
Te Grains 1:1⁄
⁄ Rice cup
47 2 50 4 51 6
Buckwheat Grains 1:2
⁄ Rice cup
50 2 53 4 56 6
Red Rice Brown Rice 1:1⁄
⁄ Rice cup
54 2⁄ 55 4⁄ 61 6⁄
Black Rice Brown Rice 1:1⁄
⁄ Rice cup
53 1⁄ 56 3⁄ 59 5⁄
Measuring & cook time guide.
Reference the full measuring & cook time guide included separately with
your nutribullet
®
EveryGrain
™
Cooker for more details. The cooking pot
capacity is 5 rice cups raw grains, 10 rice cups cooked grains.
14

1 scoop (150g) 2 scoops (300g) 3 scoops (450g)
Grain or
Rice Type
Cooking
Program
Grain to Liquid
Ratio
Serving Size
(uncooked)
Automatic
Cook Time
(minutes)
Cooked
Yield
(rice
cups
)
Automatic
Cook Time
(minutes)
Cooked
Yield
(rice
cups
)
Automatic
Cook Time
(minutes)
Cooked
Yield
(rice
cups
)
White Rice White Rice 1:2
⁄ Rice cup
28 2 31 3⁄ 34 5⁄
Brown Rice Brown Rice 1:2⁄
⁄ Rice cup
53 2 56 4 60 5⁄
Quinoa Quinoa 1:2
⁄ Rice cup
38 2⁄ 40 4 39 6
Oats Oats 1:1⁄
⁄ Rice cup
50 2⁄ 51 3⁄ 51 4⁄
Farro Grains 1:3⁄
⁄ Rice cup
39 1 53 2
Do not cook more than
2 scoops to avoid
overfilling the cooking pot
Barley Grains 1:2
⁄ Rice cup
53 2⁄ 57 5
Do not cook more than
2 scoops to avoid
overfilling the cooking pot
Millet Grains 1:2
⁄ Rice cup
50 2⁄ 54 3⁄ 58 7⁄
Amaranth Grains Pilaf – 1:1⁄
Cereal – 1:2⁄
⁄ Rice cup
50 1⁄ 53 2⁄ 54 4⁄
Jasmine Rice White Rice 1:1⁄
⁄ Rice cup
50 2 52 4 55 5⁄
Texmati Grains 1:2⁄
⁄ Rice cup
54 2⁄ 58 3 62 6
Spelt Grains 1:3
⁄ Rice cup
54 1⁄ 62 3⁄ 73 5⁄
Te Grains 1:1⁄
⁄ Rice cup
47 2 50 4 51 6
Buckwheat Grains 1:2
⁄ Rice cup
50 2 53 4 56 6
Red Rice Brown Rice 1:1⁄
⁄ Rice cup
54 2⁄ 55 4⁄ 61 6⁄
Black Rice Brown Rice 1:1⁄
⁄ Rice cup
53 1⁄ 56 3⁄ 59 5⁄
Cooker Base
WHITE
RICE
OATS
BROWN
RICE
GRAIN
STOP
START
STEAM
DELAY
START
KEEP
WARM
QUINOA
Steaming Basket
Spatula/Rice Spoon
10-Cup Cooking Pot
1-Cup Rice/Grain Measuring Cup Power Cord
The included measuring scoop is equal to 150g (180ml) of uncooked rice,
which is 1 standard rice cup. A standard rice cup is not the same as a
standard measuring cup. If you choose to use another measuring cup,
you should maintain the same cooking ratios noted below.
15

Food
Steam Time
(Minutes)
Food Cut Size
Suggestions
Broccoli 8 Trimmed florets of 1 small bunch
Squash 12
25mm cubes
Courgette
7
Quartered lengthwise
and then 10-15mm thick
Carrots 12
5mm thick coins
Asparagus 6 Thick asparagus
Cauliflower 8 Trimmed florets of 1 small bunch
Green Beans 8 Trimmed
Bok Choy 4 Trimmed and leaves cut into quarters
Spinach 3 3 large handfuls
Mushrooms 8 Whole White Button
or Cremini Mushroom
Sweet
Potatos
12
25mm cubes
White
Potatoes
12
25mm cubes
Cabbage 11
⁄ large head, cut into 40mm wedges
Salmon 9
2x 230g pieces
White Fish 11
2x 230g pieces
Chicken 23 2 medium-sized split breasts
*Always use a cooking thermometer to ensure
the internal temperature has reached 75°C
Steam time guide.
When using the Steam Program, The EveryGrain
™
Cooker will
automatically preheat before it begins the timer countdown.
Preheating takes between 5-9 minutes.
16

Inner pot markings.
On the inside of the EveryGrain
™
Cooking Pot, there are markings
that serve as a useful cooking guide, indicating how much water to
put in the pot for the grain type and number of scoops you’re cooking.
Always be sure to add your rice or grains first, and then add water.
NUMBER INSIDE A CIRCLE
Indicates how many scoops of
grains (how much uncooked
food) you’re putting into the pot.
LINE CONNECTED TO A CIRCLE
Indicates how much water you
should put into the pot for that
amount of grain.
2021_05_18_Grain Maker Inner Pot Marking
5
3
2
4
5
3
2
4
Quinoa
/Oats
White
Rice
Brown
Rice
3
2
4
5
Scoops
Water
Level
Please add grains
before water
2021_05_18_Grain Maker Inner Pot Marking
5
3
2
4
5
3
2
4
Quinoa
/Oats
White
Rice
Brown
Rice
3
2
4
5
Scoops
Water
Level
Please add grains
before water
17

1 Place the Cooker Base
unit on a clean, dry, level
surface, like a countertop
or table.
2 Open the Cooker Lid by
pressing the round button
located on the front area of
the lid. The lid will open, and
stay in this open position
until manually closed.
Before first use.
Before using your nutribullet
®
EveryGrain
™
Cooker for the first
time, please take a moment to perform the steps below.
1. UNPACK
Open the box and remove the appliance with its various components,
placing all parts on a flat, level, and dry surface.
2. CLEAN
The Steaming Basket, Spatula, and Measuring Scoop are all dishwasher
safe, or you can rinse them with warm, soapy water to clean. Rinse the
Cooking Pot with warm soapy water, and clean the Cooker Base with
a clean, damp cloth.
WARNING: Never submerge the Cooker Base in water or any other liquid.
Assembly.
Review all warning and caution statements in the Important Safeguards
section (pages 2-3) and above before proceeding to Step 1.
Assembly & use.
Assembly 1
WHITE
RICE
OATS
BROWN
RICE
GRAIN
STOP
START
STEAM
DELAY
START
KEEP
WARM
QUINOA
Assembly 1
WHITE
RICE
OATS
BROWN
RICE
GRAIN
STOP
START
STEAM
DELAY
START
KEEP
WARM
QUINOA
18
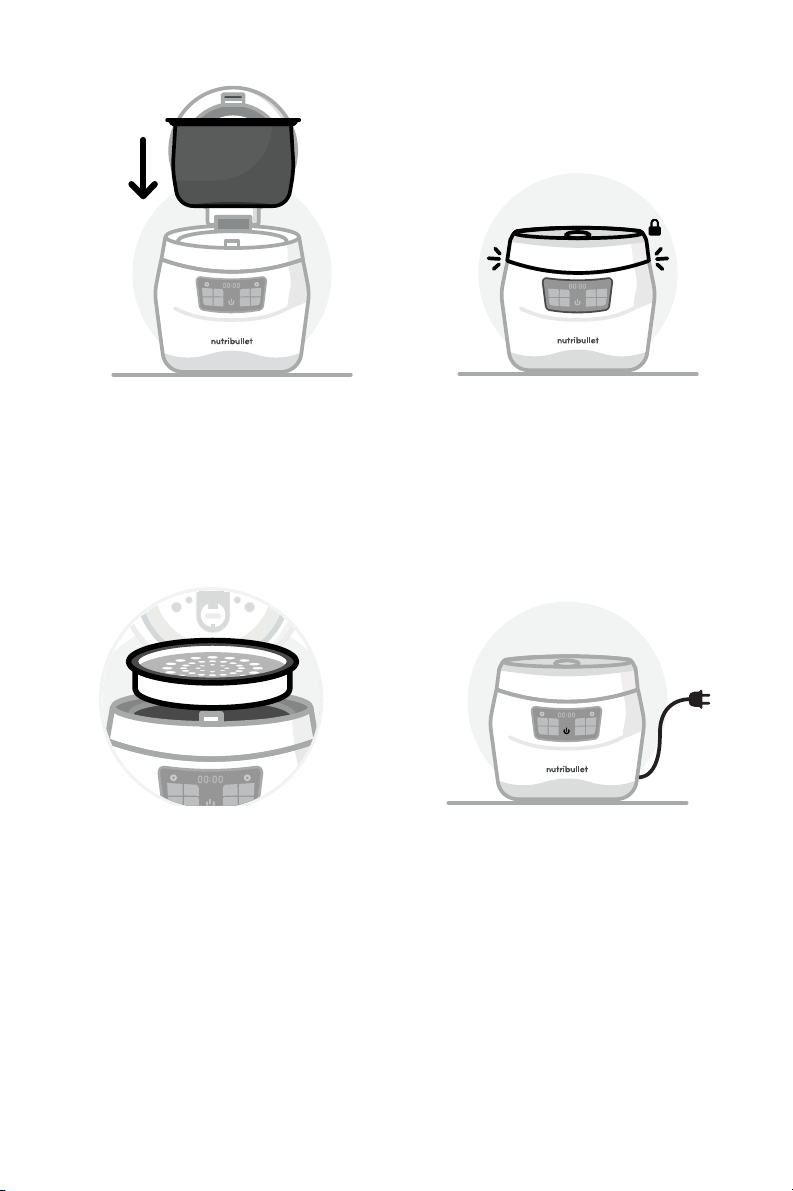
3 Insert the Cooking Pot into
the Cooker Base. Make sure
the Cooking Pot is seated
on top of the inner heating
plate, located inside of the
Cooker Base at the bottom.
4 Close the Cooker Lid, by
pushing it all the way down
until it clicks to indicate it’s
fully closed and locked.
5 Attach the Power Cord to
Cooker Base. Insert the
plug into an outlet. An
audible beep will be heard
when the cooker is plugged
in, and the Power Button
will light up, indicating it
needs to be pressed to turn
on the unit.
Assembly 3
WHITE
RICE
OATS
BROWN
RICE
GRAIN
STOP
START
STEAM
DELAY
START
KEEP
WARM
QUINOA
Assembly 4 alt
WHITE
RICE
OATS
BROWN
RICE
GRAIN
STOP
START
STEAM
DELAY
START
KEEP
WARM
QUINOA
Assembly 5
WHITE
RICE
OATS
BROWN
RICE
GRAIN
STOP
START
STEAM
DELAY
START
KEEP
WARM
QUINOA
WHITE
RICE
OATS
BROWN
RICE
GRAIN
STOP
START
STEAM
DELAY
START
KEEP
WARM
QUINOA
If you wish to steam food,
either with or without
ingredients in the pot, place
the Steaming Basket into
the Cooking Pot. The basket
should drop easily into the
top area of the pot without
eort. Make sure the basket
sits level inside the pot.
19
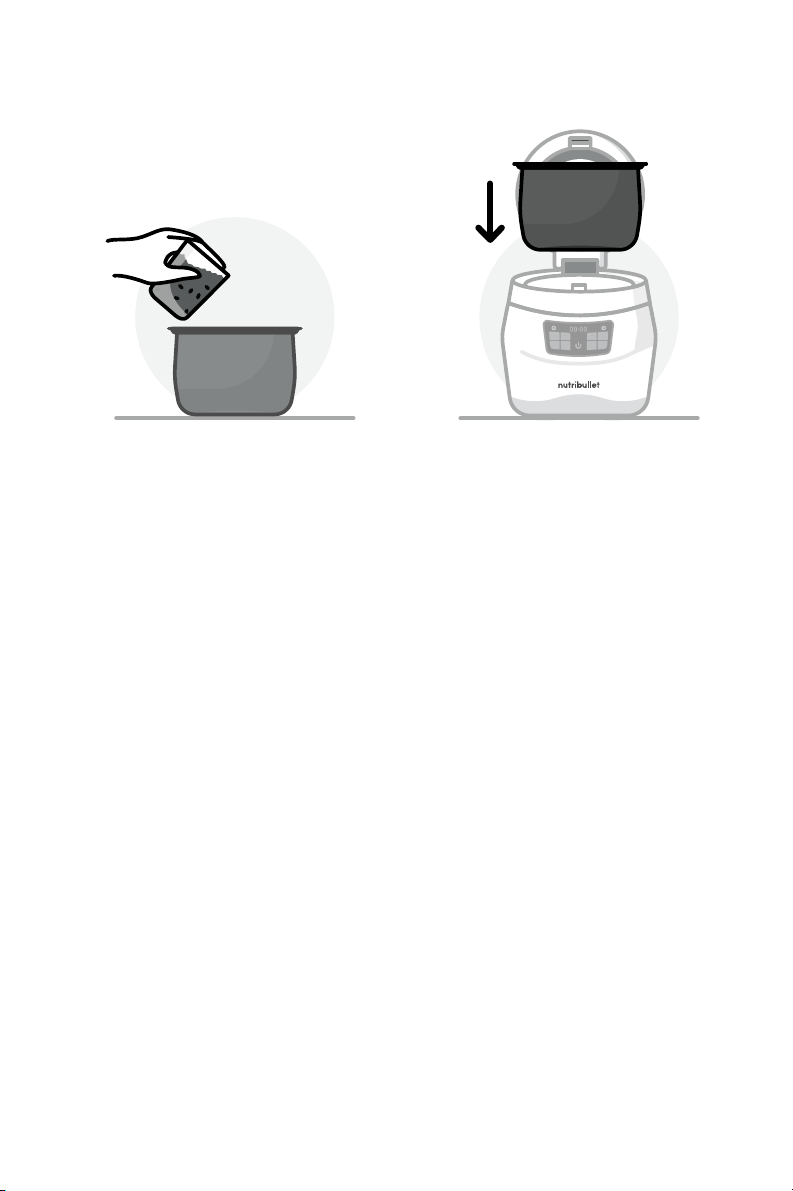
1 Place food into the Cooking
Pot and add water. Put up
to 5 scoops of rice or other
grains, or up to 4 scoops of
quinoa or oats into the
Cooking Pot and then add
water. Use the inner pot
markings as a guide for
how much water to add for
the amount of rice or grains
you’re cooking (see Inner
Pot Markings section on
page 17).
For example, if cooking 4 cups
of white rice, add water up
to the line connected to the
circled “4” in the column
titled “white rice.”
2 Open the Cooker Lid and
insert the Cooking Pot into
the Cooker Base. Push the
button on top of the Cooker
Lid to open it. Insert the
Cooking Pot into the Cooker
Base, making sure it’s
seated and level on top of
the inner heating plate.
NOTE: The heating plate is
located inside the Cooker
Base at the very bottom.
Usage instructions.
Usage instructions 1 alt
Usage instructions 2
WHITE
RICE
OATS
BROWN
RICE
GRAIN
STOP
START
STEAM
DELAY
START
KEEP
WARM
QUINOA
20

4 Close the Cooker Lid and
press the Power Button to
turn the unit on. When you
press the Power Button, the
cooker turns on, the Power
Button illuminates blue,
and your available cooking
programs will illuminate
white, indicating they are
now able to be selected.
5 Select program (cooking
program or Steam
program). See pages 10-13
for detailed information.
3 If desired, place food into
Steaming Basket and insert
basket into the Cooking Pot.
You can steam foods using
the Steaming Basket, with
or without grains cooking in
the pot. In other words, you
have 3 options: cook in the
pot only, steam in the basket
only, or simultaneously cook
and steam. If you are doing
both at once, foods in the
basket will steam while the
rice or other grains cook in
the pot below.
WHITE
RICE
OATS
BROWN
RICE
GRAIN
STOP
START
STEAM
DELAY
START
KEEP
WARM
QUINOA
Usage Instructions 3
WHITE
RICE
OATS
BROWN
RICE
GRAIN
STOP
START
STEAM
DELAY
START
KEEP
WARM
QUINOA
WHITE
RICE
OATS
BROWN
RICE
GRAIN
STOP
START
STEAM
DELAY
START
KEEP
WARM
QUINOA
21

6 If desired, press Delay
Start to delay the onset
of cooking/steaming. If
you press Delay Start,
a default time (2:00) is
displayed on the timer,
indicating 2 hours until
cooking or steaming starts.
To adjust the Delay Start
time, press the up/down
arrows. Each press adjusts
time by 15 minutes. Delay
time can go as low as 15
minutes (minimum delay
time) or as high as 12 hours
(maximum delay time).
Once the Delay Start timer
countdown reaches 0:00,
the cooking or steaming
program begins.
WHITE
RICE
OATS
BROWN
RICE
GRAIN
STOP
START
STEAM
DELAY
START
KEEP
WARM
QUINOA
7 Press the Start/Stop button
to begin the cooking
or steaming process.
Press again to stop. After
selecting a cooking program
or Steam program (and
selecting Delay Start, if
desired), press the Start/
Stop button to begin the
Delay Start timer (if used)
or the cooking/steaming
program. Press the Start/
Stop button again to stop
the current program.
WHITE
RICE
OATS
BROWN
RICE
GRAIN
STOP
START
STEAM
DELAY
START
KEEP
WARM
QUINOA
22

8 Monitor cooking/steaming
progress on the control
panel screen.
While the unit is cooking or
steaming, the control panel
screen shows lines moving in
a cascading pattern, which
indicates that your program
is active and the unit is
working to complete it.
If cooking: A countdown
timer will begin when the
cooking program has 10
minutes remaining.
CAUTION: Never touch the area
near the steam vent during cooking
or warming process.
WHITE
RICE
OATS
BROWN
RICE
GRAIN
STOP
START
STEAM
DELAY
START
KEEP
WARM
QUINOA
A beep will occur, and the
control panel screen will
show time counting down,
starting from 10 minutes.
If steaming: After setting
time and pressing the
Start/Stop button, the
cooker will automatically
preheat before it begins
the timer countdown.
Preheating takes between
5-9 minutes. Once
preheating has completed,
the timer will begin
counting down immediately.
NOTE: cooking times will vary
depending on the type of food
and quantity used. To review
how long cooking will take for
a particular grain and quantitiy,
see the included Measuring &
Time Guide included with your
EveryGrain
™
Cooker.
23
9 When cooking/steaming is
complete, the unit enters
Keep Warm program.
Once cooking/steaming
is done, the cooker will
automatically enter Keep
Warm program, one beep
will occur, and the timer
will start counting up (to
indicate time elapsed since
your program completed).
The cooker will remain in
Keep Warm program for
up to 3 hours.
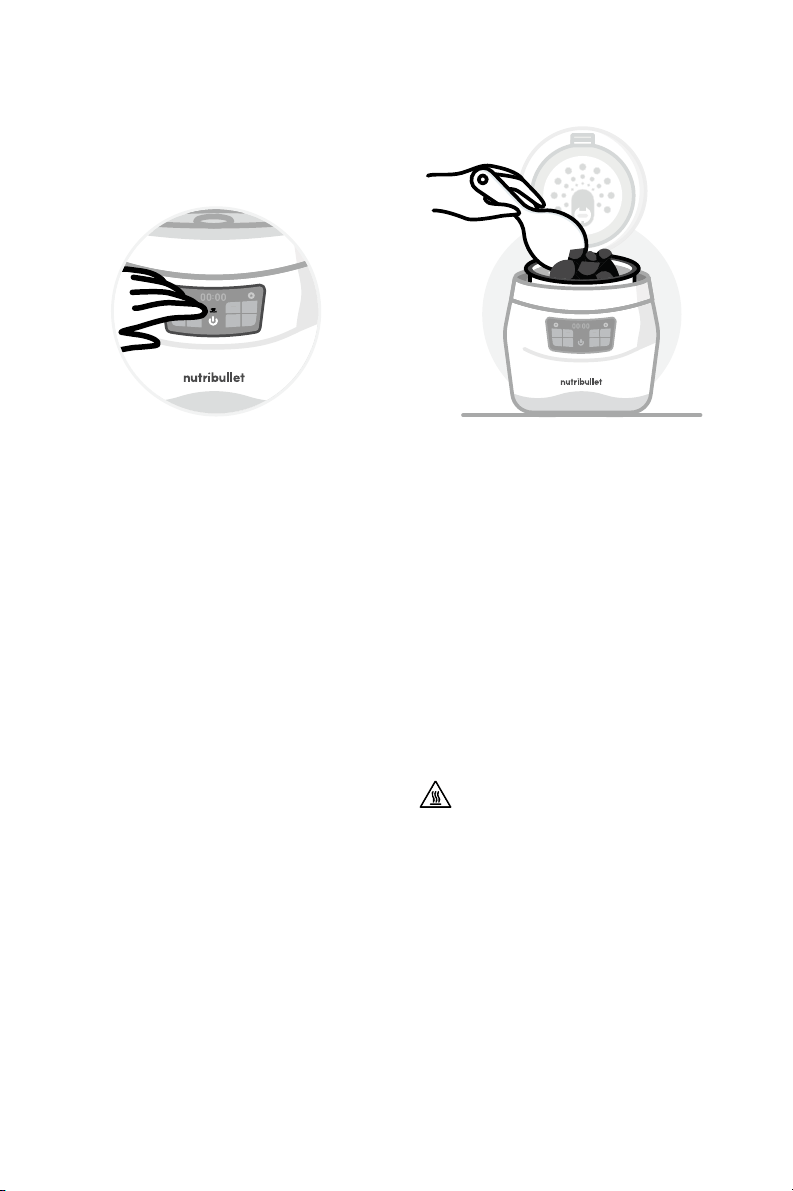
10 When you’re ready,
remove your food and
enjoy (or store for later).
Push the button on top of
the Cooker Lid to open it.
Carefully use the Spatula
to remove contents from
the Cooking Pot and/or
Steaming Basket (to eat,
or store for later). Dispose
of any leftover food in the
pot/basket, then clean
the pot/basket and other
accessories.
CAUTION: Food, Cooking Pot,
Steaming Basket (if used), and
inner heating plate will be HOT
after cooking! Handle carefully;
wear oven mitts to protect your
hands while handling hot cooker
items. Do not touch or clean the
inner heating plate until the plate
has completely cooled down.
NOTE: Clean Cooking Pot,
Steaming Basket, Spatula,
Measuring Scoop, and heating
plate regularly to avoid food
residue buildup.
WHITE
RICE
OATS
BROWN
RICE
GRAIN
STOP
START
STEAM
DELAY
START
KEEP
WARM
QUINOA
WHITE
RICE
OATS
BROWN
RICE
GRAIN
STOP
START
STEAM
DELAY
START
KEEP
WARM
QUINOA
Usage Instructions 10 alt
24

GENERAL TIPS
• After you press down on the
button to open the Cooker
Lid, the lid will automatically
rise up and stay in an
upright position on its own.
CAUTION: Do not overload the
pot with food and water. Keep its
contents below the highest line
shown on the inner pot markings.
• Clean the outside of the
Cooking Pot before putting
it into the Cooker Base.
• When closing the Cooker
Lid, make sure to press the
lid all the way down, until
you hear a click to indicate
that the lid is locked in place.
• The cooker automatically
enters Keep Warm program
for up to 3 hours after the
cooking cycle completes,
so grains are always warm
and ready to eat.
DON’T USE METAL UTENSILS
OR METAL SCOOP
To protect the non-stick coating
on the Cooking Pot and other
parts of the cooker, don’t use
a metal spoon or other metal
utensils when using this product.
Use the included Spatula, or
wood/plastic utensils.
AFTER COOKING IS DONE
To avoid rice sticking together,
stir within 30 minutes in Keep
Warm program.
Unplug appliance when not
in use for a prolonged period
of time.
Make sure the power is o, unit
is unplugged, and the cooker
has completely cooled down
before cleaning, moving, or
storing this product.
Tips & tricks.
25

Troubleshooting.
PROBLEM: Cooker does not
power on.
SOLUTION: Make sure the
Power Cord is plugged into
an electrical outlet.
An audible beep will be
heard when the appliance
is plugged in.
The Power Button will be
illuminated blue, indicating
it needs to be pressed in
order to turn on the unit.
PROBLEM: Cooker will not
operate (lid open).
The unit won’t operate if the
Cooker Lid is not fully closed
and locked.
SOLUTION: Make sure lid is
all the way down; listen for
a click to ensure lid is fully
closed and locked.
PROBLEM: Cooker will not
operate (no cooking program
or Steam program selected).
The unit won't operate if you
have not selected a cooking
program or Steam program.
SOLUTION: Decide on a
cooking program or Steam
program, then press its button
on the control panel.
PROBLEM: Food sticks inside
Cooking Pot, hard to clean.
SOLUTION: Soak inside of pot
with water for a while before
cleaning.
Water should loosen stuck food
residue over time. Hot water
is even more eective; and
hot soapy water should be the
most eective. If the residue
is stuck on hard, try applying
dishwashing liquid directly onto
the residue and let it sit for a
few minutes before soaking the
area in water.
PROBLEM: Rice is sticking
together.
SOLUTION: Stir rice within 30
minutes in Keep Warm program.
PROBLEM: Liquid is leaking from
the Cooker during cooking.
SOLUTION: You may have
added too much liquid for the
grain you are trying to cook.
Please be sure to follow the
ratios listed in the Measuring
Guide on pages 14 & 15.
26

Cleaning the EveryGrain
™
Cooker is quick and easy. The
Steaming Basket, Spatula,
and Measuring Scoop are
dishwasher safe or can be
cleaned by rinsing in warm,
soapy water. The Cooking Pot
should always be cleaned by
hand with warm, soapy water
in order to preserve its
nonstick coating.
STEP 1:
After cooking is completed,
remove contents from the
Cooking Pot or Steaming
Basket (to store or eat).
STEP 2:
Dispose of any leftover food in
the Cooking Pot or Steaming
Basket, and rinse the pieces in
warm, soapy water (or place
the Steaming Basket in the
dishwasher).
STEP 3:
Once the unit has cooled down
completely, clean the inner
heating plate with a clean,
damp cloth.
CAUTION: Never clean the heating
plate immediately after cooking. Unplug
the cooker and allow the heating plate
to cool completely before cleaning.
Care & maintenance.
Clean the Cooking Pot, the
Steaming Basket (if used), and
the heating plate after each
use. Regular cleaning helps
keep food residue from building
up inside the pot or basket.
If food sticks inside the Cooking
Pot, soak pot with water for a
while before cleaning.
Clean the Sealing Panel,
Steam Vent, and Condensation
Collector thoroughly every
time you use the Cooker. Use
a damp cloth or sponge and
warm, soapy water to wipe the
Sealing Panel and Condensation
Collector clean. Remove the
Steam Vent plug and rinse with
warm water. Clean inside of the
Steam Vent with a damp cloth.
WARNING: Do not clean the Cooking
Pot, Sealing Panel, or other parts of the
cooker with steel wool pads/balls.
The Cooker Base should only
be cleaned by wiping it with
a damp cloth.
CAUTION: Never submerge the Cooker
Base in water or any other liquid.
27

Replacement parts.
To order additional parts and accessories, please visit our
website at bulletbrands.com.au / bulletbrands.co.nz or feel
free to contact Customer Service: 1300 285 538 (AUS) /
0800 232 633 (NZ) .
How to store.
Before storing or moving the
unit, make sure power is o, unit
has cooled down, and the unit
is unplugged.
CAUTION: make sure the appliance
is o and has cooled to room
temperature before storing.
Store unit upright in a cool, dry
location. Keep accessories and
power cord with cooker.
28

29

If your product becomes
defective due to faulty
material or workmanship
within a period of 1
year from the date of
purchase, we warrant
to do the following:
• For New Zealand Consumers:
We will replace the product
with a new product, free of
charge, or repair the product
at our cost, at our discretion.
• For Australian Consumers:
Our goods come with
guarantees that cannot
be excluded under the
Australian Consumer
Law. You are entitled to
a replacement or refund
for a major failure and for
compensation for any other
reasonably foreseeable
loss or damage. You are
also entitled to have the
goods repaired or replaced
if the goods fail to be of
acceptable quality and the
failure does not amount to
a major failure.
YOUR WARRANTY
IS SUBJECT TO THE
FOLLOWING CONDITIONS:
• DO NOT operate the
appliance with a damaged
plug or cord, or if the unit has
been dropped, damaged or
dropped in water. To avoid
the risk of electric shock, do
not disassemble or attempt
to repair the appliance
on your own. If the supply
cord is damaged, it must
be replaced by a qualified
electrician in order to avoid
a hazard. Incorrect re-
assembly or repair can cause
a risk of electric shock or
injury to persons when the
appliance is used.
• The item has not been
misused, abused, neglected,
altered, modified or repaired
by anyone.
• The item has been subjected
to fair wear and tear.
• The item has not been used
for trade, professional or
hire purposes.
one (1) year limited
replacement warranty
statement.
30

• The item has not sustained
damage through foreign
objects, substances or accident.
YOUR WARRANTY
DOES NOT COVER:
• Components that are
subject to natural wear and
tear caused by normal use
in accordance with
operating instructions.
• Unauthorised/improper
maintenance/handling or
overload is excluded from
this warranty.
• For guarantee claims, you
will need to submit a proof
of purchase in the form of
a valid receipt that displays
date and place of purchase.
This warranty does not replace
but is in addition to your
statutory rights.
This warranty does not apply
to accessories supplied with
the item.
This warranty applies only to
the original purchaser and
may not be transferred.
Replacement items will
be covered by the limited
warranty for the balance of the
warranty period from the date
of the original purchase.
PLEASE NOTE:
Only the defective product
or parts returned to place of
purchase will be replaced
under this warranty.
NEW ZEALAND
PO Box 100-707
NSMC
Auckland 0745
0800 232 633
www.bulletbrands.co.nz
AUSTRALIA
PO Box 574
South Morang
Victoria 3752
1300 285538
www.bulletbrands.com.au
nutribullet is a registered trademark of CapBran Holdings, LLC.
Copyright © 2021 CapBran Holdings, LLC. All rights reserved.
Los Angeles, CA 90025, USA. Made in China.
31

bulletbrands.com.au / bulletbrands.co.nz
nutribullet
®
and the nutribullet logo are trademarks of CapBran Holdings, LLC
registered in the U.S.A. and worldwide.
Illustrations may dier from the actual product. We are constantly striving
to improve our products, therefore the specifications contained herein
are subject to change without notice.
220-240VAC 50-60Hz 600W
210806_NBG07100