Loading page 1...
Loading page 2...
Loading page 3...
Loading page 4...
Loading page 5...
Loading page 6...
Loading page 7...
Loading page 8...
Loading page 9...

First-Time Use
Edit the name of input sources
1.
Press button on your remote control.
2.
Press button to rename input.
Note:
• Maximum name length is 36 characters.
Recommended Topics
Install an App
Install apps from App Store for your entertainment preferences. For more information, please refer to Benefits
of Smart TV > Using Apps > Install an App in this manual.
Picture
Adjust picture mode and other advanced picture settings. For more information, please refer to Settings
Overview > Picture in this manual.
Screen
Change the picture size and use the overscan function. For more information, please refer to Settings
Overview > Screen in this manual.
Sound
Adjust sound mode and other advanced sound settings. For more information, please refer to Settings
Overview > Sound in this manual.
Audio Output
Select speakers and adjust the audio output settings. For more information, please refer to Settings Overview
> Audio Output in this manual.
Keep the TV updated
Set your TV to receive the latest firmware. For more information, please refer to Settings Overview > Support
> System Update in this manual.
6

Enjoy Live TV
Channel Scan
You can scan for channels automatically or manually.
Note:
• Antenna/cable function may not be applicable in some models/countries/regions.
Auto Channel Scan
Automatically scan for channels to view programs from your TV source.
> TV
If no TV channels were saved before, you will be prompted to do a channel search.
In Live TV, / > Channels > Auto Channel Scan
Before you select Auto Channel Scan, you can press / > Channels > Tuner Mode to select Antenna
or Cable.
Manual Scan
In Live TV, / > Channels > Manual Scan
Type in a channel to add it manually to your TV.
In Live TV, / > Channels > DTV Manual Scan
In Live TV, / > Channels > ATV Manual Scan
Live Menu
You can obtain quick access to the channel list, favorite channel list or use relevant features with ease when
watching TV programs.
Display Channel List
In Live TV, press button on the remote control to display the Channel List menu.
Learn about channel list sub-menu.
In Live TV, >
7
Loading page 12...
Enjoy Live TV
Note:
• These steps should be operated under TV inputs.
Related information
Edit Favorite Channel List on page 10
Channel Edit
Manually edit the channel list or favorite channel list to your preference.
Edit Channel List
Before you can edit the channel list, Channel Scan must be completed first.
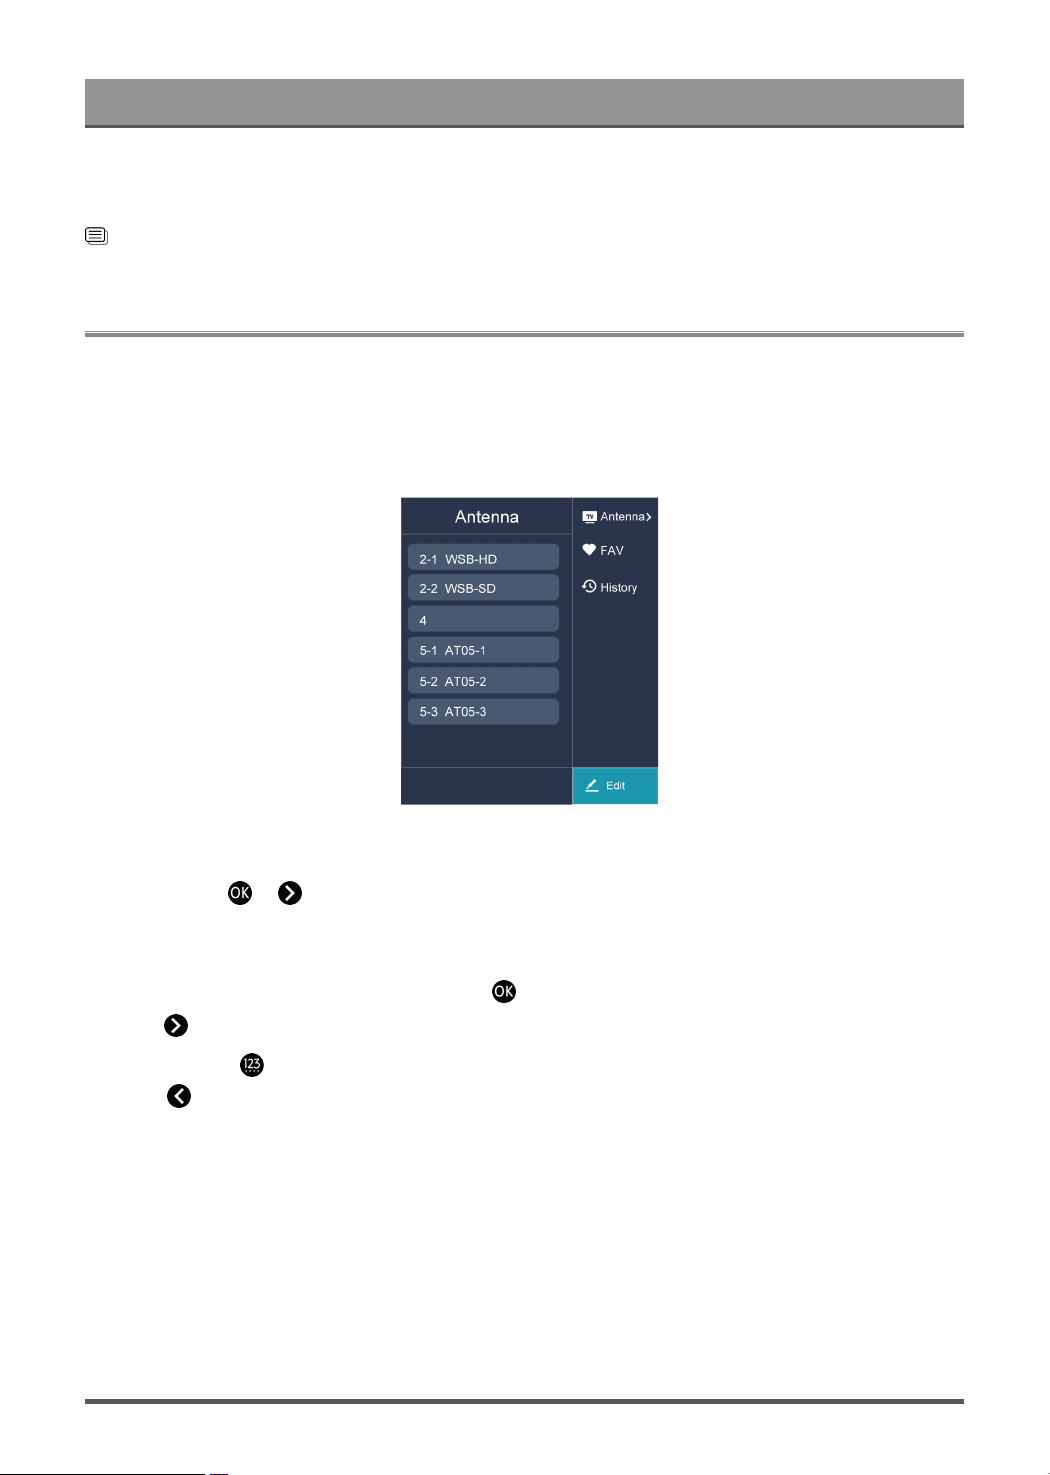
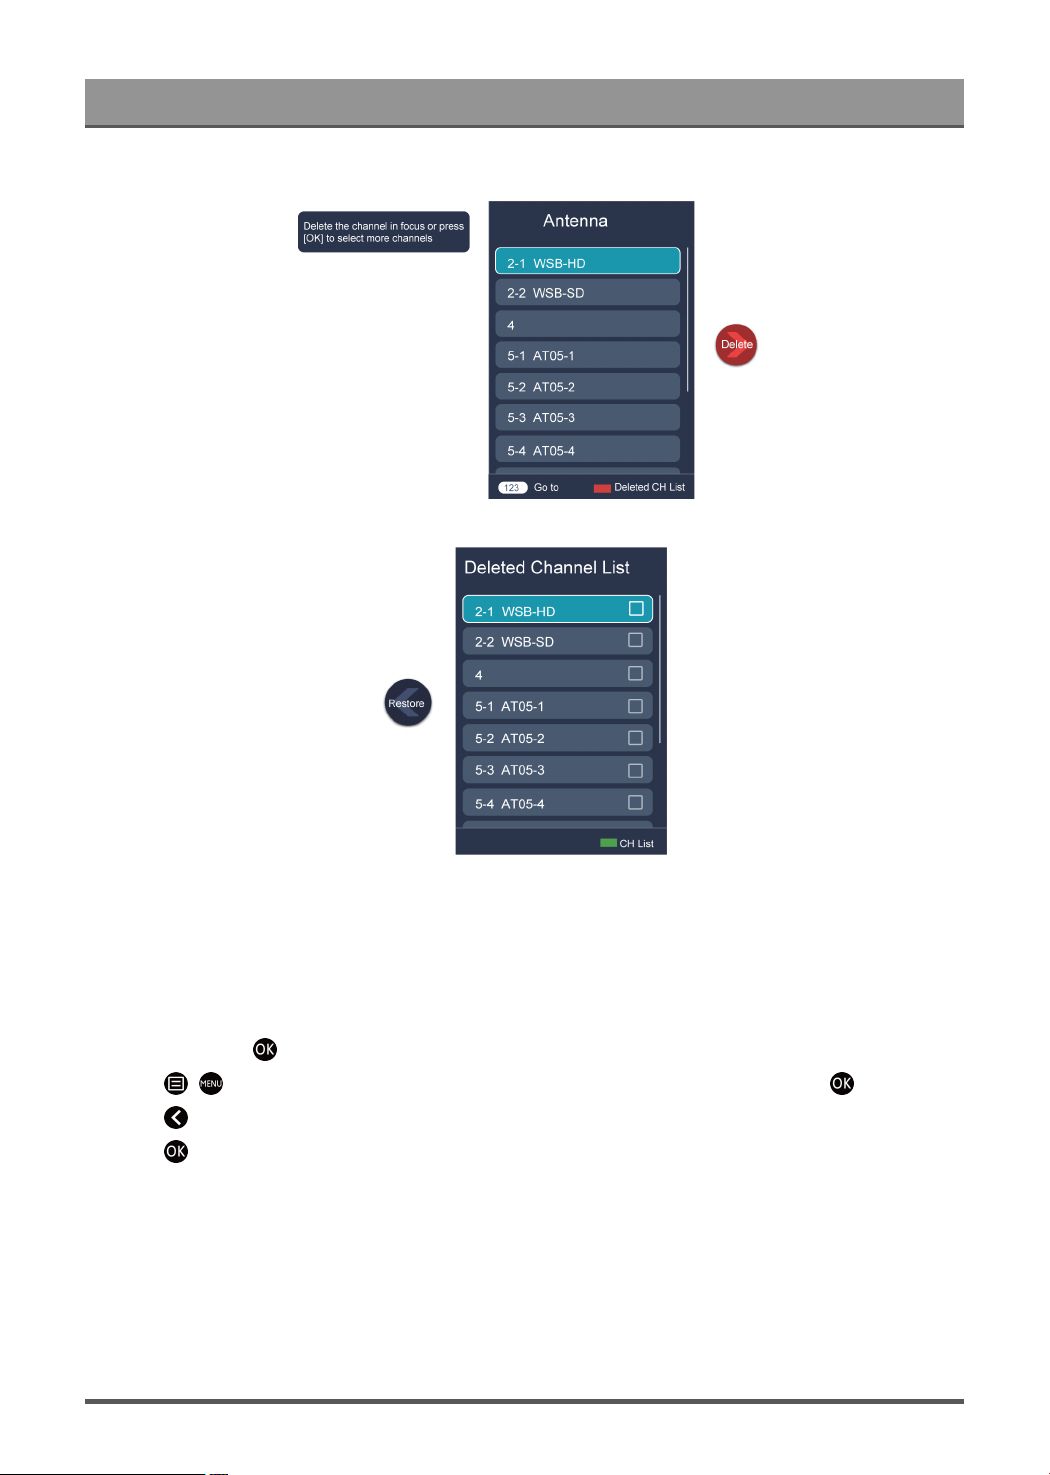
Manage the Channels
In Live TV, press > to select a Live TV channel category such as Antenna or Cable, then use D-pad
to select Edit.
• Delete:
1.
Select the channel you want to delete, or press to select more channels.
2.
Press button to delete.
•
Restore: Press button to display the colour menu and select RED to enter the list of deleted channels.
Press button to restore the deleted channel.
9
Enjoy Live TV
Edit Favorite Channel List
Before you can edit the favorite list, Channel Scan must be completed first.
Add a channel to a favorite list
You can add channels from various reception types to the favorite list.
1.
In Live TV, press button to display the channel list.
2.
Press / button, select the channel(s) you want to add to the favorite list by pressing button.
3.
Press button to select Add to Favorite.
4.
Press button to confirm.
5. Then a heart-shape icon will appear next to the added channel.
10
Loading page 15...
Loading page 16...
Loading page 17...

Enjoy Live TV
Interactive Service
You can set Interactive Service On or Off
14
Loading page 19...

Benefits of Smart TV
•
Press / button on your remote control.
Note:
• To start Google Assistant, you need to pair the remote first.
• The Google Assistant function may not be applicable in some models/countries/regions.
• The setup steps above may vary depending on actual products.
Hands-free Voice Control
Google Assistant can answer your questions or help you change TV configuration.
Before using this function, connect the TV to the Internet and sign in your Google account by pressing and
selecting Settings > Accounts & Sign In.
Note:
• Hands-free Voice Control may not be applicable in some models/countries/regions.
How to set up Hands-free Voice Control
1.
Switch the control button on the bottom of the TV to to turn on the microphone.
2.
Pair the remote first, press / button to select "Yes, I'm in".
3. Start a conversation by saying "Hey Google", and the dialog bar appears at the top of the TV screen. At the
same time, indicator lights illuminate.
4. Continue speaking, such as "What's the weather" or "volume up".
Screenless mode
> Settings > System > Advanced System > Screenless Mode
Talk to Google Assistant when the screen is off.
In Screenless Mode, Google Assistant is always available to help even when the screen is not on. Just say
"Hey Google".
This feature will affect standby power consumption. To turn it off, press button, select Settings > System
> Advanced System > Screenless Mode.
Note:
• Google Assistant and some features are available on limited country/region/language.
• Screenless mode is only for models with far-field Google Assistant.
Alexa Setup
Set up to control your TV with any Alexa-enabled devices. Alexa can help you change the TV configuration.
Using just your voice, you can change inputs, volume, channels, and more. Just ask Alexa.
What is required to control your TV with Amazon Alexa?
• Android TV models that support the Alexa skill.
• Amazon Echo device or Alexa App.
• Amazon account for Alexa App or Echo device, if you don't have the account, please create one before the
setup process.
• My Brilliant Life account to link your TV, you can create it before the setup process or in the period.
16
Loading page 21...
Benefits of Smart TV
Content Sharing
Content Sharing allows you to view media content, like videos, music or photos saved in your Android/iOS/PC
device on your TV screen.
Share Media Content from your Device
1. Connect your TV and Android/iOS/PC device to the same network.
2.
Turn on Content Sharing at > Settings > System > Advanced System > Content Sharing.
3. Turn on the content sharing function in your Android/iOS/PC device.
4. Find the TV name in the search list of your device and select it. Wait for the connection progress to
complete.
5. On your Android/iOS/PC device, choose the media content you want to share on your TV.
Related information
Connect to a Wired (Ethernet) Network on page 3
Connect to a Wireless Network on page 4
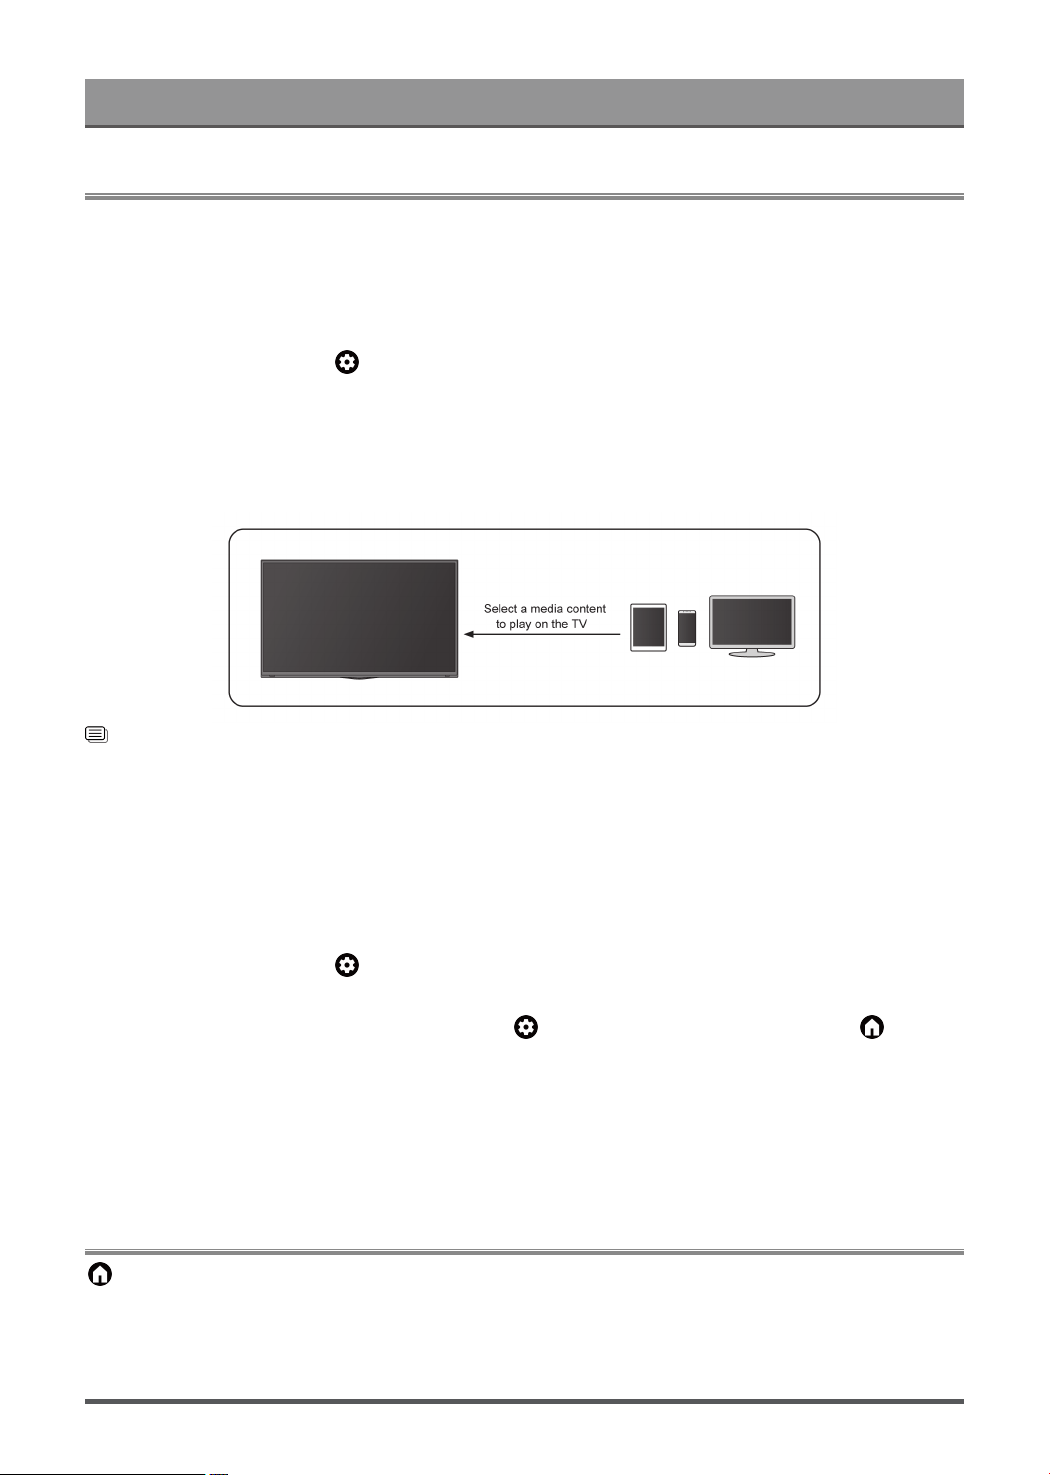
Play Media Content from your Device on the TV
You can connect media content saved in your Android/iOS/PC device to your local network and play the
content on your TV.
1. Connect your TV and Android/iOS/PC device to the same network.
2.
Turn on Content Sharing at > Settings > System > Advanced System > Content Sharing.
3. Make sure your media content in your Android/iOS/PC device are visible through the local network.
4.
On your TV, select a device with media content at > Settings > Apps > MediaCenter, or > Your
apps > MediaCenter. The media content list in your Android/iOS/PC device appears.
5. Select a media content item from the list to play.
Note:
• Content may not be played depending on the file format.
• Content may not be played smoothly, or the function may not work properly due to the network condition.
Using Apps
> Apps
From the Apps screen, there are many recommended apps for you, you can find your favorites and use them
very easily.
You can find popular apps by App categories, other devices, etc.
18
Loading page 23...

Benefits of Smart TV
Clear data
> Settings > Apps, select the app, then select Clear data.
All this app's data will be deleted permanently. This includes all files, settings, accounts, databases, etc.
Clear cache
Clear cache of applications and system.
Clear defaults
Clear defaults for apps.
Permissions
You can turn on or off the Location, and if you turn on Remove permissions if app isn't used, you can
protect your data, permissions for this app will be removed if the app is unused for a few months.
Enhanced Viewing
Press button on your remote control to select Settings > System > Advanced System > Enhanced
Viewing
You can turn on Enhanced Viewing features to enhance viewing experience.
This function may not be applicable in some models/countries/regions.
Automatic Content Recognition
Provide picture quality and audio quality adjustment for the current content.
This function may not be applicable in some models/countries/regions.
To use this function, you should accept End User License Agreement and smart feature privacy policy/terms
and conditions.
You will see the other Enhanced Viewing settings change from a greyed out state to highlighted. When this
occurs, Picture Mode Auto Adaptation and Sound Mode Auto Adaptation features will be enabled.
Picture Mode Auto Adaptation
Automatically switch to the best picture mode for the current content.
This function may not be applicable in some models/countries/regions.
Sound Mode Auto Adaptation
Automatically switch to the best sound mode for the current content.
This function may not be applicable in some models/countries/regions.
20

Connecting to External Devices
Remote & Accessories
Connect remote controls or other accessories, such as keyboard, mouse and gamepad, to interact with your
Smart TV easily.
Connect Remote Control
Pair the Bluetooth remote control with the TV.
1. To pair the Bluetooth remote control to the TV after you power the TV on for the first time, there will be
instructions on how to pair the remote control.
2.
If your remote control fails to pair with TV, keep the remote control within 10 feet (304.8 cm) from the TV,
hold and at the same time at least 3 seconds to start pairing until you see the light pulsing on the
remote control.
Note:
•
If your remote control fails to pair with TV, check the Bluetooth is set On by pressing button to select
Settings > Remotes & Accessories > Bluetooth to On.
• This function may not be applicable in some models/countries/regions.
• If an error occurred while trying to pair the remote control, it could have been caused by interference. Try
to remove what is causing the interference and try pairing again.
• If an error occurred with the remote control while using sufficiently charged batteries, you can take out the
batteries for 1~2 seconds then insert them back again. Now the remote control will work normally.
• The remote control cannot be paired to the TV while the TV is in standby mode.
Use HDMI&CEC
Use the TV's remote to control external devices that are connected to the TV by an HDMI cable. The external
devices need to support HDMI&CEC function.
Connecting an external device through HDMI&CEC function
Press button to select Settings > Channels & Inputs > Inputs > HDMI control.
1. Set HDMI control to On.
2. Connect an HDMI&CEC compliant device to the TV.
3. Turn on the connected external device. The device is automatically connected to the TV. After connection
is finished, you can access the menu of the connected device on your TV screen using your TV remote
control and control the device.
Enabling device auto power off
Press button to select Settings > Channels & Inputs > Inputs > Device auto power off.
Set to On to turn off CEC compatible external devices when the TV is turned off.
Enabling TV auto power on
Press button to select Settings > Channels & Inputs > Inputs > TV auto power on.
Set to On to turn on the TV when CEC compatible external devices is turned on.
21

Connecting to External Devices
HDMI format function
In HDMI source, press / button to select HDMI Format.
Please select Enhanced format if your HDMI device supports 4K HDR. If it does not support 4K HDR, please
select Standard format.
Note:
• HDMI cables must be used to connect HDMI & CEC compatible devices to your TV.
• The HDMI & CEC feature of the connected device must be turned on.
• If you connect an HDMI device that is not HDMI & CEC compatible, all the HDMI & CEC control features
do not work.
• Depending on the connected HDMI device, the HDMI & CEC control feature may not work.
• The HDMI & CEC feature supports One Touch Play, Routing Control, System Standby, Device OSD Name
Transfer, Remote Control Pass Through, Give Device Power Status, System Audio Control.
Related information
HDMI & CEC Issues on page 59
Control the TV with a Keyboard, Mouse or Gamepad
Connect a keyboard, mouse or gamepad to control your TV easily.
Connect a USB keyboard, mouse or gamepad
Plug the keyboard, mouse or gamepad cable into the USB port of your TV.
Connect a Bluetooth keyboard, mouse or gamepad
Find the Bluetooth device name in Settings > Remotes & Accessories and select it.
Note:
• Keyboard, mouse, or gamepad connected via USB or Bluetooth technology may not be usable with some
Apps.
• Bluetooth function may not be supported depending on the models/countries/regions.
• For more information about how to connect a Bluetooth device, refer to the Bluetooth device's user
manual.
Related information
Connecting a Bluetooth Device on page 22
Connecting Bluetooth Devices
You can connect to devices using Bluetooth technology.
Turn on Bluetooth Feature on your TV
Press button to select Settings > Remotes & Accessories > Bluetooth Visibility to On.
Connecting a Bluetooth Device
To pair a Bluetooth device, such as Bluetooth headphones, speakers, keyboards, mouse or even mobile
devices:
22
Loading page 27...
Connecting to External Devices
• Some mobile devices may not support casting feature.
Related information
Connect to a Wireless Network on page 4
Using AirPlay and HomeKit
Note:
• This function may not be applicable in some models/countries/regions.
• Use of the Works with Apple AirPlay badge means that an accessory has been designed to work
specifically with the technology identified in the badge and has been certified by the developer to meet
Apple performance standards.
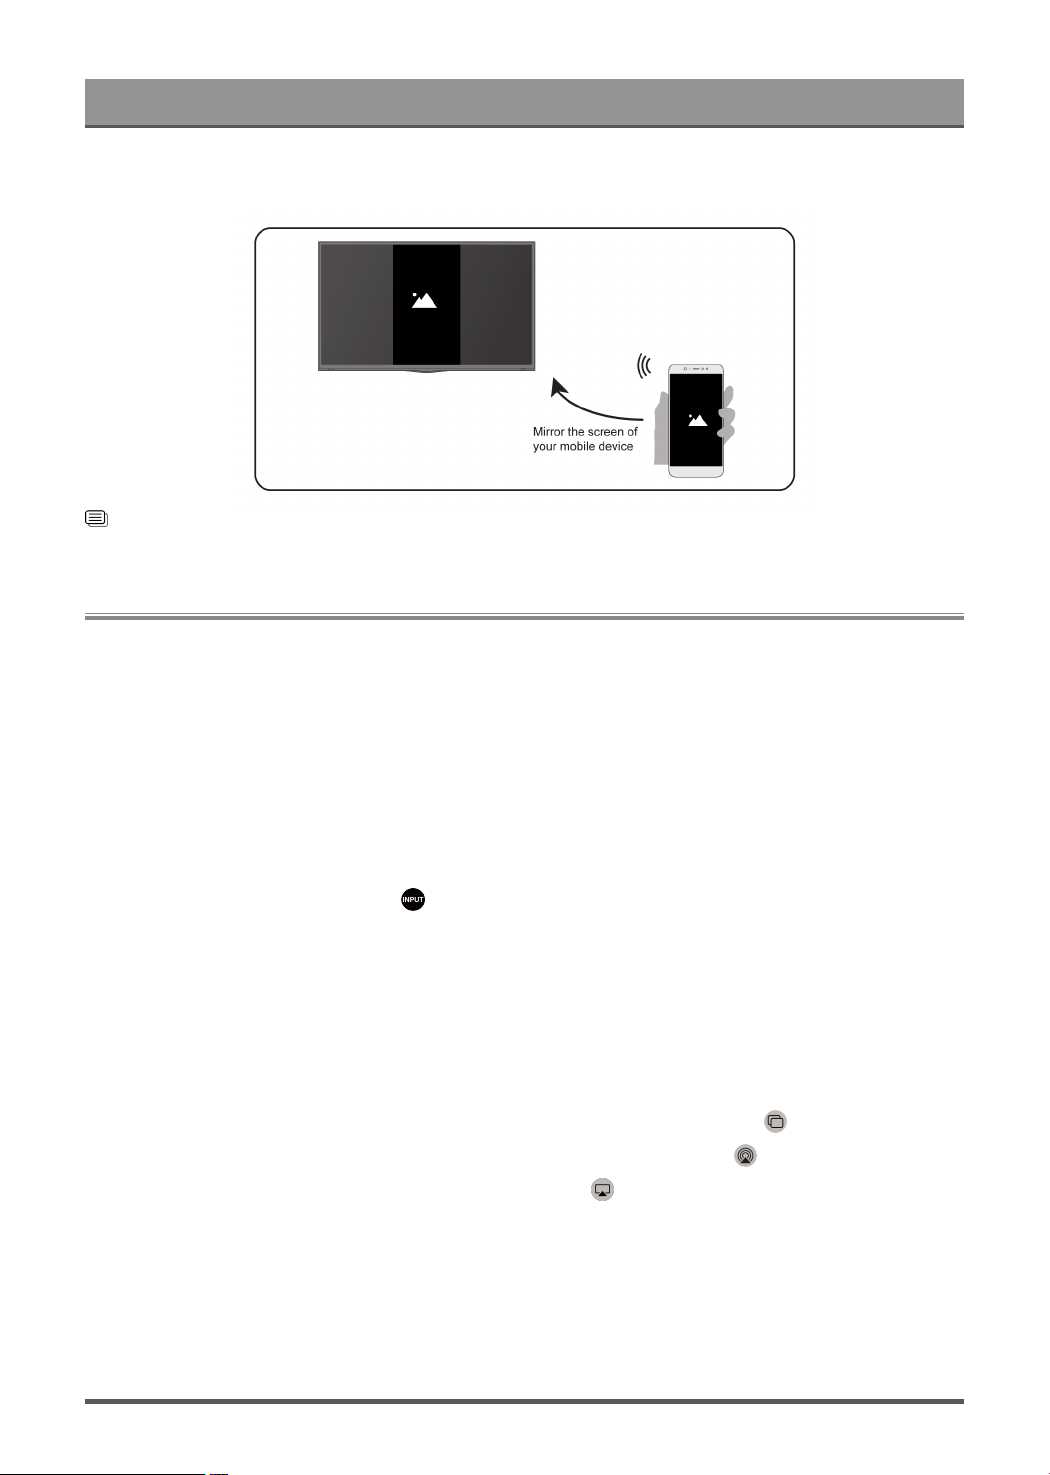
Using Airplay
Use AirPlay to wirelessly share audio and video content from your iPhone, iPad, or Mac to your TV. Stream
music and videos, share your photos, or mirror exactly whatʼs on your deviceʼs screen.
AirPlay is a source in Inputs. Press the button on your remote control to show the input list, then select
AirPlay to enter AirPlay. Then you can select AirPlay and HomeKit Settings. You can also find AirPlay and
HomeKit settings in system settings on your TV.
How to use AirPlay:
1. Make sure your Apple device is connected to the same network as your TV.
2.
Locate the AirPlay icon on supported media apps, or the Screen Mirroring icon in Control Center on your
Apple device. Depending on the content, these steps may vary:
•
To mirror your deviceʼs screen, open Control Center and tap Screen Mirroring .
•
To stream audio from supported music or podcast apps, tap AirPlay audio .
•
To stream video from supported apps, tap AirPlay video .
3. Select your TV from the list to begin using AirPlay.
Note:
• An AirPlay-enabled TV.
• The TV and Apple devices are connected to the same network.
• The icon is only for reference. In some apps, you may have to tap another icon first.
• If an AirPlay passcode appears on your TV screen, enter the passcode on your Apple device to continue.
24
Connecting to External Devices
Using HomeKit
Use HomeKit to easily and securely control your TV using your Apple devices.
1. To set up HomeKit, open AirPlay and HomeKit settings on the TV. Locate the HomeKit section and select
'Set Up'.
2. The HomeKit setup screen will display a pairing QR code on the TV. Use your iPhone or iPad to scan the
QR code, then follow the on-screen directions to complete HomeKit setup.
Note:
• Available operations vary depending on the version of the app and software.
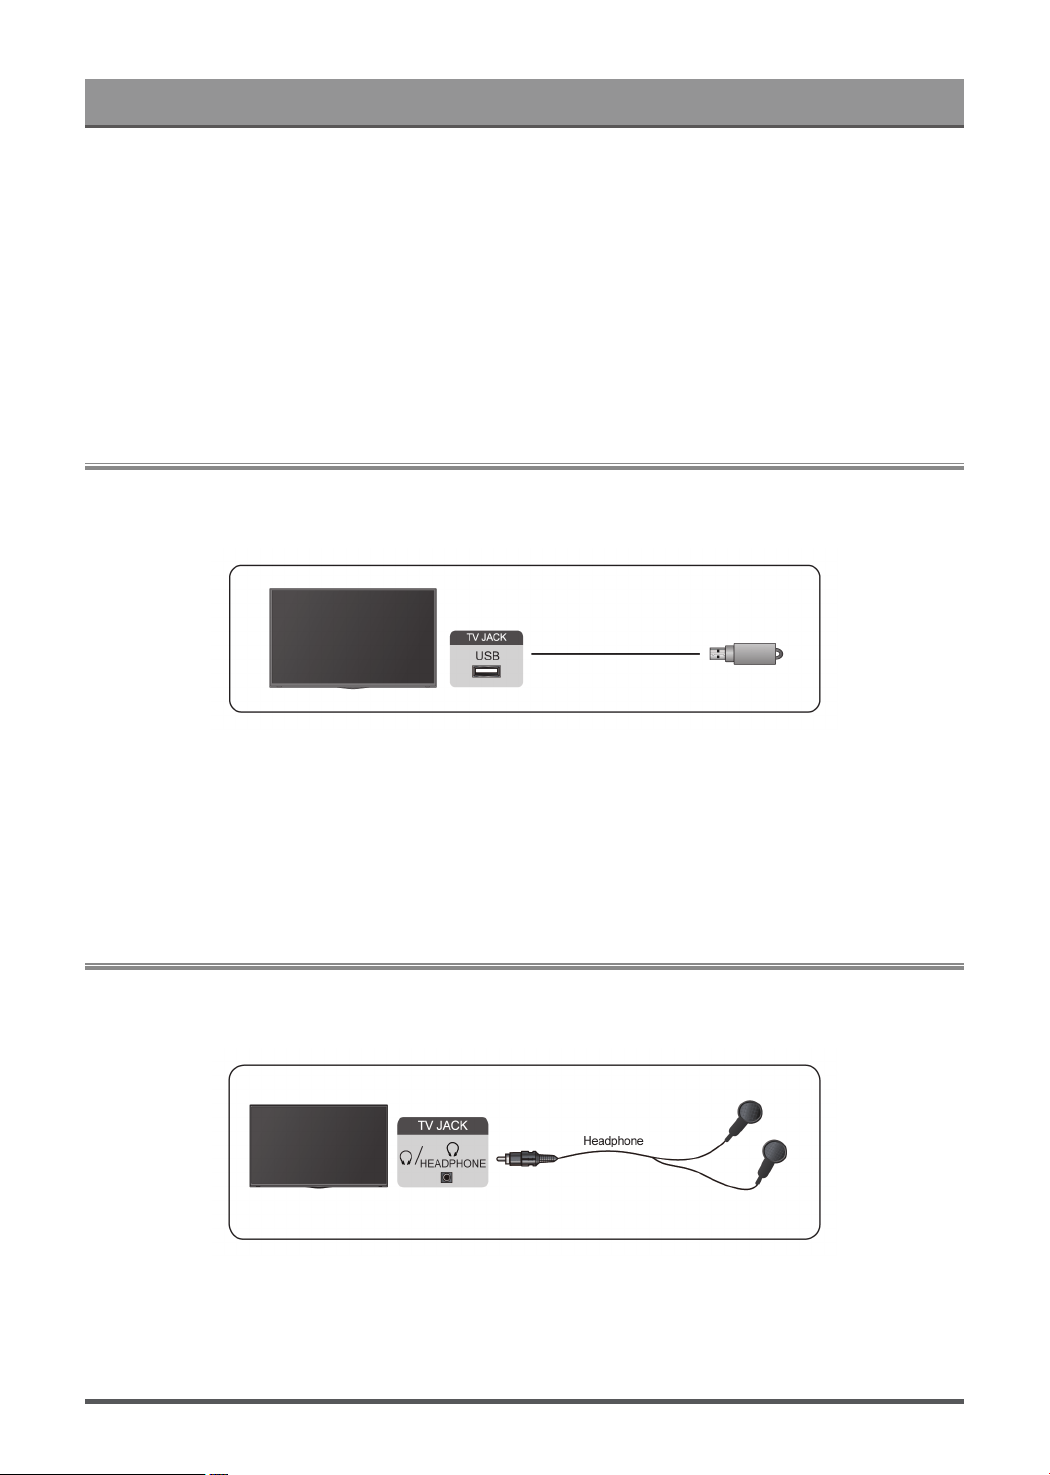
Connecting USB Devices
Connect the USB devices such as hard drives, USB sticks and digital cameras for browsing photos, listening
to music.
• Support the USB disk 4G, 8G, 16G, 32G, 64G, 128G and other common market size, and 8T hard drive is
currently supported.
• Support format: NTFS, FAT32.
• Certain digital cameras may not be compatible with the TV.
Select the content you want to play or view. For more information, please refer to Entertainment > Media in
this manual.
Connecting Headphones
You can connect a pair of headphones (not provided) to the HEADPHONE port on your TV. While the
headphone is connected, the sound from the built-in speakers will be disabled.
Note:
• Headphone port may not be available in some models.
• Headphones with microphones are not supported.
25
Loading page 30...
Loading page 31...
Loading page 32...
Loading page 33...
Loading page 34...
Loading page 35...
Loading page 36...
Loading page 37...
Loading page 38...
Loading page 39...
Loading page 40...
Loading page 41...
Loading page 42...
Loading page 43...
Loading page 44...
Loading page 45...
Loading page 46...
Loading page 47...
Loading page 48...
Loading page 49...
Loading page 50...
Loading page 51...
Loading page 52...
Loading page 53...
Loading page 54...
Loading page 55...
Loading page 56...
Loading page 57...
Loading page 58...
Loading page 59...
Loading page 60...
Loading page 61...
Loading page 62...
Loading page 63...
Loading page 64...