
Loading ...
Loading ...
Loading ...
ninjakitchen.com
ninjakitchen.com
NOTE: If the install light is blinking and the power light is solid, make sure the pint is properly
installed, and the lid is fully secured. This can be verified by ensuring that the arrow on the
processing lid is aligned with one of the arrows on the pint. If both the power light and install light
are flashing, make sure the paddle is installed in the processing lid.
6 Position the processing lid on top of the CREAMi® Breeze™ Pint. Twist the lid
clockwise to lock onto pint. This can be verified by ensuring that the arrow
on the processing lid is aligned with one of the arrows on the pint.
7 Make sure the unit is plugged in. Insert the CREAMi Breeze Pint into the
motor base. Rotate clockwise to lock. You will hear a click when the pint
is fully installed.
4 When the base is prepped or frozen, remove the pint storage lid
and check that the ingredients have not frozen at an angle.
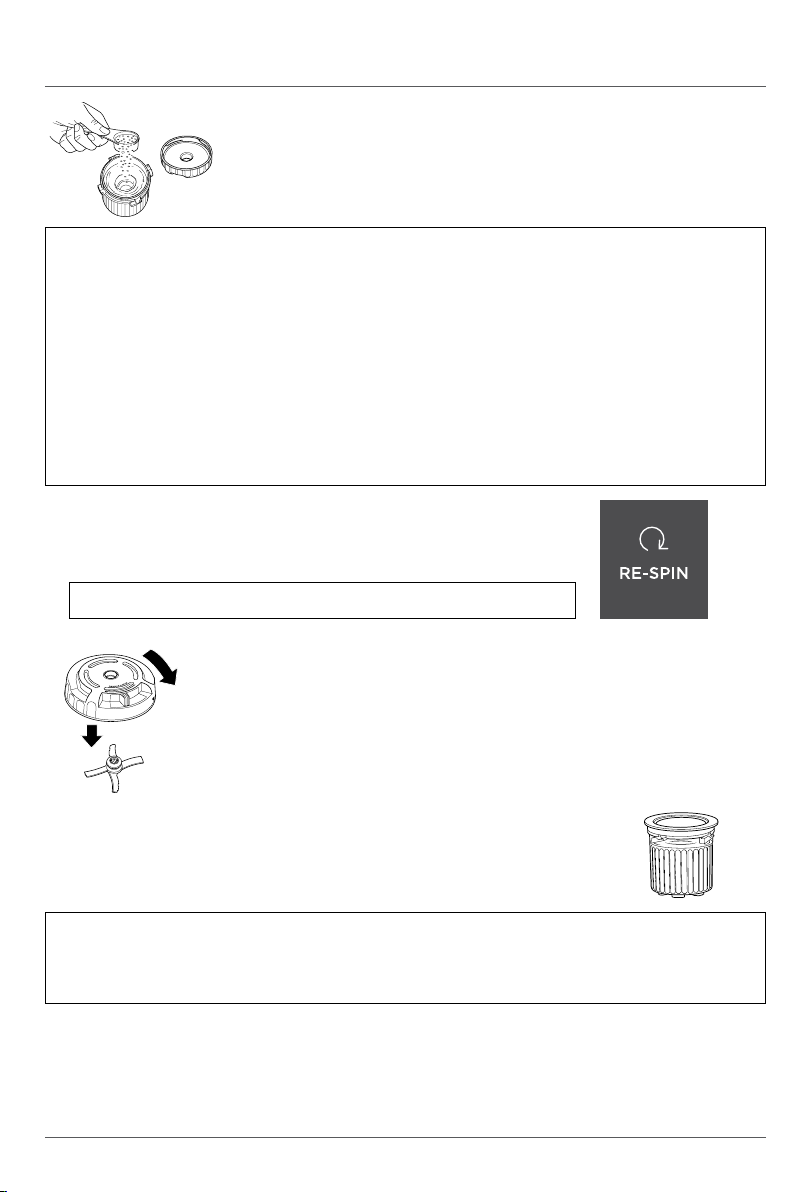
5 Press and hold the paddle latch on the top of the processing lid,
then insert the Creamerizer™ Paddle in the bottom of the lid. Release
the latch to secure the paddle. When fully installed, the latch will be
centered and the paddle will be slightly loose.
USING THE CREAMi® BREEZE™ – CONT
9 When the program ends, press and hold the release button on the front
of the motor base while also rotating the pint counterclockwise to unlock.
Then pull the pint straight back from the motor base to remove.
11a If adding mix-ins, use a spoon to create a 1
1
/2-inch wide hole that reaches
the bottom of the pint. Add chopped or broken mix-ins to the hole in the
pint and repeat steps 6–10 to process again using the MIX-IN program.
11b If not adding mix-ins, RE-SPIN can be used on a crumbly or powdery pint to
make it more creamy. RE-SPIN is often needed for very cold bases. If the treat
is smooth and scoopable, go to step 12. If the base is crumbly or powdery,
repeat steps 6–10 to process again using the RE-SPIN program.
NOTE: Do not RE-SPIN before using the MIX-IN program.
NOTE: The unit does not allow One-Touch Programs to be run back to back. Between programs,
remove the pint and check the results before proceeding.
NOTE:
• Leftovers can be stored in other containers. However, we recommend storing leftovers in a pint so that
it can be processed again if necessary.
• If your treat contains mix-ins, processing again will further crush your mix-ins and create a new flavor.
MIX-IN TIPS
We recommend adding
1
/4 cup of your favorite crushed candies, frozen fruits, chopped nuts,
chocolate pieces, and more. When adding several dierent types of mix-ins, we recommend not
exceeding
1
/4 cup in total. Feel free to adjust the quantity of mix-ins to your taste but make sure
that the processing lid can still comfortably close over the pint.
Hard mix-ins will remain intact.
Mix-ins like chocolate, candy, and nuts will not be broken down during the MIX-IN program. We
recommend using mini chocolate chips and candies or pre-chopped ingredients.
Soft mix-ins will get broken down. Mix-ins like cereal, cookies, and frozen fruit will end up smaller
after the MIX-IN program. We recommend using bigger pieces of soft ingredients.
For ice cream and gelato, we do not recommend fresh fruit, sauces, and spreads as mix-ins. Adding
fresh fruit, fudge, or caramel sauces will water down your treat. Chocolate hazelnut spread and nut
butters also do not mix well. We recommend using frozen fruit or chocolate/caramel shell toppings.
IMPORTANT: Review all warnings before proceeding.
8 Press the power button to turn on the unit. If the pint is properly installed,
the One-Touch Programs will illuminate and the unit will be ready for
use. Select the program that best suits your recipe. The program will
automatically stop when complete.
10 To remove the processing lid, rotate the lid counterclockwise to separate from the
CREAMi Breeze Pint. Then enjoy your treat!
12 Rinse the processing lid to remove any sticky residue or pieces wedged in the
Creamerizer Paddle. Then detach the paddle by pressing the latch on the top
of the processing lid. For easy cleanup, release paddle directly into the sink.
13 Turn the unit o by pressing the power button. Unplug the unit when finished.
Refer to the Care & Maintenance section for cleaning and storage instructions.
14 Didn’t finish your CREAMi Breeze Pint? Flatten the top of your frozen treat
with a spoon or spatula before refreezing. If the treat is hard after refreezing,
process it again on the program you used to make it. If it’s soft, just scoop
and enjoy it.
Loading ...
Loading ...
Loading ...