Loading ...
Loading ...
Loading ...

11
ENGLISH
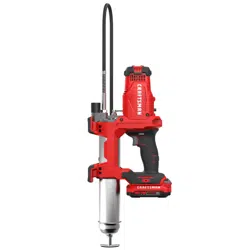
Purging Air Pockets (Fig.A,G)
IMPORTANT: Air pockets in the grease can cause the grease
gun to lose prime. Eliminate air pockets after each refill or if
the grease gun fails to pump grease:
1. Unscrew the purge valve
23
without removing it, until
all air hasescaped.
2. Tighten the purge valve
23
.
3. Uncap the flexible hose
6
then depress the variable
speed trigger switch
1
for 10–20seconds.
4. If grease fails to flow through the hose, repeat
fromstep1.
NOTE: This tool has been tested at the factory, which may
result in a small amount of grease left in the grease tube and
hose assembly. It is recommended to purge the tool with the
brand of grease to be used before firstuse.
Installing The Low Pressure Coupler (Not Supplied
With The Tool)
1. Thread the grease tube assembly
13
back into the
grease gun and screw it insecurely.
2. Pull the grease tube handle
11
out as far as it will
go, then secure the grease tube rod
12
into the
retainingslot
14
by moving the rod to the side. Ensure
the rod is placed securely in the slot to prevent it
fromdisengaging.
3. Remove the 1/8" NPT fill port plug
26
from the fillport.
4. Thread the appropriate low pressure coupler onto the
1/8" NPT fill port
25
.
5. Release the grease tube rod
12
from the retaining
slot
14
and slowly press it back into thetube.
6. Use the purge valve
23
to bleed off any air that may be
trapped in the cartridge. Refer to Purging AirPockets.
Filling The Tool From The Low Pressure Filler Pump
(Fig.A,G, I—L)
1. Pull back on the grease tube handle slowly and rotate the
rod until it is secure inplace.
NOTE: Do not lock the rod into the retaining slot
14
.
2. Connect the low pressure fitting on the grease gun to the
appropriate low pressure fitting on the filler pump. These
fittings DO NOT lock together. This prevents the grease
gun cartridge from being overfilled.
3. Fill until the rod is pushed out of the grease tube
approximately 8" (20cm). Do not overfill. If the rod fails to
move during the filling process, stop. This indicates that
the rod is not connected to the plunger and step one
must be repeated beforeproceeding.
4. Rotate rod to release and carefully push rod back into the
greasetube.
5. Use the purge valve
23
to bleed off any air that may be
trapped in the cartridge. Refer to Purging AirPockets.
Filling the Grease Gun from a Bulk
Container (Fig.A,G, I–L)
Preparing the Grease Gun for Suction
and Filler Pump Filling (Fig.A,H, I)
NOTE: Be sure the grease gun is empty of grease before
beginning thisprocess.
1. Unscrew the grease tube
9
from the grease tube
assembly
13
.
2. Unscrew the grease tube cap
10
from the grease
tube
9
and pull out the grease tube rod
12
.
3. Using your thumb and forefinger, flip the rubber seal
28
from the rear to the front. Refer to Fig.J.
NOTE: The seal resembles a cup, which should open toward
the motor housing (
5
, Fig.A) when prepared for suction and
filler pumpfilling.
4. Reinsert the grease tube rod
12
back into the
greasetube
9
.
Suction Filling from a Bulk Container
(Fig.A,G, I–L)
1. Put the open end of the grease tube assembly into the
bulklubricant.
2. Slowly pull back the grease tube handle
11
to suction
the lubricant into the greasegun.
NOTE: Be sure to keep the open end of the grease tube
assembly far enough into the lubricant to prevent air pockets
in the greasetube.
3. When the grease tube rod
12
is fully extended, secure it
into the retaining slot
14
4. Remove the grease gun tube assembly from the bulk
lubricant and wipe off excessgrease.
5. Screw the grease gun tube assembly
13
back into the
greasegun.
6. Release the grease tube rod
12
from the retaining
slot
14
and slowly press it back into thetube.
7. Use the purge valve (
23
, Fig.G) to bleed off any air
that may be trapped in the cartridge. Refer to Purging
AirPockets.
Filler Pump Filling From a Bulk Container
(Fig.A,G, I–L)
This tool comes with a 1/8" NPT fill port (
25
, Fig.G) for
attaching a low pressure fill coupler onto theunit.
WARNING: Never thread a high‑pressure coupler
onto the grease gun’s 1/8" NPT fill port. Serious
injury may occur due to excessive pressure. Use low‑
pressure couplersonly.
CAUTION: The fill pump loader must connect correctly
with the grease gun’s 1/8" NPT port. The filler pump
may not operate if the components are notcompatible.
2. Unscrew the grease tube assembly
13
from the grease
gun andremove.
3. Gently release the grease tube handle
11
to expel the
empty cartridge from the greasetube.
Loading ...
Loading ...
Loading ...