
Loading ...
Loading ...
Loading ...
13
DOOR HANDLE INSTALLATION
DOOR HANDLE INSTALLATION
TOOLS REQUIRED
1x 2.5mm Allen key
4 x screw caps
FRIDGE DOOR HANDLE
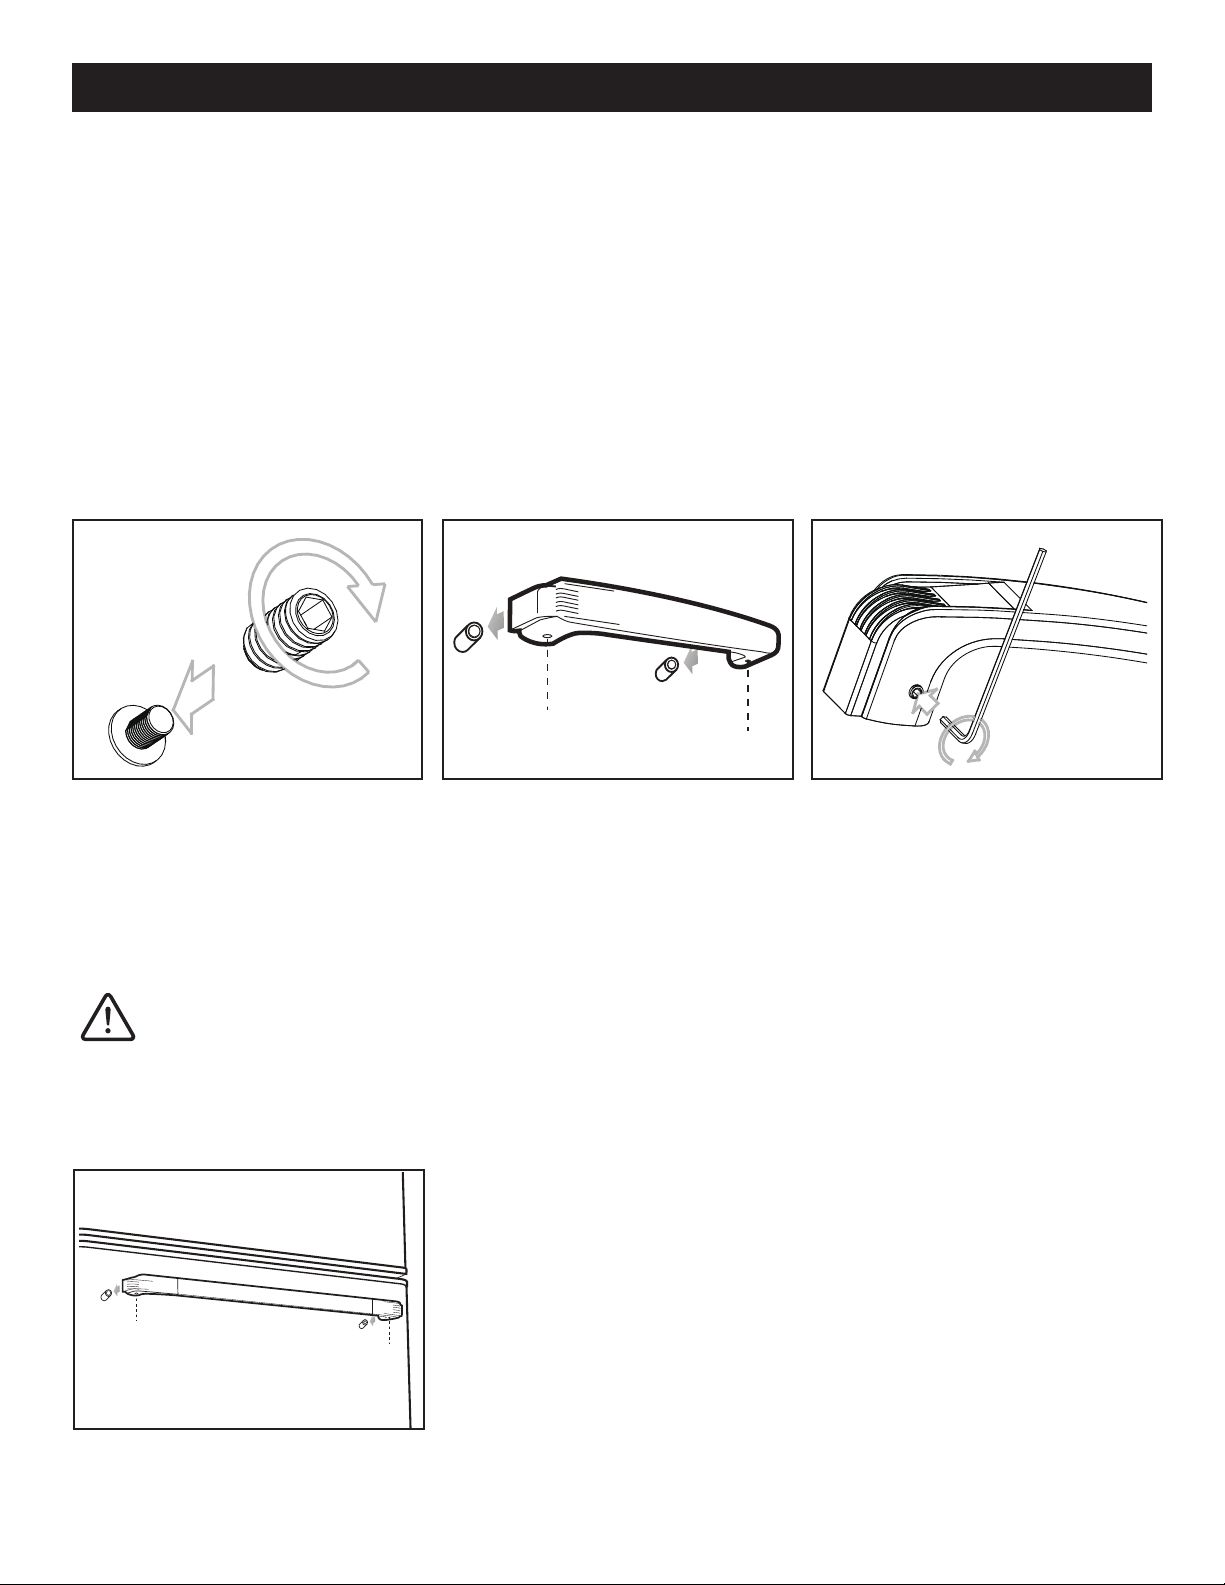
1. Twist on supplied screw caps (x2) on to existing screws on the fridge door
2. Place provided fridge handle on to the screw caps on fridge door (make sure the screw goes
into the center hole of the handle and the smaller holes on the handle are on the bottom of the
handle) - Fig 2.
3. Tighten using the provided 2.5mm Allen key - Fig 3..
FREEZER DOOR HANDLE
4. Twist on supplied screw caps (x2) on to existing screws on the freezer door - Fig 1.
5. Place provided freezer handle on to the screw caps on freezer door (make sure the screw goes
into the center hole of the handle and the smaller holes on the handle are on the bottom of the
handle) - Fig 4
6. Tighten using the provided 2.5mm - Fig 3.
CAUTION
Do not over tighten the screws, doing so could damage the freezer door.
Fig 4.
13
DOOR HANDLE INSTALLATION
DOOR HANDLE INSTALLATION
TOOLS REQUIRED
1x 2.5mm Allen key - (fridge handle)
4 x screw caps
FRIDGE DOOR HANDLE
1.
2.
Twist on supplied screw caps (x2) on to existing screws on the fridge door - Fig 1.
3.
Place provided fridge handle on to the screw caps on fridge door (make sure the screw goes
into the center hole of the handlethe and the smaller holes on the handle are on the bottom of
the handle) - Fig 2.
Tighten using the provided 2.5mm (smaller) Allen key - Fig 3.
FREEZER DOOR HANDLE
1.
2.
Twist on supplied screw caps (x2) on to existing screws on the freezer door - Fig 1.
Place provided freezer handle on to the screw caps on freezer door (make sure the screw goes
into the center hole of the handlethe and the smaller holes on the handle are on the bottom of
the handle) - Fig 4.
3.
Tighten using the provided 2.5mm (smaller) - Fig 3.
CAUTION
Do not over tighten the screws, doing so could damage the freezer door.
Fig 3.
X2
Fig 1. Fig 2.
X2
Fig 1. Fig 2.
X2
Fig 3.
13
DOOR HANDLE INSTALLATION
DOOR HANDLE INSTALLATION
TOOLS REQUIRED
1x 2.5mm Allen key - (fridge handle)
4 x screw caps
FRIDGE DOOR HANDLE
1.
2.
Twist on supplied screw caps (x2) on to existing screws on the fridge door - Fig 1.
3.
Place provided fridge handle on to the screw caps on fridge door (make sure the screw goes
into the center hole of the handlethe and the smaller holes on the handle are on the bottom of
the handle) - Fig 2.
Tighten using the provided 2.5mm (smaller) Allen key - Fig 3.
FREEZER DOOR HANDLE
1.
2.
Twist on supplied screw caps (x2) on to existing screws on the freezer door - Fig 1.
Place provided freezer handle on to the screw caps on freezer door (make sure the screw goes
into the center hole of the handlethe and the smaller holes on the handle are on the bottom of
the handle) - Fig 4.
3.
Tighten using the provided 2.5mm (smaller) - Fig 3.
CAUTION
Do not over tighten the screws, doing so could damage the freezer door.
Fig 3.
X2
Fig 1. Fig 2.
X2
Loading ...
Loading ...
Loading ...